Tutorials · Animation and Cutscenes · Chapter 3
Keyframes
By the end
scenes/curtain.propanim:rise, the curtain going up in1.5s, eased, andRESET, the neutral posescenes/lantern.propanim:swing, a turn of-17.19degrees to17.19in1.2s, played back and forthscenes/footlight_3.propanim:flicker, the third footlight’s intensity and colour jumping from key to key- A Property Animation on each of the three, and the curtain’s cloth sound
On this page
The curtain rises
A sprite clip is a run of pictures. A property clip is a run of numbers: the value of one field of a node, at one moment after another. It keys the curtain’s place, the lantern’s turn and a light’s brightness, anything the Inspector can show as a number. A node plays them with a Property Animation, and the clips live in a .propanim file, which the Animation tab’s second mode, Properties, edits.
The curtain hangs up at the top of the hall, out of sight, with only the valance showing. It is going to start the show down, covering the stage, and rise.
- Select
curtain, click Add component and choose PropertyAnimationComponent. - Click the Animation tab at the bottom of the window, then Properties, the second of the two words at its top left. It says there is no
.propanimyet. - Click New property clips. It writes
scenes/curtain.propanimbeside the scene and puts it in the Property Animation’s Clips. - Press the + at the right of the tabs, type
riseand press Enter. A clip calledriseopens, with no rows.
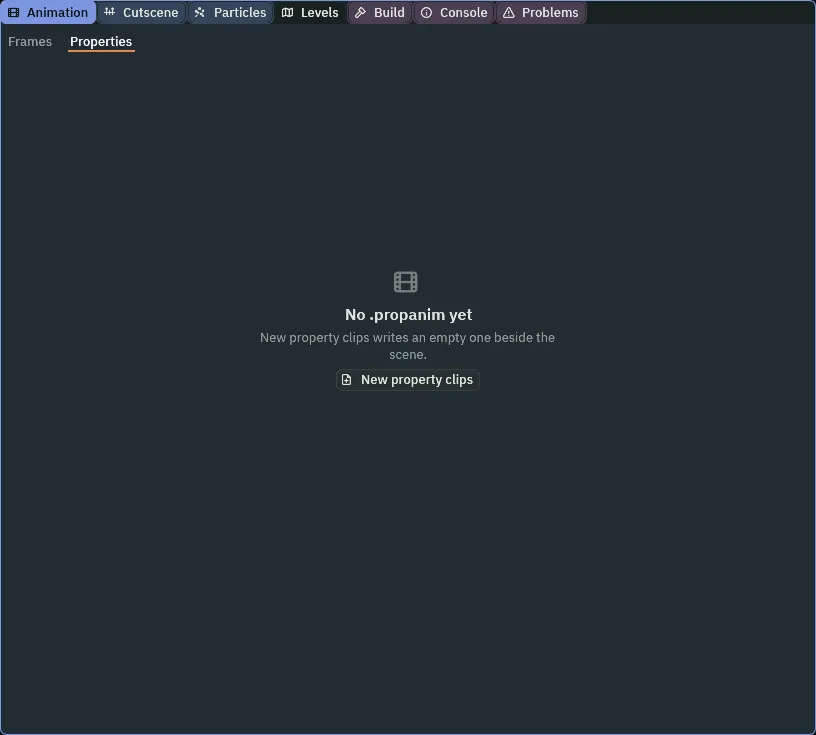
A key is a number at a time, shown as a diamond on a row. You make keys by editing, with Record on. While it is on, a change you make in the Inspector to this node, or to a node under it, is not made: it is keyed, at the playhead, into the open clip. The scene keeps its own value, and the Inspector and the Viewport show the clip’s pose with the new key in it.
- Turn on Record, the toggle in the row with the Play button, beside Capture RESET. The playhead is at
0.00. - In the Inspector, set the curtain’s Position y to
48: the curtain down, covering the stage. A rowtranslationappears, its name cut short totranslati…, with a diamond at0.00, and Save lights. - Move the playhead to
1.5: click the time box,0.00 s, beside the Play and Stop buttons. One click selects its number, so type1.5and press Enter. The Inspector now shows48, the clip’s pose. - Set Position y to
-240: the curtain up. A second diamond appears at1.50, and the clip is1.5seconds long. - Click a diamond to select it, and hold the pointer over its row: it says the key’s time and its value. A diamond that is not on
0or1.5can be dragged to it; a drag lands on the grid beside the transport, 1/60 s as it comes. - The row’s first dropdown reads Linear. Open it and choose Eased. A second dropdown, with the curve’s name, appears beside it; open it and choose InOutCubic.
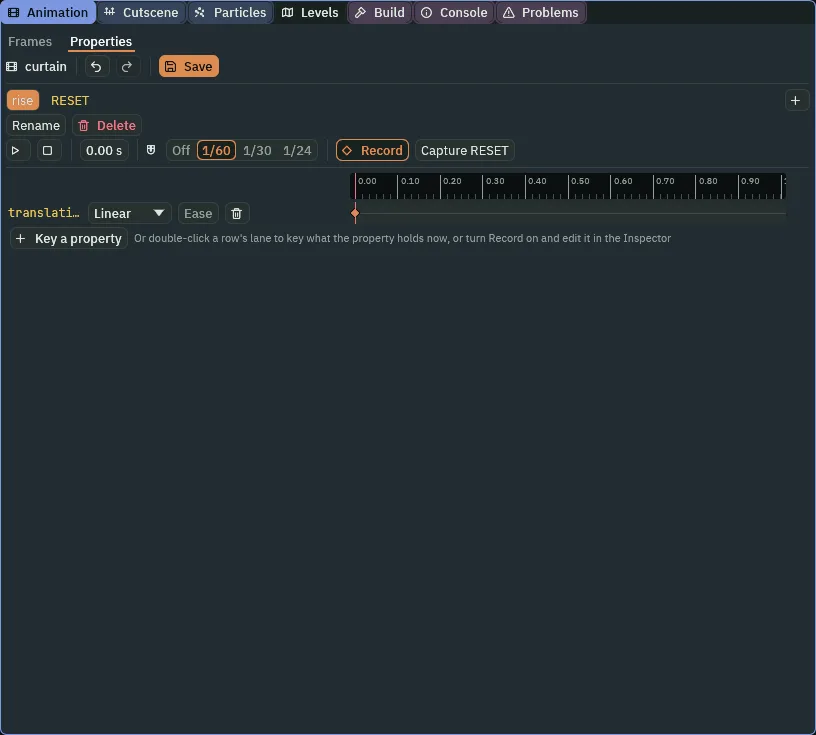
0.00, one edit of Position in the Inspector: the row and its first key. Save is lit, since the clip has changed. (This picture was taken in the finished project with rise emptied, so the RESET tab is already there.)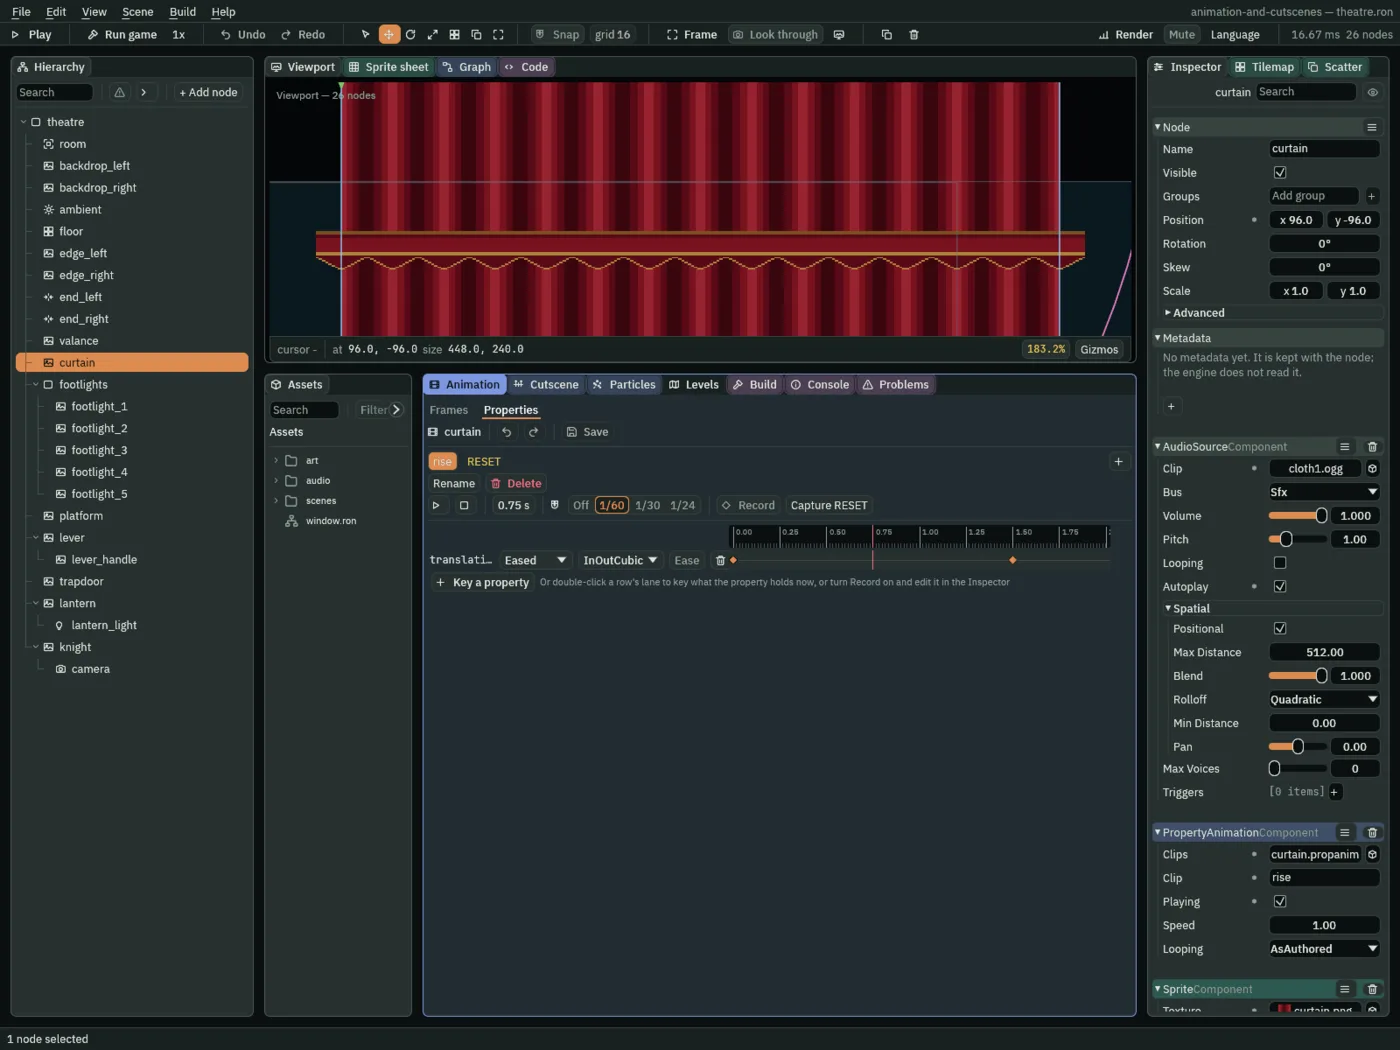
0.75 s: the curtain is halfway up, at -96, and the Inspector shows the place the clip puts it at.The curtain’s own Position is still 96, -240: the keys are in the clip, not in the scene. That is where it stands when nothing plays it.
The last thing the file needs is its neutral pose, RESET. It is written from the values the scene holds, not from the pose the playhead shows, and the scene holds the curtain up. The neutral place of this curtain is down, so stand it down for a moment.
- Turn Record off. Set Position y to
48, which this time is an edit like any other. - Press Capture RESET. A second tab,
RESET, appears besiderise, holding one key at0for the property the file keys, at96,48. The playhead can be anywhere. - Set Position y back to
-240. Press Save in the Properties bar, which writescurtain.propanim.
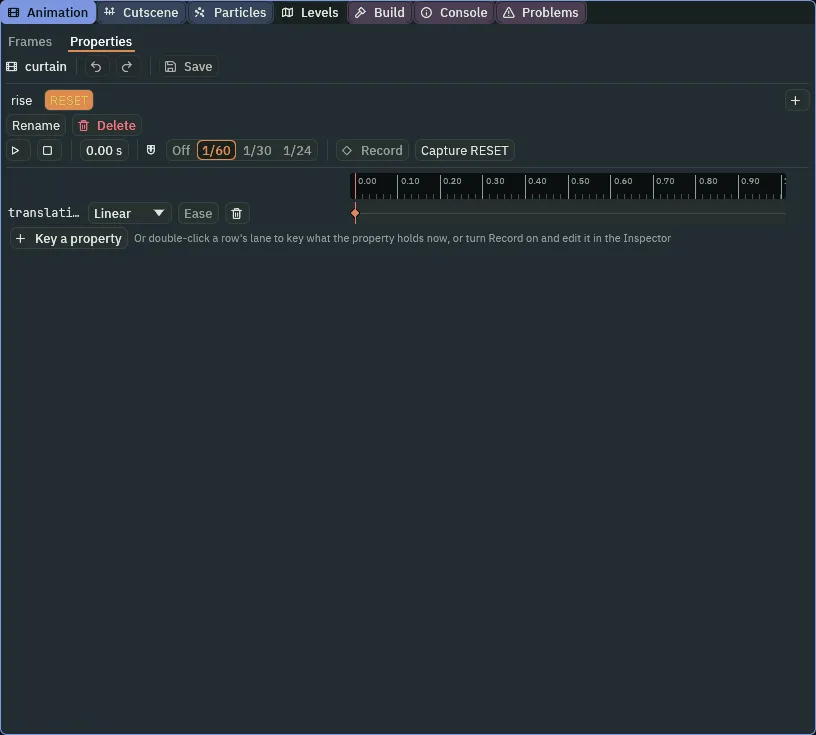
RESET: one key at 0, the curtain down.- Clips
- The Property Animation’s Clips: the
.propanimfile it plays, with the clips in it. Herecurtain.propanim, one for each prop that moves. Empty, the node plays nothing, and the Properties mode offers to write one. - Clip
- The Property Animation’s Clip: the name of the clip it plays,
risehere. A name the file does not have plays nothing. Empty, as a new Property Animation has it, plays nothing. - Playing
- The Property Animation’s Playing: whether the clip’s playhead moves on. A new one is off, so that a node that animates when something happens waits for it. Ticked, as here, the clip plays as the room starts.
- Speed
- The Property Animation’s Speed: how fast the clip plays, as a multiple of its own rate.
1plays it as keyed,0.5takes twice as long,2half the time, and a negative number plays it backwards. The curtain keeps1, and the lantern takes0.8, below. - Looping
- The Property Animation’s Looping: what happens when the clip reaches its end, for this node only. AsAuthored keeps what the clip says, which for a clip the Properties mode makes is to play once. Once plays through and stops. Loop starts again at the first key. PingPong plays forward, then backward, and so on. The curtain keeps AsAuthored.
Now the Property Animation’s own fields, in the Inspector. Clip is empty, and Playing is off.
- Set the Property Animation’s Clip to
riseand tick Playing. Leave Speed at1and Looping at AsAuthored. - Click Add component and choose AudioSourceComponent. Copy
cloth1.ogg, below, into the project’saudiofolder, and drag it from Assets onto the Audio Source’s Clip. Tick Autoplay. Bus stays Sfx. - Press Ctrl+S. The scene saves the curtain up, at
96,-240.
- The Audio Source’s Clip and Autoplay
- An Audio Source’s Clip is the sound it plays,
cloth1.ogg, a rustle of cloth. Autoplay starts it as the room starts, rather than waiting for a script, which is what a curtain that rises as the show begins wants.
- Record
- While it is on, an edit made in the Inspector to this node or to any node under it is keyed at the playhead in the open clip, and not made: the scene keeps its value. The row is added if the property has none, as Linear, and a key already at that time is replaced. A drag of a field is one key and one step of the clip’s own undo, which the Properties bar’s Undo takes back; Ctrl+Z is the scene’s. A button, a Viewport drag and a field a clip cannot key are not keyed, and the last is edited as usual, with a line on the status bar saying so once. An edit to the value the field already has changes nothing, so it keys nothing.
- Key a property, a key and a lane
- A key is a number at a time, shown as a diamond on a row’s lane. Key a property adds an empty row for a field of the node: the list names each field as the Inspector does,
intensity; when two components of the node have a field of one name it puts the component first,LightComponent.color; and it names the node first for a field of a node below it. A double-click on a row’s lane keys what the field holds now, at the time under the pointer: it is one way to key a value the field already has, on a row with no keys yet, since editing a field to what it is changes nothing. A double-click on a diamond keys nothing, and Delete removes the diamond that is selected. - Step, Linear and Eased
- How a row gets from one key to the next. Step holds the earlier key’s value until the later key’s time, and then jumps: a light switching. Linear is a straight line between them: even speed. Eased is a line shaped by a curve, and the second dropdown names it: InOutCubic starts slowly, speeds up, and slows again at the end, as a curtain that has weight does; InOutSine is the gentler version of the same. The list has more, which later chapters use.
- RESET and Capture RESET
- The neutral pose: a clip called
RESET, with one key at0for every field any clip in the file keys. While another clip plays, a field that clip does not key takes the valueRESETholds for it, instead of staying wherever the last clip left it. Capture RESET writes it from the values the scene holds, wherever the playhead is, after the other clips are keyed. A row whose name is amber is oneRESETdoes not hold yet: the lantern’s and the footlight’s are, since each has one clip and nothing to put back. Nothing here uses the curtain’sRESETyet; chapter 12’s cutscene does. - The ruler, the playhead and the grid
- The ruler counts seconds along the top. Click or drag it to move the playhead, the red line, and the scene stands as the clip has it at that time; the time box,
0.00 s, beside the Play and Stop buttons, says where. The grid, Off, 1/60, 1/30 and 1/24, is what a click or a drag snaps to; 1/60 s is a step of the game.
The lantern swings
The lantern hangs from a chain on the right of the hall, from its top edge. Its clip turns it one way over 1.2 seconds, and the Property Animation plays that back and forth.
- Select
lantern, add a PropertyAnimationComponent, and in the Properties mode press New property clips. Add a clip calledswing. - Turn on Record. With the playhead at
0.00, set the lantern’s Rotation to-17.19. A rowrotationappears with a diamond at0.00. - Move the playhead to
1.2, and set Rotation to17.19. A second diamond appears at1.20. - Set the row’s first dropdown to Eased and its second to InOutSine. Turn Record off, and press Save.
- In the Property Animation, set Clip to
swing, Speed to0.8and Looping to PingPong, and tick Playing. The lantern’s own Rotation is still0. Press Ctrl+S.
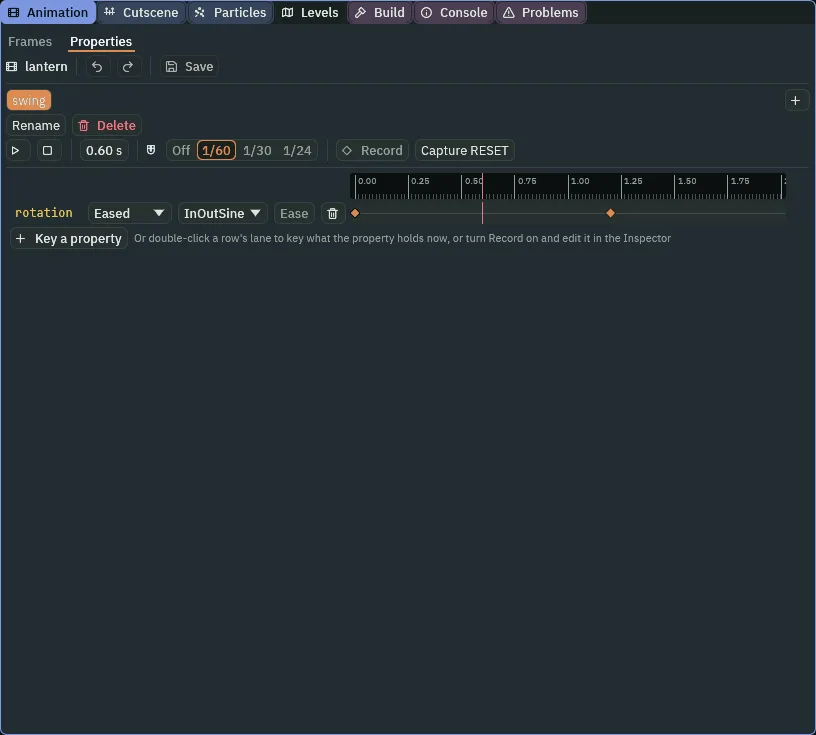
swing: two keys, one way.The Inspector shows Rotation in degrees, so you type -17.19 and 17.19. The file keeps the same turn in radians, -0.3 and 0.3.
A footlight flickers
The third footlight is a Light on a node, and a Light has an Intensity and a Color. The flicker keys both, and holds each key until the next, because a flame does not fade from bright to dim, it jumps.
- Select
footlight_3, add a PropertyAnimationComponent, and press New property clips in the Properties mode. Add a clip calledflicker. - The first key of each row is the value the light already has: its Intensity is
2and its Color is1,0.82,0.56, alpha1. Editing a field to what it already holds changes nothing, so there is nothing for Record to key. Click Key a property and chooseintensity, then click it again and chooseLightComponent.color, the light’s colour: the Sprite has a colour too, listed asSpriteComponent.color. Two empty rows appear,intensityandcolor. Double-click each row’s lane at0.00, and each gets a diamond holding the value as it is. - Set both rows’ first dropdown to Step.
- Turn on Record. Set Intensity to
0.5with the playhead at0.10, to2.6at0.15, to0.9at0.30and to2at0.45. Each lands as a key on theintensityrow. - With the playhead at
0.30, click the Light’s Color, and press U8 at the top left of the picker that opens, so it reads F, which shows each value from0to1. Set Color to1,0.7,0.45, alpha1. It lands as a key on thecolorrow. - Turn Record off, and press Save. In the Property Animation, set Clip to
flicker, Looping to Loop and tick Playing. Press Ctrl+S. The light’s own Intensity and Color are as they were.
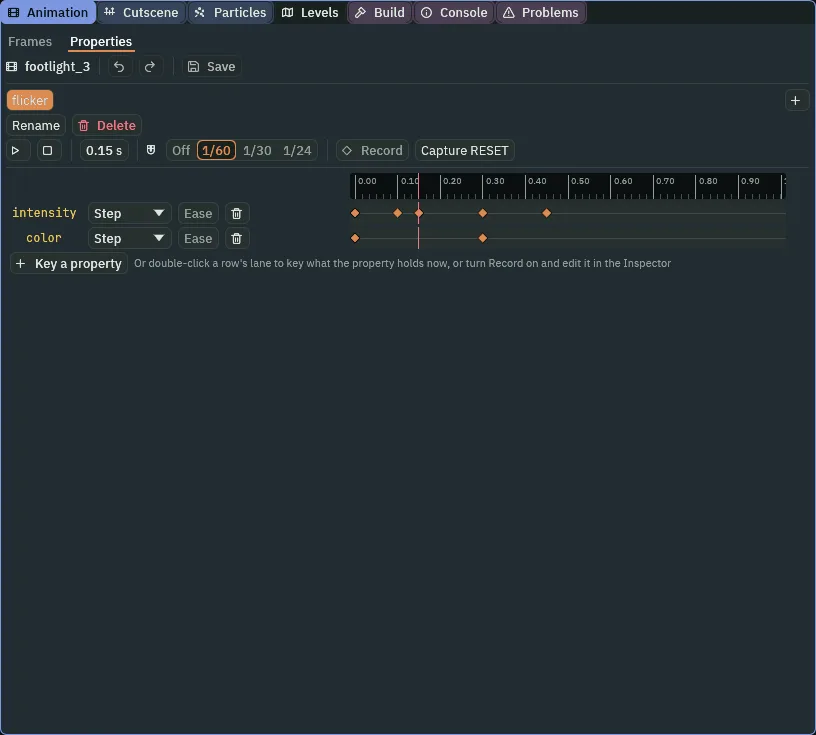
flicker: five keys of brightness and two of colour.The three clips and their nodes
The curtain’s clips
| Clip | Length | Row | Interpolation | Keys |
|---|---|---|---|---|
rise | 1.5 s | translation | Eased, InOutCubic | 0 → 96, 48; 1.5 → 96, -240 |
RESET | 0 s | translation | Linear | 0 → 96, 48 |
The lantern’s clip
| Clip | Length | Row | Interpolation | Keys |
|---|---|---|---|---|
swing | 1.2 s | rotation | Eased, InOutSine | 0 → -17.19; 1.2 → 17.19 |
The footlight’s clip
| Clip | Length | Row | Interpolation | Keys |
|---|---|---|---|---|
flicker | 0.45 s | intensity | Step | 0 → 2; 0.1 → 0.5; 0.15 → 2.6; 0.3 → 0.9; 0.45 → 2 |
color | Step | 0 → 1, 0.82, 0.56, alpha 1; 0.3 → 1, 0.7, 0.45, alpha 1 |
The nodes
| Node | Component | Field | Value |
|---|---|---|---|
curtain | Property Animation | Clips | curtain.propanim |
| Clip | rise | ||
| Playing | ticked | ||
| Audio Source | Clip | cloth1.ogg | |
| Autoplay | ticked | ||
lantern | Property Animation | Clips | lantern.propanim |
| Clip | swing | ||
| Playing | ticked | ||
| Speed | 0.8 | ||
| Looping | PingPong | ||
footlight_3 | Property Animation | Clips | footlight_3.propanim |
| Clip | flicker | ||
| Playing | ticked | ||
| Looping | Loop |
Every other field of every node is as it comes.
Check it works
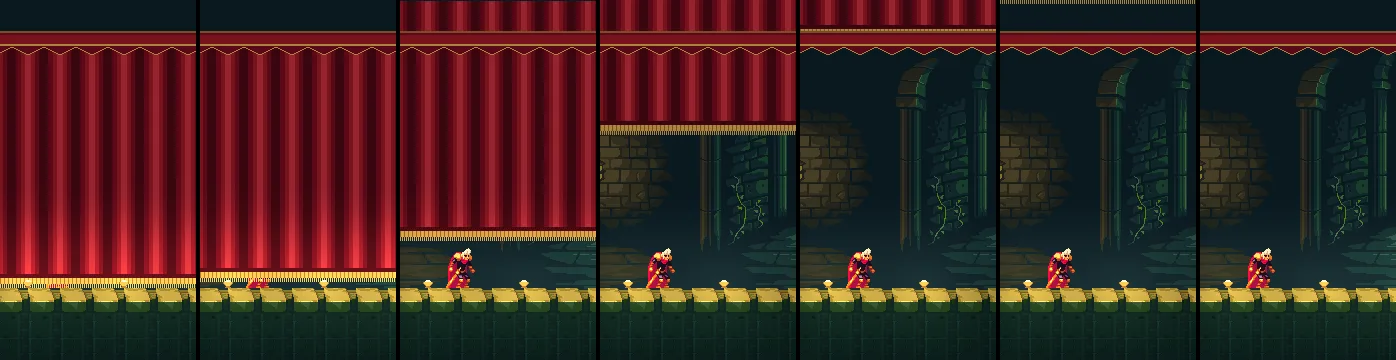
1 to step 91, which is 0.02 s to 1.52 s. It starts slowly and moves fastest in the middle: the fringe is at the boards in the first, a little above in the second, just above the knight’s head in the third, and gone off the top in the sixth.
270 to 360, 4.5 s to 6 s, a quarter of a second apart: 1.5 seconds, which is 1.2 at Speed 0.8.
0 (intensity 2), 0.1 (0.5), 0.15 (2.6) and 0.3 (0.9, a warmer colour), which are phases 0, 6, 9 and 18 steps into the loop, steps 108, 114, 117 and 126, which is 1.8, 1.9, 1.95 and 2.1 s.