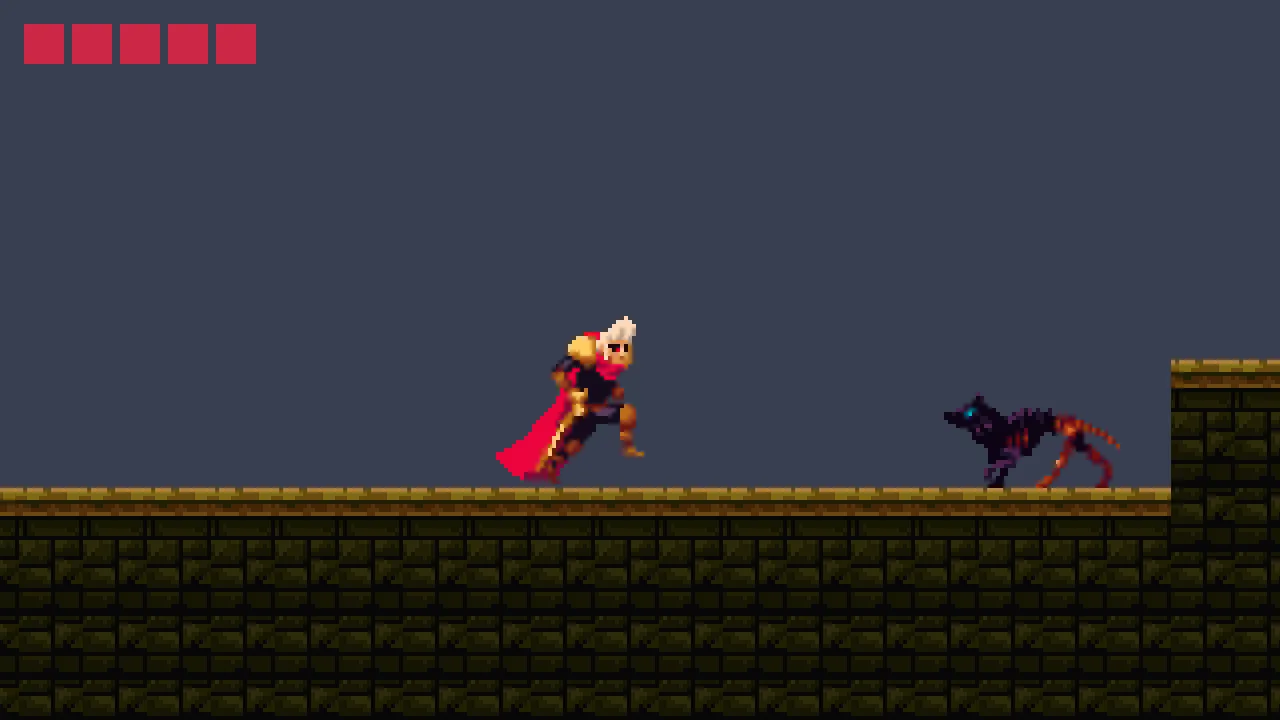
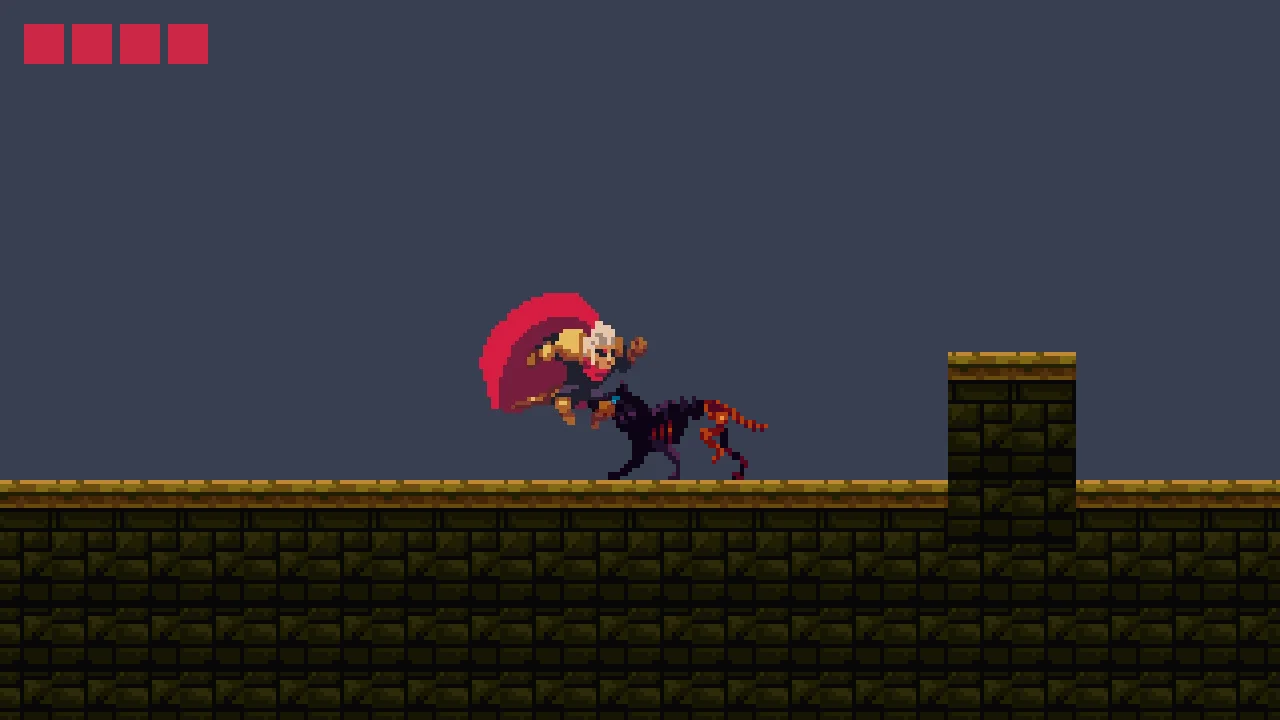
Tutorials · Crypt Knight · Chapter 11
The Crypt
By the end
scenes/crypt.ron, made from the Gate’s scene, with its own tilemap and no parallax, and The Crypt as the Levels list’s second level- Three creatures cut from their strips: a hound that walks, a fire skull that burns and a wolf that runs
- Three small scripts,
Patrol,DashandBob, one for each way they move - A knight that is hurt by an enemy’s touch, hops back from it, and heals from a heart he picks up
- The sword on an altar, and a sign that says what it does
On this page
What the Crypt is
The Crypt is a level about timing. The knight cannot attack yet: he evades. It is the same size as the Gate, 102 cells wide and 14 tall, and it has five things to get past, in this order from the left: a hound patrolling the start floor, a fire skull bobbing over a pit, a wolf that dashes along a trench, a second hound on the far side, and, at the end, the sword. Two hearts lie on the way.
All of it is chapters you have done, again: a tilemap, Areas, bodies driven by a script, and a script each. The new part is the creatures, and what touching one costs the knight. The Crypt is also indoors, so it has no town behind it: the camera’s dark background shows behind its stone, and with nothing to draw behind it, it costs the machine less.
A scene made from the Gate
The Crypt needs a camera that follows the knight, a knight, a HUD, a way out and safe ground, which the Gate already has, so the Crypt’s scene is the Gate’s, copied and cut down.
- In Assets, open
scenes, right-clickgate.ronand choose Duplicate. Right-click the copy,gate-copy.ron, choose Rename, typecrypt.ron, and press Enter. - Double-click
crypt.ronto open it. In the Hierarchy, select the root,Gate, and rename itCryptin the Inspector. - Select
sky, then Ctrl-clickmountains,forest,town,sign_walk,sign_jump,sign_high,sign_drop,sign_spikes,spikesandrelic, and press Delete. The Crypt has no town to look at, and no spikes, tablets or relic of the Gate’s. Keepsign_air: it becomes the sword’s sign below. - Also delete
safe_step,safe_ledge,safe_lower,safe_after_pitandsafe_far. Keeppit,safe_startand the rest: the camera,ground,knight,bounds,hudandexit.
Nothing about the camera, the Confiner, the knight or the HUD needs changing: the Crypt is the Gate’s size, and the knight starts at the same place, 72 and 160. What it does need is a floor.
The Crypt’s floor plan
The Crypt paints with the same tile sheet as the Gate, on a tilemap file of its own. The Gate’s own is copied, and emptied.
- In Assets, open
art, right-clickgothic-castle-tileset.tilemapand choose Duplicate. Right-click the copy,gothic-castle-tileset-copy.tilemap, choose Rename, typecrypt.tilemap, and press Enter. - Select
groundin the Crypt’s Hierarchy, and dragart/crypt.tilemaponto the Tilemap slot of its TileMapComponent. Open the Tilemap tab, and turn on Paint mode. It still holds the Gate. - Choose the Erase tool, and set its Size to
16. Zoom out in the Viewport until the whole level, 102 cells across, shows. Under Layers, clickback, and drag from cell (0, 6) to cell (101, 6): a brush 16 wide and tall, along the middle of the level, takes every row of it. Do the same onground, and onledges. The Viewport shows an empty level.
Now paint the Crypt, as chapter 4 painted the Gate: the bodies on ground with #66, then the caps with #45, and the ledges, all with the Rect tool, each row of a table one drag from a point inside its first cell to a point inside its last.
ground, #66: bodies | From cell | To cell |
|---|---|---|
| The left wall | (0, 0) | (1, 13) |
| The start floor, up to the first pit | (2, 11) | (40, 13) |
| The first pillar | (31, 9) | (32, 10) |
| Between the pit and the trench | (45, 11) | (50, 13) |
| The trench’s floor | (51, 13) | (74, 13) |
| After the trench, and the far side | (75, 11) | (99, 13) |
| The second pillar | (88, 9) | (89, 10) |
| The right wall | (100, 0) | (101, 13) |
ground, #45: caps | From cell | To cell |
|---|---|---|
| The start floor | (2, 10) | (30, 10) |
| The first pillar | (31, 8) | (32, 8) |
| Before the pit | (33, 10) | (40, 10) |
| Between the pit and the trench | (45, 10) | (50, 10) |
| The trench’s floor | (51, 12) | (74, 12) |
| After the trench | (75, 10) | (87, 10) |
| The second pillar | (88, 8) | (89, 8) |
| The far side | (90, 10) | (99, 10) |
Then the ledges, on the ledges layer, which is one-way, with #45: three, over the trench, that the knight jumps up through and lands on.
ledges, #45 | From cell | To cell |
|---|---|---|
| The first ledge | (53, 8) | (56, 8) |
| The second ledge | (60, 8) | (63, 8) |
| The third ledge | (67, 8) | (70, 8) |
And the sword’s pedestal, on the back layer, with the Brush: #48 in cell (94, 8) and #69 under it in cell (94, 9). Press Save at the top of the Tilemap panel, and Ctrl+S.
- The pits. Cells 41 to 44 have no floor at all: a bottomless pit, as the Gate’s gap, with the fire skull over it. The trench’s floor, cells 51 to 74, lies two cells lower than the rest, with a wall at each end.
- The pillars, cells 31 and 32, and 88 and 89, stand two cells over the floor. Each is a wall a patrolling hound turns back at.
- The three ledges over the trench are a way across it, and where a heart floats.
Safe ground and a pit
The Crypt keeps five stretches of safe ground and one pit. The pit is the Gate’s, moved; one safe strip is the start’s, resized, and its copies make the rest.
- Select
pit. Set its Position to688and248, and its Area’s Shape Size to96and32. The skull is over this pit. - Select
safe_start, rename itsafe_1, and set its Position and Size from the table below. Right-click it and choose Duplicate four times, and rename and set each of the copies. - Press Ctrl+S.
| Node | Position | Size | Cells |
|---|---|---|---|
safe_1 | 256, 160 | 416, 16 | 3 to 28 |
safe_2 | 592, 160 | 96, 16 | 34 to 39 |
safe_3 | 768, 160 | 64, 16 | 46 to 49 |
safe_4 | 1304, 160 | 176, 16 | 76 to 86 |
safe_5 | 1520, 160 | 128, 16 | 91 to 98 |
Three creatures from their strips
The Crypt’s enemies are three creatures from the same collection: a hell hound, which walks; a wolf, which runs; and a fire skull, which burns. Each is one strip of frames. Copy the three pictures into art, as you copied the knight’s in chapter 3, and press Refresh.
Each plays from one picture, so it needs no packing: the Sprite sheet cuts it into a clip, and writes the clip into an animation file beside the picture. The three are cut alike, with the grid set to a frame.
- Double-click
art/hell-hound-walk.pngin Assets. The Sprite sheet tab opens on it. Under Grid, set Cell to64and32. Drag across the whole top row, cell0, 0to cell11, 0: Selected 12 x 1. - Under Clips, press From selection. Name the clip
walk, set12 fpsand Loop, and press Generate 1. A file,art/hell-hound-walk.anim, appears beside the picture. - Double-click
art/wolf-runing-cycle.png. Set Cell to56and32, drag from cell0, 0to cell3, 0: Selected 4 x 1. From selection, namerun,10 fps, Loop, Generate 1. A file,art/wolf-runing-cycle.anim. - Double-click
art/fire-skull.png. Set Cell to96and112, drag from cell0, 0to cell7, 0: Selected 8 x 1. From selection, nameburn,10 fps, Loop, Generate 1. A file,art/fire-skull.anim.
A frame’s pivot is the middle of its bottom edge, as chapter 7 set out, which is right for a hound and a wolf: their feet are on the bottom row of their frames. The skull flies, and sits in the middle of its picture, so its sprite is drawn at its own size, as the one picture.
A hound that patrols
A patroller is a body in the room that walks back and forth: a Character Body, driven by its script as the knight’s is, that turns after a set distance or when it meets a wall. It cannot see a ledge, so every patrol in the Crypt ends at a wall or at its own distance. The art faces left.
- In Assets, press Create, choose New script, type
patrol, and press Enter. - In the Code tab’s Scripts list, click
patrol.rgs, replace everything in it with the script below, and press Ctrl+S.
/// A patroller: walks back and forth, turning after `distance` or at a wall,
/// and faces the way it walks. Its art faces left.
component Patrol : Body {
    /// How fast it walks.
    #[suffix("u/s")]
    speed: f32 = 40.0,
    /// How far it walks before it turns.
    #[suffix("u")]
    distance: f32 = 128.0,
    /// The way it walks: -1 for left, 1 for right.
    way: f32 = 1.0,
    /// How far it has walked since it last turned.
    #[hidden]
    walked: f32 = 0.0,

    fn loop(dt: f32) {
        walked += speed * dt;
        if walked >= distance {
            way = -way;
            walked = 0.0;
        }
        set_number("CharacterBodyComponent", "velocity.x", way * speed);
        // Drawn facing left, so mirrored to walk right.
        set_flag("SpriteComponent", "flip.x", way > 0.0);
    }

    fn on_hit_wall() {
        way = -way;
        walked = 0.0;
    }
}
component Patrol : Body- A Body base: the script may have the body’s hooks, such as
on_hit_wall, which runs when the body is stopped moving sideways. It is the script that sets the body’s speed: a body driven by a script keeps whatever its script last gave it. walkedanddistance- A patroller counts how far it has gone,
speedunits a second timesdt, inwalked, and turns when it reachesdistance:wayflips from 1 to -1 and back, andwalkedstarts again. A hound with a wall in front of it turns at once, inon_hit_wall, with the same two lines. flip.x- The art faces left, so
flip.xis on while the hound walks right, as the knight’s is off. The first hound, setwayto1, starts walking right.
- Click the Viewport tab. Select
Crypt, press + Add node, choose Character, and rename ithound_1. Set its Position to400and160, under Groups typeenemyand press Enter. - Remove its Shape with the bin icon at the right of the ShapeComponent header.
- In its CharacterBodyComponent, set Size to
32and22, Driven By to Script, Gravity to900and Terminal Velocity to400. Leave the rest. - Press Add component and choose SpriteComponent: set Texture by dragging
art/hell-hound-walk.pngonto it, Size to64and32, Anchor to0.5and1, and Sort Layer to4. - Press Add component and choose AnimatedSpriteComponent: drag
art/hell-hound-walk.animonto Animations, set Clip towalk, and leave Frame Size unticked: the Sprite’s own size, 64 by 32, is the frame’s. - Press Add component and choose AreaComponent. In its Shape, set Size to
28and18, Offset to0and-9, and its own Layer to1, and untick0in its Mask: it is an enemy, and enemies are on layer1and look for nothing, as hazards do. - Press Add component and choose Patrol. Leave its Speed at
40, Distance at128and Way at1. - Right-click
hound_1and choose Duplicate. Rename the copyhound_2, set its Position to1300and160, and its Patrol’s Distance to112. - Press Ctrl+S.
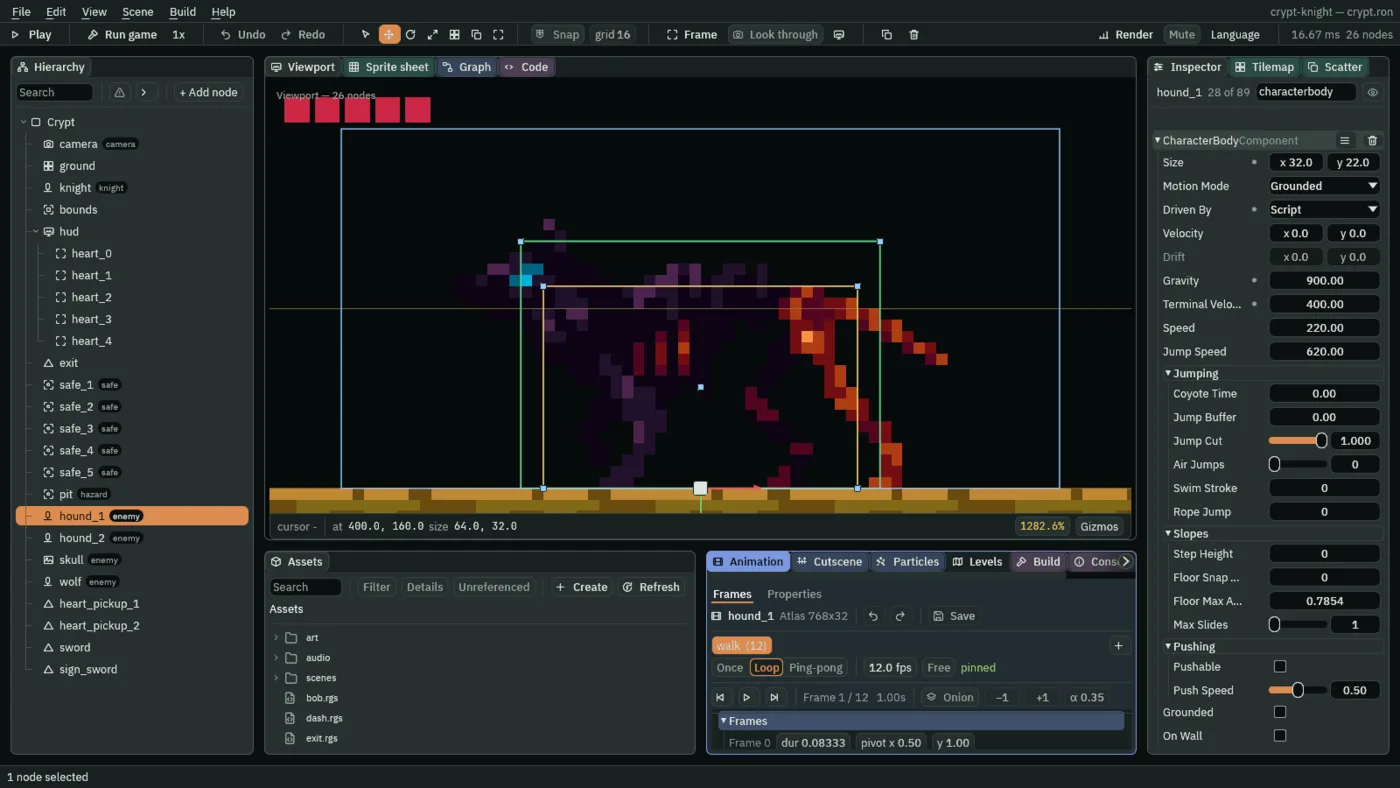
The first hound’s walk is 128 units from x 400, and the first pillar’s face is at x 496: it turns there, after 80 units, and from then on every 128. The second walks 112 from x 1300, and meets the second pillar, whose face is at x 1408, after 92.
A skull that bobs
The fire skull is not a body: it has no floor to stand on. It hangs over the pit and bobs, rising and sinking for ever. A pulse does that: it eases a node away from where it is and back, again and again.
- In Assets, press Create, choose New script, type
bob, and press Enter. In the Code tab, replace everything inbob.rgswith the script below, and press Ctrl+S.
/// Bobs up and down for ever: `rise` units up and back, `period` seconds each
/// way.
component Bob {
    /// How far up it rises.
    #[suffix("u")]
    rise: f32 = 72.0,
    /// Seconds to rise, and as long to sink back.
    #[suffix("s")]
    period: f32 = 1.2,

    fn on_create() {
        // Up is toward negative y.
        pulse_by(vec2(0.0, -rise), period, .InOutSine);
    }
}
pulse_by moves the node by an offset and back, over a time, in a shape: here up 72 units, since the world’s y grows downward, over 1.2 seconds, and back, with .InOutSine, which eases at both ends. It runs for as long as the node exists.
- Click the Viewport tab. Select
Crypt, press + Add node, choose Sprite, and rename itskull. Set its Position to688and176, the middle of the pit, and under Groups typeenemy. - Drag
art/fire-skull.pngonto its Sprite’s Texture, and set Size to96and112, Anchor to0.5and0.5and Sort Layer to4. - Press Add component and choose AnimatedSpriteComponent: drag
art/fire-skull.animonto Animations, and set Clip toburn. - Press Add component and choose AreaComponent. In its Shape, set Size to
28and30, and Offset to0and8, the bright core of the skull and not its flames; set its own Layer to1, and untick0in its Mask. - Press Add component and choose Bob. Leave its Rise at
72and Period at1.2. - Press Ctrl+S.
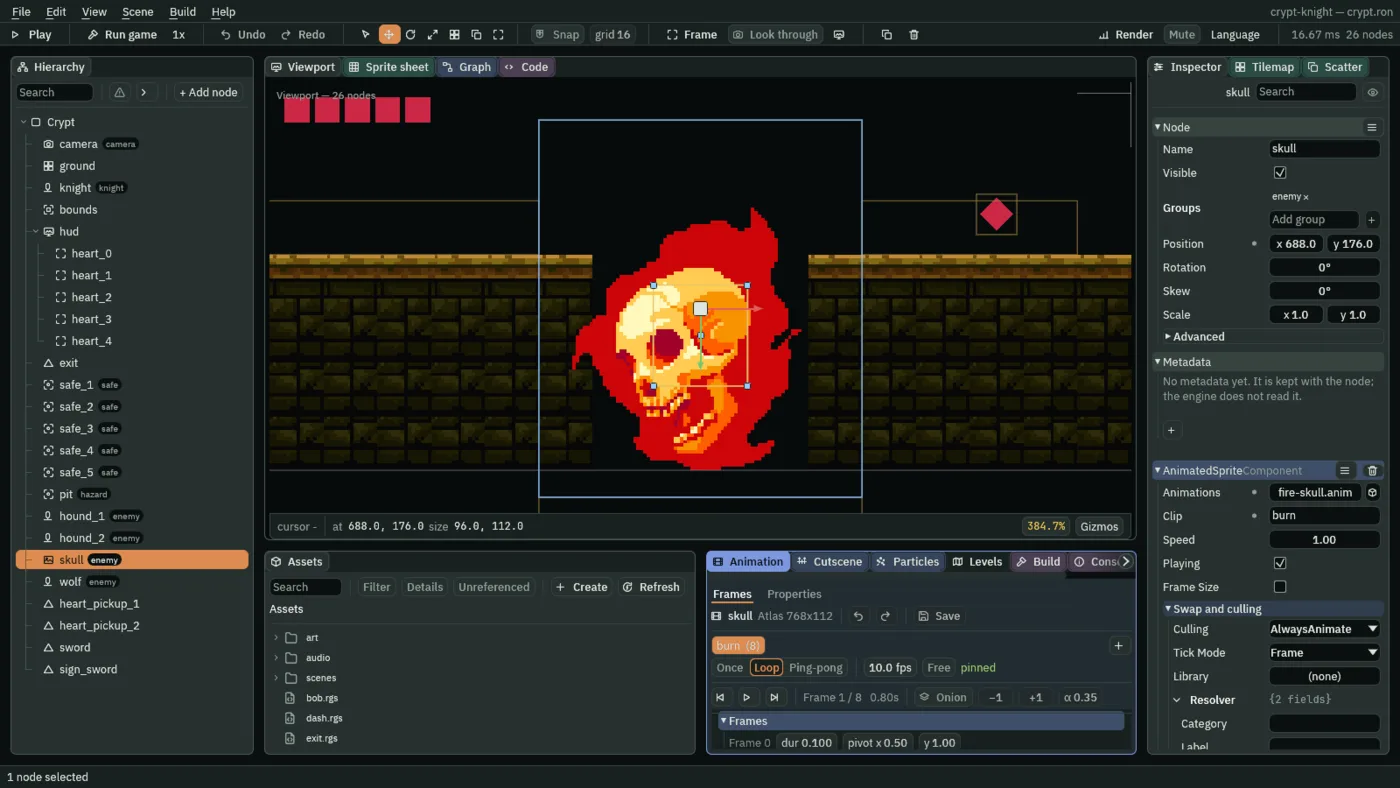
At rest the skull is low in the pit, under the floor line, and at the top of its bob it has risen 72 units, to the knight’s height. A knight can jump across the pit while it is down, and is hit by it when it is up: time it.
A wolf that dashes
The wolf lives in the trench: it runs from one wall to the other, waits there, and runs back. The three ledges over the trench are the knight’s way across, over its back.
- In Assets, press Create, choose New script, type
dash, and press Enter. In the Code tab, replace everything indash.rgswith the script below, and press Ctrl+S.
/// A dasher: runs one way until a wall stops it, waits there, then runs back.
/// Its art faces right.
component Dash : Body {
    /// How fast it runs.
    #[suffix("u/s")]
    speed: f32 = 160.0,
    /// Seconds it waits at each wall.
    #[suffix("s")]
    rest: f32 = 1.0,
    /// The way it runs: -1 for left, 1 for right.
    way: f32 = 1.0,
    /// Seconds of waiting left.
    #[hidden]
    waiting: f32 = 0.0,

    fn loop(dt: f32) {
        if waiting > 0.0 {
            waiting -= dt;
            set_number("CharacterBodyComponent", "velocity.x", 0.0);
        } else {
            set_number("CharacterBodyComponent", "velocity.x", way * speed);
        }
        // Its legs stop while it waits.
        set_flag("AnimatedSpriteComponent", "playing", waiting <= 0.0);
        set_flag("SpriteComponent", "flip.x", way < 0.0);
    }

    fn on_hit_wall() {
        way = -way;
        waiting = rest;
    }
}
- Click the Viewport tab. Select
Crypt, press + Add node, choose Character, and rename itwolf. Set its Position to904and192, the floor of the trench, and under Groups typeenemy. Remove its Shape. - In its Character Body, set Size to
36and18, Driven By to Script, Gravity to900and Terminal Velocity to400. - Add a SpriteComponent: drag
art/wolf-runing-cycle.pngonto its Texture, Size56and32, Anchor0.5and1, Sort Layer4. - Add an AnimatedSpriteComponent: drag
art/wolf-runing-cycle.animonto Animations, Cliprun. - Add an AreaComponent: Shape Size
32and14, Offset0and-7, its own Layer1, and0unticked in its Mask. - Add Dash, and leave its Speed at
160and Rest at1. - Press Ctrl+S.
The wolf’s art faces right, the hound’s left, so the two scripts flip the other way round. While it waits at a wall its legs stop: set_flag turns the Animated Sprite’s Playing off, as a wolf running on the spot reads as a bug.
The knight meets an enemy
The knight’s Area looks for layer 1, where the hounds, the skull and the wolf are, so he already hears them. What he does about it is the script’s. An enemy costs a heart, like a hazard, but it does not put him back on safe ground: it hops him back, up and away, and takes his steering from him for a quarter of a second. He blinks, as after a spike, and the camera shakes.
Open knight.rgs. First, the comment at the top, which now says so: replace its first seven lines with these eight.
/// The knight: runs where `move` points, jumps on `jump`, jumps lower when
/// `jump` is let go early, drops through a ledge when `down` is held as it
/// jumps, jumps once more in the air once the relic is taken, faces the way it
/// last moved, and shows the clip for what it is doing. It keeps where it last
/// stood on safe ground. A spike or a pit costs it a heart and puts it back
/// there; an enemy costs it a heart and hops it back. A hurt shakes the camera
/// and blinks the knight, and nothing can hurt it while it blinks. A heart it
/// picks up heals one. With no hearts left, the level is lost.
Two more fields, after blink_time: how long the hop takes his steering, and the seconds of it still to run.
    /// How long an enemy's hurt takes the knight's steering away while it hops
    /// back.
    #[suffix("s")]
    hop_time: f32 = 0.25,
    /// Seconds of the hop still to run.
    #[hidden]
    hopping: f32 = 0.0,
Then loop. It takes dt now, which counts the hop down, and a heart picked up says "heal". Replace everything from fn loop() { down to, and including, the block if x != 0.0 { facing = x; }, with this. The line after it, set_flag("SpriteComponent", "flip.x", facing < 0.0);, stays.
    fn loop(dt: f32) {
        // A heart picked up says "heal" to the group "knight", heard a step
        // later.
        if heard("heal") {
            hearts = min(hearts + 1.0, 5.0);
            keep_number("hearts", hearts);
        }
        // One more jump in the air once the relic is taken: double_jump is
        // kept as 0 or 1.
        set_number("CharacterBodyComponent", "air_jumps", kept_number("double_jump", 0.0));
        let x = direction("move").x;
        if hopping > 0.0 {
            // Hopping back from a hurt: the hop keeps its own speed.
            hopping -= dt;
        } else {
            set_number("CharacterBodyComponent", "velocity.x", x * speed);
            let drop = pressed("jump") && held("down");
            set_flag("CharacterBodyComponent", "drop_through", drop);
            if pressed("jump") && !drop {
                jump();
            }
            if !held("jump") {
                cut_jump();
            }
            if x != 0.0 {
                facing = x;
            }
        }
Last, on_enter. Replace the whole hook with this.
    /// When the knight's Area meets another: a spike, a pit or an enemy costs
    /// a heart.
    fn on_enter(other: NodeId) {
        let hazard = in_group(other, "hazard");
        if hazard || in_group(other, "enemy") {
            hearts -= 1.0;
            keep_number("hearts", hearts);
            if hearts <= 0.0 {
                fail();
            } else {
                if hazard {
                    move_to(kept_point("safe", position()));
                    set_point("CharacterBodyComponent", "velocity", vec2(0.0, 0.0));
                } else {
                    // Up, and back the opposite way to the way it faces.
                    set_point("CharacterBodyComponent", "velocity", vec2(-facing * 90.0, -160.0));
                    hopping = hop_time;
                }
                // The camera's node is in the group "camera".
                emit_to("camera", "shake");
                pulse_colour("SpriteComponent", "color", vec4(1.0, 1.0, 1.0, 0.25), 0.08, .Linear);
                // A hook that is waiting ignores every call until it finishes,
                // so while this one waits, nothing can hurt the knight.
                await wait(blink_time);
                // Setting the colour ends the blink.
                set_colour("SpriteComponent", "color", vec4(1.0, 1.0, 1.0, 1.0));
            }
        }
    }
let hazard- A local, true when the thing met is in the group
hazard. A hazard puts him back on safe ground, as in chapter 9; anything else that costs a heart, an enemy, hops him instead. velocityof-facing * 90and-160- The hop: 90 units a second away from the way he faces, and 160 up.
set_pointwrites a vector into the body’svelocity. For the 0.25 seconds ofhopping,loopleaves his sideways speed alone, so the hop carries him instead of the keys. - Why away from where he faces
- A script cannot read another node’s position, so the knight cannot tell which side an enemy struck him from. Throwing him back away from the way he faces is right for a hit from the front, which is nearly every hit; a hit from behind throws him toward the enemy, once.
- heard
"heal"and min - A heart he picks up, below, tells the group
knightto"heal"; the knight hears it a step later and adds a heart, never above five.
Press Ctrl+S. The knight in the Gate and the knight in the Crypt are one script: each gains the two new fields, with their defaults, the next time its scene opens.
Two hearts to pick up
- In Assets, press Create, choose New script, type
heart, and press Enter. In the Code tab, replace everything inheart.rgswith the script below, and press Ctrl+S.
/// A heart lying in the crypt: it bobs, and the knight takes it by walking
/// into it, which heals one heart. Then it is gone.
component Heart : Area {
    fn on_create() {
        pulse_by(vec2(0.0, -3.0), 0.5, .InOutSine);
    }

    fn on_enter(other: NodeId) {
        if in_group(other, "knight") {
            // The knight is in the group "knight", and hears this a step
            // later.
            emit_to("knight", "heal");
            hide();
        }
    }
}
- Click the Viewport tab. Select
Crypt, press + Add node, choose Shape, and rename itheart_pickup_1. Set its Position to776and148, and its Rotation to45. - In its Shape, keep Kind on Rectangle, set Size to
7and7, Anchor to0.5and0.5, Outline to0, Color to0.6,0.02,0.06with an alpha of1, and Sort Layer to6: a small red diamond, the colour of the HUD’s. - Add an AreaComponent: Shape Size
12and12. Leave its Layer and Mask: it is on layer0and looks for the knight, who is there. - Add Heart.
- Right-click
heart_pickup_1and choose Duplicate. Rename the copyheart_pickup_2, and set its Position to992and116: over the second ledge. - Press Ctrl+S.
A heart bobs 3 units over half a second, and is taken by touch, with the same hidden-Area trick as the relic. The knight is told to heal by the group: a script writes only to its own node, so the heart cannot reach into the knight, and says so instead.
The sword on its altar
At the end of the Crypt, past the second hound, an altar holds the sword. Taking it will let him attack, in chapter 12. It is the relic of chapter 10 again, with another power: the script is the same one.
- Select
Crypt, press + Add node, choose Shape, and rename itsword. Set its Position to1512and118. - In its Shape, keep Kind on Rectangle, set Size to
3and16, Anchor to0.5and0.5, Outline to0, Color to0.85,0.88,0.92with an alpha of1, and Sort Layer to6: a thin bar, standing on its end. - Add an AreaComponent: Shape Size
16and48, Offset0and18. - Add Relic, and set its Power to
sword. - Select
sign_air, the Gate’s sign you kept, and rename itsign_sword. Set its Position to1512and98, the Text of its World Text toJ or X to strike., the Size of its Shape to110and13, and its Area’s Offset to0and34: 17 characters make 110, and the Area is lower, to reach the floor. - Press Ctrl+S.
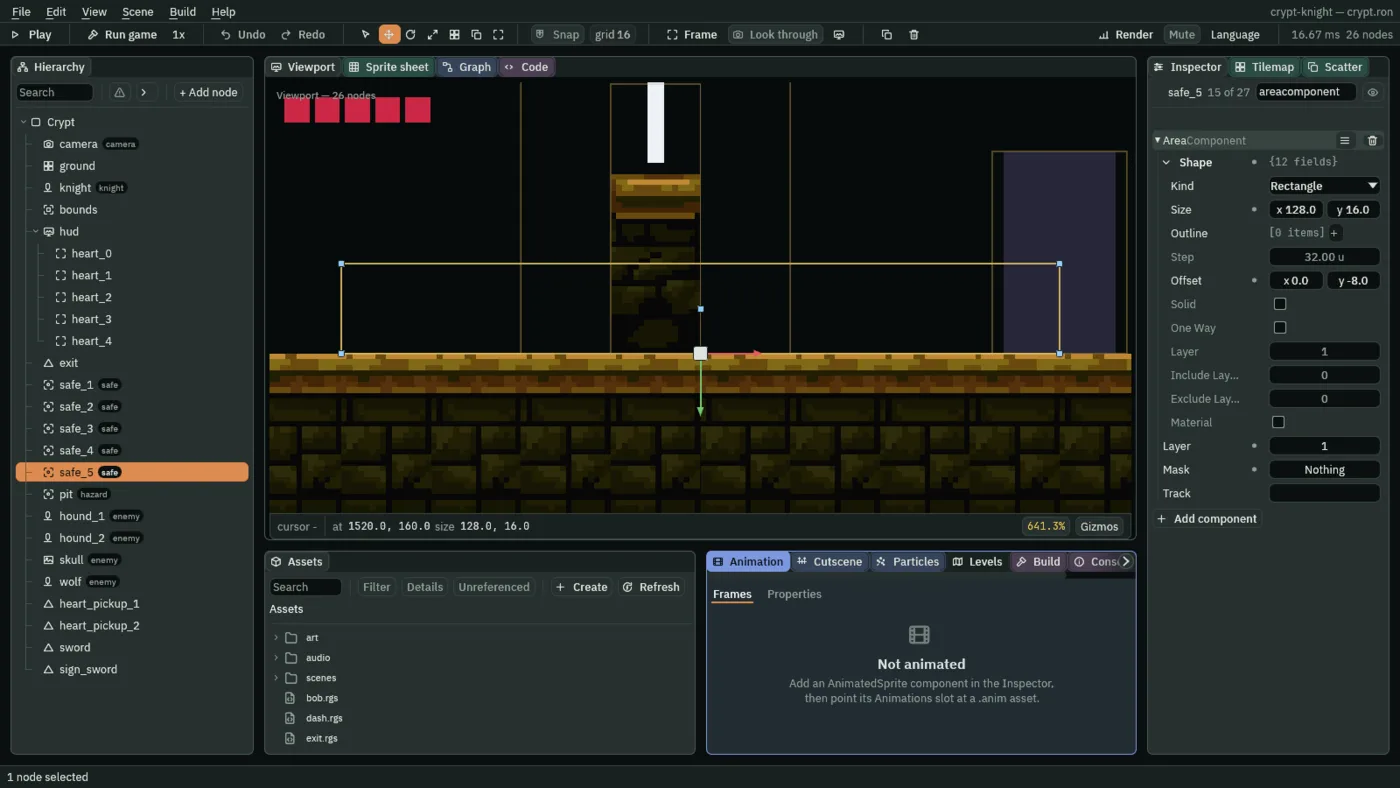
The exit is the Gate’s, at the same place, 1584 and 160, and it already wins the level.
The Crypt on the list
- Click the Levels tab. Type
The Cryptinto the box in the panel’s bar and press Add level. - With its row selected, press Scene and choose
crypt.ron. - Drag
abandoned_castle_music_-_starninjas_6.oggfromaudioin Assets onto the Music button of its row: the same loop as The Gate’s.
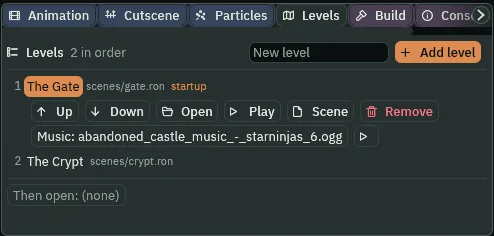
The Gate’s exit now opens The Crypt. The Crypt’s exit is the last level’s: the run ends there, until chapter 13 adds the third and chapter 15 the victory screen.
Check it works