Tutorials · Crypt Knight · Chapter 4
The Gate’s ground
By the end
- A tilemap,
art/gothic-castle-tileset.tilemap, with three layers:back,ground, which is solid, andledges, which is solid and one-way - The Gate’s ground, 102 cells wide and 14 tall, 1632 by 224 world units: a start floor, a step, a tall ledge, a drop with a ledge over it, a pit and a gap, and the walls at both ends
- Four layers of night town behind it, which drift past at four speeds as the camera moves
- Collision you did not place: the solid layers make their own
On this page
A level in one node
The Gate is a castle courtyard, 102 cells wide, and a node for every floor and wall of it would be a hundred nodes, each with its collision kept in step by hand. A tilemap is one node that holds the whole level: a grid of cells, each showing one tile of a tile sheet, on layers. Every layer you mark solid makes its own collision. The Tilemaps guide has the whole of it; this chapter needs only what follows.
- Select
Gatein the Hierarchy, press + Add node, and choose Tilemap. Rename the new nodeground. Its Position is0and0, so the grid is laid out from the world’s origin: cell (0, 0) is the top-left corner of the level. - Open the Tilemap tab, beside the Inspector. It says there is no tilemap yet.
- Drag
art/gothic-castle-tileset.pngfrom Assets onto the New tilemap… button. The editor writesart/gothic-castle-tileset.tilemap, beside the sheet and named after it, and points the node at it. It is the sheet’s first tilemap, so it takes the sheet’s own name; the editor never writes over a tilemap, and a second one would beart/gothic-castle-tileset-2.tilemap.
The new file has two layers: back, for scenery that stops nothing, and ground, which is marked solid. The Tileset block reads the sheet as 16 by 16 tiles in 21 columns, which is right: 336 pixels is 21 tiles across, and the sheet has 315 tiles in 15 rows.
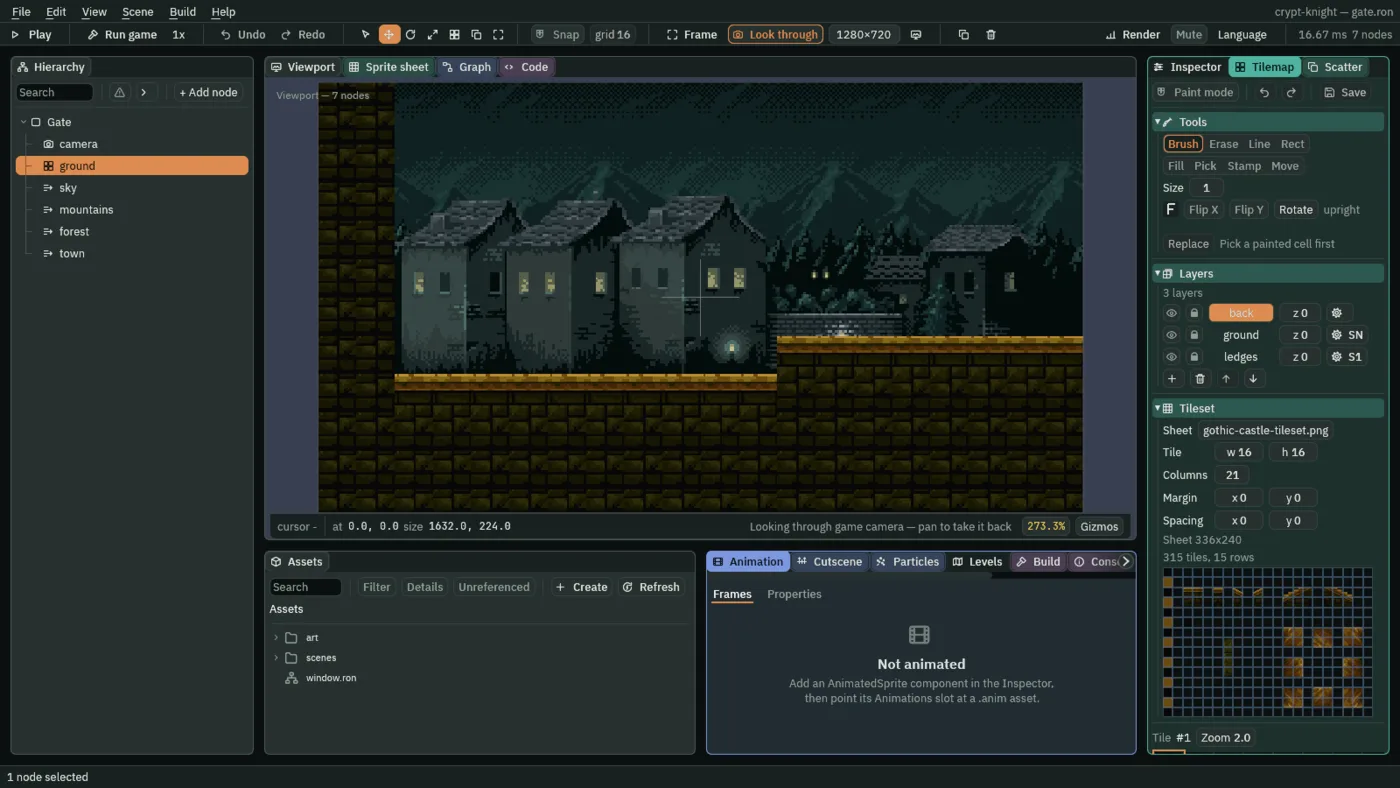
A third layer, for ledges you can pass through
Some of the Gate’s ledges the knight can jump up through and land on, and drop down through again. That is a one-way layer: solid from above and not from the other sides. It is a layer of its own, because a layer is solid all of it or none of it.
- Under Layers, click the name
ground, then press the + under the list, which adds an empty layer over the chosen one. - Double-click the new layer’s name, type
ledges, and press Enter. - Click the gear at the right of its row. Tick Solid, then One-way, and leave Blocks nav and Occluder unticked. The button now reads S1, where
ground’s reads SN: solid and one-way, against solid and blocking navigation.
- Solid
- The layer’s tiles make collision: each cell is a wall.
- One-way
- Only the top of each cell stops anything. A body lands on it from above, and passes through it from below and from the sides.
Paint the ground
Cell (x, y) of the grid covers world x from 16·x to 16·x + 16, and y from 16·y to 16·y + 16. The status line under the Viewport shows where the cursor is in world units, so a cell is the cursor’s numbers divided by 16, rounded down.
- With
groundselected, turn on Paint mode at the top of the Tilemap panel. In the Viewport, scroll to zoom and drag with the middle button, or hold Space and drag, to pan. Zoom out until about 50 cells show at a time: the level is 102 across. - Under Layers, click the name
ground, and under Tools choose Rect. - In the tile picker, at the foot of the panel, hover the tiles until the tooltip reads
#66: the plain stone brick, the third tile of the fourth row. Click it. If the tiles are too small to hit, raise Zoom under the picker. The foot of the panel says Tile #66. - Drag a rectangle for each row of the first table below, from a point inside its first cell to a point inside its last. Both corner cells are painted.
- Click
#45in the picker, the stone with a lit edge on top, the third tile of the third row, straight above#66. Drag a rectangle for each row of the second table. - Under Layers, click
ledges, keep#45, and drag one rectangle from cell (41, 7) to cell (50, 7). - Press Save at the top of the Tilemap panel, which is copper while there is anything to save, and Ctrl+S for the scene.
First the bodies, on the ground layer with #66. Each row is one rectangle, from its first column and top row to its last column and bottom row:
| Stretch | From cell | To cell |
|---|---|---|
| The left wall | (0, 0) | (1, 13) |
| The right wall | (100, 0) | (101, 13) |
| The wall over the drop | (51, 0) | (52, 6) |
| The start floor | (2, 11) | (11, 13) |
| The step | (12, 10) | (24, 13) |
| The tall ledge | (25, 8) | (40, 13) |
| The lower floor | (41, 11) | (60, 13) |
| The spike pit’s floor | (61, 13) | (63, 13) |
| After the pit | (64, 11) | (80, 13) |
| The gap’s floor | (81, 13) | (86, 13) |
| The far side | (87, 11) | (99, 13) |
Then the tops, still on ground, with #45: the cap of each floor, one row of cells above its body.
| Stretch | From cell | To cell |
|---|---|---|
| The start floor | (2, 10) | (11, 10) |
| The step | (12, 9) | (24, 9) |
| The tall ledge | (25, 7) | (40, 7) |
| The lower floor | (41, 10) | (60, 10) |
| The spike pit’s floor | (61, 12) | (63, 12) |
| After the pit | (64, 10) | (80, 10) |
| The gap’s floor | (81, 12) | (86, 12) |
| The far side | (87, 10) | (99, 10) |
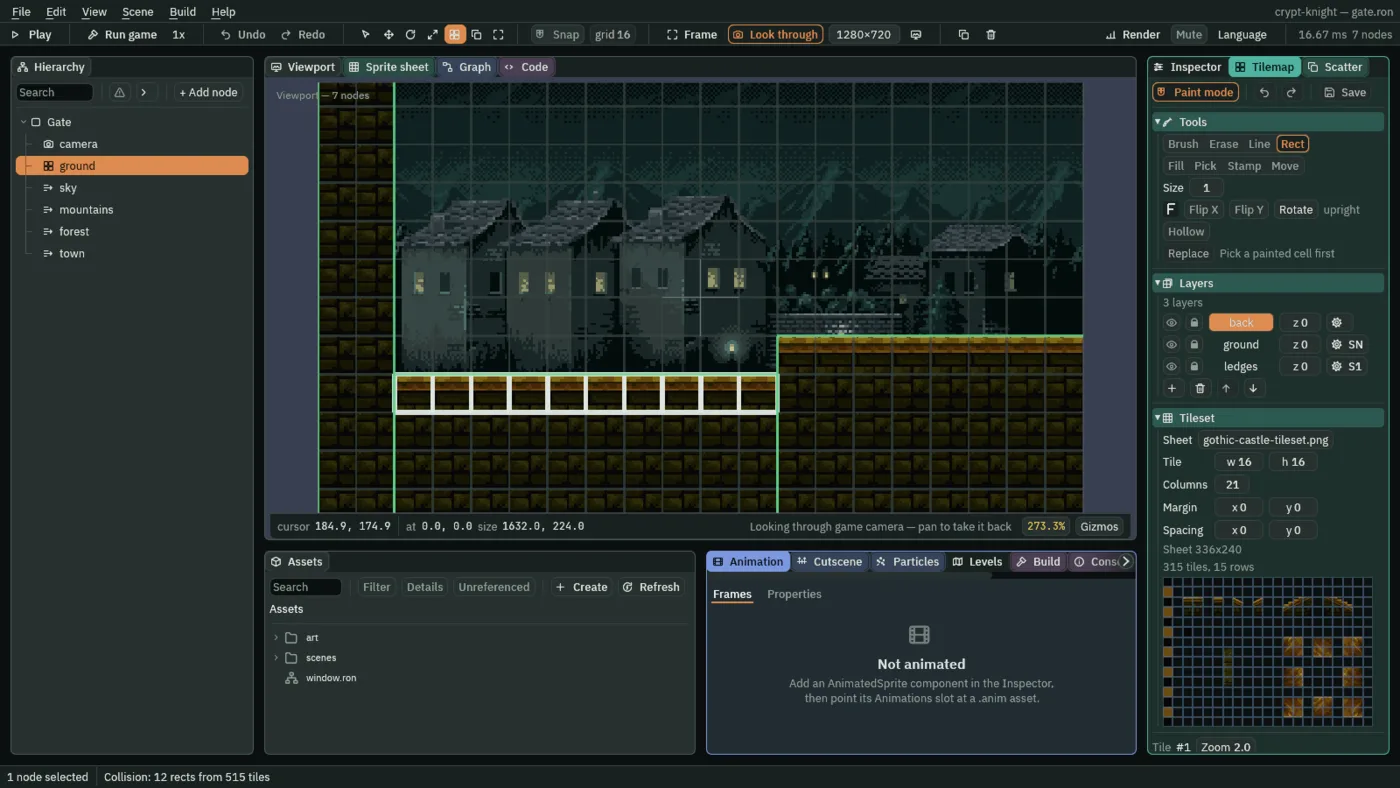
A wrong rectangle is easy to undo: Ctrl+Z, or the undo arrow at the top of the Tilemap panel. A cell painted twice keeps the last tile. To check a stretch, look at the bar under the window: in Paint mode it counts the collision your layers make.
What you painted
None of the numbers above are arbitrary; the next chapters play on them.
- The start floor and the step. The floor is where the knight starts. The step, one cell up, is the first thing a jump climbs.
- The tall ledge. Two cells above the step: only a held jump reaches it, and chapter 5 teaches that difference.
- The drop. The ledge on the
ledgeslayer, cells 41 to 50, hangs over the lower floor, and the wall over it leaves no way on but down. You drop through the ledge, with S and Space held, in chapter 5. - The spike pit and the gap. Two cells deep, with a floor, so the knight is never stranded below the level. The pit gets spikes in chapter 9, which also takes the gap’s floor away, and a double jump, in chapter 10, is what crosses the gap.
- The walls at both ends keep the knight, and the camera in chapter 6, inside the level.
The night town behind it
Far things seem to move slower than near ones as you pass them. A Parallax plane does that to a backdrop: it moves at a fraction of the camera’s speed. The Gate has four, from the sky to the town. Cameras has more on Parallax; here are the four.
- Select
Gate, press + Add node, and choose Parallax. It carries a Parallax and a Sprite. Rename itsky. - Drag
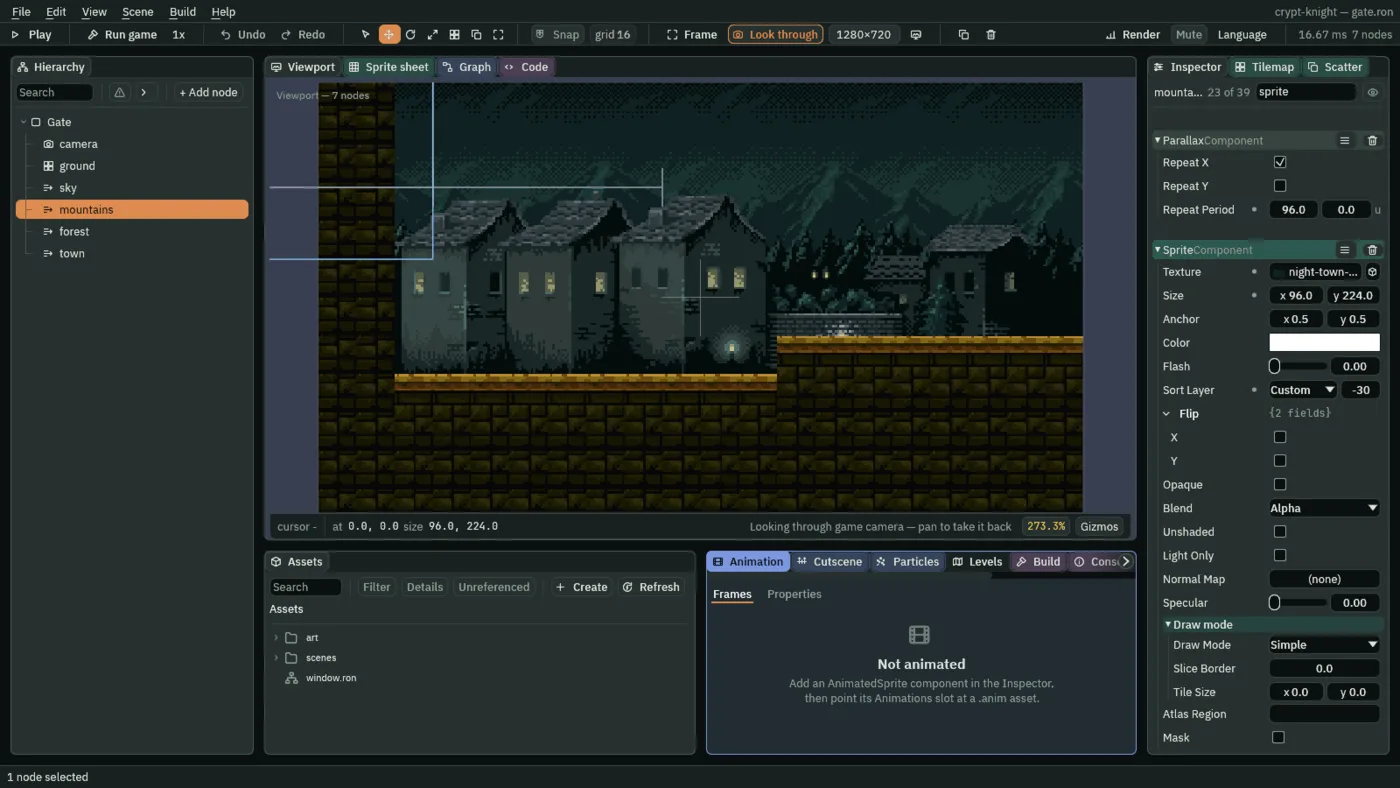
art/night-town-background-sky.pngonto the Sprite’s Texture, set Size to96and224, the picture’s own size, and Sort Layer to-40, behind everything. - In its Parallax, set Factor to
1and1, Offset to0and0, and Repeat Period to96and0. Leave Repeat X ticked and Repeat Y unticked. - Do the same for the other three, each a child of
Gate, with the values in the table below.
| Node | Texture | Size | Sort Layer | Factor | Offset | Repeat Period |
|---|---|---|---|---|---|---|
sky | night-town-background-sky.png | 96 × 224 | -40 | 1, 1 | 0, 0 | 96, 0 |
mountains | night-town-background-mountains.png | 96 × 224 | -30 | 0.9, 1 | 0, -30 | 96, 0 |
forest | night-town-background-forest.png | 64 × 96 | -20 | 0.75, 1 | 0, 10 | 64, 0 |
town | night-town-background-town.png | 512 × 99 | -10 | 0.6, 1 | 0, 0 | 512, 0 |
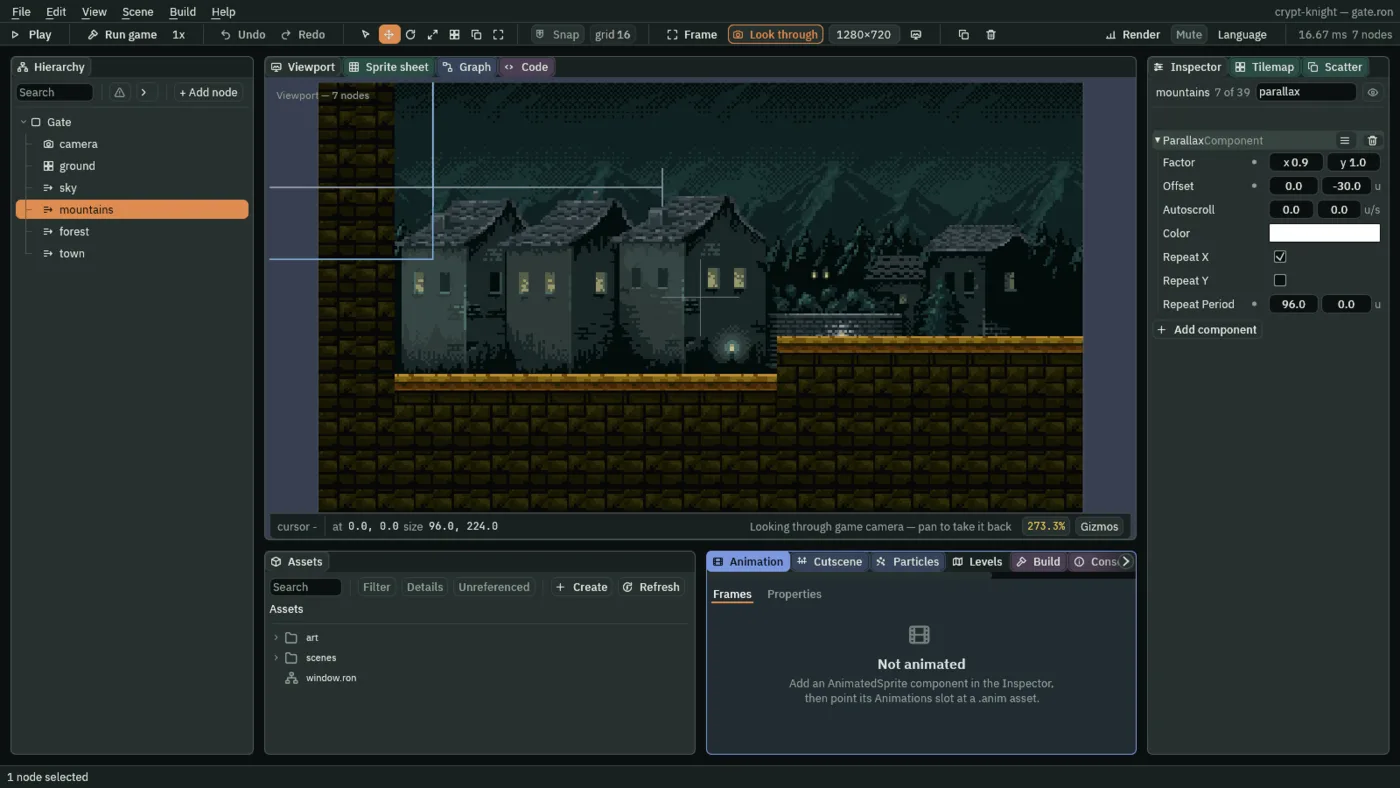
- Factor
- How much of the camera’s movement the plane is carried along by. At
1it moves with the camera and stays put on screen, like the sky. At0.6the town slides by at 40% of the speed of the ground. Far things are near1, near things near0. - Offset
- A fixed shift, added after the parallax. The mountains are lifted 30 units and the forest dropped 10, chosen by eye, so each layer sits behind the floor where it looks right.
- Repeat Period
- With Repeat X on, how far apart the copies sit: each picture’s own width, so the copies meet edge to edge and the plane never runs out as the camera moves.
- Sort Layer
- Orders drawing: a lower layer draws first, underneath. The four planes sit at -40 to -10, under the tilemap, which sits at 0.
- Press Ctrl+S.