Tutorials · Crypt Knight · Chapter 9
Hearts and hazards
By the end
- The gap’s floor erased, so the gap is a bottomless pit
- Spikes and a pit, both in a
hazardgroup, and six stretches of safe ground, in asafegroup - The knight keeping five hearts, losing one to a hazard, and put back on the last safe ground he stood on
- A blink while nothing can hurt him, and a camera that shakes
- Five hearts at the top left of the screen, a HUD that shows how many are left
On this page
What hurts, and what it costs
The knight has five hearts. A hazard, spikes or a pit, costs him one, puts him back on the last safe ground he stood on, blinks him for a second during which nothing can hurt him, and shakes the camera. With no hearts left the level is lost. A row of five hearts on the screen shows how many remain.
Spikes and pits are Areas in a hazard group, and so is safe ground, in a safe group: a stretch of Area along a floor, kept short of the floor’s edges so that the knight is never put back on the lip of a pit. The knight’s own Area, from chapter 8, notices them. An Area only notices Areas on layers it looks for, and chapter 8 left the knight’s looking for none, so the layers are the first thing to settle:
| Area | Layer | Mask: the layers it looks for |
|---|---|---|
| The knight’s | 0 | 1: the hazards and the safe ground |
| A sign, and later the relic, a heart and the exit | 0 | 0: the knight |
| A hazard, a stretch of safe ground, and later an enemy | 1 | Nothing |
So the knight hears what hurts him, what he takes hears him, and nothing hears what it has no use for. A node’s Area is on a layer, and its mask is the list of layers it hears. The Mask row of the Inspector lists layers by number, as 0 and 1.
A gap with no floor
Chapter 4 gave the gap a floor two cells down, so the knight could never be stranded below the level. A floor that hurts reads wrong, though, and a gap you can climb out of by a held jump would make the double jump of the next chapter optional. So the gap loses its floor: it becomes a bottomless pit, with a hazard under the level’s bottom edge, which is what you add below.
- Select
ground, open the Tilemap tab, and turn on Paint mode. Under Layers, clickground, and under Tools choose Erase, with Size1. - Drag from a point inside cell (81, 12) to a point inside cell (86, 12): the six cap cells of the gap’s floor go. Then drag from cell (81, 13) to cell (86, 13): the six body cells under them.
- Press Save at the top of the Tilemap panel, and read the bar at the foot of the window: it should say Collision: 11 rects from 503 tiles.
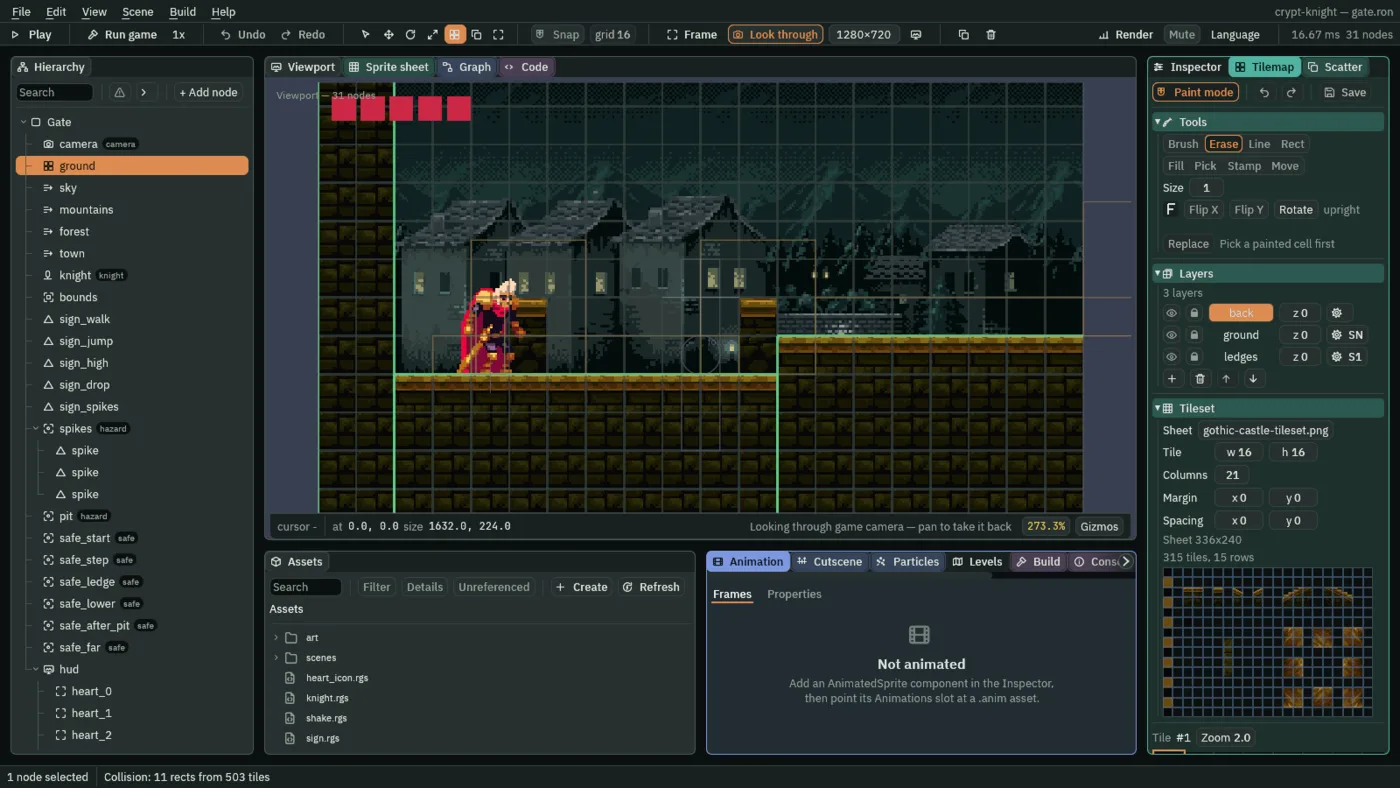
The 503 is chapter 4’s 515 less the twelve you erased, and the rectangles are one fewer, since the gap’s floor was a rectangle of its own. The gap is cells 81 to 86 across, so the world’s x from 1296 to 1392, and the hole it leaves goes right down past the level’s bottom edge, at y 224.
Spikes
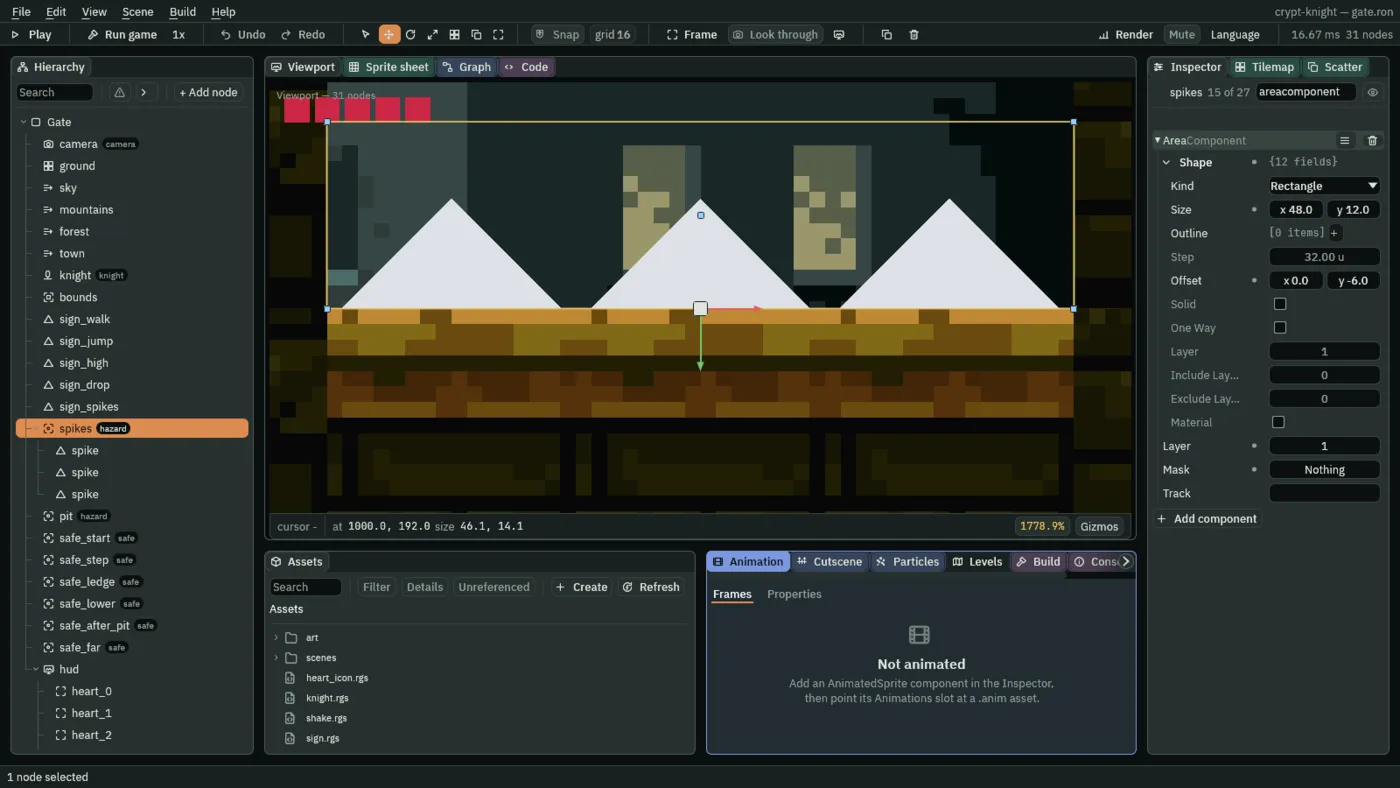
The spike pit, cells 61 to 63, keeps its floor. Three spikes stand on it, under a single Area that is the thing that hurts. Each spike is a small turned square, which is the shape of a spike enough to read from a screen away.
- Select
Gate, press + Add node, and choose Area. Rename itspikes, and set its Position to1000and192: the middle of the pit, and the height of its floor. - Under Groups, type
hazardand press Enter. - In its Area, set the Shape’s Size to
48and12, and its Offset to0and-6: a strip as wide as the pit’s three spikes, and 12 tall, standing on the floor. - Set the Area’s own Layer to
1. Click the Mask row and untick0, so it reads Nothing. - With
spikesselected, press + Add node and choose Shape: it lands underspikes. Rename itspike. - Set its Position to
-16and0, and its Rotation to45. In its Shape, keep Kind on Rectangle, set Size to10and10, Anchor to0.5and0.5, Outline to0, and its Color to0.72,0.75,0.8with an alpha of1: a pale steel. Set its Sort Layer to-5. - Right-click
spikeand choose Duplicate, twice. Set the copies’ Position to0and0, and16and0. - Press Ctrl+S.
- Sort Layer
-5 - Behind the floor’s tiles, which are at
0: the spikes are drawn first, so the floor covers their lower halves, and they look sunk into it. Their Area is the strip above the floor. - Rotation
45 - In degrees. A square turned a quarter of a right angle stands on its corner, which is a spike.
- Layer and Mask
- A hazard is on layer
1and looks for nothing: it has no use for hearing the knight. It is the knight’s Area, looking for layer1, that notices it.
The pit under the gap
- Select
Gate, press + Add node, choose Area, and rename itpit. Set its Position to1344and248. - Give it the group
hazard, as the spikes have. In its Area, set the Shape’s Size to128and32, leave its Offset at0and0, set its Layer to1, and untick0in its Mask. - Press Ctrl+S.
The pit’s Area runs from x 1280 to 1408, wider than the gap, and from y 232 to 264, just under the level’s bottom edge at 224. A knight who falls through the gap lands in it, a little after he leaves the level’s picture. Nothing draws it, as nothing draws any Area: it is a rule, and the Viewport shows its outline only while you select it.
Safe ground
Where is the knight put back to? To the last place he stood on safe ground. Safe ground is an Area, in a safe group, laid along a floor a little short of each end, so a knight put back on it is never right at an edge: a spike pit, a gap or a drop starts a step away from it. There are six, one for each floor the knight can stand on before the end of the Gate.
- Select
Gate, press + Add node, choose Area, and rename itsafe_start. Set its Position to112and160. - Give it the group
safe. In its Area, set the Shape’s Size to128and16, its Offset to0and-8, its Layer to1, and untick0in its Mask: a strip 16 tall, standing on the floor’s top. - Right-click
safe_startand choose Duplicate five times, and rename and set each copy from the table below. Only the Position and the Size change. - Press Ctrl+S.
| Node | Position | Size | Cells | Floor |
|---|---|---|---|---|
safe_start | 112, 160 | 128, 16 | 3 to 10 | The start floor |
safe_step | 296, 144 | 176, 16 | 13 to 23 | The step |
safe_ledge | 528, 112 | 224, 16 | 26 to 39 | The tall ledge |
safe_lower | 816, 160 | 256, 16 | 43 to 58 | The lower floor, under the drop |
safe_after_pit | 1160, 160 | 208, 16 | 66 to 78 | The floor after the spike pit |
safe_far | 1504, 160 | 160, 16 | 89 to 98 | The far side, after the gap |
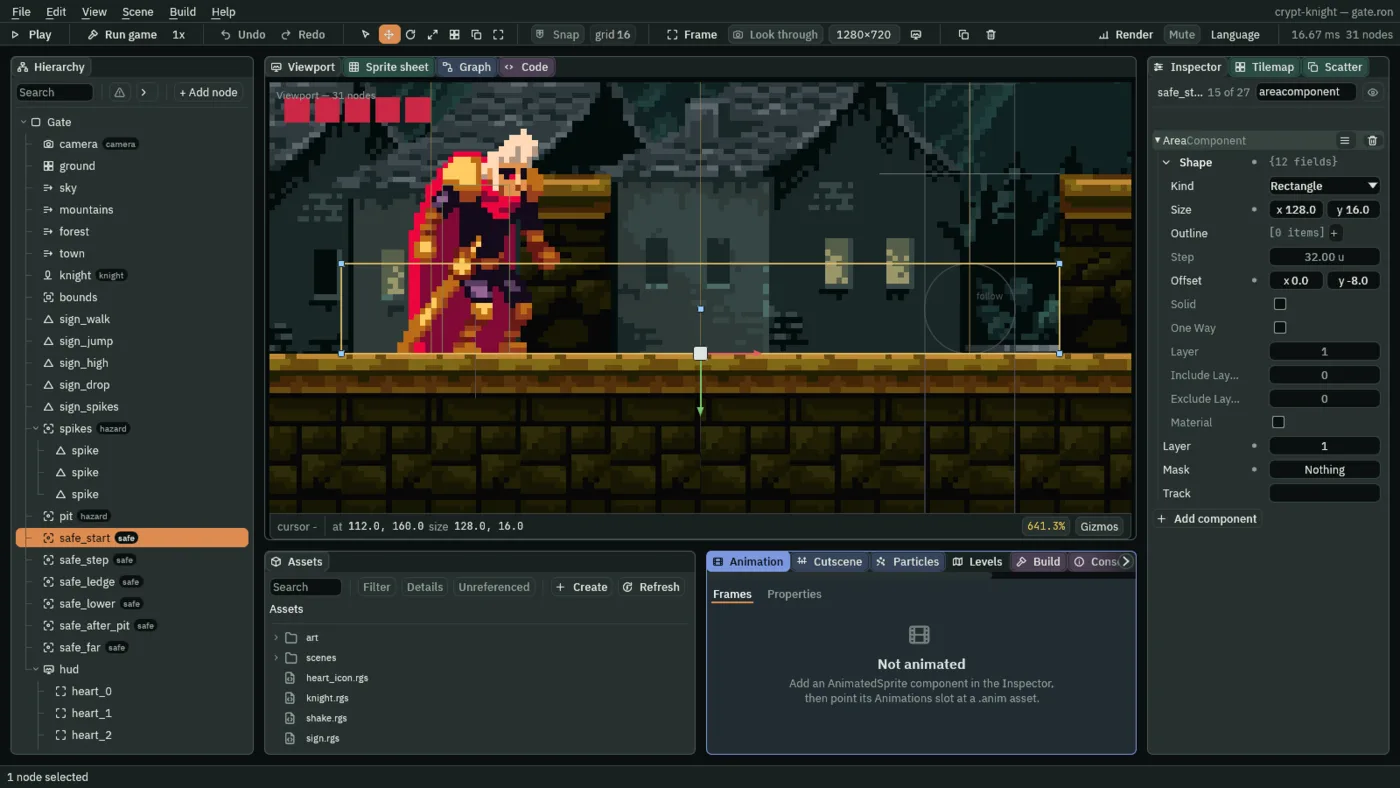
Each strip starts a cell or two in from its floor’s first cell and stops a cell or two short of its last, a cell, 16 units, being more than the knight is wide. The lower floor’s, for example, ends at x 944, so the knight is put back there, 32 units short of the spike pit, which begins at 976.
The knight hears them
- Select
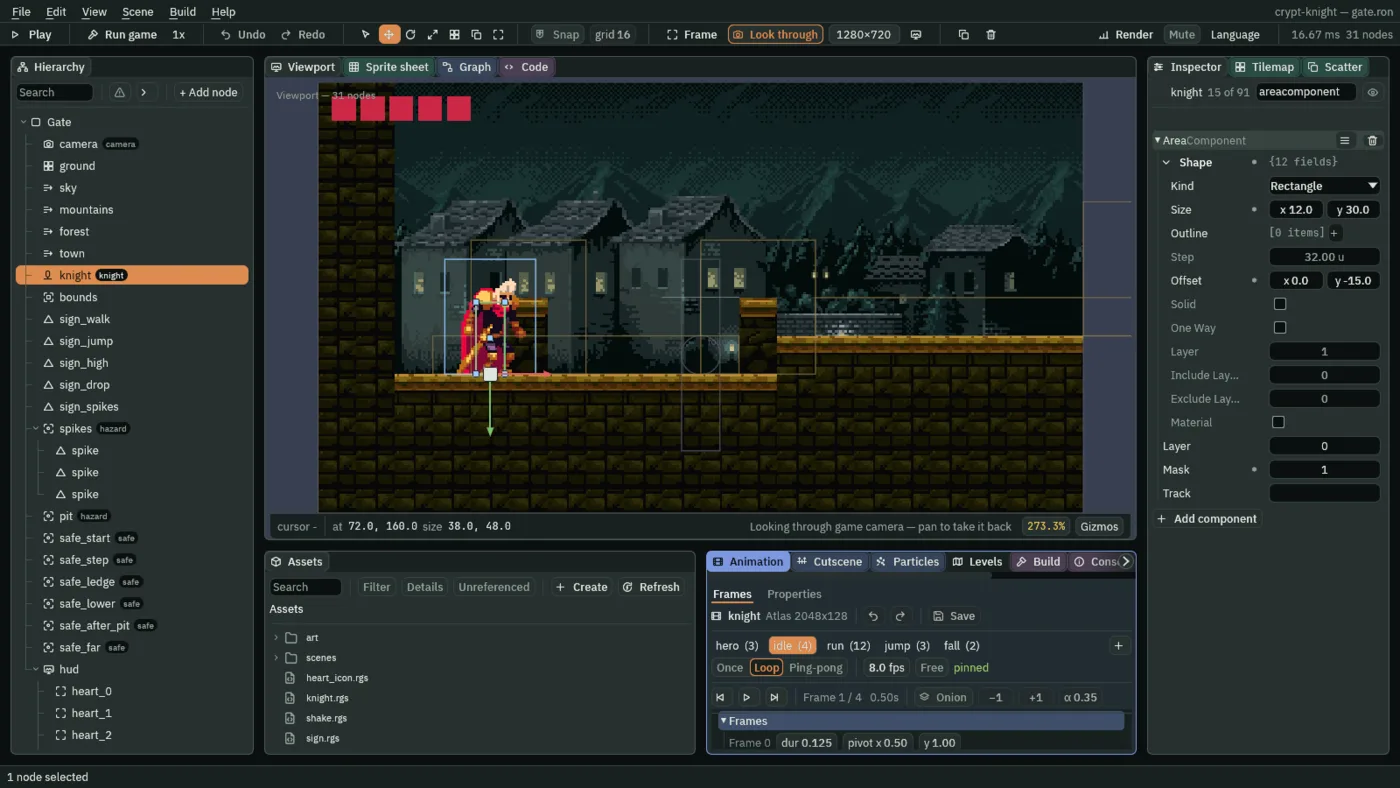
knight. In its Area, click the Mask row, and tick1. It reads 1, not Nothing. Leave the Area’s own Layer at0. - Press Ctrl+S.
The knight’s script
The knight’s script grows from 42 lines to 93: hearts, safe ground, what a hazard does and the blink. Replace everything in knight.rgs with the script below, and press Ctrl+S. The panel says Up to date once it checks, and the Inspector gains two rows on the knight’s script, Hearts and Blink Time.
/// The knight: runs where `move` points, jumps on `jump`, jumps lower when
/// `jump` is let go early, drops through a ledge when `down` is held as it
/// jumps, faces the way it last moved, and shows the clip for what it is doing.
/// It keeps where it last stood on safe ground. A spike or a pit costs it a
/// heart and puts it back there; the hurt shakes the camera and blinks the
/// knight, and nothing can hurt it while it blinks. With no hearts left, the
/// level is lost.
component Knight : Area {
    /// How fast the knight runs.
    #[suffix("u/s")]
    speed: f32 = 110.0,
    /// The way the knight faces: -1 for left, 1 for right.
    facing: f32 = 1.0,
    /// The clip on show, so a clip starts only when it changes.
    shown: String = "",
    /// The hearts left. Every level starts with five.
    hearts: f32 = 5.0,
    /// How long the knight blinks after a hurt, while nothing can hurt it.
    #[suffix("s")]
    blink_time: f32 = 1.0,

    fn on_create() {
        // Kept, so the HUD can show them.
        keep_number("hearts", hearts);
        // Safe ground, until the knight has stood on some: where it starts.
        keep_point("safe", position());
    }

    fn loop() {
        let x = direction("move").x;
        set_number("CharacterBodyComponent", "velocity.x", x * speed);
        let drop = pressed("jump") && held("down");
        set_flag("CharacterBodyComponent", "drop_through", drop);
        if pressed("jump") && !drop {
            jump();
        }
        if !held("jump") {
            cut_jump();
        }
        if x != 0.0 {
            facing = x;
        }
        set_flag("SpriteComponent", "flip.x", facing < 0.0);
        let want = "fall";
        if grounded() {
            want = "idle";
            if x != 0.0 {
                want = "run";
            }
        } else if velocity().y < 0.0 {
            want = "jump";
        }
        if want != shown {
            play_clip(want);
            shown = want;
        }
    }

    /// Each step the knight's Area is in another. On safe ground it keeps where
    /// it stands. In a spike or a pit it goes back to the last safe ground it
    /// stood on, even while it blinks and the spike costs nothing.
    fn while_in() {
        if in_group(other, "safe") && grounded() {
            keep_point("safe", position());
        }
        if in_group(other, "hazard") {
            move_to(kept_point("safe", position()));
            set_point("CharacterBodyComponent", "velocity", vec2(0.0, 0.0));
        }
    }

    /// When the knight's Area meets another: a spike or a pit costs a heart.
    fn on_enter(other: NodeId) {
        if in_group(other, "hazard") {
            hearts -= 1.0;
            keep_number("hearts", hearts);
            if hearts <= 0.0 {
                fail();
            } else {
                move_to(kept_point("safe", position()));
                set_point("CharacterBodyComponent", "velocity", vec2(0.0, 0.0));
                // The camera's node is in the group "camera".
                emit_to("camera", "shake");
                pulse_colour("SpriteComponent", "color", vec4(1.0, 1.0, 1.0, 0.25), 0.08, .Linear);
                // A hook that is waiting ignores every call until it finishes,
                // so while this one waits, nothing can hurt the knight.
                await wait(blink_time);
                // Setting the colour ends the blink.
                set_colour("SpriteComponent", "color", vec4(1.0, 1.0, 1.0, 1.0));
            }
        }
    }
}
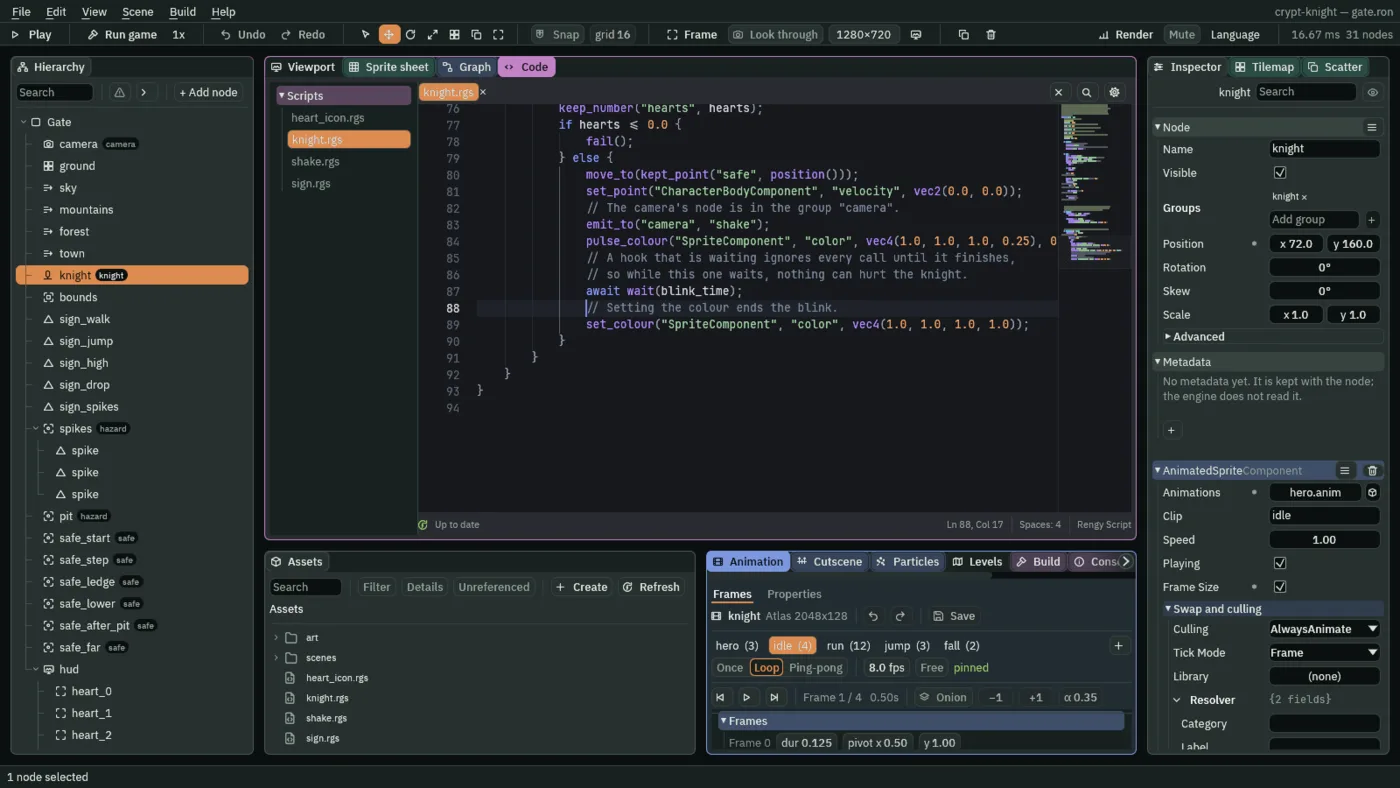
component Knight : Area- The script now has an Area base, as
Signhas: it hears what its own node’s Area meets.on_enterruns when another Area starts to overlap the knight’s, with itsNodeIdasother, andwhile_inon every step another still does. - keep_number and kept_number
- A kept value is a name and a value held by the game, outside any node, so another script can read what this one wrote.
keep_number("hearts", hearts)keeps the number under the namehearts; the HUD reads it back. Kept values outlast a change of scene, which the next chapter uses. Ship Evader’s lives uses them too. - keep_point and kept_point
- The same for a point.
on_createkeeps where the knight starts as"safe", so that there is always somewhere to put him back;kept_point("safe", position())reads it, with its second argument as the answer until anything has been kept. while_in- On every step the knight’s Area is inside another one: if it is in safe ground and the knight is grounded, he keeps where he stands as the safe point. Kept every step rather than on landing, because walking onto spikes involves no landing. If it is in a hazard, he goes back, even while he blinks, so that a pit met in a blink does not keep him falling for ever.
on_enter- The first touch of a hazard costs a heart, and keeps the new count. At none, fail ends the level as lost. Otherwise move_to puts him back, and set_point zeroes his velocity, so he does not carry on falling.
- emit_to
- Sends a signal, here
"shake", to every node in a group, here"camera". The camera’sShake, below, hears it on the next step. - pulse_colour and
await wait(blink_time) - A pulse eases the Sprite’s colour toward a see-through white and back, 0.08 s each way, for as long as the knight blinks, which is the
wait. A hook that is waiting ignores every call until it ends, so nothing can hurt him while he blinks: that is the whole of the invulnerability. set_colour then writes plain white, which ends the pulse.
The camera shakes
A hurt should be felt. The camera’s picture jolts about a few units for a quarter of a second, and settles. The script that does it lives on the camera’s node, and the knight finds that node by a group.
- In Assets, press Create, choose New script, type
shake, and press Enter. - In the Code tab’s Scripts list, click
shake.rgs, replace everything in it with the script below, and press Ctrl+S.
/// The camera's shake: "shake", sent to the group "camera" that this node is
/// in, jolts the picture about for a moment, then it settles back to rest. It
/// moves the camera's offset, not the camera, so the rig that moves the camera
/// carries on undisturbed.
component Shake {
    /// How long a shake jolts the picture about.
    #[suffix("s")]
    shake_time: f32 = 0.25,
    /// How far from rest a shake may move the picture.
    #[suffix("u")]
    shake_reach: f32 = 3.0,
    /// Seconds from one jolt to the next.
    #[suffix("s")]
    jolt_time: f32 = 0.05,
    /// Seconds of shaking left.
    #[hidden]
    shaking: f32 = 0.0,
    /// Seconds until the next jolt.
    #[hidden]
    next_jolt: f32 = 0.0,

    fn loop(dt: f32) {
        // A signal is heard on the step after it was sent, and only on that
        // step, so the loop asks on every one.
        if heard("shake") {
            shaking = shake_time;
            next_jolt = 0.0;
        }
        if shaking > 0.0 {
            shaking -= dt;
            next_jolt -= dt;
            if shaking <= 0.0 {
                // Over: back to rest, where the picture is the camera's own.
                anneal_point("CameraComponent", "offset", vec2(0.0, 0.0), jolt_time, .OutQuad);
            } else if next_jolt <= 0.0 {
                // A jolt, toward a point as far as shake_reach from rest, in
                // any direction: tau() is a whole turn.
                let turn = random(0.0, tau());
                let far = random(0.0, shake_reach);
                anneal_point("CameraComponent", "offset", vec2(far * turn.cos(), far * turn.sin()), jolt_time, .Linear);
                next_jolt = jolt_time;
            }
        }
    }
}
- Click the Viewport tab and select
camera. Under Groups, typecameraand press Enter. - Press Add component and choose Shake. Leave its three rows as they come: Shake Time
0.25, Shake Reach3and Jolt Time0.05. - Press Ctrl+S.
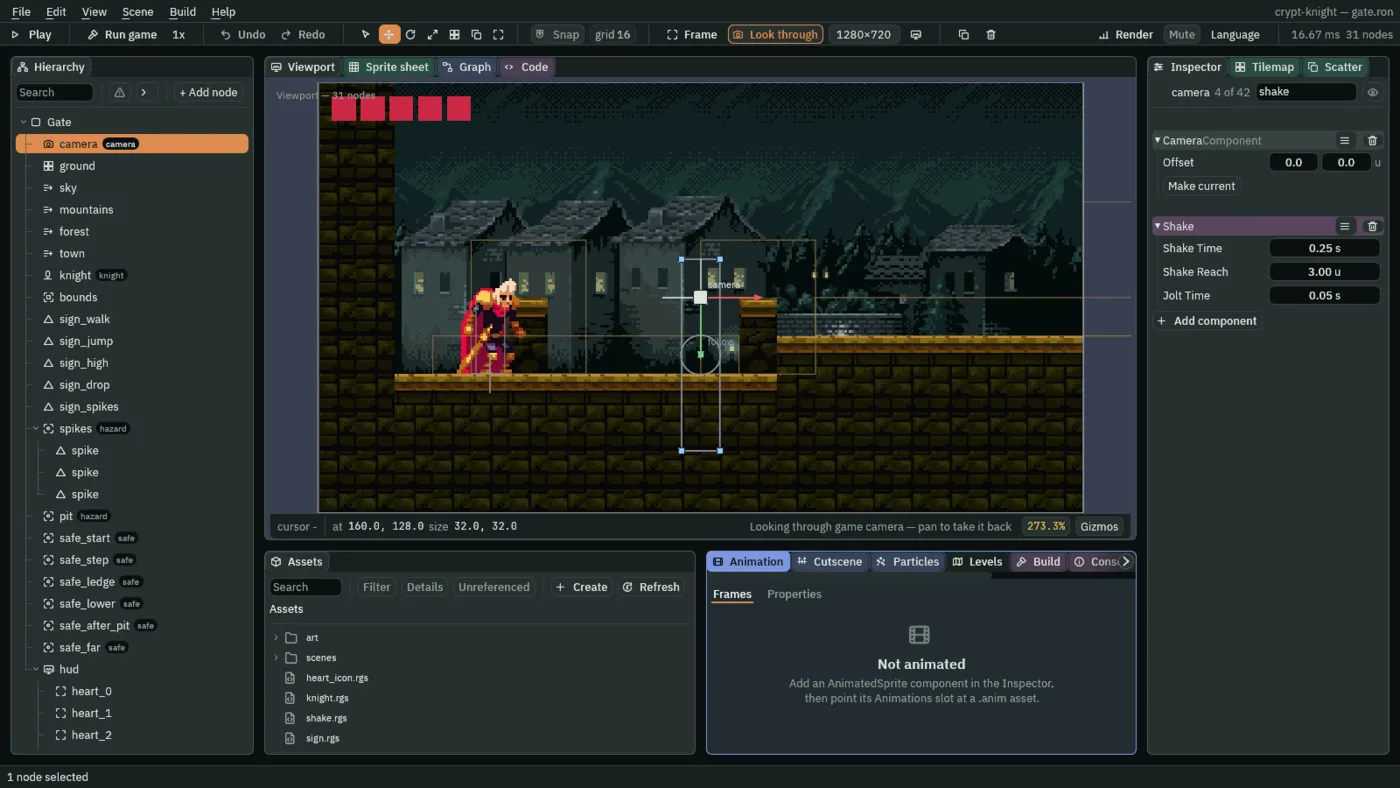
- heard
- Whether a signal of that name reached this node on this step. A signal is heard on the step after it is sent, and only on it, so
loopasks every step. The knight sends"shake"to the groupcamera, and the node in it hears it. - anneal_point
- Eases a point field of one of this node’s components toward a value over a time: here the Camera’s
offset, which is how far the picture sits from where the rig put the camera. Each jolt is an anneal to a random point no further thanshake_reachfrom rest, in a random direction,.Linearover 0.05 s. When the shake ends, one more takes it home,.OutQuad, which slows to a stop. dt- The step’s length in seconds, which
loopmay ask for as a parameter:fn loop(dt: f32). Counting time off with it, rather than in steps, keepsshake_timein seconds.
The shake moves the camera’s offset, not the camera. The Camera Rig of chapter 6 writes the camera’s position every step, and would undo a shake that wrote the position; the offset is the one field the rig does not write.
Five hearts on the screen
A HUD is drawn over the picture, in screen space: the same place on the window whatever the camera is doing. It is a canvas, a node that is the screen’s area, with Panel nodes anchored on it. A heart is a small red panel, and the five are one script, HeartIcon, that shows or hides its own according to the kept hearts.
- In Assets, press Create, choose New script, type
heart_icon, and press Enter. - In the Code tab’s Scripts list, click
heart_icon.rgs, replace everything in it with the script below, and press Ctrl+S.
/// One of the hearts at the top left: shown while the knight still has that
/// heart, hidden once it is lost.
component HeartIcon {
    /// Which heart this is, counting from 0 at the left. The knight loses the
    /// rightmost first.
    index: f32 = 0.0,

    fn loop() {
        // Kept by the knight; five until it has kept any.
        if index >= kept_number("hearts", 5.0) {
            hide();
        } else {
            show();
        }
    }
}
- Click the Viewport tab. Select
Gate, press + Add node, choose Node, and rename ithud. Give it a CanvasComponent: Reference Size320and180, Scale Mode ScaleWithHeight, Use Safe Area ticked, Space Screen, Layer0. - Select
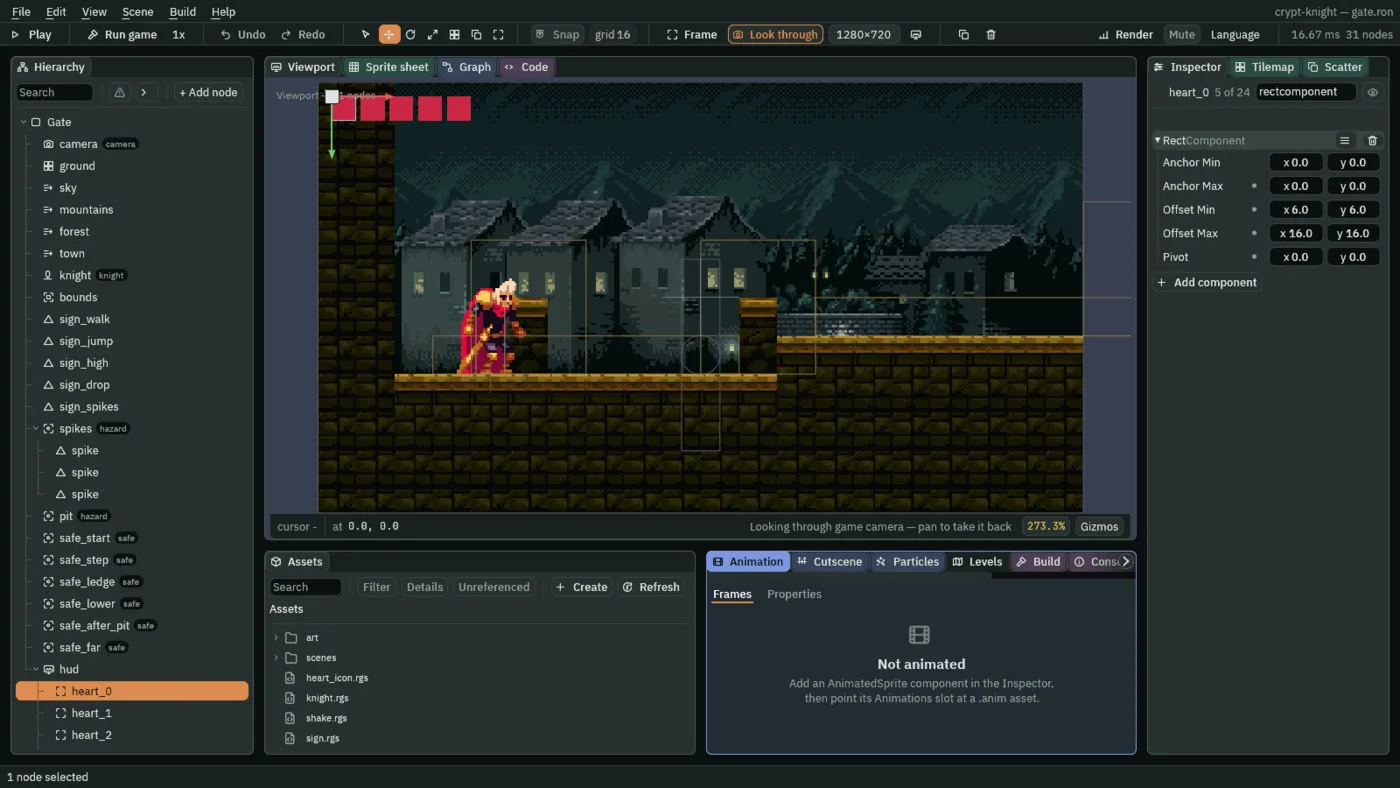
hud, press + Add node, and choose Panel. Rename itheart_0. - Its Rect: Anchor Min and Anchor Max
0and0, the top left; Offset Min6and6; Offset Max16and16; Pivot0and0. That is a square of 10 units, 6 in from the corner. - Its Panel: click Color, and set it to
0.6,0.02,0.06, alpha1: a deep red. - Press Add component and choose HeartIcon. Leave its Index at
0. - Right-click
heart_0and choose Duplicate, four times. Rename the copiesheart_1toheart_4, and set each one’s Offset Min and Offset Max and Index from the table below. The five sit 12 units apart. - Press Ctrl+S.
| Node | Offset Min | Offset Max | Index |
|---|---|---|---|
heart_0 | 6, 6 | 16, 16 | 0 |
heart_1 | 18, 6 | 28, 16 | 1 |
heart_2 | 30, 6 | 40, 16 | 2 |
heart_3 | 42, 6 | 52, 16 | 3 |
heart_4 | 54, 6 | 64, 16 | 4 |
Check it works
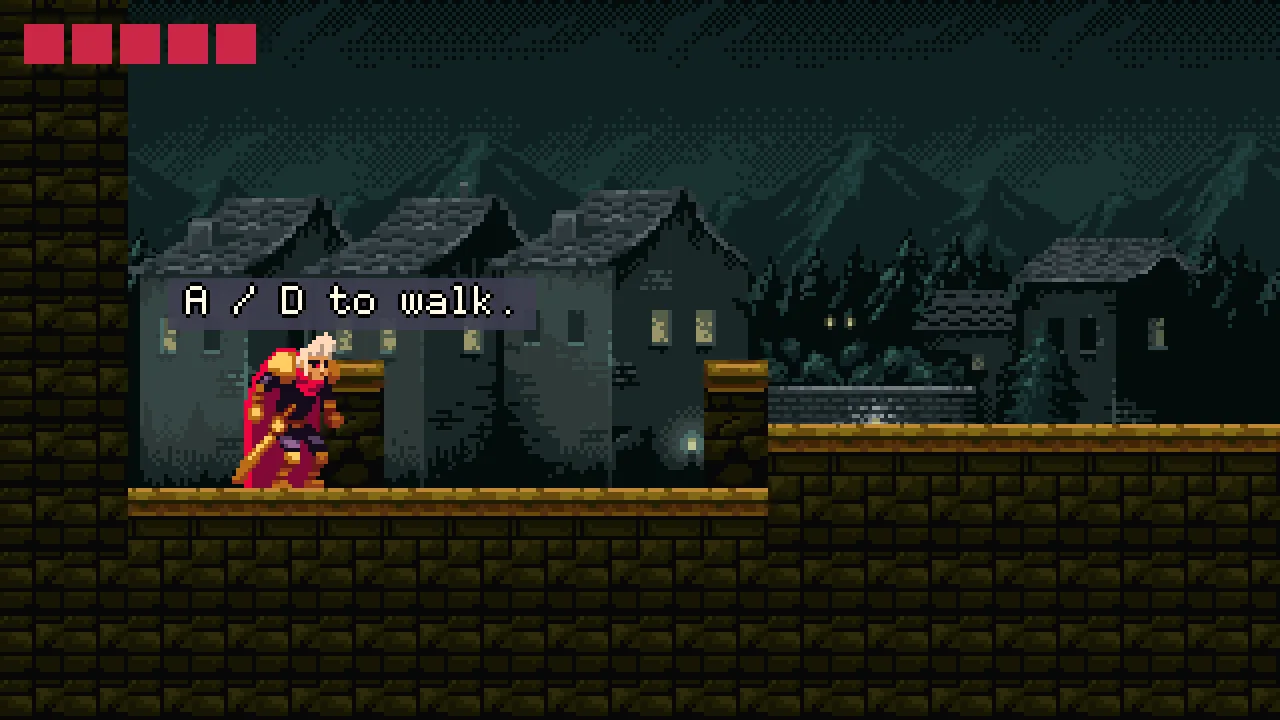
The spikes are a long way from the start. To reach a hazard without the walk, set the knight’s Position to 930 and 160, a little before the spike pit, press Ctrl+S, and start Play as below with D held. Set it back to 72 and 160 afterwards, and save again.