Tutorials · Ship Evader · Chapter 15
Pause and settings
By the end
- Esc pausing everything that runs with the game, and a pause menu that runs only while it is paused
- What a pause holds, and what plays on through it
- A settings screen, with a slider for the music and one for the sound effects
- Volumes saved as the sliders move, and applied by the title each time it opens
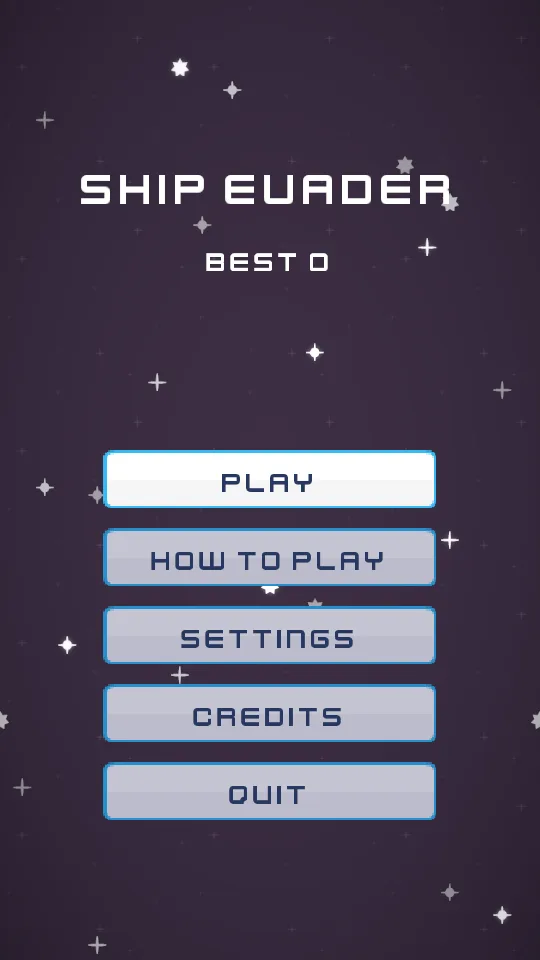
- How to play’s third line, and the title’s fifth button
On this page
Esc pauses
The pause action has had Esc since chapter 4. A script of its own hears it, beside Game on the root, since Game’s loop spends the whole game waiting for the last life and hears nothing else. Make a script called pause_key:
- In Assets, press Create, choose New script, type
pause_key, and press Enter. The editor writespause_key.rgsinto the project folder. - Click the Code tab, then
pause_key.rgsin its Scripts list, replace everything in it with the script below, and press Ctrl+S.
/// Esc, which the input map calls pause, pauses the game: everything that runs
/// with the game stops where it is, and the pause menu, which runs only while
/// the game is paused, takes over. It sits beside Game on the root, because
/// Game's loop spends the whole game waiting for the last life.
component PauseKey {
    fn loop() {
        if pressed("pause") {
            pause();
        }
    }
}
- Double-click
scenes/game.ronin Assets to open the game, and click the Viewport tab. - Select
Game, the root, press Add component, and choose PauseKey: it sits beside Game. - Press Ctrl+S.
pause pauses the scene as the step ends. Whether a node runs while the scene is paused is its Process Mode, behind the Inspector’s Advanced fold: Inherit, as its parent does, the default; Pausable; WhenPaused, only while paused; or Always. Every node in the game so far keeps the default, so all of it is pausable, and all of it stops.
A menu that runs only while paused
The pause menu runs only while the game is paused. It shows itself on the first step of each pause, and hides itself on the step it resumes the game: once the game runs again its hooks stop, and a menu left showing would sit over the game. Make a script called pause_menu:
- In Assets, press Create, choose New script, type
pause_menu, and press Enter. The editor writespause_menu.rgsinto the project folder. - Click the Code tab, then
pause_menu.rgsin its Scripts list, replace everything in it with the script below, and press Ctrl+S.
/// The pause menu, over the game. It runs only while the game is paused, so
/// it shows itself on the first step of each pause, and it hides itself on the
/// step it resumes the game: once the game runs again its hooks stop, and a
/// menu left showing would sit over the game.
component PauseMenu {
    /// Whether it is showing, so it shows itself once a pause, not on every
    /// step.
    #[hidden]
    open: bool = false,

    fn loop() {
        if !open {
            show();
            open = true;
        }
        if pressed("ui_up") || pressed("ui_down") {
            play_sound("move");
        }
        if pressed("resume") {
            play_sound("press");
            hide();
            open = false;
            resume();
        }
        if pressed("title") {
            // A change of scene ends the pause too.
            play_sound("press");
            change_scene("title");
        }
    }
}
- Click the Viewport tab:
game.ronis still open. - Select
hud, press + Add node, choose Node, and rename itpause_menu: it lands afterbanner. - Untick its Visible.
- Open its Advanced fold and set Process Mode to WhenPaused.
- Give it a RectComponent, which fills the canvas; an AudioSourceComponent on Sfx with Positional unticked and the title menu’s two triggers,
moveat0.4andpressat0.6; and PauseMenu. - Under
pause_menu, a Labelpausedfrom the top centre, Offset Min-350and380, Offset Max350and460,PAUSEDat1.3, centred. - When you click the first colour of the buttons below, look at the top left of the picker that opens: if it reads U8, press it, so it reads F and the picker shows each value from 0 to 1, as this tutorial gives every colour, until you close the editor.
- Under
pause_menu, a buttonresume, made as the title’s, at-222,760to222,838,RESUME, Actionresume. - Add a FocusComponent to it, then a ShortcutComponent with Action
pauseand Key empty: Esc resumes too, and RESUME draws ESC inside its right edge. - Under
pause_menu, a second button,title, also made as the title’s, at-222,864to222,942,QUIT TO TITLE, Actiontitle, with a FocusComponent. - Set
resume’s Up totitleandtitle’s Down toresume: the list a Focus link opens offers only nodes that have a FocusComponent of their own, so both get theirs first. - Choose File → Save.
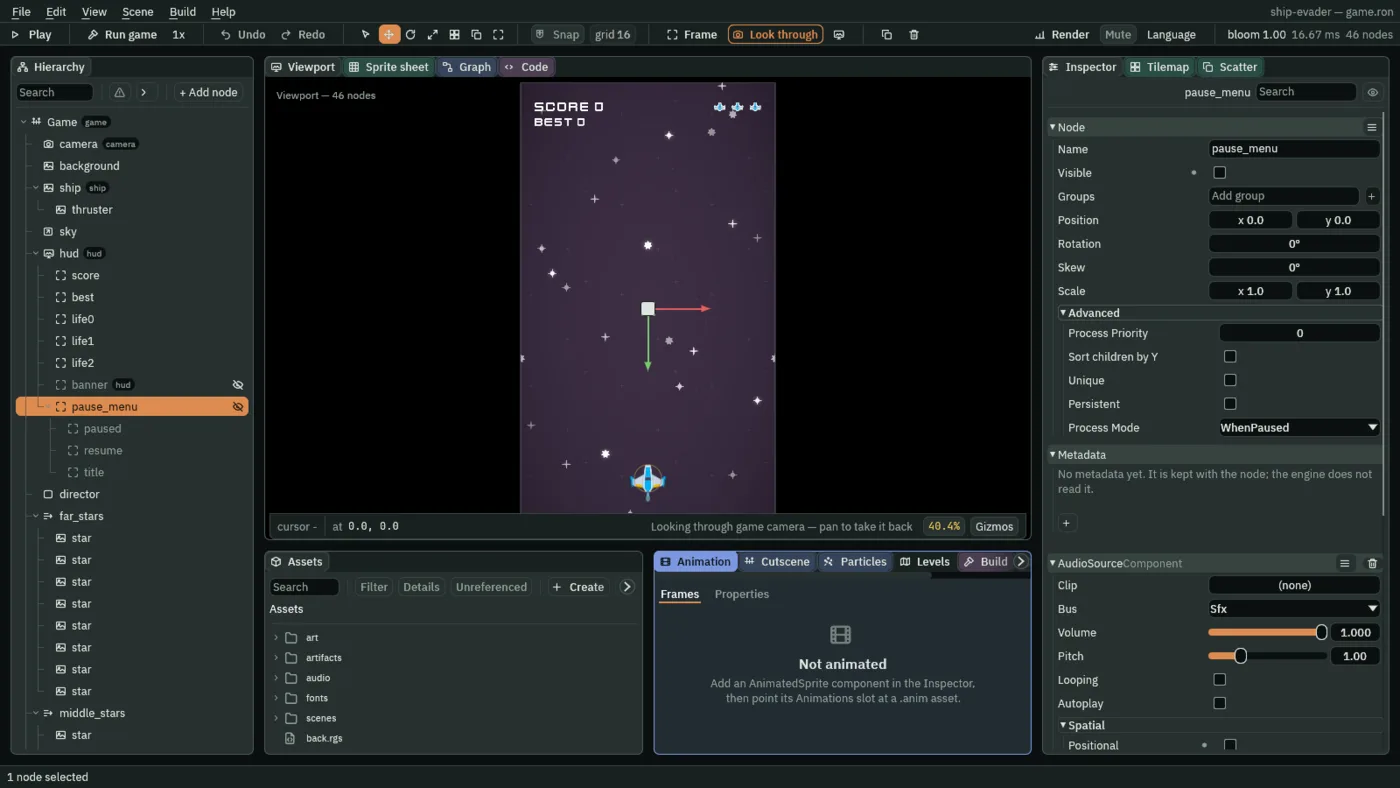
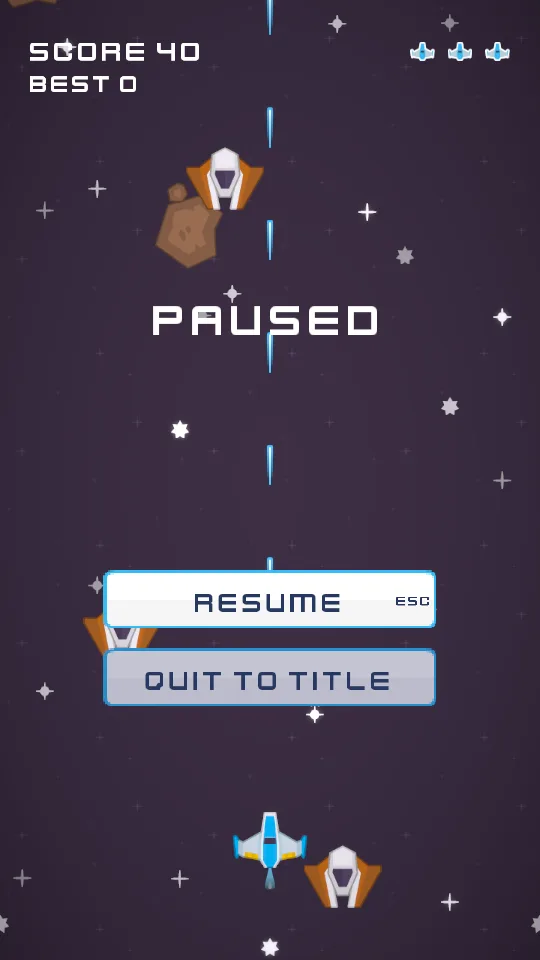
Its buttons sit on game over’s rows, below where the STAGE banner shows, so a pause during a banner covers neither. Nothing dims the field behind the menu, and nothing should: a plain panel would be drawn over the buttons, since the interface draws its pictures grouped by texture rather than in the tree’s order. The menu reads well over the field as it is.
What a pause holds
- Held where they are: everything that moves, every hook, wait and anneal, every particle and animated sprite, the starfield, and the game’s sounds, which carry on from where they stopped when the game resumes.
- Playing on: the music, the pause menu’s own sounds, and any sound started while paused.
- Working: kept and saved values, the keys, and the menus.
- A change of scene ends a pause: QUIT TO TITLE goes to the title unpaused.
- Open
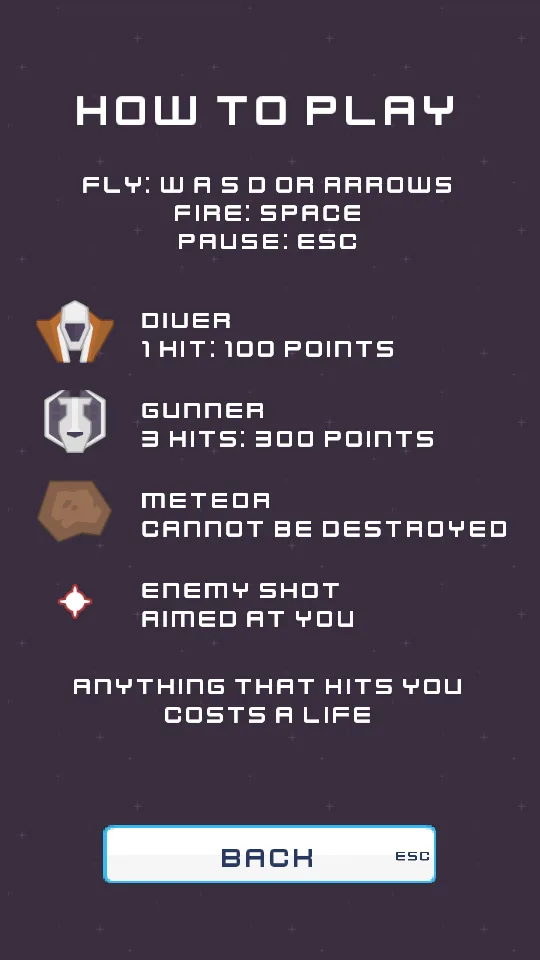
scenes/how_to_play.ron, selectcontrols, and add a third line to its Text,PAUSE: ESC: Esc pauses now. - Choose File → Save: in a Text, Enter starts a new line rather than leaving the field, so Ctrl+S would save nothing.
Settings
A Slider reports an action too: when the player moves it, its action is pressed, and amount answers where it now is. Each slider’s script sets its bus and saves the value, and opens on the saved one. Make a script called music_volume:
- In Assets, press Create, choose New script, type
music_volume, and press Enter. The editor writesmusic_volume.rgsinto the project folder. - Click the Code tab, then
music_volume.rgsin its Scripts list, replace everything in it with the script below, and press Ctrl+S.
/// The music slider, on the settings screen: it opens where the saved music
/// volume is, and each move the player makes sets the music's volume and
/// saves it.
component MusicVolume {
    fn on_create() {
        // Writing a slider moves it and presses nothing, so the screen opens
        // on the saved volume and saves nothing.
        set_number("SliderComponent", "value", saved_number("music_volume", 0.8));
    }

    fn loop() {
        // Only on a step the player moved it, which is when amount() answers
        // the slider's new place.
        if pressed("music") {
            let level = amount("music");
            set_music_volume(level);
            save_number("music_volume", level);
        }
    }
}
Then a script called effects_volume:
- In Assets, press Create, choose New script, type
effects_volume, and press Enter. The editor writeseffects_volume.rgsinto the project folder. - Click the Code tab, then
effects_volume.rgsin its Scripts list, replace everything in it with the script below, and press Ctrl+S.
/// The effects slider, on the settings screen: it opens where the saved
/// effects volume is, and each move the player makes sets the effects' volume,
/// saves it, and plays a laser at it, so the player hears how loud the game
/// will be. While it is dragged, the laser plays no more than once every
/// sample_gap.
component EffectsVolume {
    /// The shortest time between two of the laser's sounds while the slider
    /// moves.
    #[suffix("s")]
    sample_gap: f32 = 0.15,
    /// Seconds until the laser may sound again.
    #[hidden]
    quiet: f32 = 0.0,

    fn on_create() {
        // Writing a slider moves it and presses nothing, so the screen opens
        // on the saved volume without a sound.
        set_number("SliderComponent", "value", saved_number("effects_volume", 0.8));
    }

    fn loop(dt: f32) {
        // Counted here rather than waited out: a hook that waits hears
        // nothing, and the moves made meanwhile would go unset and unsaved.
        if quiet > 0.0 {
            quiet -= dt;
        }
        if pressed("effects") {
            let level = amount("effects");
            set_sfx_volume(level);
            save_number("effects_volume", level);
            if quiet <= 0.0 {
                play_sound("sample");
                quiet = sample_gap;
            }
        }
    }
}
if pressed("music")- Only on a step the player moved the slider is
amountread. A screen’s first step reads no slider, so a script that read it every step would change the volume as the screen opened. - set_number on the Slider
- Writing a slider moves it and presses nothing, so the screen opens on the saved volume without saving or sounding.
- set_music_volume and save_number
- Set the Music bus at once, and save the value under
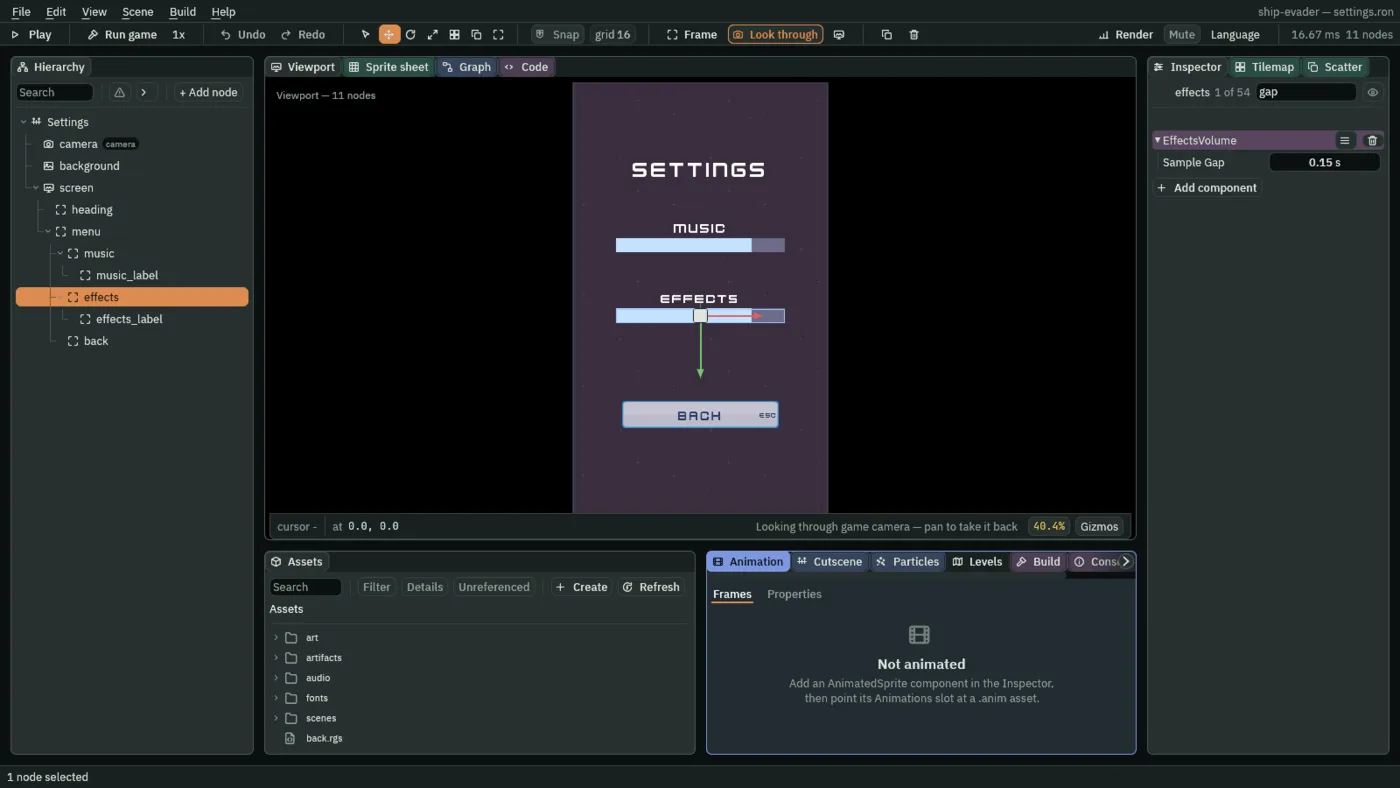
music_volume; the effects slider sets the Sfx bus and saveseffects_volume. A saved value is written to the file a moment after it changes, not on every step a slider is dragged. quiet- The effects slider plays a laser at the new level, no more than once every 0.15 s, counted down in
loop(dt). A wait would not do: a hook that is waiting hears nothing, and the moves made meanwhile would go unset and unsaved.
The screen’s own script plays a tick as the focus moves, and goes back on BACK or Esc. Make a script called settings_menu:
- In Assets, press Create, choose New script, type
settings_menu, and press Enter. The editor writessettings_menu.rgsinto the project folder. - Click the Code tab, then
settings_menu.rgsin its Scripts list, replace everything in it with the script below, and press Ctrl+S.
/// The settings screen's own sounds and its way back: a sound as the focus
/// moves between the two sliders and Back, and Back, or Esc through its
/// Shortcut, goes to the title. Each slider looks after its own volume.
component SettingsMenu {
    fn loop() {
        if pressed("ui_up") || pressed("ui_down") {
            play_sound("move");
        }
        if pressed("back") {
            // A sound asked for on the step that changes scene plays on after
            // it.
            play_sound("back");
            change_scene("title");
        }
    }
}
- Choose File → New scene and click the Viewport tab.
- Add a Node root called
Settingswith the same AudioSourceComponent asTitle’s. - Choose File → Save as… and save the scene as
scenes/settings.ron: the editor saves no scene without a node in it, which is why this comes afterSettings. - Build the rest as How to play: under
Settings, the game’scamera(no Shake) andbackground, and ascreencanvas. - Under
screen, a Labelheading,-350,200to350,280,SETTINGSat1.3, centred. - Under
screen, amenuNode with a RectComponent, an AudioSourceComponent on Sfx with Positional unticked and two triggers,move(audio/select_001.ogg,0.4) andback(audio/back_001.ogg,0.6), and SettingsMenu. - Under
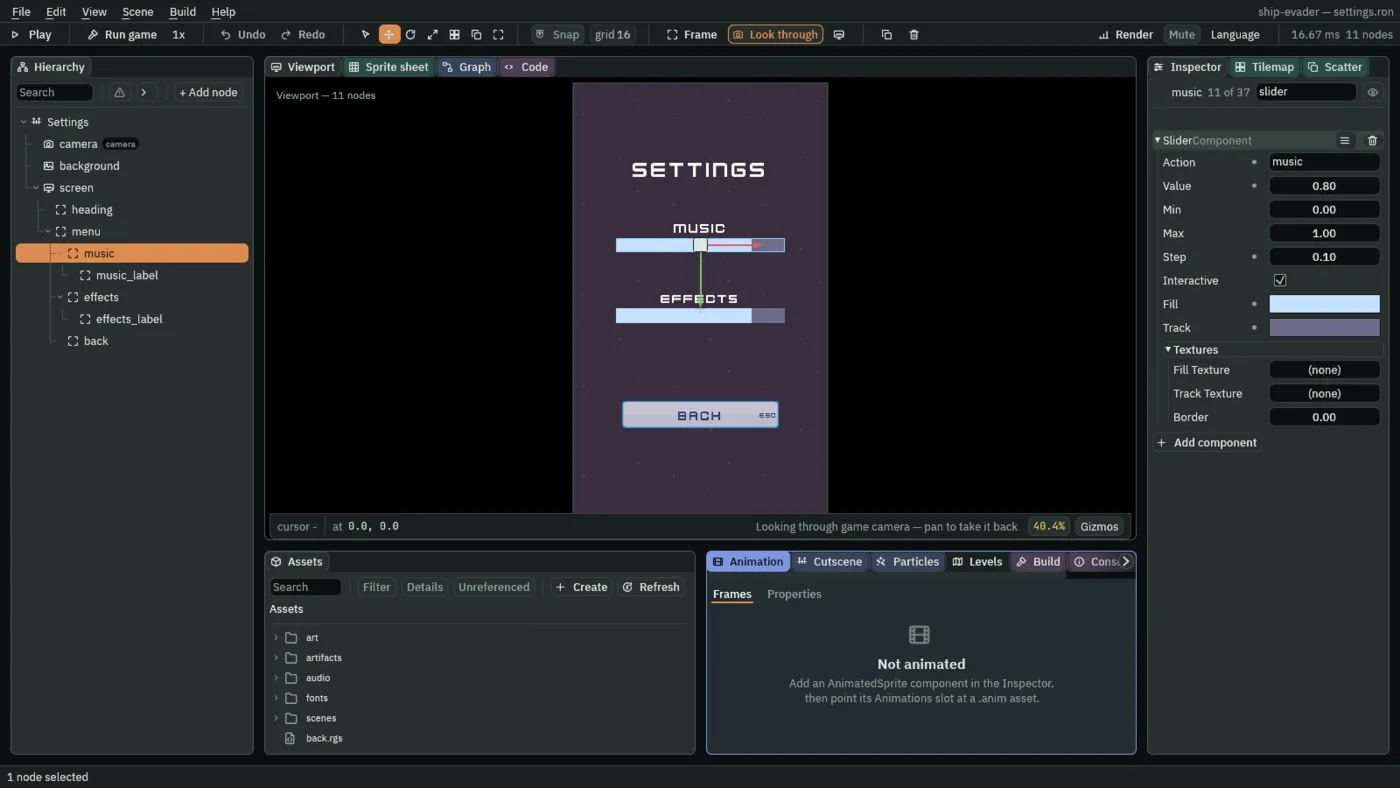
menu, press + Add node, choose Slider, and rename itmusic. - Set its Rect from the top centre: Offset Min
-240and440, Offset Max240and480. - Set its Slider: Action
music, Value0.8, Min0, Max1, Step0.1, Interactive ticked, Fill0.55,0.75,1, alpha1, Track0.15,0.15,0.25, alpha1. - Add a FocusComponent and MusicVolume.
- Under
music, a Labelmusic_labelthat names the slider, above it: Anchor Min0and0, Anchor Max1and0, Offset Min0and-56, Offset Max0and-8;MUSICat0.8, centred. - Under
menu, a second Slidereffects, the same but at-240,640to240,680, with Actioneffects, no Focus, an AudioSourceComponent on Sfx with Positional unticked and one trigger,sample, Clipaudio/laserSmall_000.oggat0.5, and EffectsVolume. - Under
effects, a Labeleffects_labelsayingEFFECTS, as the music’s. - Under
menu, a Menu Buttonback, made as the title’s, at-222,900to222,978,BACK, Actionback; its Shortcut’s Actionui_cancel, which draws ESC inside BACK’s right edge as it did in chapter 13; then a FocusComponent. - Set
music’s Up tobackandback’s Down tomusic, now that both have a FocusComponent. - Choose File → Save.
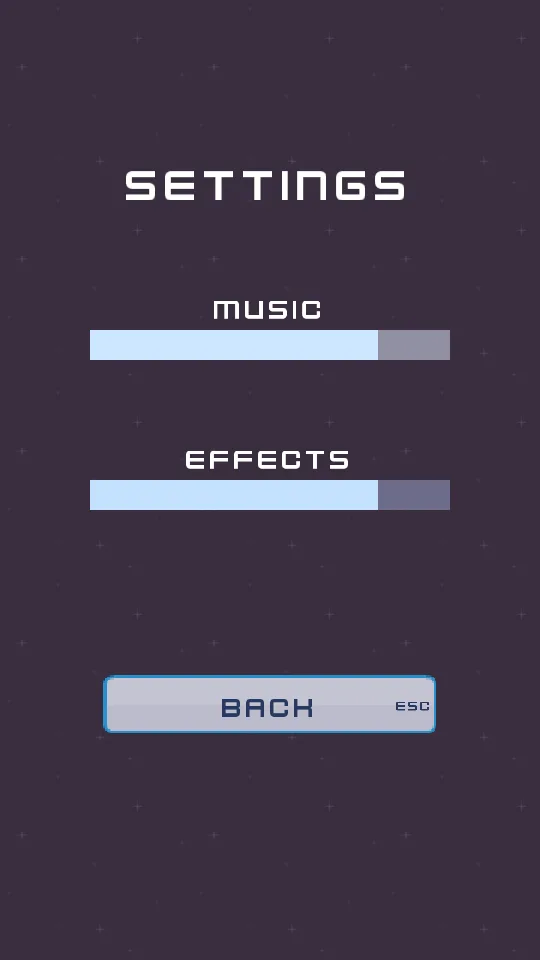
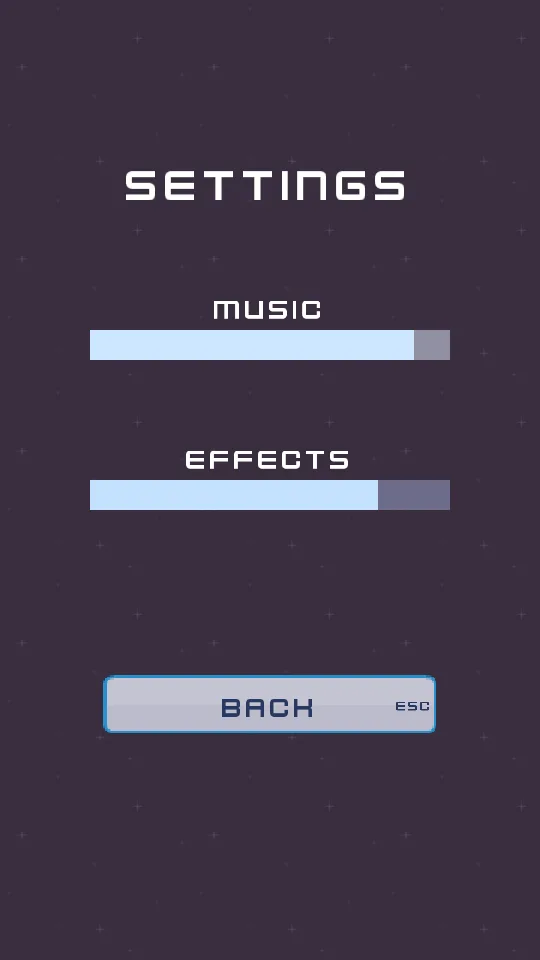
In an exported game a slider that has the focus is lifted toward white, its fill and its track both: Left and Right, or A and D, move the lifted one, a tenth at a time, so the slider the keys move shows where the focus is. The mouse drags either.
The title applies the volumes
The title sets both buses from the saved volumes as it opens, so they hold from the game’s first sound, at every launch. Make a script called title:
- In Assets, press Create, choose New script, type
title, and press Enter. The editor writestitle.rgsinto the project folder. - Click the Code tab, then
title.rgsin its Scripts list, replace everything in it with the script below, and press Ctrl+S.
/// The title, on its root: the volumes the player saved in Settings, applied
/// as the title opens, so they hold from the game's first sound. 0.8 until
/// the player has chosen any.
component Title {
    fn on_create() {
        set_music_volume(saved_number("music_volume", 0.8));
        set_sfx_volume(saved_number("effects_volume", 0.8));
    }
}
Until a player moves a slider, both are 0.8, so from here every sound plays at 0.8 of its own level: the game is a little quieter than it was. A scene opened straight from the editor, without the title before it, plays at full volume.
- Double-click
scenes/title.ronin Assets to open the title, and click the Viewport tab. - Select
Title, the root, press Add component, and choose Title. - Right-click
how_to_playand choose Duplicate: the copy lands after it. - Rename the copy
settings, and set its Offset Min to-222and808, Offset Max to222and886, Text toSETTINGSand Action tosettings. - Move
creditsdown to-222,912to222,990, andquitto-222,1016to222,1094. - Press Enter, then Ctrl+S.
- Click the Code tab, then
title_menu.rgsin its Scripts list, replace everything in it with the script below, now thatscenes/settings.ronexists, and press Ctrl+S.
/// The title's menu: a sound as the focus moves, and where each of its
/// buttons goes. Play is the NewGame beside this, which starts a new game.
component TitleMenu {
    fn loop() {
        // W and S, and the arrows: the input map's ui_up and ui_down, which
        // move the focus. The menu goes round from its last button to its
        // first and back, so each of them moves it.
        if pressed("ui_up") || pressed("ui_down") {
            play_sound("move");
        }
        if pressed("how_to_play") {
            // A sound asked for on the step that changes scene plays on after
            // it.
            play_sound("press");
            change_scene("how_to_play");
        }
        if pressed("settings") {
            play_sound("press");
            change_scene("settings");
        }
        if pressed("credits") {
            play_sound("press");
            change_scene("credits");
        }
        if pressed("quit") {
            // No sound: the game closes at the end of this step.
            quit();
        }
    }
}
- Click the Viewport tab, so the game runs in front of you when you press F5.