Tutorials · Ship Evader · Chapter 2
A tall window
By the end
- A project called
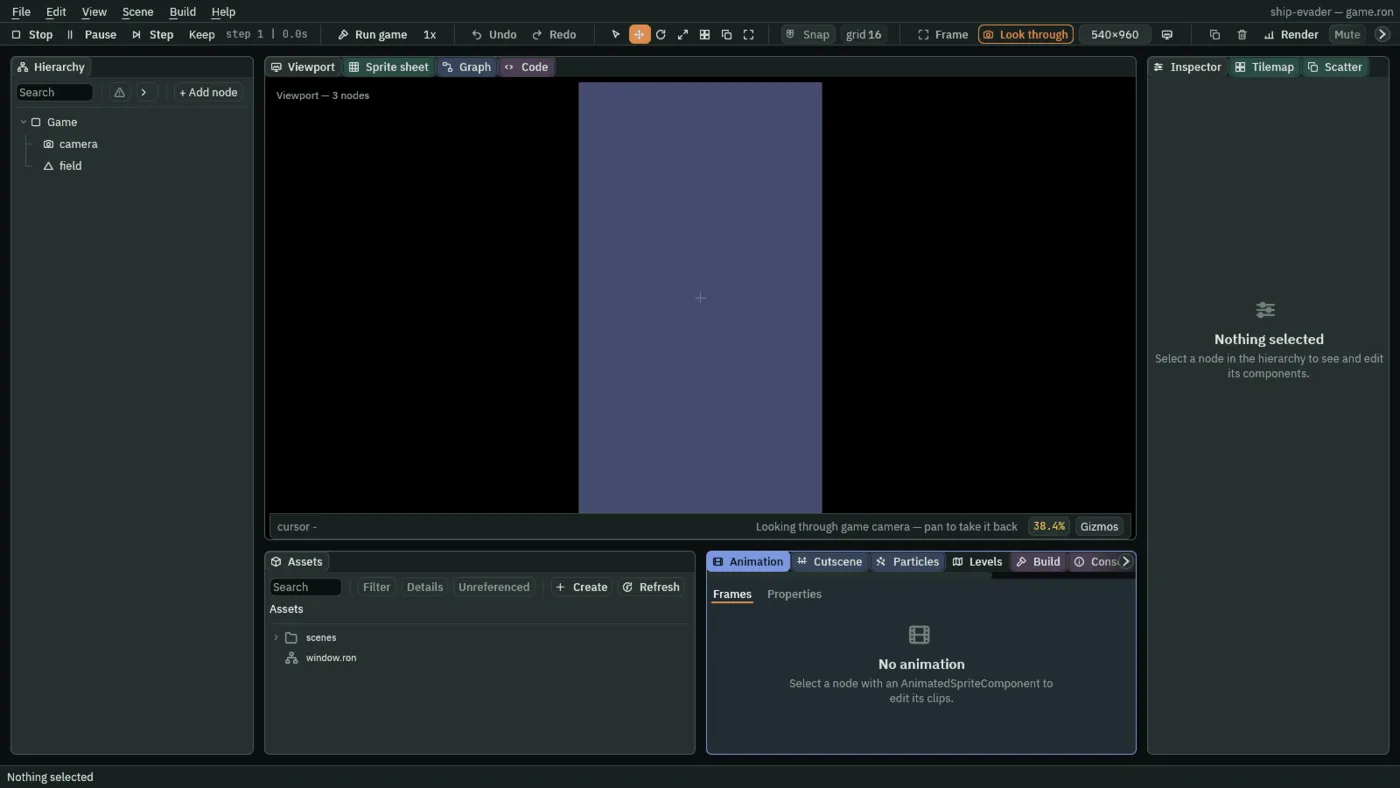
ship-evader, and a window file that opens its game 540 by 960 - A scene with a root node, a camera and a dark blue field
- A Letterbox camera, which shows exactly 720 by 1280 world units and puts bars wherever the window is another shape
- The scene the project opens on, and the game running in Play and in a window of its own
On this page
Make the project
Ship Evader starts as an empty project, and everything in this tutorial happens in it: the scenes you build, the scripts you write and the pictures you copy in.
- Open Rengy and press New project… on its launcher.
- In the folder dialog, make a new folder called
ship-evader, open it, and choose it. The project takes its name from the folder. - The editor opens the project on an empty room. In Assets, right-click
mover.rgs, the starter script, and choose Delete: Ship Evader writes its own.
The name matters later. The game you export in chapter 16 is named after this folder, and so is the folder its saved best score goes into, so call it ship-evader exactly.
A tall window
The game plays upright, like a phone held in portrait: in a window 540 pixels wide and 960 high. The window’s size is a project setting.
- Choose File → Project settings… and open its Window tab.
- Set Title to
Ship Evaderand Size to540and960, leaving Mode on Windowed, and Borderless and Always on top unticked. - Press Save. The tab writes
window.roninto the project as you make each change, and Save writes it again.
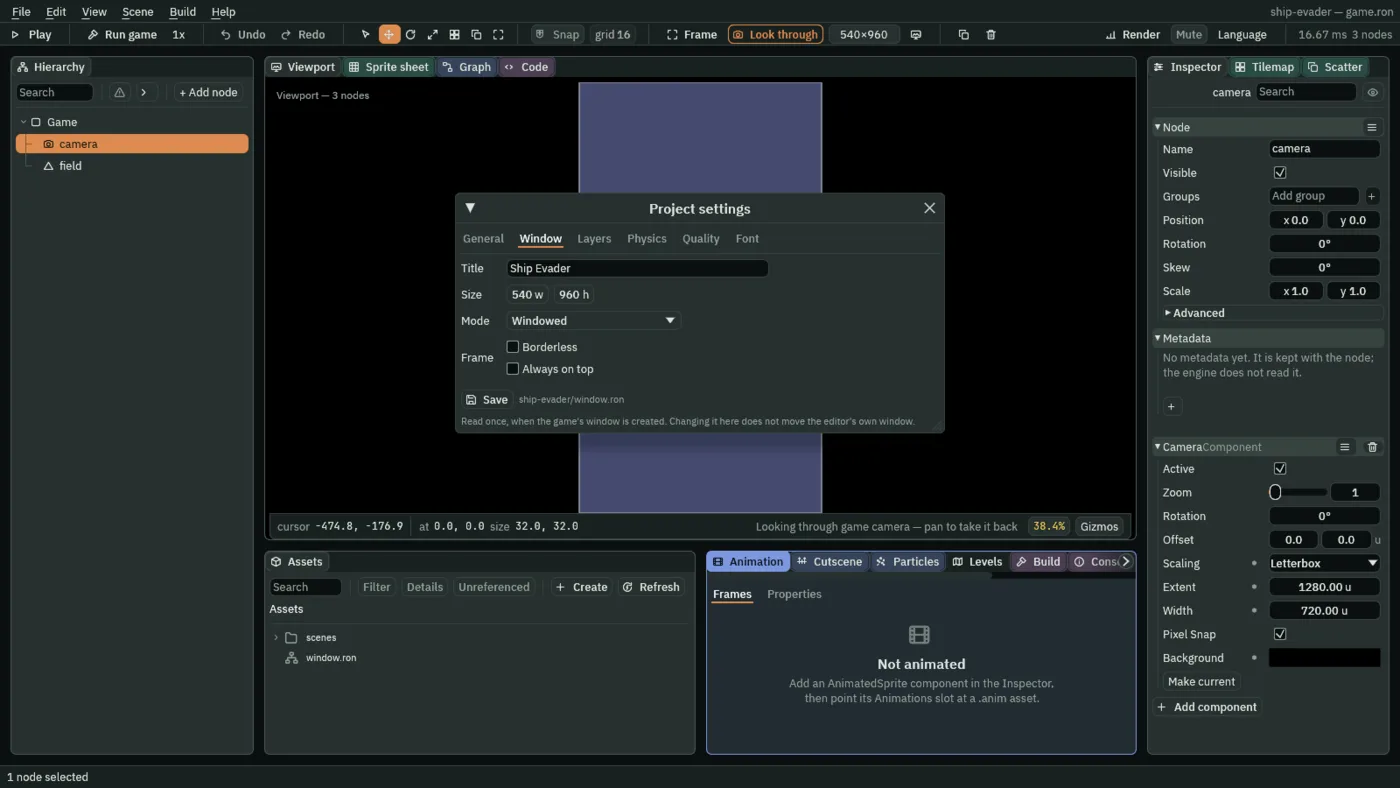
The window is what an exported game and Run game open. The editor’s own Play stays inside the editor, in the Viewport.
- Close the window with the × at the right of its title bar: it floats over the Viewport.
The scene, and its root
A scene is a tree of nodes, and each node carries components: a picture, a camera, a script. This one needs a root to hang the rest from. Scenes and nodes has the whole model.
- In the Hierarchy, press + Add node and choose Node. With nothing selected it lands as a root, as the menu’s Add as root says.
- Rename it
Game: press F2, type the name, and press Enter. - Press Ctrl+S.
- In the save dialog, make a folder called
scenes, open it, and save the scene asgame.ron.
Save often. Run game and an exported game read each scene from its file, as you last saved it.
A camera that keeps 9:16
The game is drawn through a node carrying a Camera, which decides how much of the world the window shows. Ship Evader wants the same field on every screen: 720 world units across and 1280 down.
- Select
Game, press + Add node, choose Camera, and rename itcamera. The menu says Add child of Game, so it lands underGame. - Leave its Position at
0and0, so the field is centred on the world’s origin. - In its Camera, set Scaling to Letterbox, Extent to
1280and Width to720. - Click Background, and press U8 at the top left of the picker that opens, so it reads F: the picker then shows each value from 0 to 1, as this tutorial gives every colour, until you close the editor.
- Make it black:
0,0,0, alpha1.
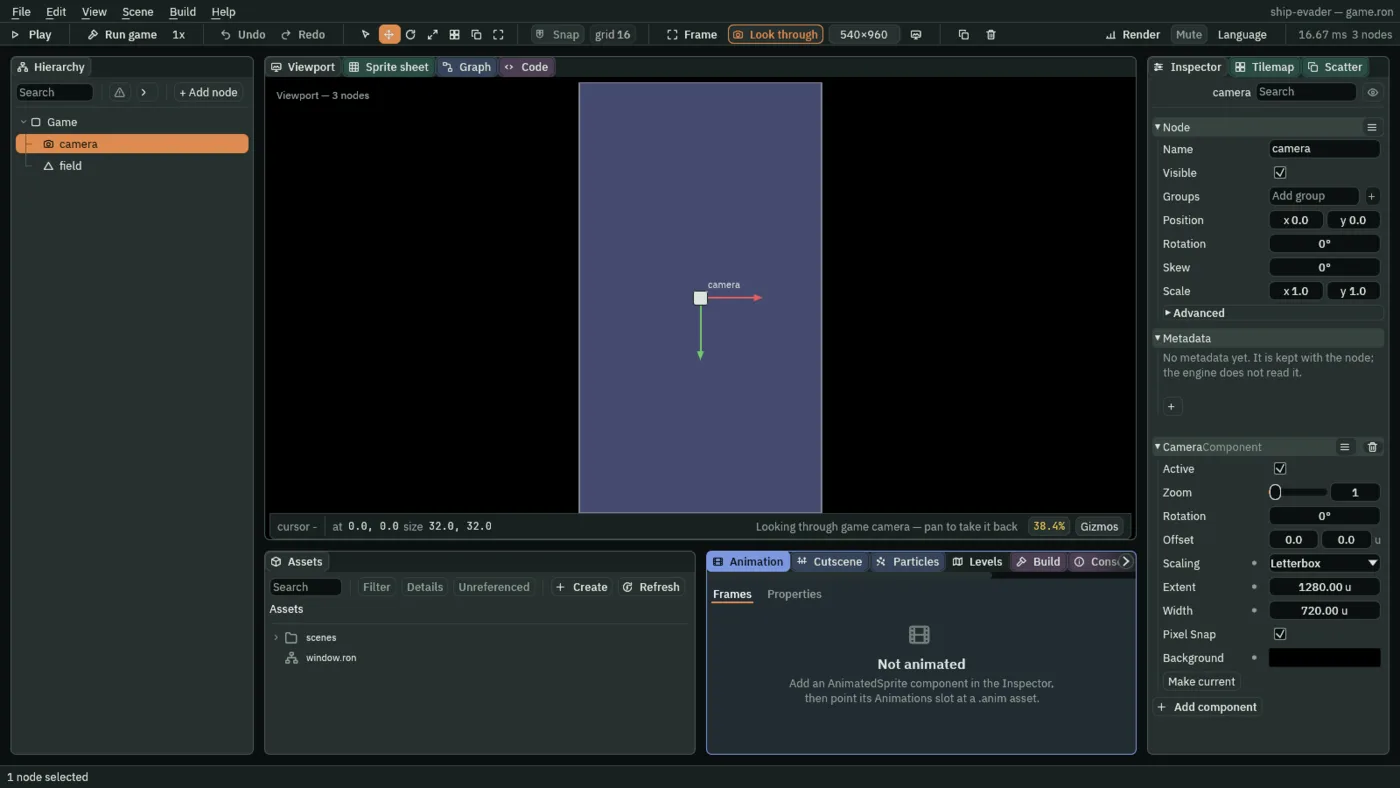
- Letterbox
- Shows exactly Width by Extent world units, as large as the window allows, and fills the rest of the window with Background. A window of any other shape gets bars, at its sides or above and below, and the field keeps its shape.
- Extent and Width
- The field’s height and width, in world units. A world unit is a pixel of the pack’s pictures, which arrive in the next chapter, so the ship, 99 of them wide, is about a seventh of the field.
The world’s y grows downward. The top of the field is at y -640 and the bottom at 640; its left and right edges are at x -360 and 360. The scripts in later chapters read these edges from the camera rather than writing them in.
The field
Until the art arrives, a dark rectangle the size of the field shows where the game will be played.
- Select
Game, press + Add node, choose Shape, and rename itfield. - In its Shape, keep Kind on Rectangle and set Size to
720and1280. - Set Color to a dark blue,
0.06,0.07,0.16, alpha1, and Outline to0. - Set Sort Layer to
-10and press Enter, so everything you add later draws over it. - Press Ctrl+S.
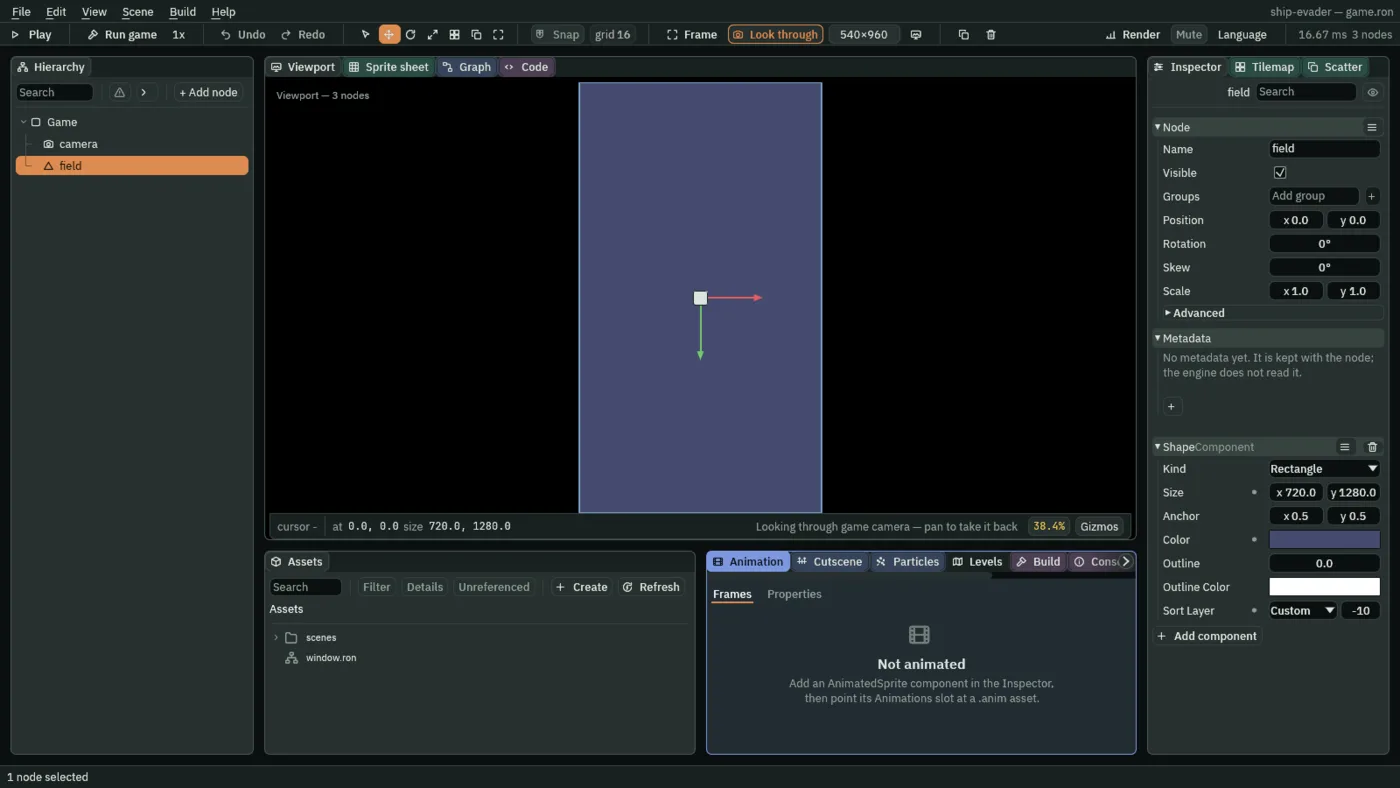
A Sort Layer orders drawing: a lower layer draws first, underneath. The field, and the background that takes its place in the next chapter, sit at -10 and never cover the ship.
The scene the game opens on
A project opens one scene first: the one Run game and an exported game start on.
- Choose File → Project settings… again, and open its General tab.
- Set Startup scene to
scenes/game.ron. The tab writes it intoproject.rengyas you choose it.
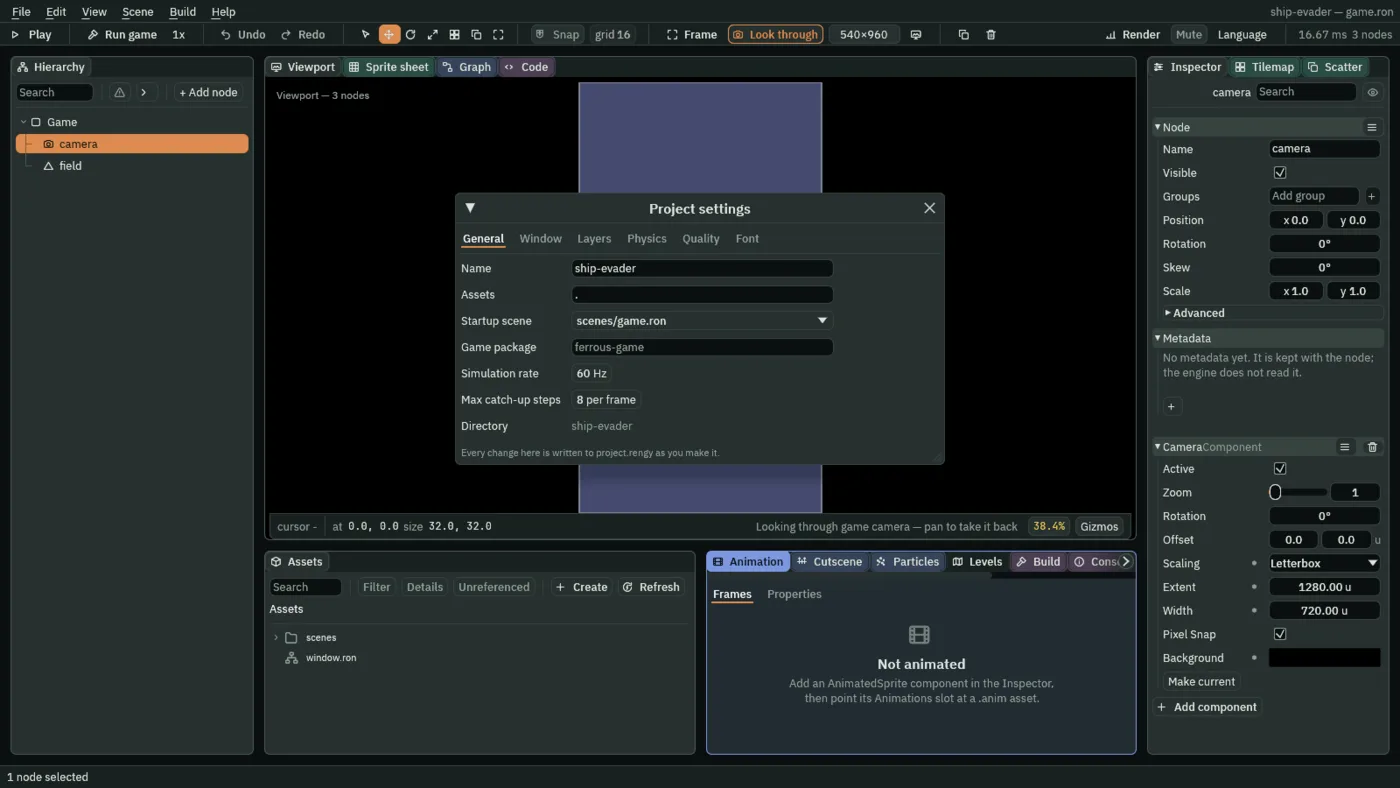
Right-clicking a scene in Assets and choosing Set as startup scene does the same.
- Close the window again.
Check it works