Tutorials · Ship Evader · Chapter 13
Screens
By the end
- The eight actions a menu answers to,
ui_uptoui_cancel, and the six of them this game puts in the input map - A title scene, which the game now opens on, with the game’s starfield and glow copied in
- Buttons that press an action a script hears with
pressed: by the keys, the mouse, or Esc - Keyboard focus going round a menu, with a tick at each move
- How to play and Credits, and Back to the title
- A new game started with its lives, score and stage set, and the title’s music by Autoplay
On this page
The menu’s actions
A menu moves its light, the focus, between its buttons, and presses the lit one. It answers eight actions, if a project has them: ui_up and ui_down move the focus, ui_left and ui_right move a slider, ui_next and ui_previous step the focus on and back as Tab and Shift+Tab do, ui_accept presses, and ui_cancel goes back. This game binds neither ui_next nor ui_previous. The arrow keys, Tab, Enter and Space work in every menu anyway; the six it does bind add W, A, S, D and Esc.
- Choose View → Input map…, and add
ui_up,ui_down,ui_left,ui_right,ui_acceptandui_cancel. - Select
ui_accept, press Record a control, and press Enter. - Select each action, and give it its keys with Choose key…, typing to find each:
ui_upW and Up;ui_downS and Down;ui_leftA and Left;ui_rightD and Right;ui_acceptSpace too; andui_cancelEsc. - Press Save.
Every one of those keys but Enter already runs another action: W, A, S, D and the arrows run move, Space fire, and Esc pause. Record a control on such a key stops with “W already runs move.” and two choices: Take it anyway, which unbinds the key from move, composite and all, so the ship could no longer fly on it; and Keep it where it is, which binds nothing. Choose key… binds a key another action uses, which is what the menu needs.
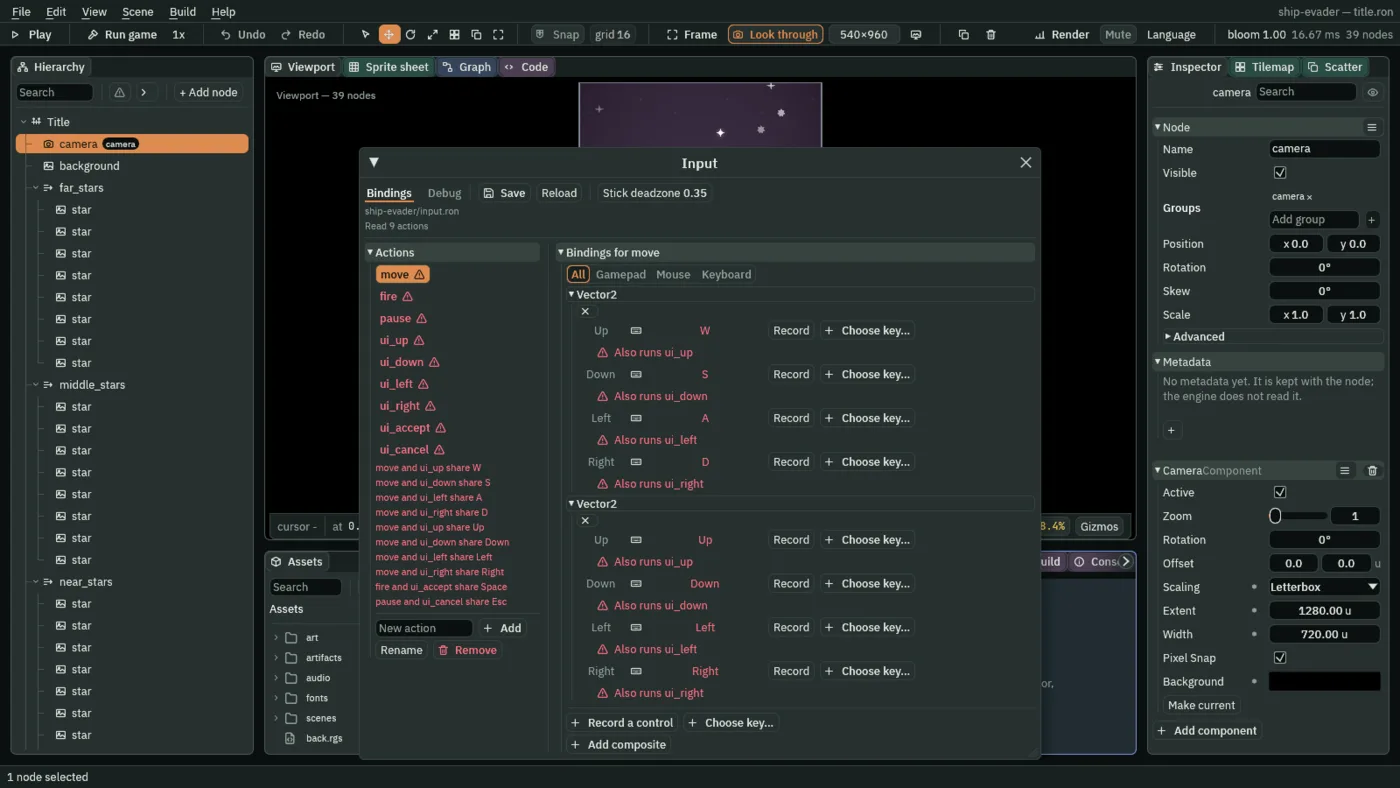
The window then shows the actions sharing keys in red, with lines such as “move and ui_up share W”. Here that is meant, and harmless: no ship flies on a menu, the pause menu of chapter 15 runs only while the game is paused, and on the title Space presses the lit button, as Enter does.
- Close the window with the × at the right of its title bar: it floats over the Viewport.
Two scripts the screens share
A Button reports an action when it is pressed, and a script hears it with pressed, exactly as if a key bound to that action had gone down. The title’s PLAY starts a new game, and How to play and Credits each have one button, BACK.
- In Assets, press Create, choose New script, type
new_game, and press Enter. - Make
backthe same way. - In the Code tab’s Scripts list, click
new_game.rgs, replace everything in it with the script below, and press Ctrl+S.
/// A new game, from the button whose action this names: its press's sound,
/// the game's kept values as a new game starts with them, and the game's
/// scene. On the title the button is Play.
///
/// Kept values outlast a change of scene, so a new game's are set here, before
/// the scene changes, and not by the game as it starts: it begins with them
/// already in place.
component NewGame {
    /// The action of the button that starts a new game.
    action: String = "play",

    fn loop() {
        if pressed(action) {
            // A sound asked for on the step that changes scene plays on after
            // it.
            play_sound("press");
            keep_number("lives", 3.0);
            keep_number("score", 0.0);
            keep_number("stage", 1.0);
            change_scene("game");
        }
    }
}
Kept values outlast a change of scene, so a new game’s lives, score and stage are kept here, as the scene changes, and the game begins with them in place. A sound asked for on the step that changes scene plays on after it, so the press is heard.
- Click
back.rgsin the same list, replace everything in it with the script below, and press Ctrl+S.
/// The way back to the title, on a screen whose one button is Back. Back is
/// pressed by a click, by Enter or Space while it has the focus, or by Esc
/// through its Shortcut; it plays the back sound and goes to the title.
component Back {
    fn loop() {
        if pressed("back") {
            // A sound asked for on the step that changes scene plays on after
            // it.
            play_sound("back");
            change_scene("title");
        }
    }
}
The title
- Click the Viewport tab, and choose File → New scene. An empty scene takes the place of the one that was open, without asking to save it.
- Press + Add node, choose Node, and rename it
Title. - Add an AudioSourceComponent to
Title: Clipaudio/menu_3.ogg, Bus Music, Volume0.5, Looping and Autoplay ticked, and Positional unticked. - Press Ctrl+S, and save the scene in the
scenesfolder astitle.ron. The editor saves no scene without a node in it, which is why this comes afterTitle.
A looping sound on the Music bus set to Autoplay is the scene’s music, on the game’s one music channel. How to play and Credits play the same track the same way, and a scene asking for the track already playing leaves it playing, so the title music plays on, unbroken, through all three.
- Open
scenes/game.ron. - In the Hierarchy, select
camera, then Ctrl-clickbackground,far_stars,middle_stars,near_starsandbloom, and press Ctrl+C. - Open
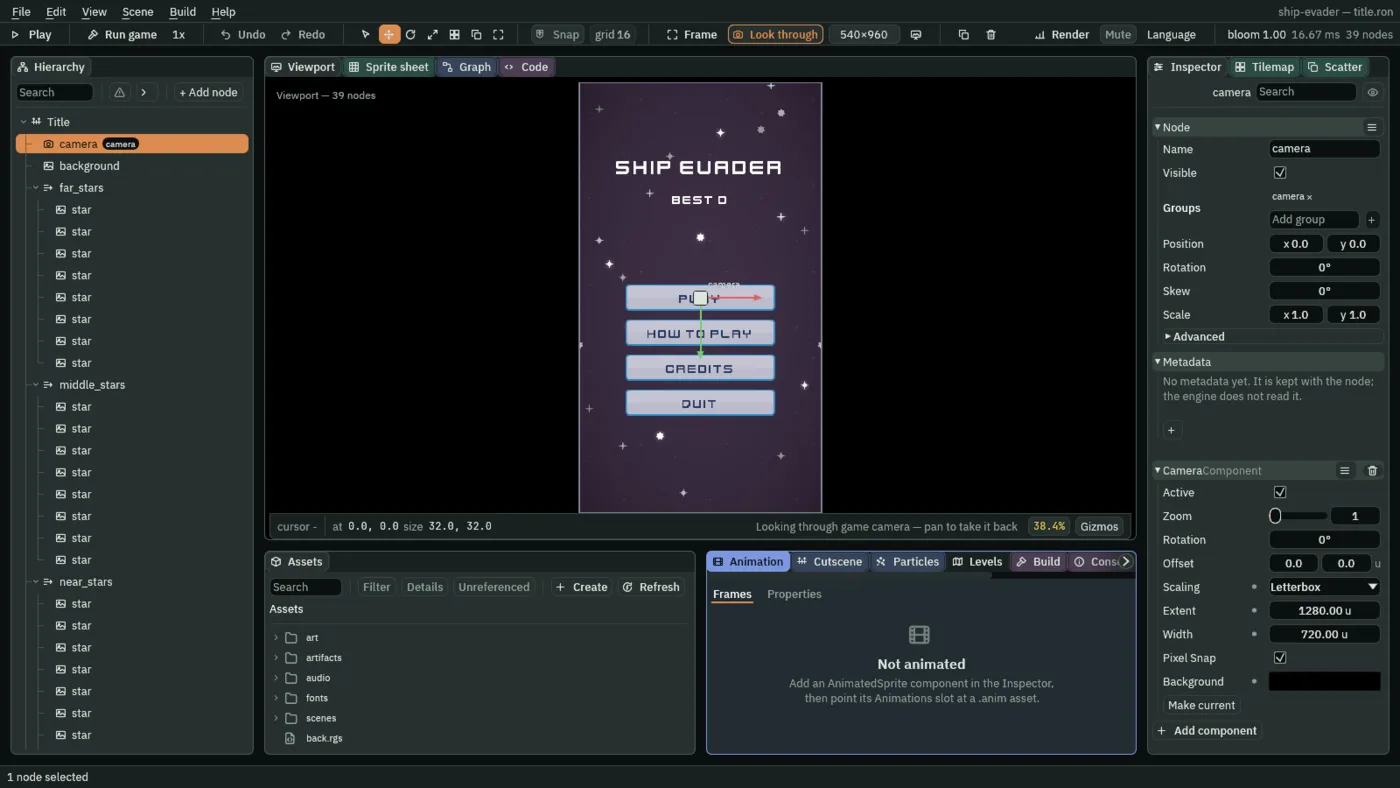
scenes/title.ron, right-clickTitle, and choose Paste as child. The six come over with their children, the stars and all: thirty nodes. - Select the title’s
cameraand remove its Shake: nothing shakes a menu. Itscameragroup stays; nothing on the title listens for it.
- Select
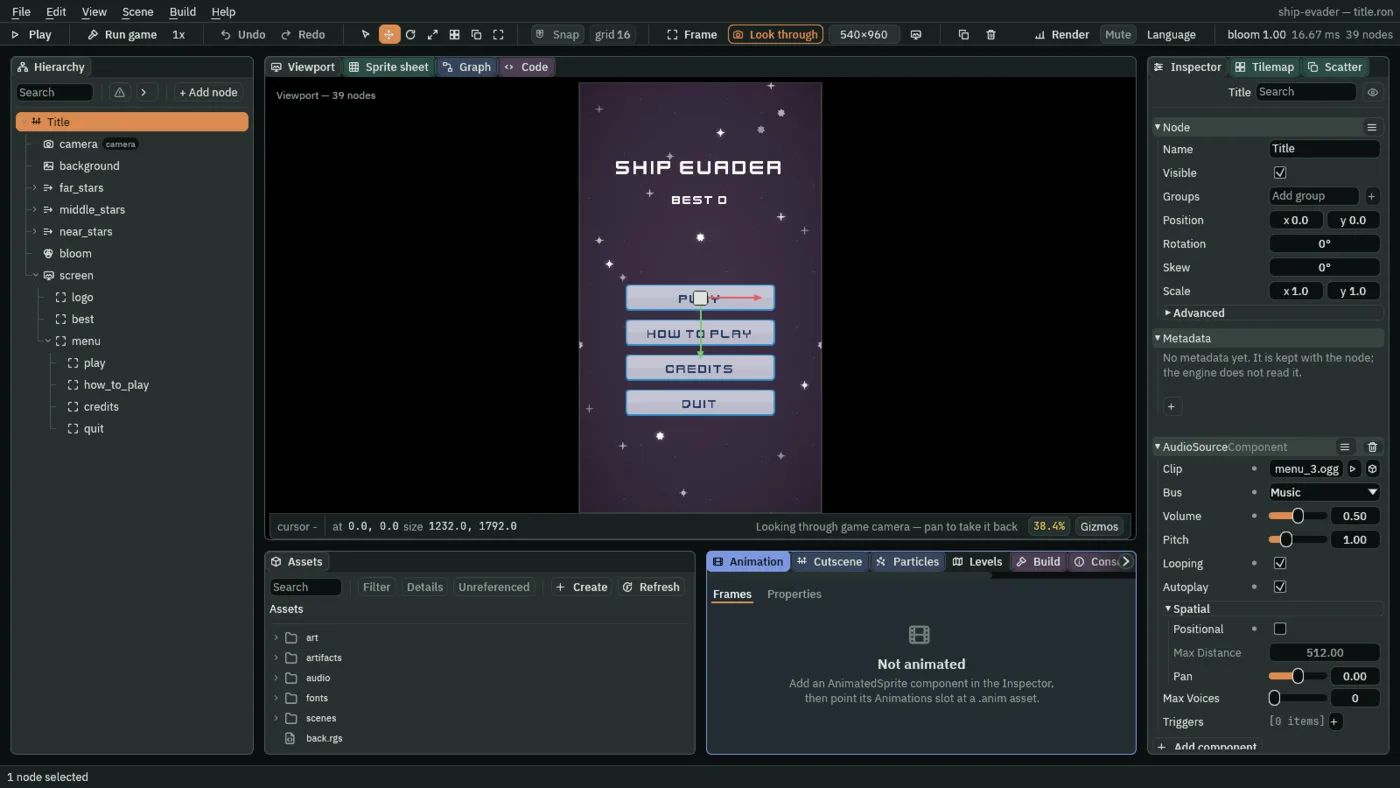
Title, add a Node calledscreen, and give it a CanvasComponent as the HUD’s: Reference Size720and1280, Scale Mode ScaleWithHeight, Use Safe Area ticked, Space Screen, Layer0. - Under
screen, add a Label calledlogo. - Its Rect: Anchor Min and Anchor Max
0.5and0, the top centre; Offset Min-350and200; Offset Max350and290; Pivot0.5and0.5. - Its Text:
SHIP EVADER, Scale1.3, Align Center. - Add a Label called
bestunderscreen, anchored the same way: Offset Min-300and320, Offset Max300and370; TextBEST 0, Scale0.8, Align Center. - Add Best, the HUD’s script: it shows the saved best here too.
- Add a Node called
menuunderscreen, and give it a RectComponent: as it comes, it fills the canvas. - Give
menuan AudioSourceComponent on Sfx, Volume1, Positional unticked, with two triggers:move, Clipaudio/select_001.ogg, Volume Min and Max0.4; andpress, Clipaudio/confirmation_001.ogg,0.6. - Add NewGame to
menu, keeping its Actionplay.
Buttons
- Select
menu, press + Add node, and choose Button: a Rect, a Panel, a Text and a Button on one node. - Rename it
play. - Its Rect: Anchor Min and Anchor Max
0.5and0; Offset Min-222and600; Offset Max222and678; Pivot0.5and0.5. That is 444 by 78, twice the picture’s size, so it stretches evenly. - In its Panel, click Color.
- If the button at the top left of the picker that opens reads U8, press it, so it reads F: the picker then shows each value from 0 to 1, as this tutorial gives every colour, until you close the editor.
- Make the Panel white:
1,1,1, alpha1. - Drag
art/buttonBlue.pngfrom Assets onto its Texture, and set Border to0. - Its Text:
PLAY, Scale0.8, Align Center, and Color a dark blue,0.02,0.04,0.12, alpha1. - Its Button: Action
play; Normal0.55,0.55,0.65, alpha1; Hovered white; Pressed0.4,0.4,0.5, alpha1. - Right-click
playand choose Duplicate. - Rename the copy
quit: Offset Min-222and912, Offset Max222and990, TextQUIT, Actionquit. - Duplicate
playagain: the copy lands betweenplayandquit. - Rename it
how_to_play: Offset Min-222and704, Offset Max222and782, TextHOW TO PLAY, Actionhow_to_play. - Duplicate
how_to_playascredits: Offset Min-222and808, Offset Max222and886, TextCREDITS, Actioncredits.
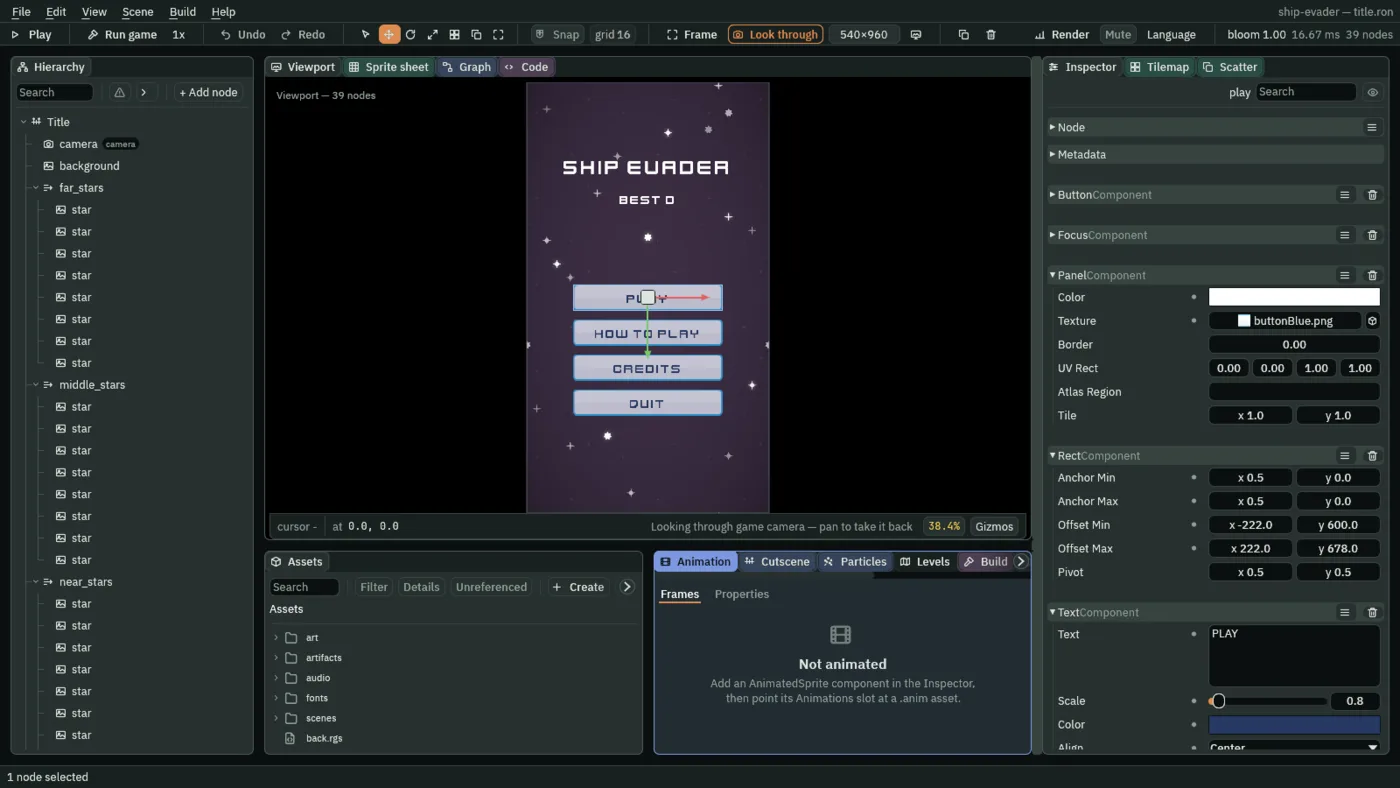
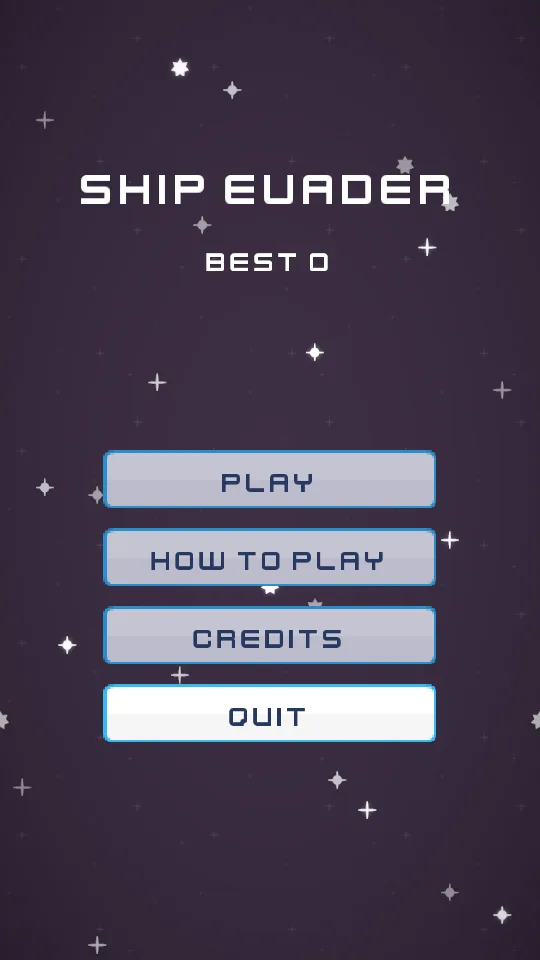
A Button’s tint replaces its Panel’s colour: greyed at rest, white when lit, darker while pressed. The picture’s face is white, so the words are dark: white words would vanish on a lit button. A canvas with a Focus Ring draws a ring round the focused button; this game’s canvases have none, so in an exported game the lit tint is all the focus there is, and it must differ from the resting one. The editor’s Play also draws a ring of its own round the focused button, which an exported game does not, and stands it down where a canvas rings itself.
Focus that goes round
When a screen opens, its first button takes the focus. Up and Down move it to the nearest button above or below. At the ends, Focus links send it round: from PLAY up to QUIT, and from QUIT down to PLAY.
- Give
playandquiteach a FocusComponent, then setplay’s Up toquitandquit’s Down toplay. The list a Focus link opens offers only nodes that have a FocusComponent of their own, so both get theirs first. The two middle buttons need none. - Press Ctrl+S. The next screen starts with File → New scene, which takes this one’s place without asking to save it.
So Up and Down always move the light, and the menu’s script plays a tick on each. Tab moves it too, in order, but without a sound: no action names Tab, so no script hears it. A mouse resting on one button while the keys light another lights both.
How to play and Credits
Each is a scene of its own, built as the title is: a root holding the title’s music, the game’s camera and background, a canvas, and a menu holding one button, BACK. Make both scenes before the title’s script names them: a change_scene naming no scene is listed in Problems.
- Choose File → New scene, add a Node root called
HowToPlaywith the same AudioSourceComponent asTitle’s, and save the scene asscenes/how_to_play.ron. - Copy
cameraandbackgroundfromscenes/game.ronand paste them as children ofHowToPlay. - Remove the camera’s Shake.
- Add a
screenNode underHowToPlaywith a CanvasComponent as the title’s. - Under
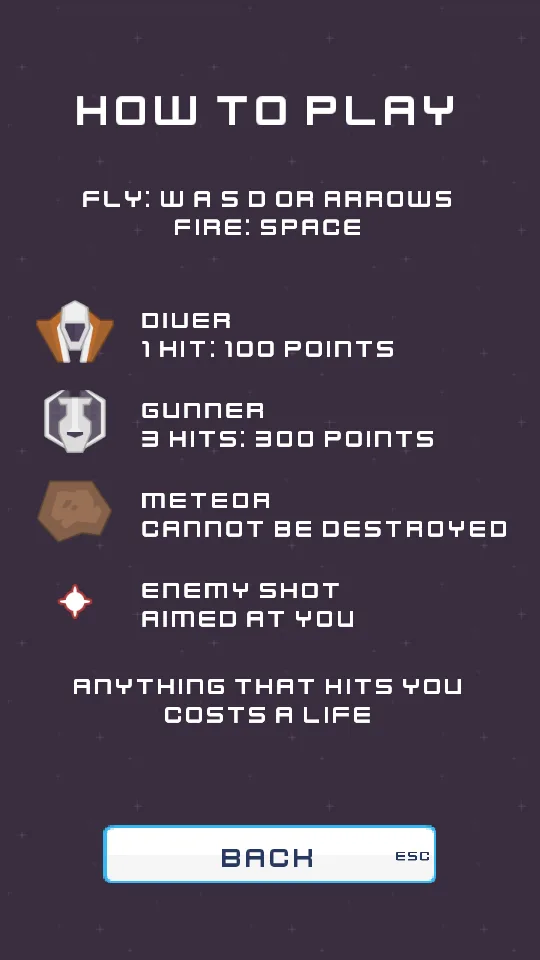
screen, add Labels, each anchored at the top centre (Anchor Min and Max0.5and0) with Pivot0.5and0.5:heading, Offset Min-350and100, Offset Max350and180,HOW TO PLAYat Scale1.3, centred;controls,-350,220to350,340, two lines,FLY: W A S D OR ARROWSandFIRE: SPACE, at0.7, centred; andwarning,-350,890to350,970,ANYTHING THAT HITS YOUandCOSTS A LIFE, at0.7, centred. In a Text’s box, Enter starts a new line. - Under
screen, add the four things in the sky, each a Panel anchored at the top left (Anchor Min and Max0and0), white, with its picture as Texture and Border0:diver,48,400to152,484,art/enemyRed2.png;gunner,59,520to141,604,art/enemyBlack4.png;meteor,49,640to150,724,art/meteorBrown_big1.png; andenemy_shot,76,779to124,825,art/laserRed08.png. - Beside each, add a Label under
screen, anchored at the top left, at0.7, aligned Left:diver_rule,190,400to690,484,DIVERand1 HIT: 100 POINTS;gunner_rule,190,520to690,604,GUNNERand3 HITS: 300 POINTS;meteor_rule,190,640to690,724,METEORandCANNOT BE DESTROYED; andenemy_shot_rule,190,760to690,844,ENEMY SHOTandAIMED AT YOU. - Add a
menuNode underscreen, with a RectComponent, an AudioSourceComponent on Sfx with Positional unticked and one trigger,back, Clipaudio/back_001.oggat0.6, and Back. - Under
menu, press + Add node and choose Menu Button: a Button with a Shortcut. - Call it
back, and make it as the title’s buttons, at Offset Min-222and1100, Offset Max222and1178, with TextBACKand Actionback. - In its Shortcut, set Action to
ui_cancel, leaving Key empty and Show Label as it comes: the editor, in its Viewport and in Play, and an exported game draw the key’s name, ESC, inside BACK’s right edge; untick Show Label to hide it. - Press Enter, then Ctrl+S: the editor saves nothing while the cursor is still in a field.
A Shortcut presses its own button’s action when its action is pressed: Esc runs ui_cancel, so Esc presses BACK. How to play lists only the keys this chapter has: Esc pauses the game from chapter 15, which adds a line for it.
- Make
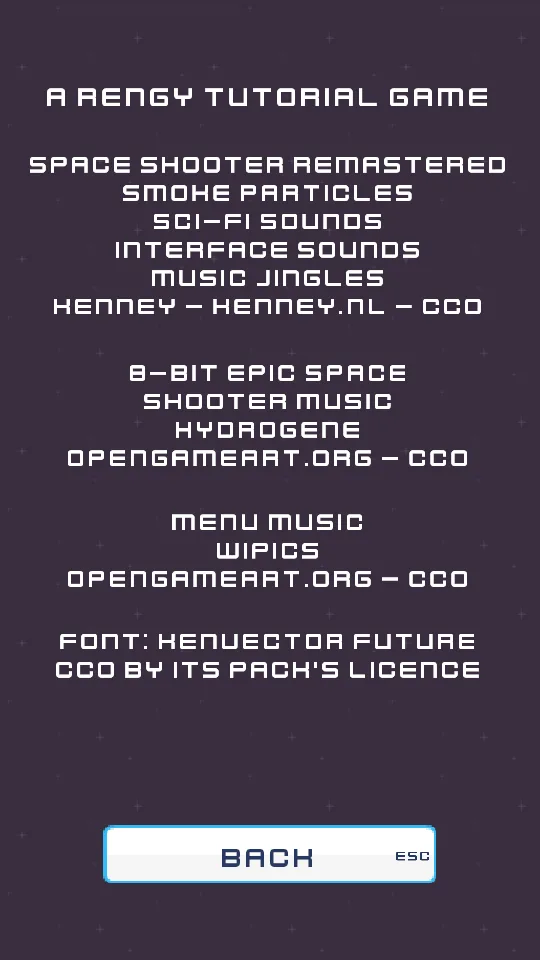
scenes/credits.ronthe same way, with a root calledCredits, its music,camera,background,screen, and amenuandbackas How to play’s. - Under
screen, add its labels, each from the top centre at Offset Min x-350and Offset Max x350, centred:heading,100to150,A Rengy tutorial gameat0.8; then at0.7,kenney,190to430, six lines,Space Shooter Remastered,Smoke Particles,Sci-fi Sounds,Interface Sounds,Music JinglesandKenney - kenney.nl - CC0;gameplay_music,470to630,8-bit Epic Space,Shooter Music,HydroGeneandopengameart.org - CC0;title_music,670to790,Menu Music,wipicsandopengameart.org - CC0; andfont,830to910,Font: Kenvector FutureandCC0 by its pack's licence. - Choose File → Save: in a Text, Enter starts a new line rather than leaving the field, so Ctrl+S would save nothing.
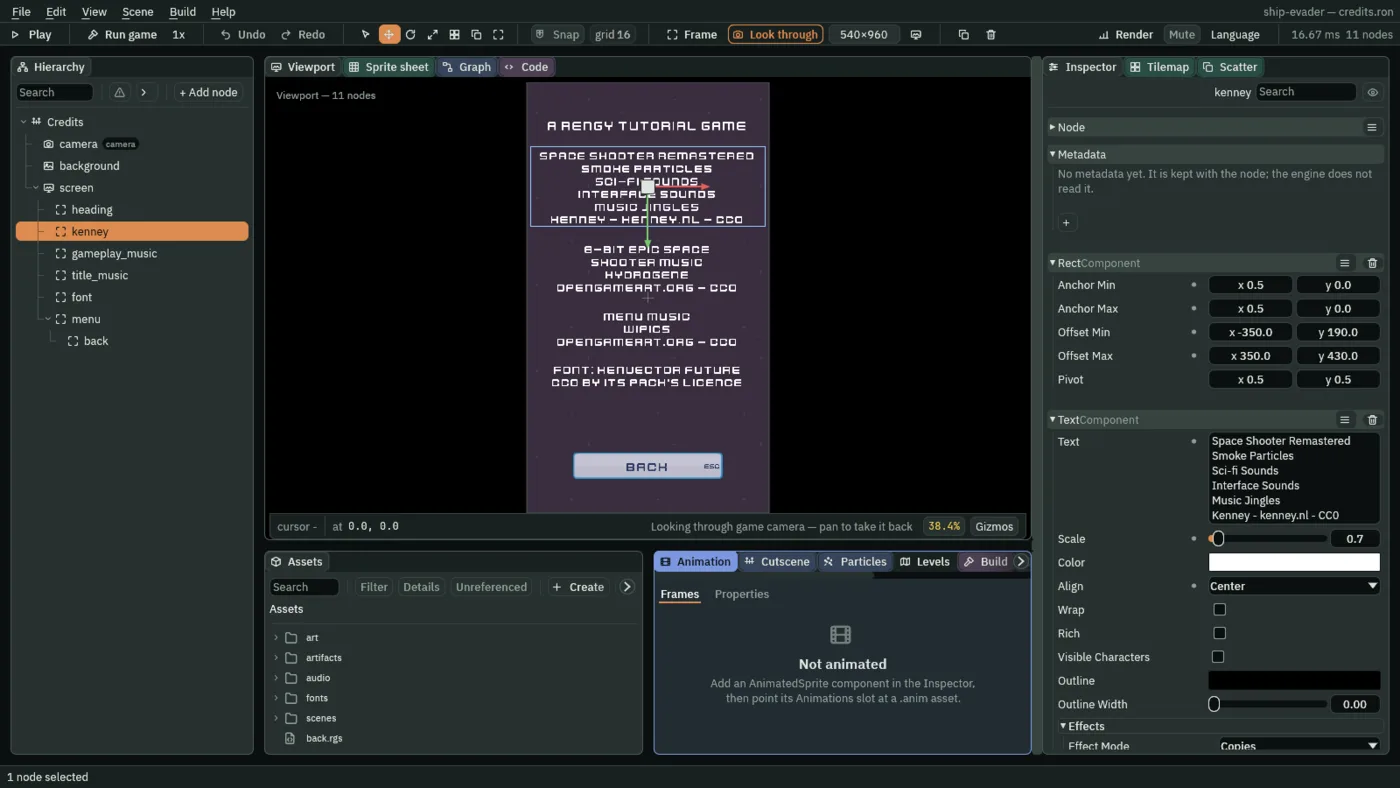
A centred Text centres each of its lines, so every line of the credits sits in the middle.
The title’s menu
Now the title’s own script: a tick as the focus moves, and where its buttons go.
- In Assets, press Create, choose New script, type
title_menu, and press Enter. - In the Code tab’s Scripts list, click
title_menu.rgs, replace everything in it with the script below, and press Ctrl+S.
/// The title's menu: a sound as the focus moves, and where each of its
/// buttons goes. Play is the NewGame beside this, which starts a new game.
component TitleMenu {
    fn loop() {
        // W and S, and the arrows: the input map's ui_up and ui_down, which
        // move the focus. The menu goes round from its last button to its
        // first and back, so each of them moves it.
        if pressed("ui_up") || pressed("ui_down") {
            play_sound("move");
        }
        if pressed("how_to_play") {
            // A sound asked for on the step that changes scene plays on after
            // it.
            play_sound("press");
            change_scene("how_to_play");
        }
        if pressed("credits") {
            play_sound("press");
            change_scene("credits");
        }
        if pressed("quit") {
            // No sound: the game closes at the end of this step.
            quit();
        }
    }
}
- Open
scenes/title.ron, click the Viewport tab, selectmenu, press Add component, and choose TitleMenu, to sit beside its NewGame. - Press Ctrl+S.
quit closes an exported game at the end of the step, and stops Play in the editor. It plays no sound, since the window is about to close.
The game opens on its title
- Choose File → Project settings…, open its General tab, and set Startup scene to
scenes/title.ron.
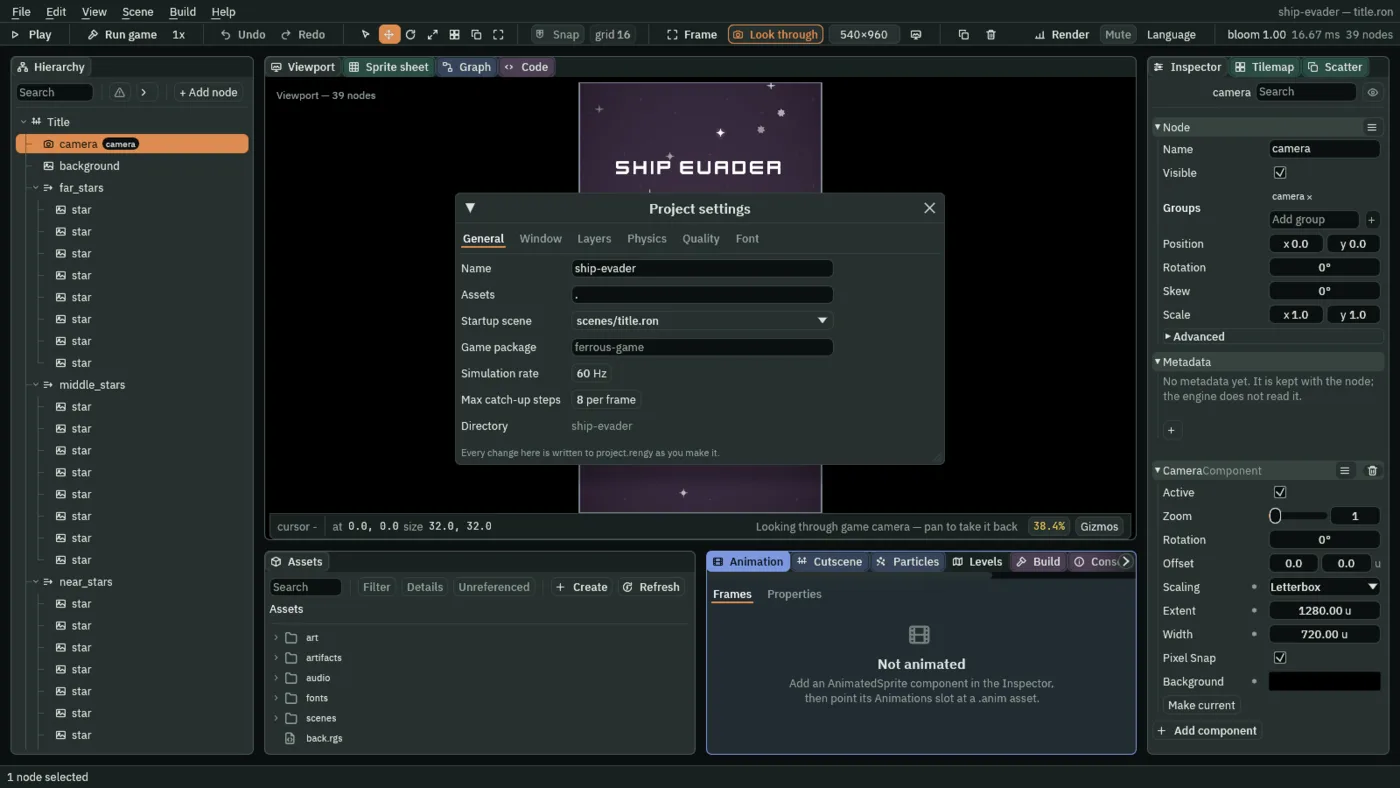
- Close the window again.
The editor’s Play plays the scene that is open, so from now on open scenes/title.ron before you press F5. Build → Run / Stop game starts the game in its own window on the startup scene, as an exported game does. A game played straight from game.ron has no title before it: it has kept no lives, and starts on 3.
The comments that changed
Four scripts’ comments now say what the game does with a title before it. The game plays the same without them. To bring yours up to date, make each read as below, and press Ctrl+S in each file, then click the Viewport tab. In best.rgs, at the top:
/// The best score, on the HUD and on the title: the one saved under the name
/// "best", written onto this node's Text as BEST and the number. It changes
/// only when the saved value does, which is when a game ends.
In director.rgs, in loop:
        // Once the last stage has begun, there is nothing left to count to. And
        // once the last life is lost the game is over: no stage begins while it
        // waits to start again. A game played straight from its own scene has
        // kept no lives yet, and has 3.
In game.rgs, in on_create:
        // The track this node's Audio Source names "music", on the channel
        // music plays on. The first game asks for it as it starts: it
        // replaces the title's loop. A new game is a fresh copy of the scene
        // and asks for it again: asking for the track already playing leaves
        // it playing, so the music goes on from where it was.
And in ship.rgs, at the top of on_enter:
        // The lives are kept rather than held in a field of the ship's, so
        // that any script can read them, as the HUD does. The title's Play
        // keeps 3 before the first game, and the game keeps 3 again before
        // each new one. A game played straight from its own scene has kept
        // none, and has 3.
Check it works