Tutorials · Worlds and Levels · Chapter 2
A tilemap
By the end
- A Tilemap node for the vale,
buildings, its map cut from the Old Dark Castle sheet,16pixels a tile and52to a row, from8pixels down - The hut and the chapel painted on two layers,
backbehind everything and a Solidground, in place ofhut-blockandchapel-block - Brush, Erase, Line, Rect, Fill and Pick, the collision overlay, Save and Undo
- The crypt’s first hall,
halls, painted by hand oncrypt-stone.png: the chapel door leads down to it, and its east wall stops him
On this page
When to reach for a tilemap
The hut and the chapel are walls, doors, windows and floors, built from a few kinds of square piece: a grid of art. That is what a tilemap is for. It is one node that draws a grid of cells, each holding a tile, a square cut from one picture, the sheet. This chapter’s map replaces two grey stand-ins, hut-block and chapel-block, and ends ground-block-east where the chapel’s floor begins. Under the chapel, the crypt’s first hall is a second map, on a sheet of stone drawn for the tutorial.
Reach for tiles for anything built on a grid: buildings, rooms, floors and walls. The hills’ curves are chapter 5’s Sprite Shape, and an outline that follows no grid, the mere, chapter 6’s Polygon.
What collides, what draws, what sorts: a map collides by its layers, each Solid or not; it draws every layer whose eye is open, tinted by the map’s Color; and it sorts as one node on its Sort Layer, its layers ordered inside it by their z.
The sheet
The vale’s buildings come from the Old Dark Castle tiles of the Gothicvania collection, the sheet Physics and Mechanisms cuts too.
- Copy the picture above into
art, and press Refresh in Assets.
A map for the vale
- In the Hierarchy, select
vale. Press + Add node and choose Tilemap. Rename itbuildings; its Position stays0,0. - Click the Tilemap tab beside the Inspector. It says No tilemap. Drag
art/old-dark-castle-interior-tileset.pngfrom Assets onto New tilemap…: the editor writesart/old-dark-castle-interior-tileset.tilemapbeside the sheet and points the node at it. - In Assets, right-click the new
.tilemap, choose Rename, and name itvale.tilemap. Its.metagoes with it, so the node still finds it. - Click the Inspector tab. Set the map’s Color to
1.0,0.94,0.86, alpha1, a dawn, and its Sort Layer to Ground. Leave Tile Size at16, Grid on Rectangle and Collision ticked.
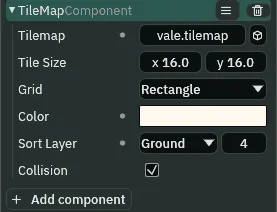
- The TileMap’s Tilemap
- The
.tilemapfile the node draws: the sheet, how it is cut, and the painted layers. The node says where the map is in the scene; the file holds what is painted on it. - The TileMap’s Tile Size
- One cell’s size in world units,
16by16as it comes, so here a pixel of a tile is a unit of the world. It is not the sheet’s tile size in pixels, which the Tileset band sets: a 16-pixel tile can be drawn at any size. - The TileMap’s Grid: Rectangle
- How the cells are laid out. Rectangle, as it comes, is square cells in rows and columns, cell
c,rcovering x16cto16c + 16and y16rto16r + 16. Chapter 14 lays out the other four, the isometric and the hexagonal grids. - The TileMap’s Color
- A tint over every tile of the map, white as it comes. The vale’s is a warm dawn.
- The TileMap’s Sort Layer
- The sorting layer the whole map draws on. Its layers’ z order them inside it and never step a tile onto another sorting layer, so the pilgrim, on Figures, draws over every tile of a map on Ground.
- The TileMap’s Collision
- Whether the map’s Solid layers collide, ticked as it comes. A map that is only scenery, which nothing should stand on, unticks it.
- New tilemap…
- What the Tilemap tab shows on a Tilemap node that names no
.tilemap. A sheet dropped on it starts a map beside the sheet, under the sheet’s name, cut in 16-pixel tiles, as many to a row as the sheet’s width holds, with two layers,backand a Solidground, and points the node at it. A name already taken is never written over: a second map from one sheet gets-2.
Cutting the sheet
The Tilemap tab is where a map is cut and painted, from the top: its Tools, its Layers, its Tileset, and the sheet’s tiles to pick from. The Tileset band says how the sheet is cut.
- Click the Tilemap tab again. In the Tileset band, set Margin’s
yto8. Tile is16by16and Columns52, as New tilemap made them.
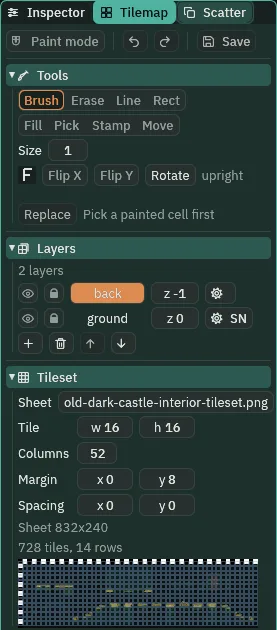
52 to a row, from 8 pixels down. The picture shows the chapter’s end: back’s z, in the Layers band above the sheet, is typed in the next section.- The Tileset band’s Tile
- One tile’s size on the sheet, in pixels:
16by16, as New tilemap cuts every sheet. - The Tileset band’s Columns
- Tiles to a row. New tilemap fills it from the sheet’s width:
832pixels make52. - The Tileset band’s Margin
- The border round the whole sheet before its first tile, in pixels, across and down. This sheet’s first row of tiles starts
8pixels down, under the checkered strip along its top, so its Margin is0and8. At0and0, as New tilemap leaves it, every cut would start8pixels too high, and each tile would be the bottom half of one row of art over the top half of the next. - The Tileset band’s Spacing
- The gap between tiles on the sheet, in pixels:
0here, since this sheet’s tiles touch. Chapter 14 cuts a sheet whose tiles have a gap between them. - The picker
- Under the Tileset band, the sheet’s tiles, each a cell to click. A click holds that tile for the next stroke, and the line over the picker names it, Tile #126: tiles are numbered from
1at the top left, row by row, so tile126is row2, column21, counting both from0.
Tile numbers on these pages are the picker’s: the row × 52 + the column + 1. The sheet’s walls, door and arch sit half a row off this cut, so each of those cells is half clear, and a half-row piece is used only where its clear half is hidden: the door is its three full rows, the window the arch’s two, and the walls’ top a roof of slabs.
Layers
A map paints on layers, each a grid of its own, and New tilemap made two. back is for what stands behind him and holds nothing up. ground is Solid: what he stands on.
- In the Layers band, click
back’s z and type-1: it draws behindground, and behind every other layer of the map.
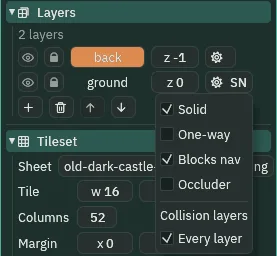
ground’s gear open: Solid, and Blocks nav as it comes.- A layer’s eye
- Hides the layer, in the game too: it draws nothing, and still collides as its flags say. Click it again to show the layer.
- A layer’s padlock
- Locks the layer: no stroke lands on it. Only the editor’s, and not saved in the file.
- A layer’s z
- Its order inside the map’s Sort Layer: a higher z draws in front of a lower one, and never onto another sorting layer.
0as a layer comes. - A layer’s gear, and Solid
- The gear opens the layer’s flags, and its label shows the ones set by their first letters: S for Solid, N for Blocks nav. Solid makes the layer’s tiles collision, merged into as few boxes as cover them; New tilemap makes
groundSolid. Blocks nav, One-way, Occluder and the collision layers under them are chapter 4’s. - A layer’s order
- A click on a row’s name paints on that layer, and a double-click renames it. Under the rows, + adds an empty layer over the selected one, the bin removes it with its tiles, and the arrows move it behind the one above or in front of the one below.
So, of a tile layer: it collides when it is Solid and the map’s Collision is ticked, whether its eye is open or not; it draws while its eye is open; and it sorts inside its map by its z, the map as a whole on its Sort Layer.
The painting tools
Press Paint mode at the top of the tab, or T, and drag in the Viewport: a stroke lands on the lit layer, with the tile the picker holds. Each picture below is one stroke on a copy of the checkpoint, the tile clicked in the picker first: on the vale’s back, round the hut and over the empty cells east of it, and, for Fill, on the crypt’s first hall.
- Brush
- Paints the held tile in every cell the drag passes over. B. Its width, Size in the Tools band, is
1cell as it comes. - Erase
- Clears every cell the drag passes over, on the lit layer only. E.
- Line
- A straight run of the held tile from where the drag starts to where it ends. L.
- Rect
- A filled box of the held tile between the drag’s two corners; with Hollow pressed, its border only. U.
- Fill
- A click floods the run under the pointer: every cell joined to it, edge to edge, that holds the same tile, becomes the held tile. With Whole layer pressed, every cell of that tile, joined or not. G.
- Pick
- A click reads a cell into the brush: the picker then holds that tile. I. A drag lifts a block of cells out, which chapter 3 uses.
126, dragged along one row: seven cells.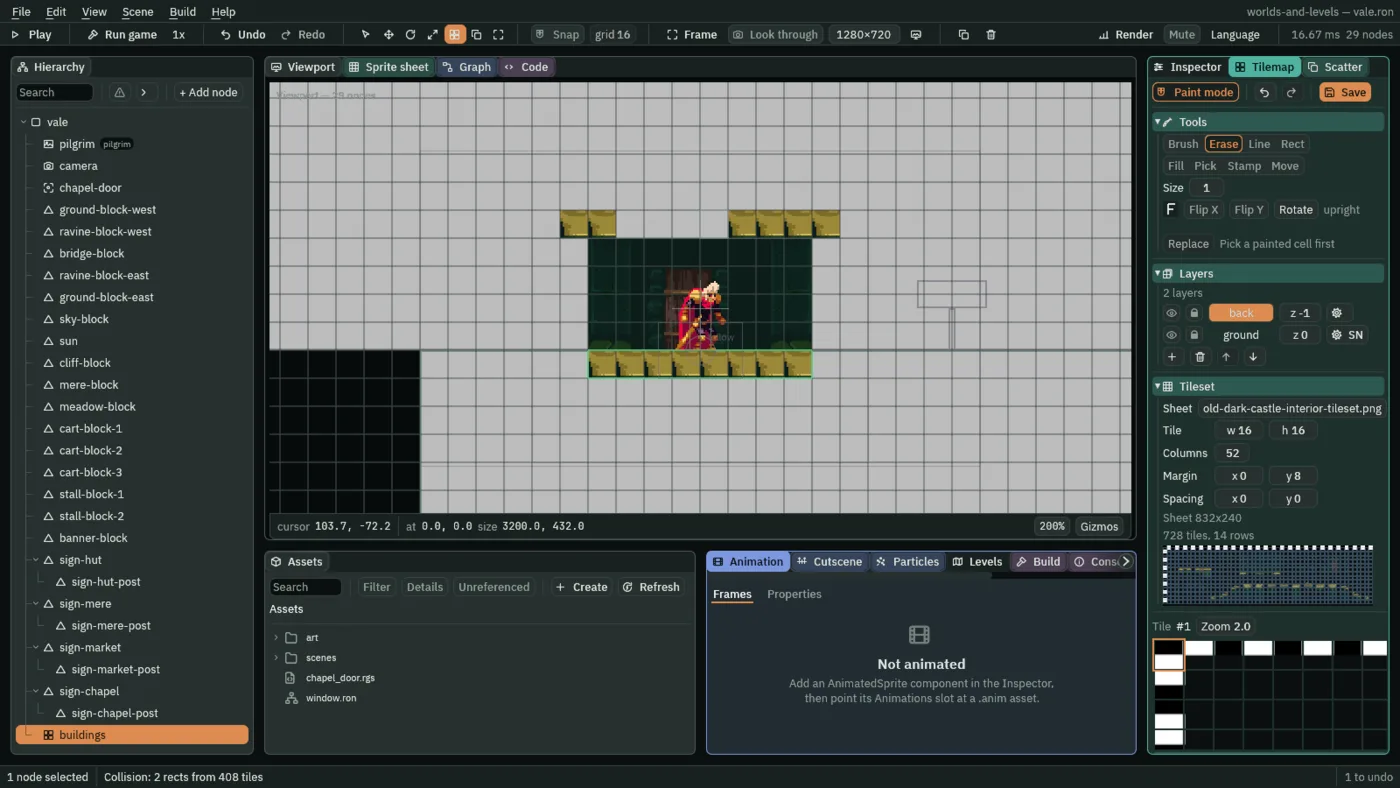
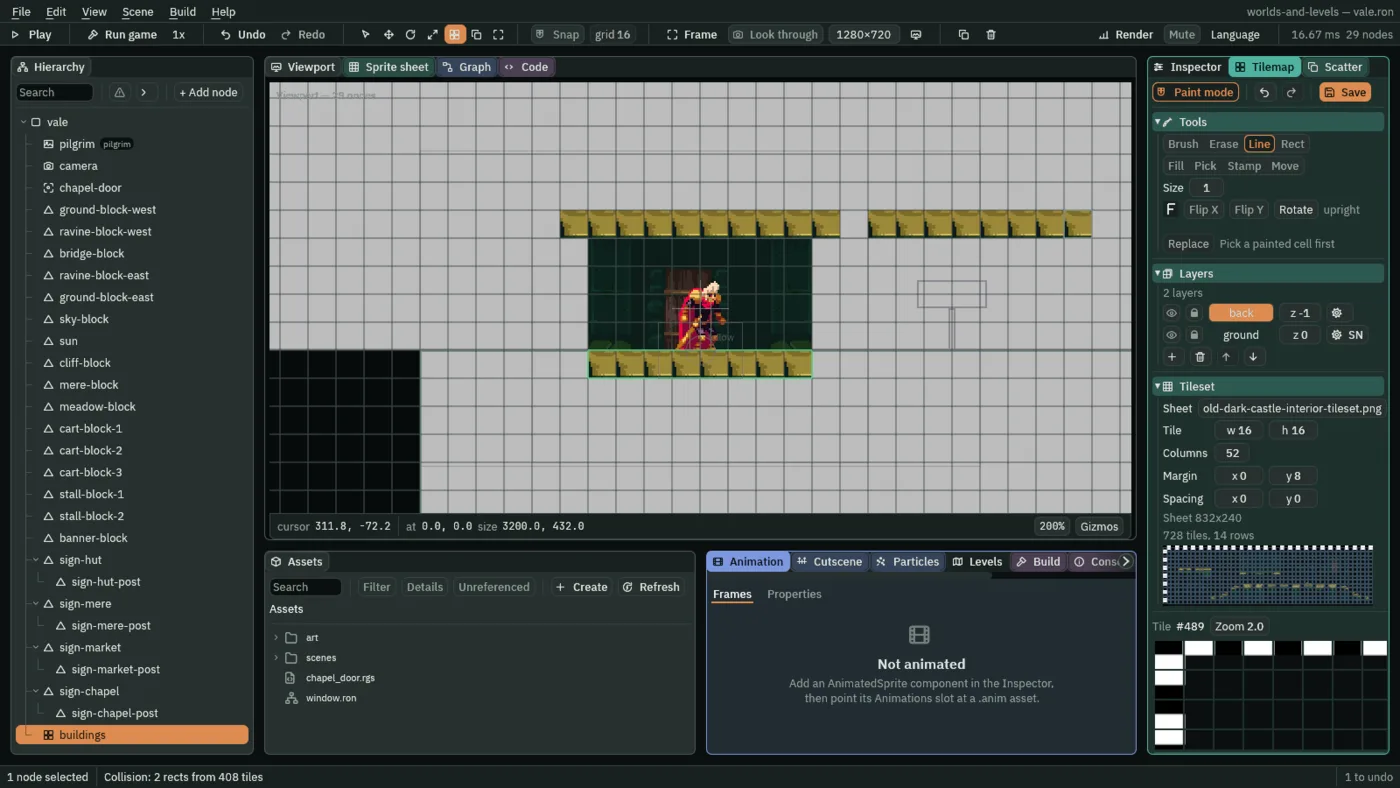
489, from one end of the run to the other: eight cells.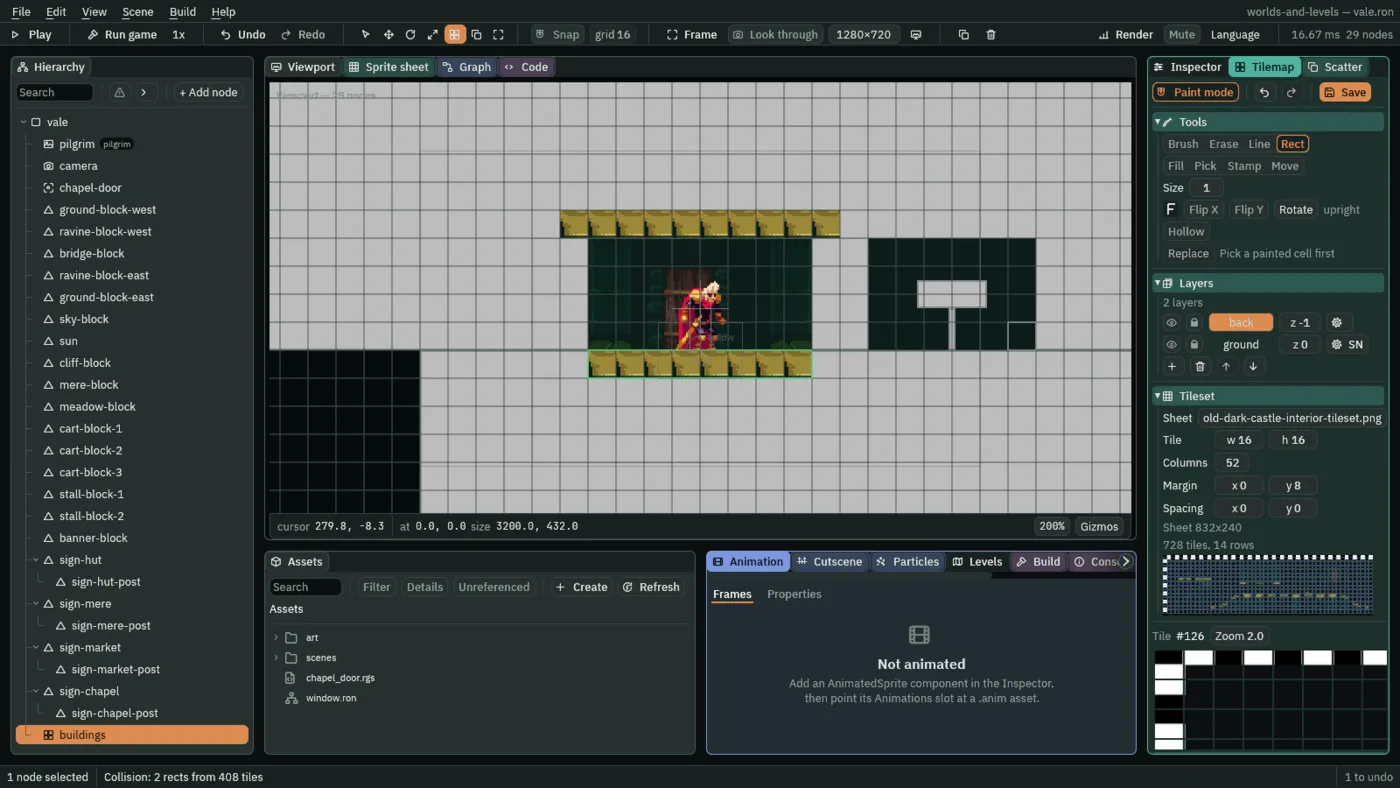
24 cells.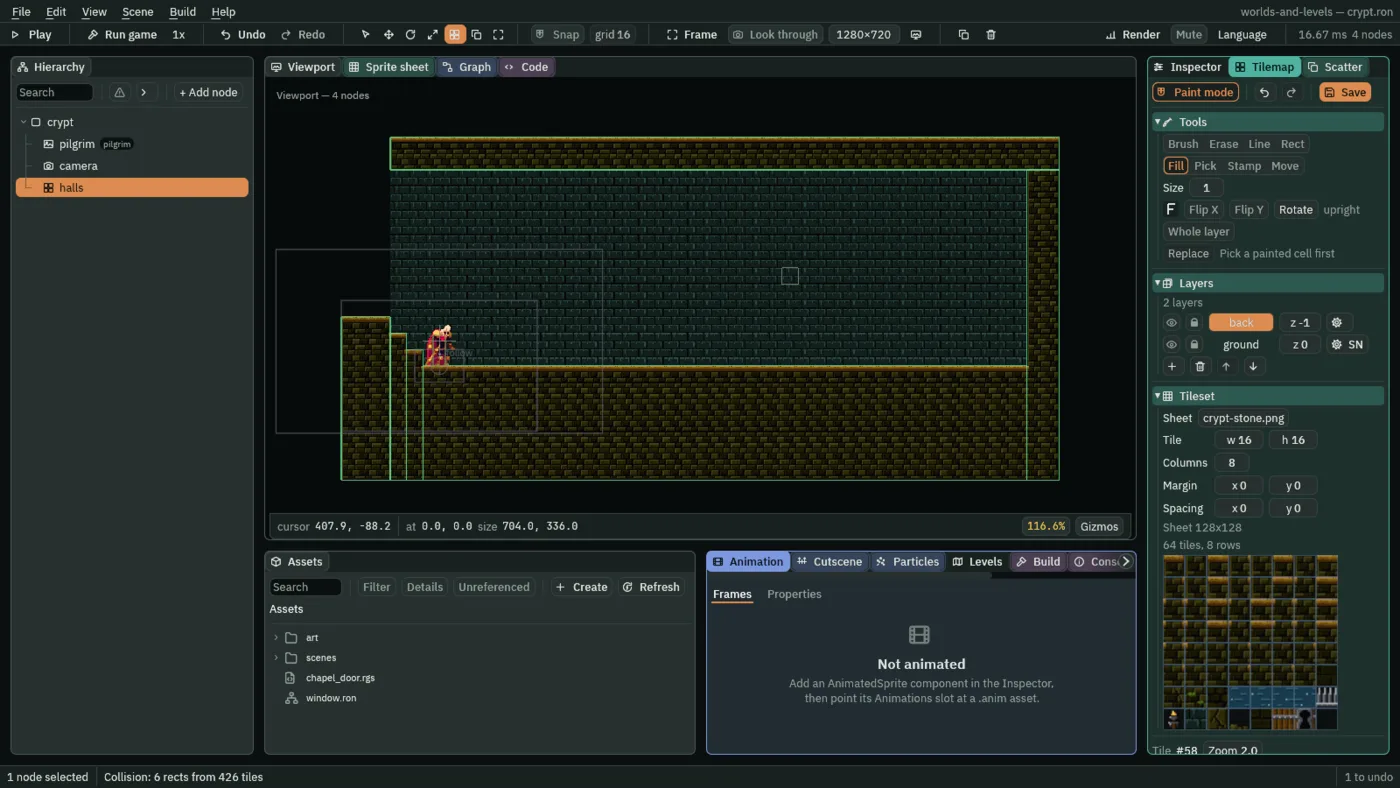
58.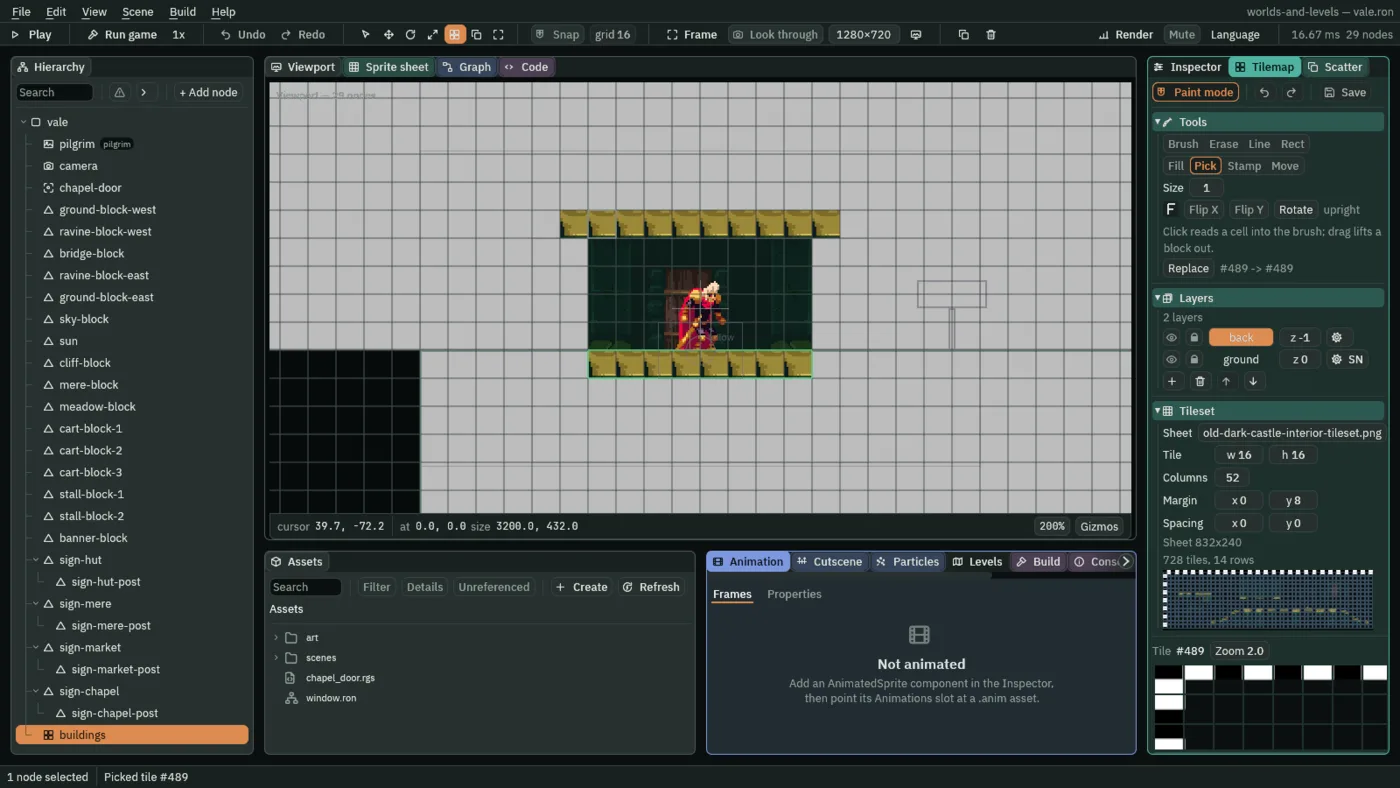
489.A run of one tile is a Line or a Rect; everything else is the Brush, cell by cell, with Pick to take a tile already painted.
The hut and the chapel
- Select
hut-block, press Delete, and press Delete in the box that asks; do the same forchapel-block. - Select
ground-block-east. With Snap on and the Select tool, drag its bottom-right corner in until the strip under the Viewport reads768.0, 320.0, then set its Position to2496,0: it now ends at x2880, where the chapel’s floor begins. - Select
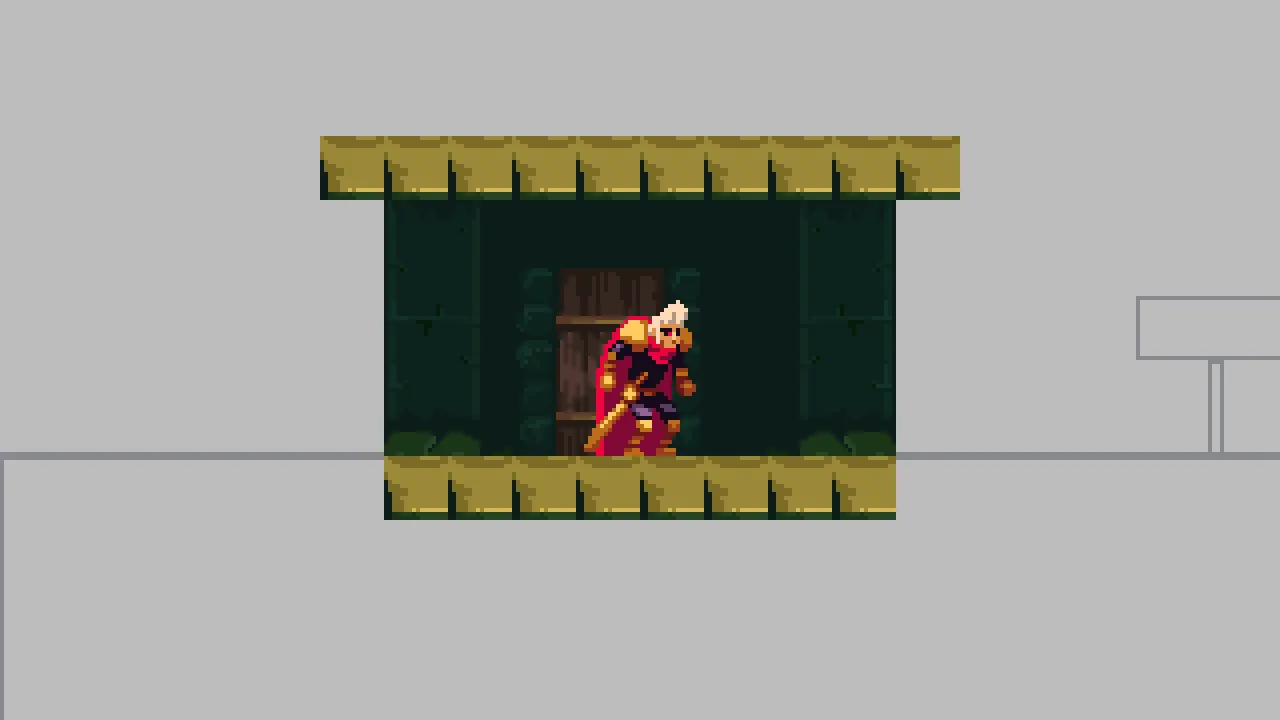
buildingsagain, click the Tilemap tab and press Paint mode, and paint the hut and the chapel from the table, on the layer each names: click the layer’s row first. A cell (column; row) covers x16 × columnand y16 × row, so row0is the first row under the walking line and row-1the first above it.
| Piece | Layer | Cells (column; row) | Tiles |
|---|---|---|---|
| the hut’s wall | back | 2 to 9; -4 to -1 | a Rect of the flat wall, 126, then each pillar with the Brush: west 124/125, 176/177, 228/229, 280/281; east 132/133, 184/185, 236/237, 288/289 |
| the hut’s door | back | 4 to 6; -3 to -1 | 198 199 200 / 250 251 252 / 302 303 304 |
| the hut’s roof | back | 1 to 10; -5 | a Line of the slab, 489 |
| the hut’s step | ground | 2 to 9; 0 | a Line of the slab, its top the walking line |
| the chapel’s wall | back | 180 to 199; -6 to -1 | a Rect of 126, then each pillar with the Brush: west, columns 180 and 181, 124/125, 176/177 on rows -5 to -3, 228/229, 280/281; east, columns 198 and 199, 132/133, 184/185 on rows -5 to -3, 236/237, 288/289 |
| the chapel’s railing | back | 182 to 197; -2 and -1 | a Line of 232 over a Line of 284 |
| the chapel’s window | back | 183 to 186; -5, and 182 to 187; -4 | the arch’s two full rows: 475 to 478 over 526 to 531 |
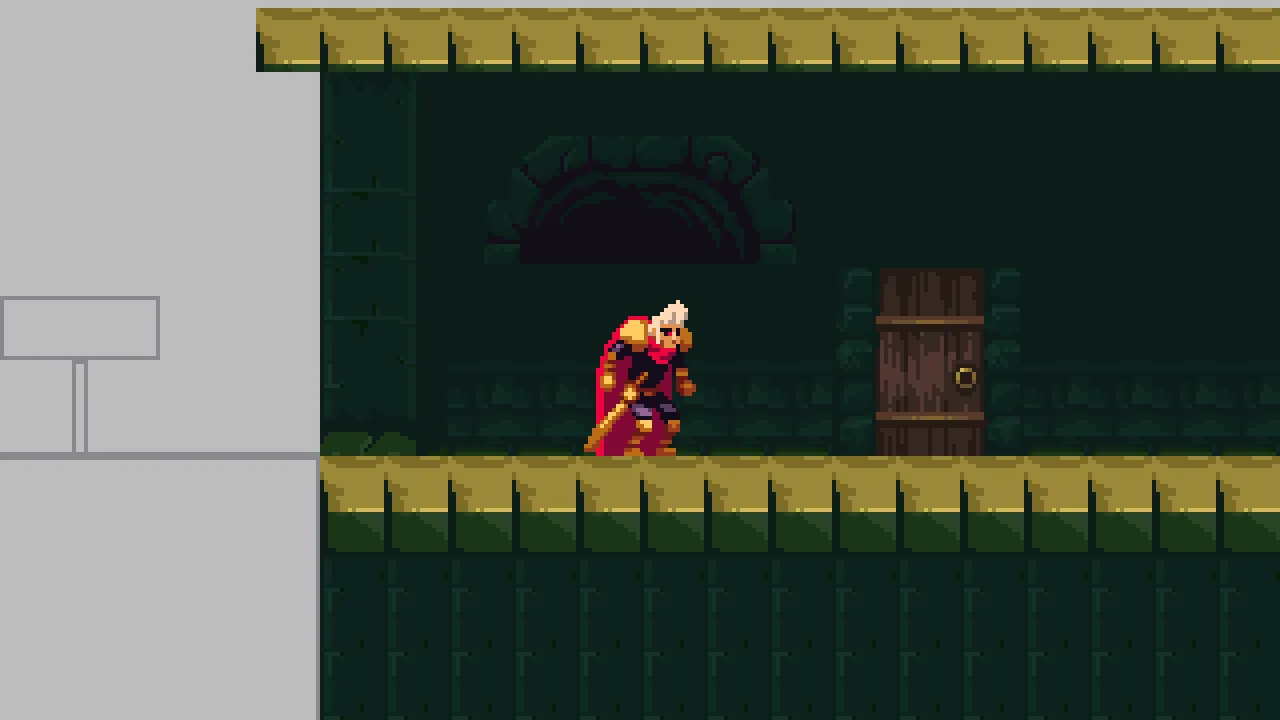
| the chapel’s door | back | 188 to 190; -3 to -1 | as the hut’s; its east edge is the chapel door’s Area’s |
| the chapel’s roof | back | 179 to 200; -7 | the slab, Picked off the hut’s roof, a Line |
| the chapel’s floor | ground | 180 to 199; 0 to 19 | the slab on row 0, the stone under it, 541, on row 1, the pillar’s stone, 593, on rows 2 to 19 |
back then holds 184 cells and ground 408. The chapel’s floor is every tile opaque, down to y 320, the depth of the grey ground beside it.
- Press Ctrl+S. It saves the scene, and every map with strokes not yet saved.
- Save, and Ctrl+S
- The tab’s Save writes its
.tilemap, and lights while the map has strokes not yet written. Ctrl+S saves the scene and every map with unsaved strokes, so one press keeps both. - Undo, one history
- The arrows at the top of the tab, Ctrl+Z and Ctrl+Y, and the toolbar’s Undo and Redo are one history: a stroke, a change in the tab and a change in the Inspector undo in the order they were made, each stroke one step. A stroke made while the game plays in the editor is kept when it stops.
- Press Run game. Close the window when you have seen the hut.
What collides: the overlay
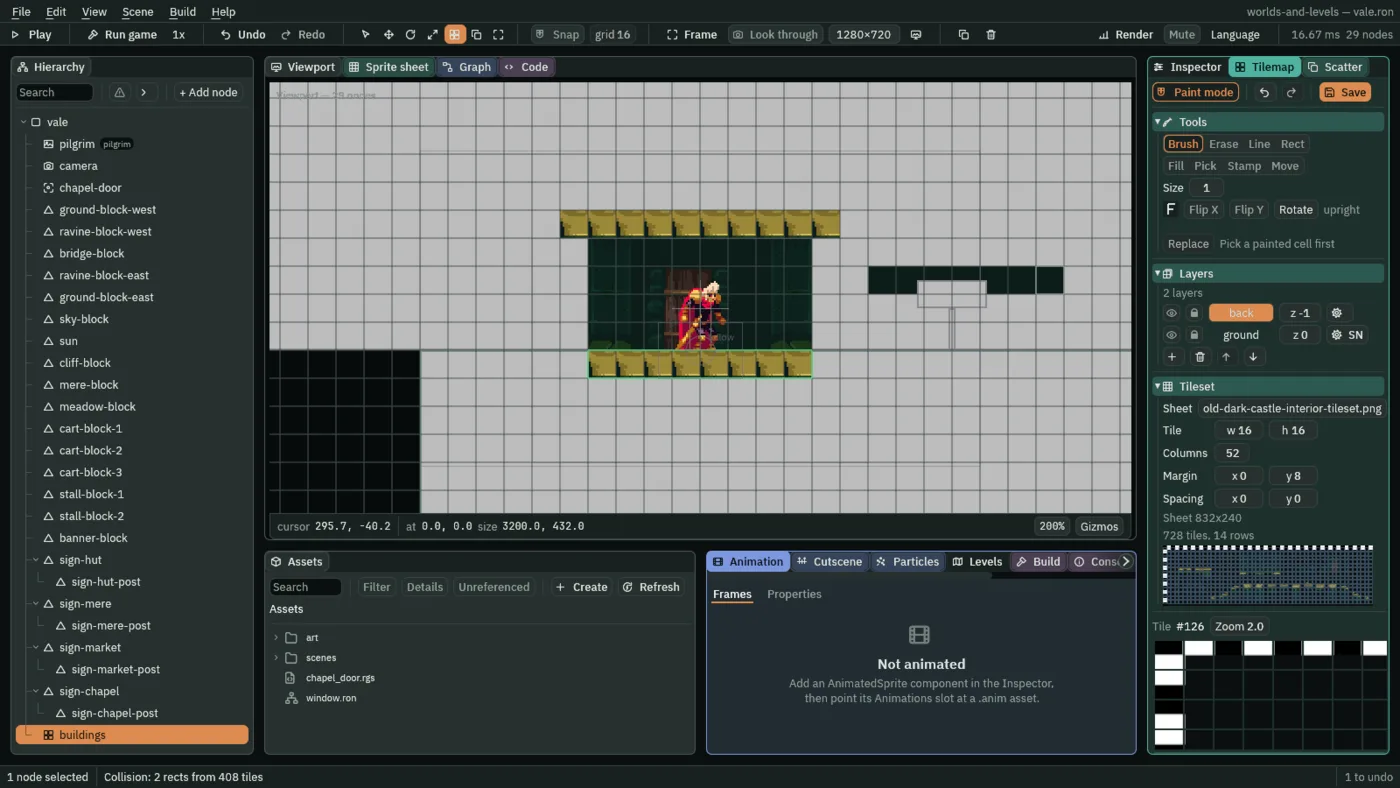
In Paint mode the Viewport draws the map’s collision over it: each Solid layer’s tiles merged into boxes, outlined in green, the boxes a body really stops on. The status line at the foot of the editor counts them.
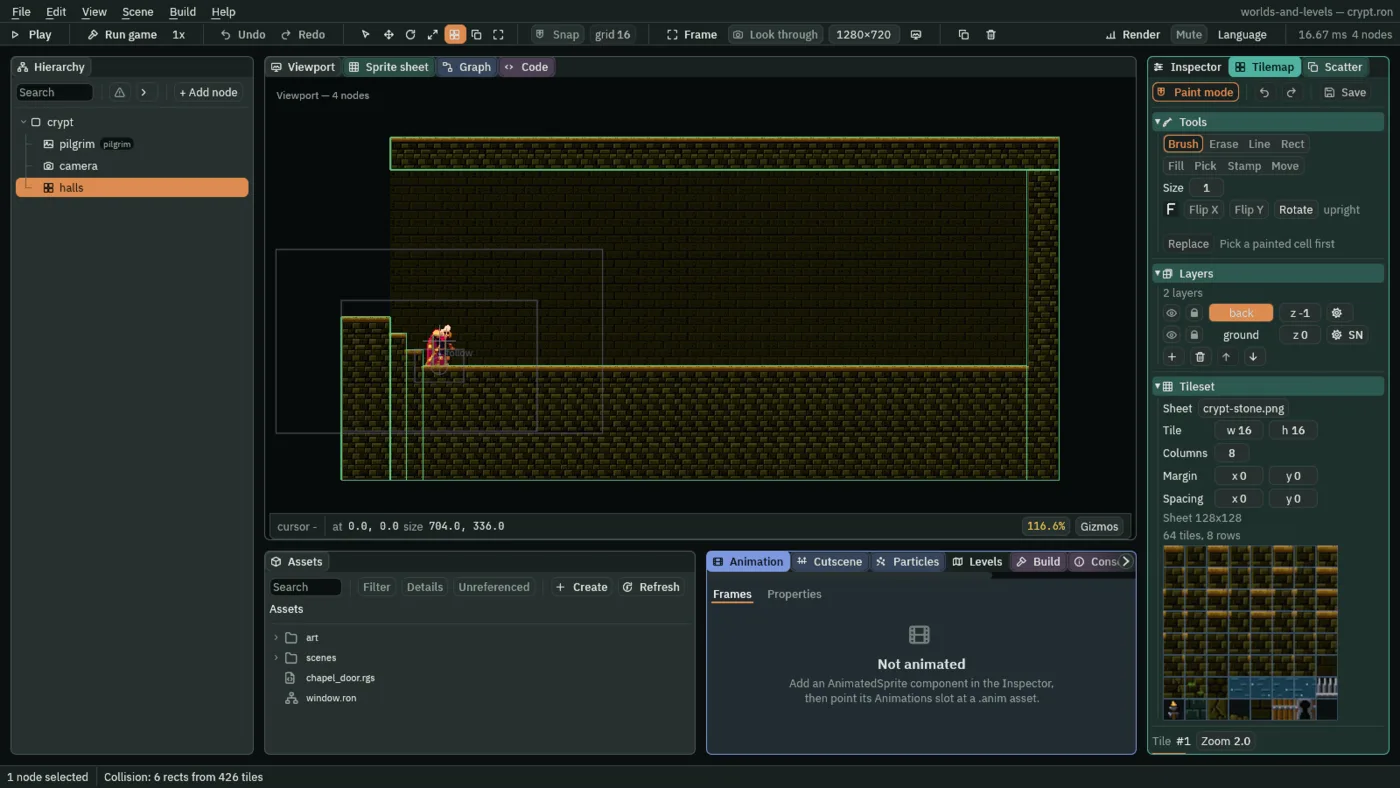
6 boxes from 426 tiles.- The collision overlay
- Drawn in Paint mode on the selected map: the boxes its Solid layers make, green, the boxes the game stops bodies on. A one-way layer’s are their top edges alone.
backis not Solid, so it has none. - The status line’s Collision
- How many boxes the map’s Solid tiles merged into, from how many tiles: Collision: 6 rects from 426 tiles. It says off for this tilemap when the map’s Collision is unticked.
A map collides as it is drawn as long as it is not turned. A turn on its node, or a skew, leaves its tiles colliding as boxes laid out unturned, somewhere other than where they are drawn, and Problems says so:

buildings turned 5°.The crypt’s first hall
The chapel door takes him down to the crypt, which has nothing to stand on yet. Its map is on crypt-stone.png, drawn for the tutorial and in the starter: tiles 1 to 47 are a stone wall’s every edge and corner, in the order chapter 3’s Add blob lays them out, 47 the stone with stone all round, and 48 the back wall.
- Open
scenes/crypt.ron. Selectcrypt, press + Add node, choose Tilemap, and rename ithalls. Set its Sort Layer to Ground. - In the Tilemap tab, drop
art/crypt-stone.pngon New tilemap…, and rename the new.tilemapcrypt.tilemapin Assets. It is cut as it comes:16pixels, Columns8, Margin0, Spacing0. - Type
back’s z-1.groundis Solid as it comes. - Paint the stone on
ground, every cell the tile its eight neighbours call for, read off the picker: the masses as47with Rect; the long edges with Line, the floor’s top, its underside and its two ends, and the east wall’s outer face on down the floor’s east end; the ceiling’s edges Picked off the floor’s; the east wall’s inner face with Fill; the corners and the stair’s edges with the Brush. The second table below names each edge’s tile. - On
back, a Rect of48, the back wall. Press Ctrl+S.
| Piece | Layer | Cells (column; row) | World (x; y) |
|---|---|---|---|
| the floor | ground | -2 to 41; 0 to 6 | -32 to 672; 0 to 112 |
| the west wall, under the top step | ground | -2 and -1; -3 to -1 | -32 to 0; -48 to 0 |
| the stair | ground | 0; -3 to -1, 1; -2 and -1, 2; -1 | tops y -48, -32 and -16 |
| the ceiling | ground | 1 to 41; -14 and -13 | 16 to 672; -224 to -192 |
| the first hall’s east wall | ground | 40 and 41; -12 to -1 | 640 to 672; -192 to 0 |
| the back wall | back | 1 to 39; -12 to -1 | 16 to 640; -192 to 0 |
| Tile | Where | Cells (column; row) |
|---|---|---|
#32 | every top: the floor’s, the ceiling’s and the west wall’s | row 0, row -14, and -1; -3 |
#37 | every underside: the floor’s and the ceiling’s | row 6 and row -13 |
#13 | every face looking west: the floor’s west end and the east wall’s inner face | column -2 and column 40 |
#43 | the east wall’s outer face, on down the floor’s east end | column 41 |
#11 | the top-left corners: the west wall’s and the ceiling’s | -2; -3 and 1; -14 |
#5 | the bottom-left corners: the floor’s and the ceiling’s | -2; 6 and 1; -13 |
#27 | the top-right corners: each step’s and the ceiling’s | 0; -3, 1; -2, 2; -1 and 41; -14 |
#46 | the stair’s inner corners | 0; -2, 1; -1 and 2; 0 |
#34 | where the east wall’s inner face meets the floor | 40; 0 |
#42 | where it meets the ceiling’s underside | 40; -13 |
#35 | the floor’s bottom-right corner | 41; 6 |
The floor goes down to y 112, the lowest the view reaches, so no view of the hall shows what is under it. The stair is three steps, each 16 high and 16 wide, rising west from its foot at x 48 to the top step, x 0 to 16 at y -48; he comes in at 64, 0, clear of the first riser. Nothing stands above the top step or west of x 0 over y -48: that is the way up.
Every edge here was chosen by hand from its neighbours, 426 stone cells of it. Chapter 3 paints the rest of the crypt with a terrain, which chooses them for you.
Through the door
Walk him into the chapel door and the game changes scene: he comes in at the stair’s foot, and the crypt’s camera has him in view from its first frame.

In the crypt, ground stops him as a Block did. Hold D from where he comes in:

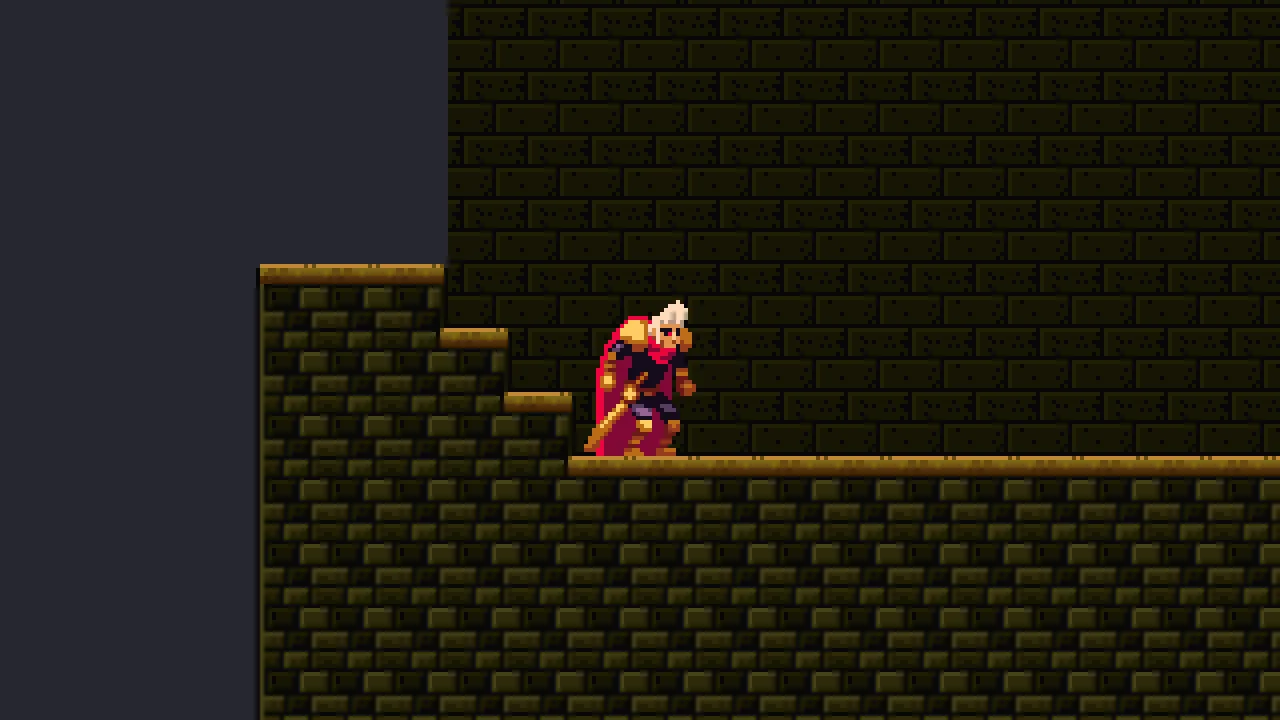
640: he stops against it and stays.Held for six seconds, D never takes his right edge past the wall’s face, x 640. And the chapel’s floor holds him as the grey floor did: dropped onto it from 48 above, he lands with his feet on its top, y 0. The floor’s tiles meet with no seam wherever the camera stands, a fraction of an art pixel included.
The two maps
| Node | Field | buildings, in the vale | halls, in the crypt |
|---|---|---|---|
| Tilemap | Tilemap | art/vale.tilemap | art/crypt.tilemap |
| Color | 1.0, 0.94, 0.86, alpha 1 | white, as it comes | |
| Sort Layer | Ground | Ground | |
| Tile Size, Grid, Collision | 16, Rectangle, ticked | 16, Rectangle, ticked | |
| Tileset band | Tile, Columns | 16, 52 | 16, 8 |
| Margin | 0, 8 | 0, 0 | |
| Layers | back | z -1 | z -1 |
ground | Solid | Solid |
In the vale, hut-block and chapel-block are gone, and ground-block-east is 768 wide at 2496, 0, ending at x 2880.