Tutorials · Worlds and Levels · Chapter 1
Block it out
By the end
- The starter open in the editor: the vale, the pilgrim, his camera and the chapel door, and nothing to stand on
- Eight sorting layers, Sky to Words, named back to front in the Project settings window
- Six Blocks where he walks, each a Shape and a Collider sized as one by its handles, and twenty Shapes where he does not
- The vale walked end to end on grey, from the hut to the chapel door, with no leap
On this page
The vale you start from
Worlds and Levels builds one level, Hollowmere, seen from the side: a vale ten screens wide, from a hut at its west end to a chapel at its east, and a crypt under the chapel. A pilgrim walks it. Nothing in it is made yet. This chapter blocks the whole vale out in grey, and each chapter after it replaces grey stand-ins with the real thing, so the vale can be walked end to end at every step.
The starter is worlds-and-levels.zip. It holds the project, its two scenes, the vale and the crypt, the chapel door’s script, the pilgrim and every picture drawn for the tutorial. The five pictures and the font that chapters 2, 6, 7, 10 and 14 ask you to download are not in it.
- Download the starter and unzip it somewhere outside your other projects. You get one folder,
worlds-and-levels. - Open Rengy. In the launcher, choose Open project… and pick the
worlds-and-levelsfolder. - The editor opens the project’s startup scene,
scenes/vale.ron. Press Look through in the toolbar: the Viewport shows the vale through its camera, as the game will.
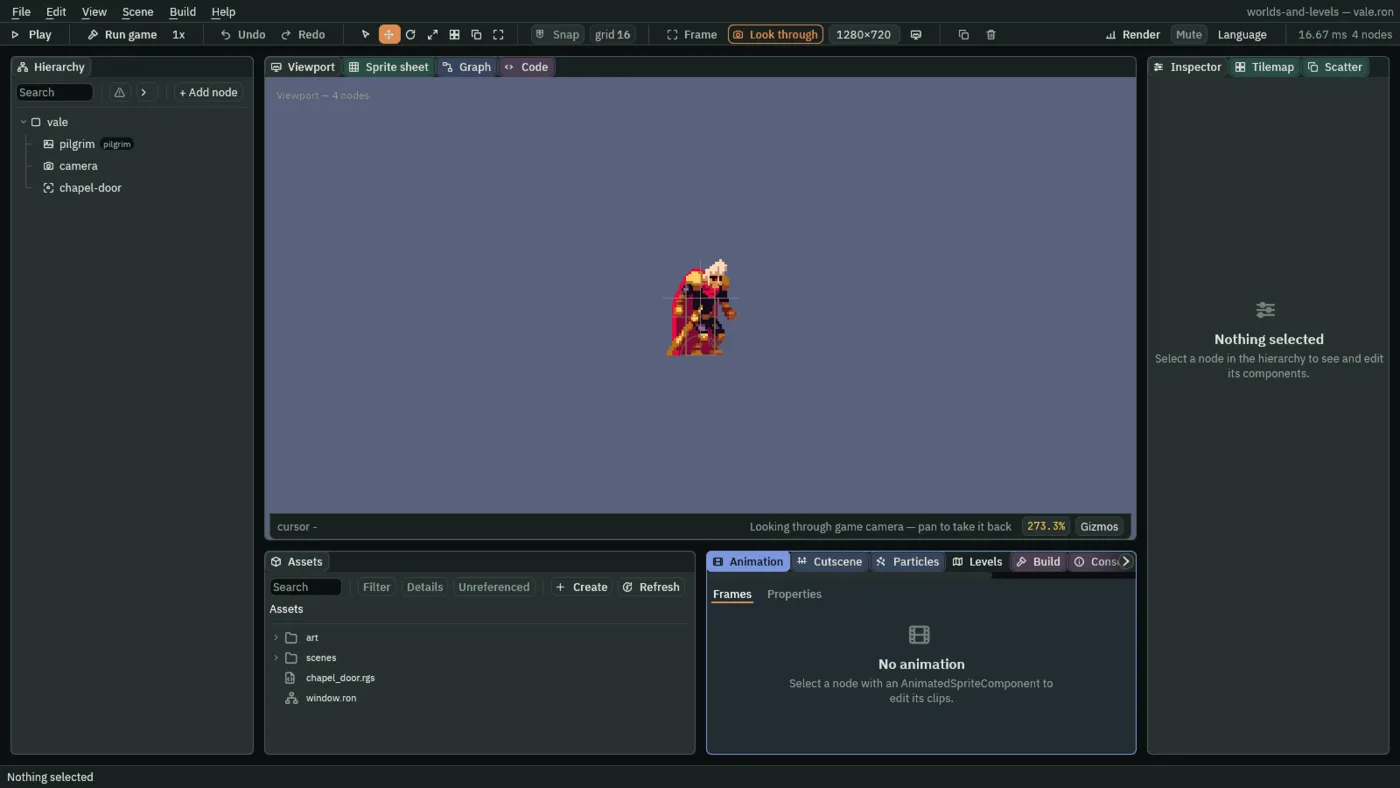
One unit is one art pixel, and y grows downward: the vale’s walking line is y 0, and a place above it has a negative y. The vale is 3200 units wide, ten screens of 320, and the pilgrim walks it at 160 a second. Its nodes:
| Node | What it is | Where |
|---|---|---|
pilgrim | him: his clips and their State Machine, and a Character Body the keys drive | 96, 0, his feet |
camera | his camera, 320 by 180 of the vale at four screen pixels to a unit, with a rig that follows him | 96, -24, 24 above his feet |
chapel-door | an Area 32 by 48 whose script takes him down into the crypt | 3040, 0, the vale’s east end |
He walks with A and D or the arrow keys, and leaps with Space, W or the up arrow. The crypt, scenes/crypt.ron, holds the same: him at 64, 0, where chapter 2’s stair will rise, his camera, and nothing else.
- Press Run game. The game opens in its own window,
1280by720, on the vale. Close the window when you have seen it.

A second in, his feet are past y 400, straight below where he stood, and he is still falling. The camera stands at his framed point from the first frame, so it has nothing to catch up on; it follows him down into nothing. The first thing to make is something to stand on.
Grey boxes first
A level designer blocks a level out before any art exists: a box for every floor, wall and thing, in grey, so the level can be walked, its distances felt and its pieces moved while moving them still costs nothing. + Add node has two presets for it. A Shape draws an untextured rectangle, circle or capsule and holds nothing up. A Block is a Shape and a Collider of one size: what you see is what he stands on.
Reach for a Block wherever he walks, and a Shape wherever he does not. Later chapters replace the grey with the tool each thing wants: tiles for the buildings, painted from a grid of art (chapters 2 to 4); a Sprite Shape for the hills, a curve with edges (chapter 5); a Polygon for the mere, a flat outline (chapter 6); a Mesh for the sky, a shape you colour and map yourself (chapter 7); and a MultiMesh for the meadow, many copies of one shape (chapter 8).
The sorting layers
Front and back are the Sort Layer first. Every node that draws stores one, a number, and a higher number draws in front; the project names the numbers. The starter names one, Default. Hollowmere uses eight, named once, back to front, and never reordered.
- Choose File → Project settings… and click its Layers tab.
- Double-click the
Defaultrow’s name, typeSky, and press Enter. - Click the box beside Add layer, type
Far, and press Add layer. AddBack,Water,Ground,Props,FiguresandWordsthe same way, in that order, each in front of the last. - Close the window.
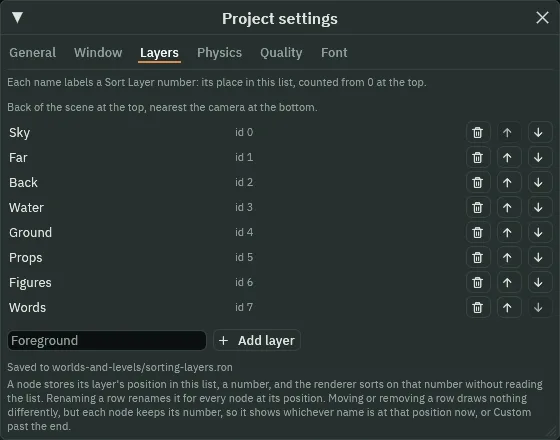
| Number | Layer | What stands on it in this chapter |
|---|---|---|
0 | Sky | the grey sky |
1 | Far | the sun |
2 | Back | the hut and the cliff |
3 | Water | the mere |
4 | Ground | the ground, the ravine’s walls, the bridge and the chapel’s floor |
5 | Props | the meadow, the carts, the stalls, the banner and the signposts |
6 | Figures | the pilgrim |
7 | Words | nothing yet: chapter 10’s words |
The names are written to sorting-layers.ron; the project file is left as it was. A node stores the number, not the name. The starter’s pilgrim was already at 6, so he is on Figures from now on without being touched. And moving a node up or down the Hierarchy never brings it in front of a node on a later layer.
- The Layers tab’s rename
- A double-click on a row’s name makes it a field: type, and press Enter. It renames the layer for every node at that number, since nodes keep the number.
- The Layers tab’s Add layer
- Adds the name typed in the box beside it as a new row at the bottom, with the next number, in front of every row above it. The rows’ arrows and bins reorder and remove, and draw nothing differently: each node keeps its number and shows whichever name is at that place now. Hollowmere never uses them.
A Block where he walks
The ground first. He walks the vale on one slab of grey, 320 deep, with the ravine cut out of it near the east end and bridged level, so D alone takes him from the hut to the chapel door. That is six Blocks, every one hung from the middle of its top, so its node is on the walking line.
- In the Hierarchy, select
vale. Press + Add node: the menu says Add child of vale. Choose Block.
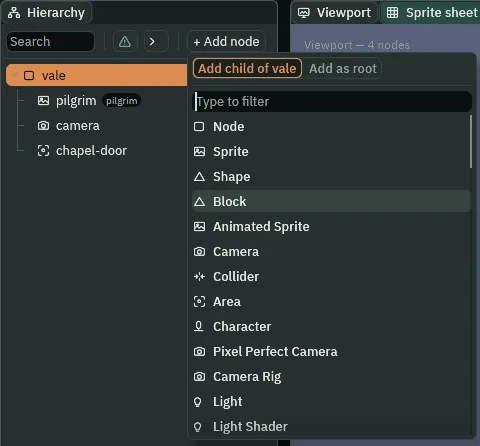
vale selected: Block, beside Shape.- Rename it
ground-block-west: double-click its row in the Hierarchy, or press F2, then type the name and press Enter. Every later rename is done the same way. - In the Inspector’s Node section, set Position to
912and0. Click a number to type into it, and press Enter. - Press Snap in the toolbar. The grid beside it reads
grid 16. - Press Q for the Select tool. Drag the small ring at the Block’s middle, its anchor, up to the middle of its top edge: Snap puts it there, and the Shape’s Anchor reads
0.5,0. - Drag the Block’s bottom-right corner to
1888,320. The strip under the Viewport reads its size,1952.0, 320.0: the anchor keeps the Block centred on its node, so the left edge goes out to-64with it. - In its Shape, set Outline to
1, Outline Color to0.25,0.25,0.28, alpha1, and Sort Layer to Ground. When you click a colour, if the button at the top left of the picker reads U8, press it so that it reads F: each channel then runs from0to1, as this tutorial gives every colour. Color stays the preset’s grey,0.5,0.5,0.5.
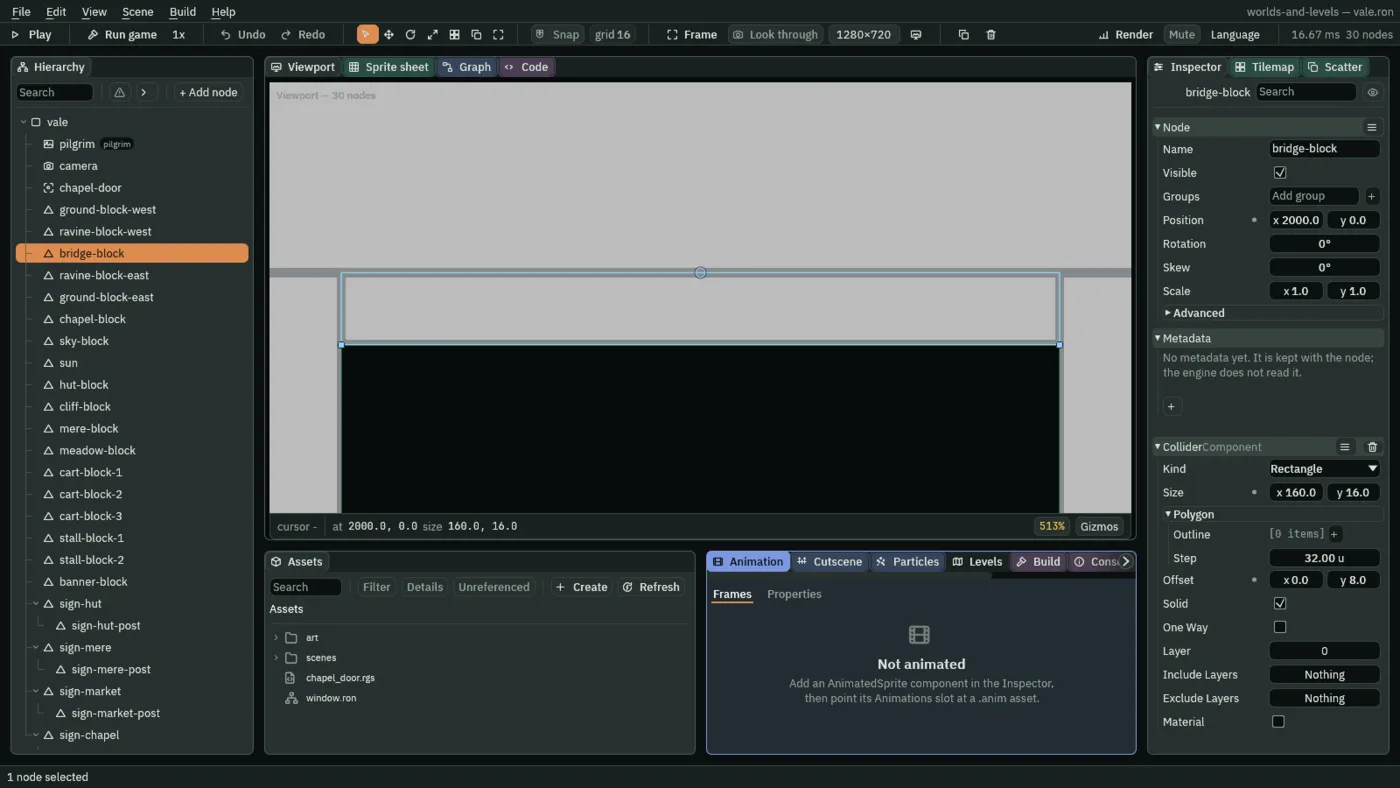
A Block’s Shape and Collider are one box. The Collider’s size is the Shape’s, and its offset is the Shape’s middle: 0, 8 on the bridge, half its 16 below a node hung from its top. While they match, the Viewport draws them as one outline with one set of handles, and a drag writes both. The bridge shows two corners, its bottom two: the anchor on its top edge pins the top two, so they are no handles.
Drag the anchor with the Select tool. A fresh editor starts on the Move tool, and under it the ring sits under the gizmo’s middle square, which takes the drag; the corners work under every tool. Make the other five Blocks the same way, each a child of vale:
| Node | Position | Bottom-right corner | Size |
|---|---|---|---|
ground-block-west | 912, 0 | 1888, 320 | 1952 × 320 |
ravine-block-west | 1904, 0 | 1920, 320 | 32 × 320 |
bridge-block | 2000, 0 | 2080, 16 | 160 × 16 |
ravine-block-east | 2096, 0 | 2112, 320 | 32 × 320 |
ground-block-east | 2656, 0 | 3200, 320 | 1088 × 320 |
chapel-block | 3040, 0 | 3200, 16 | 320 × 16 |
All six have Anchor 0.5, 0, Sort Layer Ground, the grey, and an Outline of 1 in 0.25, 0.25, 0.28. Every corner is on the 16 grid, and every top is the walking line: the ground runs from x -64 to 3200 with the ravine’s 160 cut out of it, bridged level, and the chapel’s grey floor lies on the east ground’s top. Nothing he walks on rises above y 0.
- Block
- A preset of + Add node: a Shape and a Collider of one size on one middle,
64square and grey as it comes. What is drawn is what he stands on. - The Block’s linked handles
- While its Shape and Collider match, one outline and one set of handles for both. A corner writes the Shape’s size and the Collider’s size and offset together; the anchor ring writes the Shape’s anchor and the Collider’s offset; each drag is one step to undo. A size typed into either, or the node turned or scaled, parts them, and each shows its own handles again.
- Snap
- The toolbar’s toggle, off as the editor opens. With it on, a drag puts a node or a corner on the grid,
16units as it comes (grid 16 beside it sets the spacing); a turn snaps to15°; and an anchor ring snaps to its shape’s edges, thirds and middle. - The anchor ring
- The small ring a Shape draws at its anchor while it is selected. Drag it with the Select tool, Q, to move the anchor; under the Move tool, W, it sits under the gizmo’s middle square.
A Shape where he does not
Everything he walks past and does not stand on is a Shape alone: the sky, the sun, the hut, the cliff, the mere, the meadow, the carts, the stalls, the banner and the four signposts. A Shape draws and holds nothing up, so its values are typed: there is no Collider to keep in step.
They go under the six Blocks, each a child of vale, in the order of the table: the sky and the sun first, then the hut. Each is named …-block, so the made thing that takes its place in a later chapter can take the plain name, and each is grey with an Outline of 1 in the darker grey, but the sun. All are Rectangles but the sun, a Circle, and the carts, Capsules. A signpost’s post goes under its board, as the board’s child.
| Node | Sort Layer | Position | Anchor | Size |
|---|---|---|---|---|
sky-block | Sky | 1600, 0 | 0.5, 1 | 3584 × 400 |
sun, a Circle | Far | 600, -80 | 0.5, 0.5 | 40 × 40 |
hut-block | Back | 96, 0 | 0.5, 1 | 128 × 96 |
cliff-block | Back | 1200, 0 | 0.5, 1 | 256 × 160 |
mere-block | Water | 1200, 0 | 0.5, 1 | 320 × 28 |
meadow-block | Props | 1640, 0 | 0.5, 1 | 400 × 12 |
cart-block-1, a Capsule | Props | 2300, 0 | 0.5, 1 | 48 × 32 |
cart-block-2, a Capsule | Props | 2340, 0 | 0.5, 1 | 48 × 32 |
cart-block-3, a Capsule | Props | 2420, 0 | 0.5, 1 | 48 × 32 |
stall-block-1 | Props | 2560, 0 | 0.5, 1 | 64 × 56 |
stall-block-2 | Props | 2650, 0 | 0.5, 1 | 64 × 56 |
banner-block | Props | 2480, -112 | 0.5, 0 | 128 × 48 |
sign-hut | Props | 240, -32 | 0.5, 0.5 | 40 × 16 |
sign-hut-post, under sign-hut | Props | 0, 32 in it | 0.5, 1 | 4 × 24 |
sign-mere | Props | 980, -32 | 0.5, 0.5 | 40 × 16 |
sign-mere-post, under sign-mere | Props | 0, 32 in it | 0.5, 1 | 4 × 24 |
sign-market | Props | 2180, -32 | 0.5, 0.5 | 40 × 16 |
sign-market-post, under sign-market | Props | 0, 32 in it | 0.5, 1 | 4 × 24 |
sign-chapel | Props | 2820, -32 | 0.5, 0.5 | 40 × 16 |
sign-chapel-post, under sign-chapel | Props | 0, 32 in it | 0.5, 1 | 4 × 24 |
- For each row in turn, select
vale, or a post’s board, press + Add node and choose Shape. Rename it, and set its Position. A post’s is in its board’s own units: the board’s middle is32above the walking line, so at0,32the post stands on it. - In its Shape, set the Kind where the table names one, and Size, Anchor and Sort Layer from the table; Color
0.5,0.5,0.5, alpha1, Outline1and Outline Color0.25,0.25,0.28, alpha1. - The sun is the one in colour: Color
1,0.93,0.7, alpha1, Outline3and Outline Color1,0.98,0.9, alpha1, a paler ring3wide inside its edge.
The hut, the third, shows a Shape’s rows: Size 128, 96, and Anchor 0.5, 1, so it stands on its foot, the middle of its bottom edge, on the walking line; on Back.
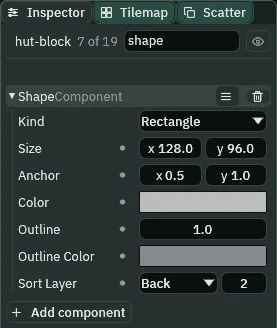
shape, shows only the rows that match.- The Shape’s Kind: Rectangle, Circle or Capsule
- What it draws. A Rectangle fills its size; a Circle is the largest circle inside it; a Capsule is a rectangle with round ends on its longer side, the carts’ shape. Rectangle as it comes.
- The Shape’s Size
- Its width and height in units, before the node’s scale.
64by64as it comes. - The Shape’s Anchor
- The point of the Shape that stands on its node, from
0,0, its top-left corner, to1,1, its bottom-right;0.5,0.5, its middle, as it comes. A thing that stands on the ground has0.5,1, its foot; a Block he walks on has0.5,0, so its node is on the walking line. - The Shape’s Color
- Its fill. Every stand-in is the same grey,
0.5,0.5,0.5, but the sun; a lower alpha would make it see-through. - The Shape’s Outline
- A line drawn inside its edge, this many units thick;
0, as it comes, draws none. It follows the Kind: four bars round a Rectangle, a ring round a Circle or a Capsule. A round Shape with an outline is drawn as a mesh, which matters to its sorting: see the sun, below. - The Shape’s Outline Color
- The outline’s colour. A darker grey on every stand-in, so grey boxes that touch still read apart.
- The Shape’s Sort Layer
- The sorting layer it draws on, chosen by name, its number beside it. A higher number draws in front, whatever the Hierarchy’s order. Sky,
0, as it comes.
The grey vale
- Press Ctrl+S. Select
vale, move the pointer over the Viewport and press F to frame it.
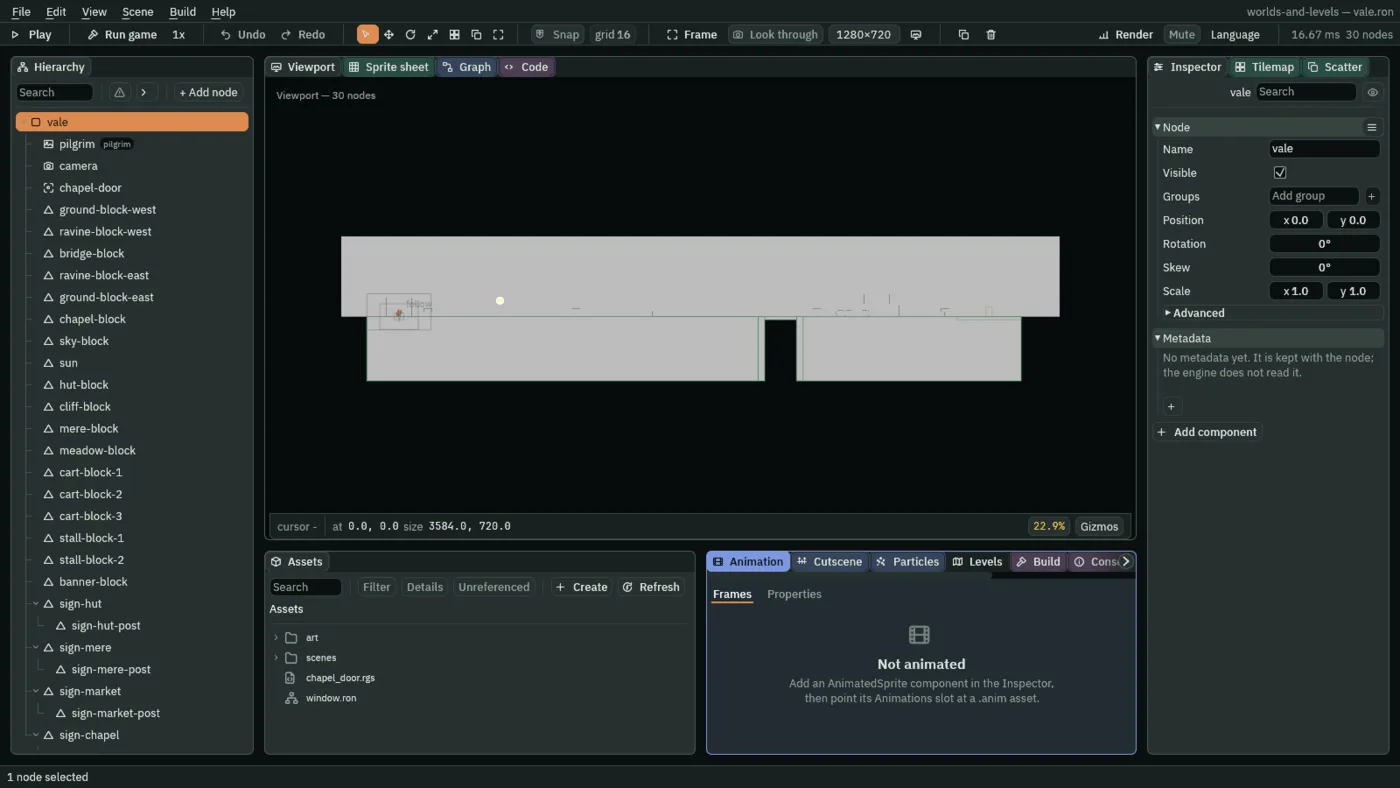
The grey sky ends at the walking line, so the ravine shows the camera’s Background under the bridge. The sun is the one stand-in in colour, its ring 3 wide inside its edge:
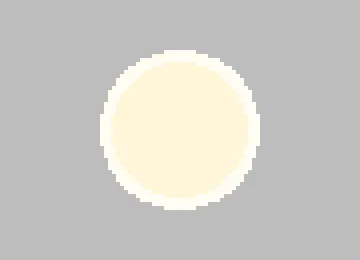
The sun is on Far, not on Sky where it belongs by sense, because of how it is drawn. A round Shape with an outline is drawn as a mesh, and on one Sort Layer a mesh is drawn before a box it ties with: on Sky the grey sky’s box, drawn after it, would cover it. Far is in front of Sky, so the sun is drawn after the sky, whatever the Hierarchy says. Front and back are always the Sort Layer first.
What collides, what draws, what sorts
Every kind of thing this tutorial draws answers the same three questions differently, and each chapter asks them of its own. Of the grey stand-ins:
- What collides: a Block, through its Collider. A Shape alone collides with nothing.
- What draws: both, their fill and their outline.
- What sorts: the Sort Layer first; on one layer, a round outlined Shape, a mesh, before a box. Never the Hierarchy.
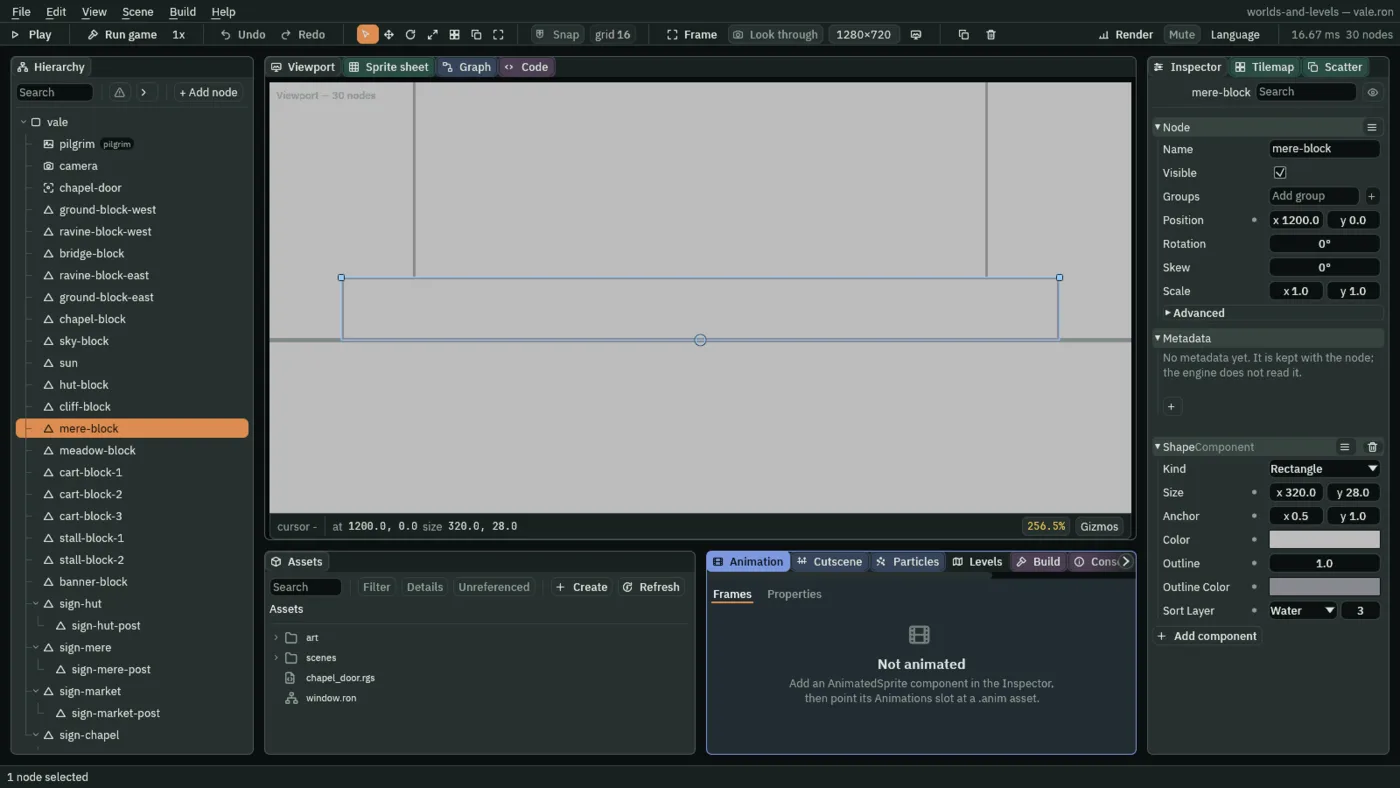
Put him 60 above the middle of the mere and he falls straight through it and lands on the ground beneath, at y 0. The mere is drawn and holds nothing up, as the real mere will: he walks past it, not on it.
Walk the vale
- Press Run game and hold D.
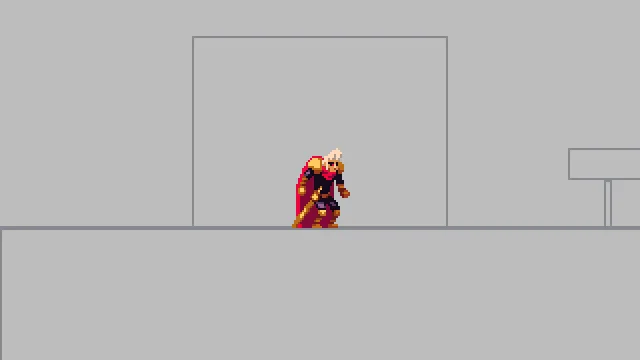
Held all the way, D takes him to the chapel door within 25 seconds. His feet never sink under the walking line, over the bridge and onto the chapel’s floor too, and no seam between two Blocks stops him or turns him back: at the door, the game changes to the crypt, where he falls, for nothing is built there yet. Chapter 2 gives it a floor.
The stand-ins
| What | Component | Field | Value |
|---|---|---|---|
| The project | Layers tab | rows | Sky, Far, Back, Water, Ground, Props, Figures, Words |
| Every stand-in but the sun | Shape | Color | 0.5, 0.5, 0.5, alpha 1 |
| Outline | 1 | ||
| Outline Color | 0.25, 0.25, 0.28, alpha 1 | ||
| The six Blocks | Shape, with its Collider | Anchor | 0.5, 0, by the ring |
| Size | by the corners, with Snap on | ||
| Sort Layer | Ground | ||
sun | Shape | Kind | Circle |
| Color | 1, 0.93, 0.7, alpha 1 | ||
| Outline, Outline Color | 3; 1, 0.98, 0.9, alpha 1 | ||
| Sort Layer | Far |