Tutorials · Worlds and Levels · Chapter 8
The meadow
By the end
- A MultiMesh,
meadow, in place ofmeadow-block: its Polygon drawn into one blade of grass,3wide and12tall, on Props - Its Placements painted with the Scatter brush in one stroke along the east crest’s turf: blades no nearer than
3, turned up to12°either way,0.75to1.25of their size, tinted between two greens - The whole meadow drawn in one draw
On this page
When to reach for a MultiMesh
The east crest is still crossed by a grey strip, meadow-block. This chapter replaces it with grass.
Reach for a MultiMesh for many copies of one shape: grass, pebbles, rubble, stars. It draws the Polygon or Mesh on its own node once at each of its Placements, each copy placed, turned, sized and tinted its own way, all in a single draw, and adds no node for a copy: a hundred blades are one row in the Hierarchy.
What collides, what draws, what sorts: a MultiMesh draws its shape at every placement and collides with nothing, so he walks through the grass. It sorts on the shape’s Sort Layer: the blade’s Props, in front of the hills and behind him on Figures. With no Polygon or Mesh beside it, there is nothing to draw, and Problems says so: “This MultiMesh has no Polygon or Mesh on its node, so there is no shape to draw at its placements — add a Polygon here, or a Mesh”. The preset comes with its Polygon, so the row never shows here.
The preset
- With
scenes/vale.ronopen, selectmeadow-block, press Delete, and press Delete in the box that asks. - Select
vale, press + Add node and choose MultiMesh: the menu lists it after Polygon.
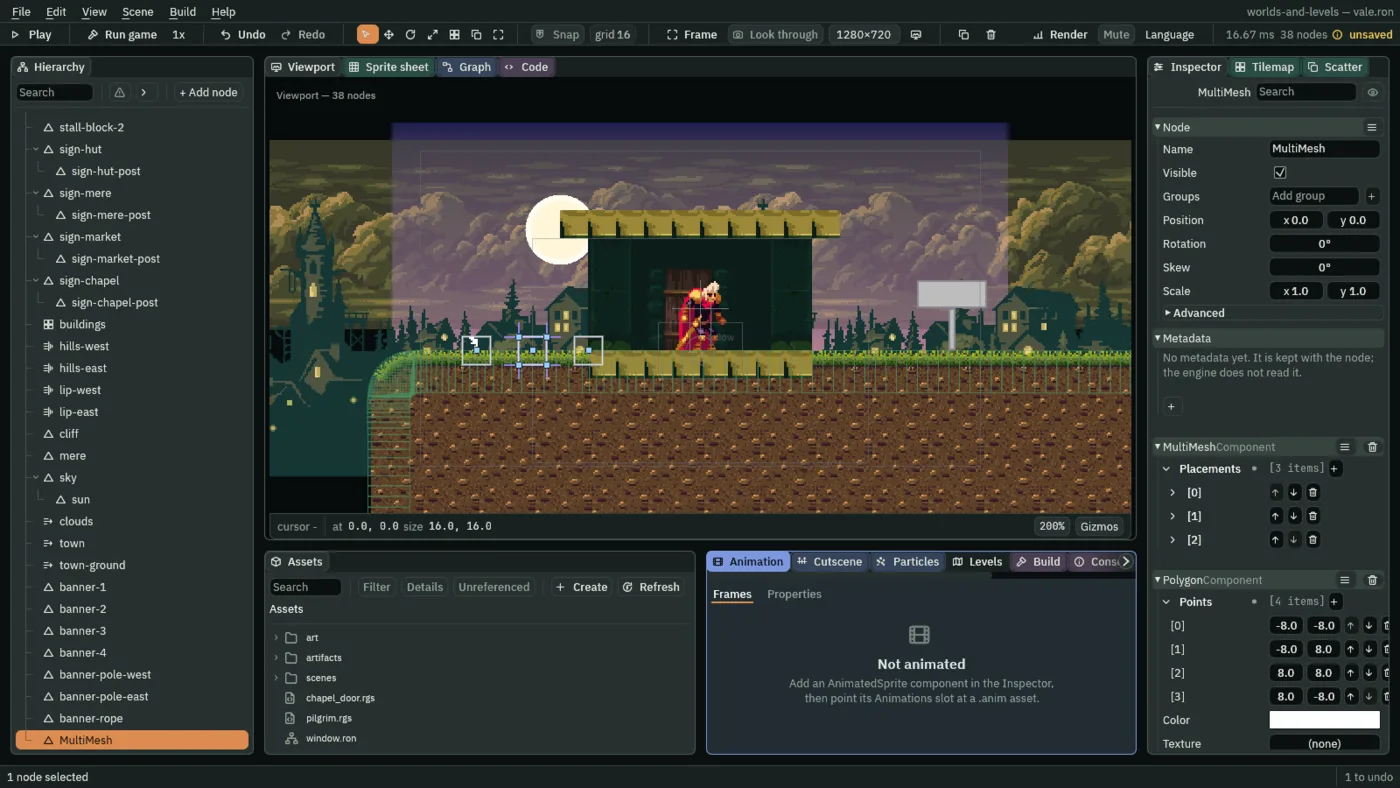
16-unit square, drawn at three Placements.The preset is a Polygon, a white square 16 across, beside a MultiMesh of three Placements along the node’s line: three copies of the square, so the node is never a MultiMesh without its shape. A node Add node puts here stands at 0, 0.
- Rename the node
meadowand type its Position1640,0, where the grey meadow stood. Press Frame, and pick400%from the zoom menu at the Viewport’s foot.
One blade
The shape is the blade: three points, 3 wide at its foot and 12 tall, its foot on the node’s origin, so each copy stands on its Placement’s Position and turns about its foot.
- With Snap off, hover the square’s top-right point and press Delete: three are left.
- Drag the three, in the order the list holds them, onto the table’s
[0],[1]and[2], and type each in the Inspector so it is exact. - Set the Polygon’s Sort Layer to Props. Leave its Color white, Texture none, Fit Stretch, Tile Scale
1and Opaque unticked.
| Points | x | y |
|---|---|---|
| [0] | -1.5 | 0 |
| [1] | 1.5 | 0 |
| [2] | 0 | -12 |
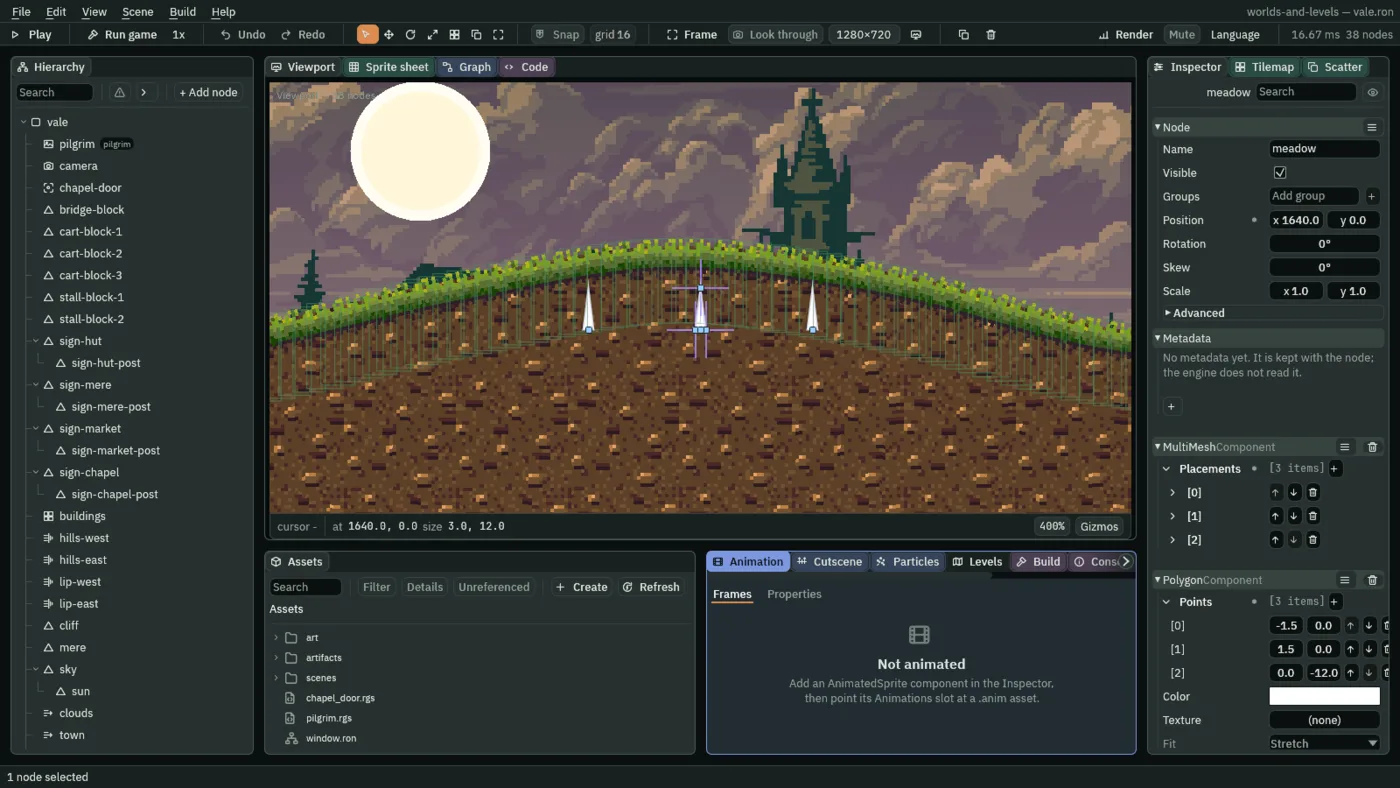
The preset’s three copies stand on the node’s line, y 0, inside the crest under its turf. The brush will put each blade on the turf instead, so these three go.
- In the MultiMesh, press the bin beside Placements’
[0]three times. The list is empty, and the meadow draws nothing.
- Placements
- Where the shape is drawn: one copy at each placement, each opened by its arrow. + adds one at the node’s origin and the bin takes one off. Empty draws nothing, on purpose.
- The placement’s Position, Rotation, Scale and Color
- Position is the copy’s place in the node, where the shape’s origin goes. Rotation turns it about that point, in degrees,
0°upright, as the Inspector shows every rotation. Scale sizes it, across and down. Color is a tint multiplied with the shape’s own colour: on a white blade, the blade’s colour.
Painting the grass
The Placements are painted with the Scatter brush: a stroke in the Viewport adds a placement under the pointer each frame, each turned, sized and tinted by the Scatter panel’s settings.
- With
meadowselected, click the Scatter tab beside the Inspector, and choose the Scatter tool on the toolbar, or press U: a stroke in the Viewport now paints.
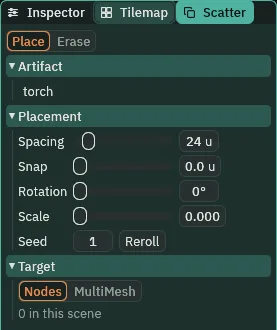
- Under Target, click MultiMesh: the Artifact list goes, the panel says
meadow: 0 placements, and Tint appears. Leave the Tool on Place. - Set Spacing to
3and leave Snap at0. Set Rotation to12°and Scale to0.25. Leave Seed at1. - Click each Tint swatch and, with the picker reading F, set the first and the second from the table below.
| Tint | Typed | On the screen |
|---|---|---|
| The first | 0.1706, 0.4480, 0.0732, alpha 1 | 0.45, 0.70, 0.30 |
| The second | 0.5705, 0.7106, 0.1473, alpha 1 | 0.78, 0.86, 0.42 |
- Pick
100%from the zoom menu at the Viewport’s foot, and find the east crest, between the mere and the ravine: from x1440to1840it is all in view. Press on the top of its turf at x1440, and drag east along the turf’s top to x1840before letting go: the cursor row at the Viewport’s foot says where the pointer is. Press Ctrl+S.
Each frame of the stroke, the brush puts a blade where the pointer is, unless one already stands within 3 of it. Your stroke places its own blades; the checkpoint’s laid 134, turned from -11.9° to 12.0° and scaled from 0.751 to 1.249, every one tinted between the pair, and no two feet nearer than 3.
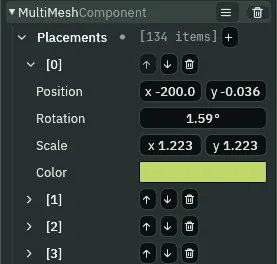
200 west of the node, its Rotation 1.59°.- The Scatter panel’s Tool: Place and Erase
- Place, as it comes, puts copies along a drag. Erase takes off the ones within its Radius of the pointer.
- The Scatter panel’s Target: Nodes and MultiMesh
- Where a stroke’s copies go. Nodes, as it comes, makes one node per copy of the artifact picked in the list above. MultiMesh adds rows to the selected node’s Placements instead, its own shape the copy: no nodes, one draw. It is offered while a node with a MultiMesh is selected, and the panel says the node and its count,
meadow: 134 placements. - Spacing
- How far apart two copies must be: a stroke places none within it of another. At
3, a blade’s3-wide foot just meets the next one’s;0places one at every move of the pointer. - Snap
- Puts each copy on a grid of this size;
0, as it comes, places it where the pointer is. - The Scatter panel’s Rotation
- How far each copy is turned at random, either way, in degrees, as a placement’s Rotation reads: at
12°, each blade leans up to12°left or right. - The Scatter panel’s Scale
- How far each copy is sized at random, either way, as a fraction of one: at
0.25, each blade is from0.75to1.25of its size, the same across as down. - Tint
- Two colours; each copy is tinted somewhere between them, by the seed. Typed in linear light, as every colour is. Only for a MultiMesh target, and both white leaves the shape its own colour.
- Seed and Reroll
- Where the random turns, sizes and tints start: the same seed scatters the same way twice. Reroll moves to the next one. The panel’s settings are its own and are not saved with the scene; what is saved is the placements a stroke made.
The cost: one draw
Press Run game and hold D onto the east crest. The grass stands along the turf over the crest, every blade leaning and sized its own way, between the two greens.
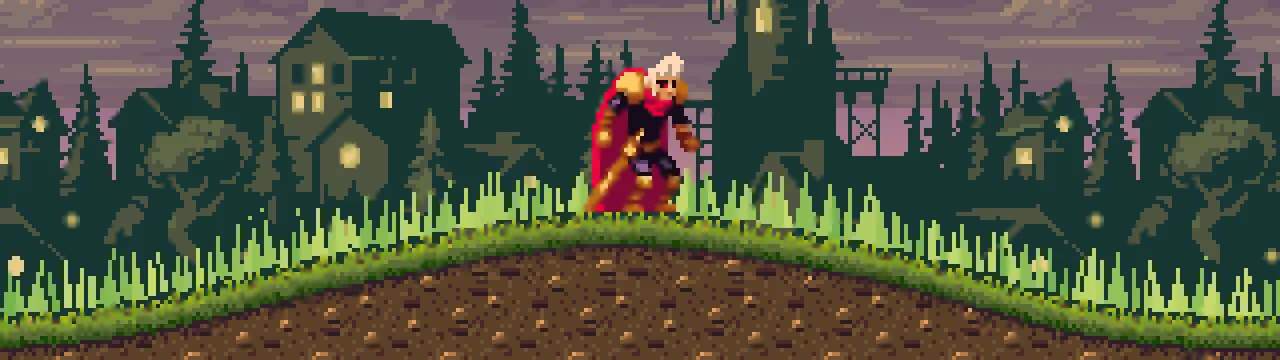
With him on the crest, 107 of the 134 blades on the screen, the whole meadow is one draw, of the blade’s one triangle, 134 times: one draw more than with the meadow hidden, and 134 triangles. And it collides with nothing: from the meadow’s west end, a second of D takes him exactly as far through the grass as with the meadow removed.
Under the grass, the turf runs unbroken over the east crest, which the grey strip hid until now, and into both lips’ joins with their hills.
The meadow
| Field | meadow |
|---|---|
| Node Position | 1640, 0 |
| The Polygon’s Points | -1.5, 0; 1.5, 0; 0, -12 |
| The Polygon’s Color, Sort Layer | white, Props |
| Placements | painted in one stroke over x 1440 to 1840 |
| Scatter | Setting |
|---|---|
| Tool, Target | Place, MultiMesh |
| Spacing, Snap | 3, 0 |
| Rotation | 12°, either way |
| Scale | 0.25, either way |
| Tint | the table above |
| Seed | 1 |
meadow-block is gone.