Tutorials · Cameras and Framing · Chapter 13
A gallery of cameras
By the end
- Eight scenes beside the town and the castle, seven of them in one corridor painted on the castle’s tileset
- A security monitor whose view is Never, snapped twice a second by a script and drawn through scanlines
- A doorway onto a far side that draws only while it is seen, wound round its middle by a shader; and a magnifying glass at his hand, a view and its Sprite on one node
- A title screen of three dusk planes, its clouds drifting for ever on Autoscroll and Repeat Y
- A spyglass held on Down: a second framing that eases out to a far tower and back
- An auto-scroller that a script glides while its rig is off, carrying him at its edge
- Cinema bars made of the camera’s own Background, and a phone’s two cameras, which E swaps
On this page
Eight scenes and a corridor
The Lookout is built. This chapter puts a camera or a view to eight more uses, each a small case in a scene of its own beside the town and the castle: a security monitor, a doorway onto a far side, a magnifying glass, a title screen, a spyglass, an auto-scroller, cinema bars and a phone. To open one, open scenes in Assets and double-click it. Play plays the scene that is open; Run game still starts the town.
Seven of them stand in one corridor, a long room of the castle’s stone with him in it, so the corridor comes first. Its air runs from x 0 to 2000 and y -192 to 0, with two cells of stone all round and three more rows under the floor: the floor’s top is y 0, each end is a wall, and a camera that follows him sees stone to the bottom of its view.
- Choose File › New scene. Press + Add node, choose Node, and rename it
gallery-monitor. Choose File › Save as…, open the project’sscenesfolder, name the filegallery-monitor.ron, and save. - Select
gallery-monitor, press + Add node and choose Tilemap. Rename itroom, and leave its Position at0,0. - With
roomselected, open the Tilemap tab beside the Inspector. Dragart/old-dark-castle-interior-tileset.pngfrom Assets onto New tilemap…. Before you paint, rename the new filegallery.tilemapin Assets. - In the tab’s Tileset fold, set Margin y to
8: tiles16by16and52columns, as the castle’s. In its Layers fold, clickground, the solid layer, so it is the one you paint on.backstays empty.
- Margin
- The Tilemap tab’s Margin, in its Tileset fold: where the grid of tiles starts on the sheet, in pixels from its top-left corner. New tilemap… starts it at the corner,
0,0. The castle’s tiles are8lower: with Margin y8, every row of the stone pillar the corridor is made of is a whole tile you can pick.
The stone is the castle’s own, the pillar at x 320, y 152 of the sheet, two tiles across: its moss cap, the stone under a cap, and its body, two rows that alternate. Every cell of the corridor takes the pillar’s left tile in an even column and its right tile in an odd one. A cell in column c and row r covers x 16c to 16c + 16 and y 16r to 16r + 16, so row 0 is the first row under the floor’s top; the Viewport’s cursor line says where you are.
| The stone | In an even column | In an odd column |
|---|---|---|
| The moss cap | #489 (320, 152) | #490 (336, 152) |
| Under a cap | #541 (320, 168) | #542 (336, 168) |
| The body, on an even row | #593 (320, 184) | #594 (336, 184) |
| The body, on an odd row | #645 (320, 200) | #646 (336, 200) |
| The corridor’s stone | Rows | Columns | Stone |
|---|---|---|---|
| The ceiling | -14 and -13 | -2 to 126 | the body |
| The west wall | -12 to 4 | -2 and -1 | the body |
| The east wall | -12 to 4 | 125 and 126 | the body |
| The floor’s top | 0 | 0 to 124 | the moss cap |
| Under it | 1 | 0 to 124 | under a cap |
| The floor’s body | 2 to 4 | 0 to 124 | the body |
- Under Tools, click Brush. Choosing a tool turns on Paint mode at the top of the tab: a click in the Viewport now paints, and selects nothing.
- To pick a tile, hover the tiles in the picker at the tab’s foot until the tooltip reads its number,
#593for the body’s first, and click it: the Tile line over the picker shows it. If the tiles are too small to hit, raise Zoom beside it. - Paint each piece’s first two columns by hand, one tile a cell, all its rows; the floor’s three pieces share their columns, so paint them as one block five rows deep. Then click Pick and drag over the block, click Stamp, and click the cell two columns along, and every second cell after it, to the piece’s end. Pick lifts any block you drag over, so once four columns are painted you can pick the four and stamp four at a time, then eight. Stop at the piece’s end: a stamp that runs past it paints over what is beyond.
- The floor’s
125columns leave one over at its east end, column124, which takes the left-hand tiles: paint its five rows on their own. The ceiling’s129columns leave one over too, column126, which takes the left-hand tiles: paint it on its own. The east wall starts in an odd column, so its first column,125, takes the right-hand tiles and its second the left. - The walls run down: paint their top two rows by hand, and stamp that block down every second row; the row left over at the foot you paint on its own.
- Press the tab’s Save, which writes the tilemap. In the Inspector, set
room’s Sort Layer to Ground, and leave Tile Size at16,16and Collision ticked.
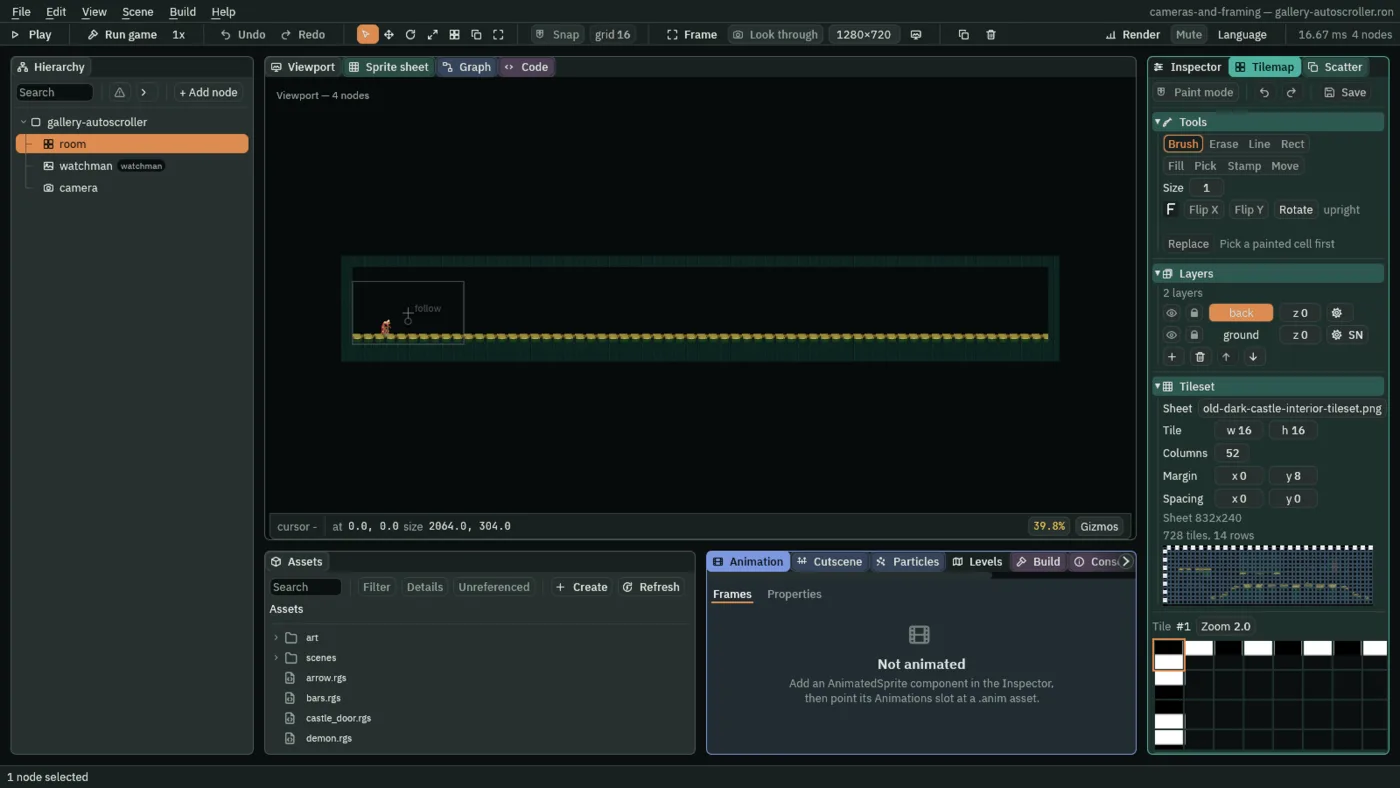
2064 by 304 with its stone, and its tilemap in the Tilemap tab.Then him, and a camera.
- Press Ctrl+S. Open
scenes/town.ron, right-clickwatchmanin the Hierarchy and choose Copy. Openscenes/gallery-monitor.ron, right-clickgallery-monitorand choose Paste as child. The map’s eye comes with him: selectmap-eye, under him, and press Delete. Set his Position to96,0. - Select
gallery-monitor, press + Add node and choose Camera. Rename itcamera. Set Scaling to Letterbox, Extent to180, Width to320and Background to0.012,0.020,0.040, alpha1, the town camera’s; leave Pixel Snap ticked. - Press Ctrl+S.
- The other six corridor scenes start as this one does. Choose File › Save as…, name the file
gallery-portal.ron, rename the rootgallery-portal, and press Ctrl+S. Do the same forgallery-magnifier,gallery-spyglass,gallery-autoscroller,gallery-cinemaandgallery-phone.
Each case below opens its own scene and adds to it. Where a case gives no other value, its camera keeps these.
A security monitor
A monitor in the corridor shows a vault far down it, through a view whose Update is Never: it draws only when a script says so. Its picture is drawn through a shader of scanlines, as an old screen’s is.
- In Assets, click Assets in the path bar, press Create, choose New shader, type
scanlinesand press Enter. Double-click it, replace everything in it with the first text below in the Code tab, and press Ctrl+S. Makesnap.rgsthe same way with New script, from the second. - Open
scenes/gallery-monitor.ron. Selectcameraand set its Position to200,-60. - Select
gallery-monitor, press + Add node and choose Viewport. Rename itvault-eyeand set its Position to1400,-60: the vault. - In its Viewport, choose New render target for Texture. Set Size to
64,48, Zoom to0.5and Update to Never, and tick Drawn. Set Clear Colour to0.10,0.12,0.14, alpha1: a grey. Leave Subtree unticked and Layers empty, the whole scene. - Press Add component and choose Snap. Leave its Every at
0.5. - Select
gallery-monitor, press + Add node and choose Shader Material. Rename itmonitorand set its Position to320,-64. In its Sprite, click Texture and choosevault-eye, and set Size to64,48and Sort Layer to Fixtures. In its Shader Material, choosescanlines.wgslfor Shader, and leave lines unset. - Select
gallery-monitor, press + Add node and choose Animated Sprite. Rename itvault-demon, at1400,0, on the floor. In its Sprite, dragart/demon-idle.pngonto Texture, and set Size to160,144, Anchor to0.5,1and Sort Layer to Props. In its Animated Sprite, dragart/demon-idle.animonto Animations, set Clip toidleand tick Frame Size. - Press Ctrl+S.
// How many dark lines cut across the picture, from its top to its bottom. Each
// line is one row of the picture, the one under a row that is left as it is.
//! param lines: float = 24.0

// The security monitor's screen. It draws the monitor's picture, the vault's
// view, a row at a time: the first row of every pair as it is, and the second
// darkened, so the picture is cut by dark lines the way an old screen's is.
fn shade(frag: Fragment) -> vec4<f32> {
    // How far down the picture this pixel is, from 0 at its top to 1 at its
    // bottom.
    let down = region_uv(frag).y;
    // Where it is in its pair of rows, from 0 at the pair's top to 1 at its
    // bottom: past the half, it is in the second row, the dark one.
    let in_the_pair = fract(down * lines());
    let dim = select(1.0, 0.55, in_the_pair >= 0.5);
    // The picture's own colour at this pixel, times the sprite's Color; the
    // darkening takes the colour down and leaves the alpha alone.
    let picture = texel(frag.uv) * frag.color;
    return vec4<f32>(picture.rgb * dim, picture.a);
}
/// The security monitor's camera. Its view is Update Never and saved with Drawn
/// ticked, so it shows nothing but its Clear Colour until something unticks
/// Drawn: this does, every `every` seconds. The view is then not yet drawn, so
/// it draws the vault once more, as it is now, and keeps that picture until
/// the next snap.
component Snap {
    /// Seconds between one snap and the next.
    #[suffix("s")]
    every: f32 = 0.5,

    fn loop() {
        // Wait out the time between snaps, then untick Drawn on this view.
        await wait(every);
        set_flag("ViewportComponent", "drawn", false);
    }
}
//! param lines: float = 24.0- How many pairs of rows the picture is cut into, top to bottom:
24, the file’s own, while the monitor’s Values hold none. The shader reads it aslines(). region_uv(frag)- Where this pixel is in the sprite itself, from
0,0at its top-left corner to1,1at its bottom-right.frag.uvis where it is in the whole texture. await wait(seconds)- Holds the hook where it is for that many seconds; it goes on from the next line once they have passed.
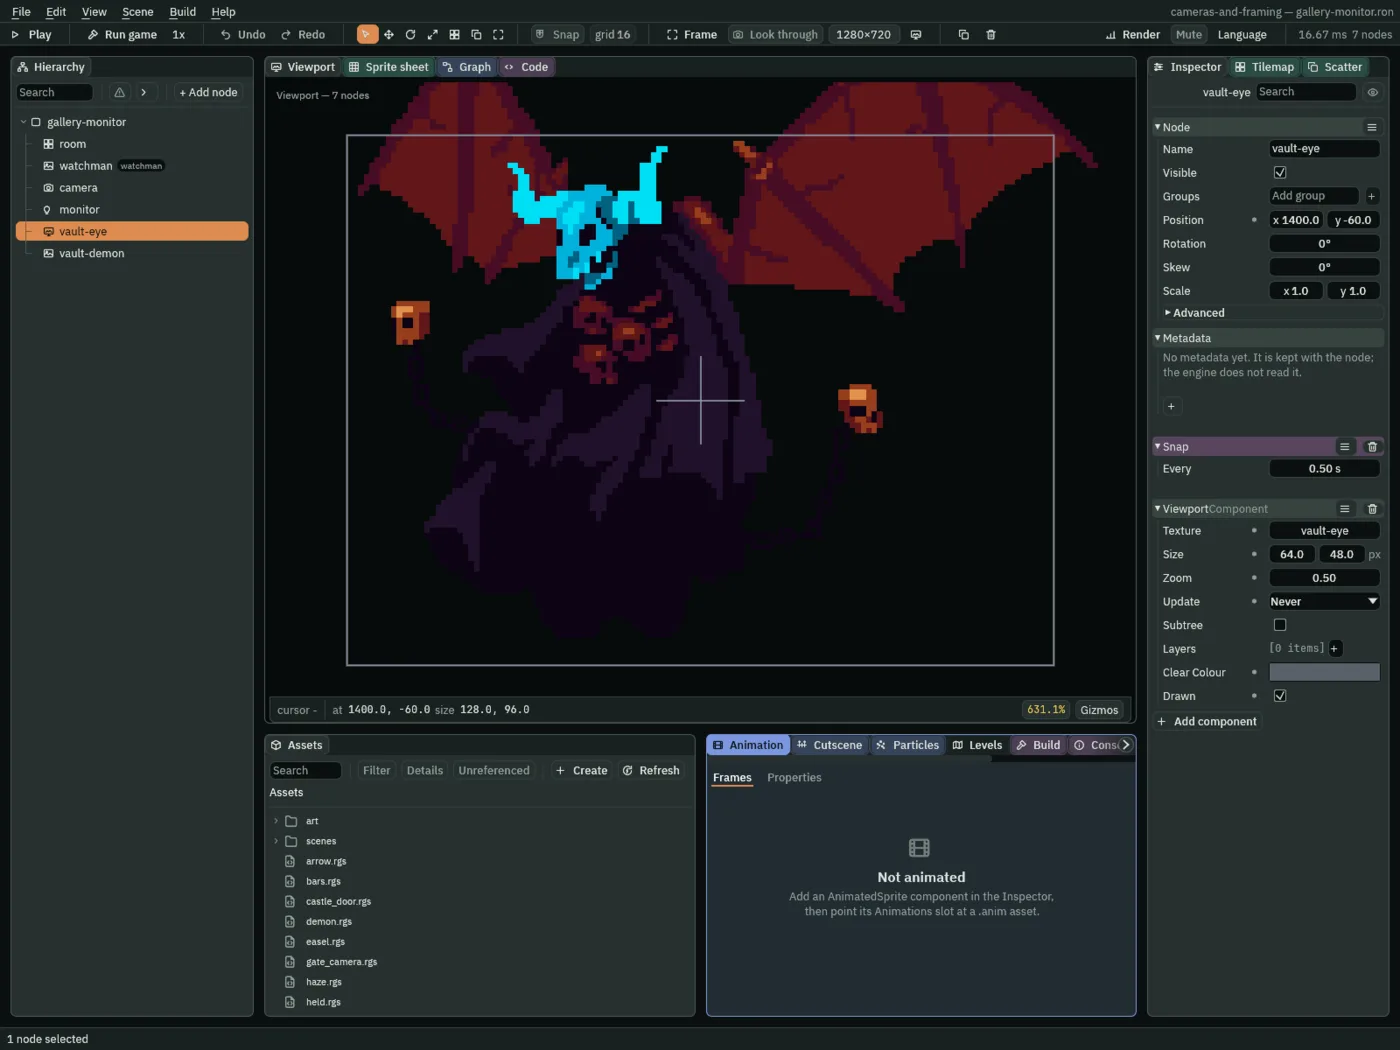
vault-eye sees: 128 by 96.The camera stands still at 200, -60, with no rig: it sees x 40 to 360, and the monitor, x 288 to 352, is whole in the picture. The vault is far down the corridor: vault-eye sees 128 by 96 round it, x 1336 to 1464, the demon standing there, and draws that into its 64 by 48 texture, which the monitor shows. The scanlines draw the texture a row at a time: the first row of each pair as it is, the second at 0.55 of its colour.
A Never view draws only when its Drawn is unticked, and then ticks it again. This one is saved with Drawn ticked before it has ever drawn, so it shows its Clear Colour: until the first snap, the monitor reads no signal.
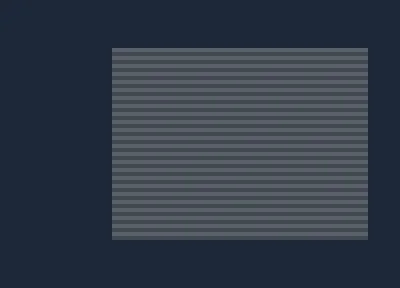
Every 0.5 seconds Snap unticks Drawn, so the view draws the vault once more, as it is then, and keeps that picture until the next snap. It snaps every 31 steps, not 30: the wait is 30, and the loop takes a step to come round. In between, the demon goes on through its clip down in the vault, and the monitor holds still.
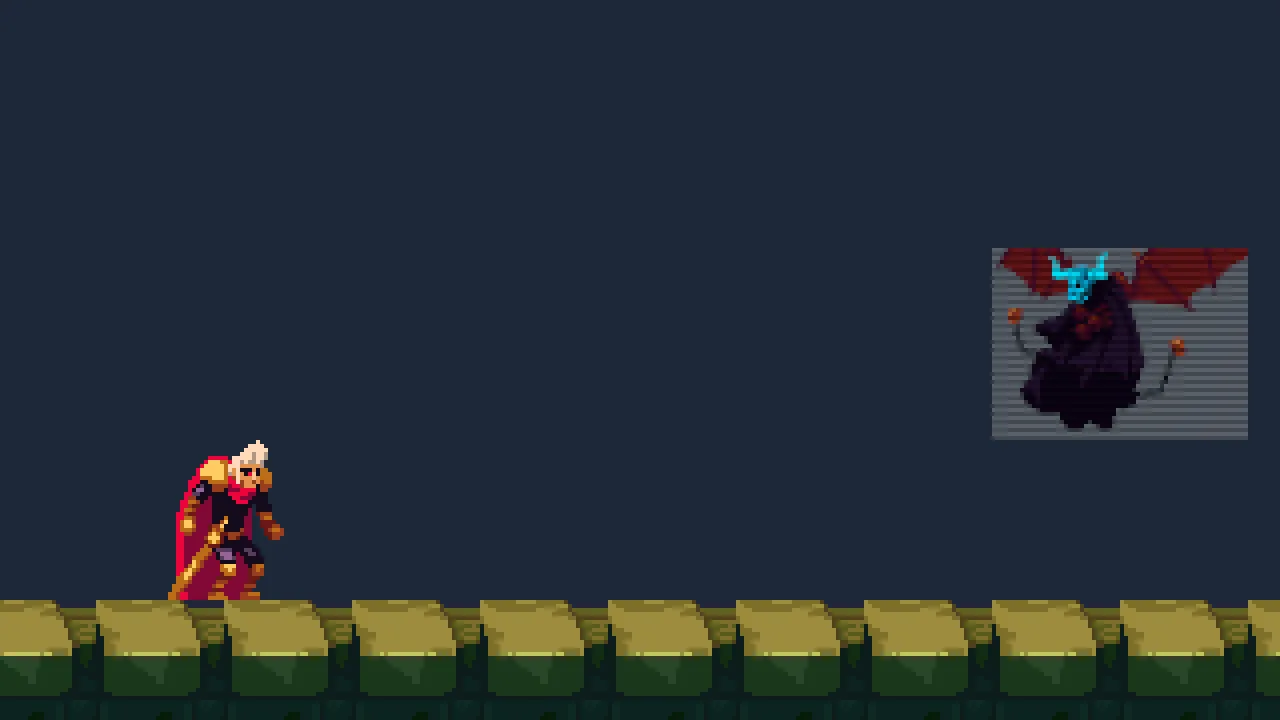

The vault is a pass of its own twice a second, not in every frame: between snaps the view does not draw, and its texture keeps the last picture.
Node, under gallery-monitor | Component | Field | Value |
|---|---|---|---|
| project | shader, script | scanlines.wgsl, snap.rgs beside project.rengy | |
camera | Node | Position | 200, -60 |
vault-eye | Node | Position | 1400, -60 |
| Viewport | Texture, Size, Zoom | New render target; 64, 48; 0.5 | |
| Update, Drawn | Never; ticked | ||
| Subtree, Layers | unticked; none | ||
| Clear Colour | 0.10, 0.12, 0.14, 1 | ||
| Snap | Every | 0.5 | |
monitor | Node | Position | 320, -64 |
| Sprite | Texture, Size, Sort Layer | vault-eye; 64, 48; Fixtures | |
| Shader Material | Shader, Values | scanlines.wgsl; none | |
vault-demon | Node | Position | 1400, 0 |
| Sprite | Texture, Size, Anchor, Sort Layer | art/demon-idle.png; 160, 144; 0.5, 1; Props | |
| Animated Sprite | Animations, Clip, Frame Size | art/demon-idle.anim, idle, ticked |
A doorway onto a far side
A doorway standing on the corridor’s floor shows a far side, a stretch of the town far down the corridor, wound round its middle. Its view draws only while the doorway is on the screen.
- Make
swirl.wgslas you madescanlines.wgsl, with the shader below. It starts with chapter 12’s ripple. - Open
scenes/gallery-portal.ron. Selectcameraand set its Position to96,-24, his framed point. Press Add component and choose CameraRigComponent. Next to Framings, press +, open the framing, set its Name tofollow, choosewatchmanfor Subject, and set Offset to0,24. Leave the rest as it comes. - Select
gallery-portal, add a Viewport and rename itfar-eye, at1700,-80. In its Viewport, choose New render target for Texture, and set Size to32,64, Zoom to0.5and Update to WhenVisible. Leave Clear Colour as it comes, clear, Subtree unticked and Layers empty. - Select
gallery-portal, add a Sprite,far-houses, at1700,-16. Dragart/night-town-background-town.pngonto Texture, and set Size to512,99, Anchor to0.5,1and Sort Layer to Town. - Add another Sprite,
far-sky, at1700,-80: Textureart/night-town-background-sky.png, Size96,224, Sort Layer Sky, and Anchor left at0.5,0.5. - Select
gallery-portal, press + Add node and choose Shader Material. Rename itdoorwayand set its Position to480,-32: standing on the floor, x464to496. In its Sprite, click Texture and choosefar-eye, and set Size to32,64and Sort Layer to Fixtures. In its Shader Material, chooseswirl.wgsl, and leave turns unset. - Press Ctrl+S.
// The ripple, from ripple.wgsl, which the cistern's water and the beacon's hot
// air use too.
//! include ripple
// How many turns the picture is wound by, from its edge to its middle.
//! param turns: float = 1.5

// The doorway onto the far side. It draws the doorway's picture, the far
// side's view, wound round its middle: the nearer a pixel is to the middle,
// the further round the place it reads from is turned, and the winding turns
// on by itself as the time goes on. The ripple moves where it reads from a
// little more, so the doorway never settles.
fn shade(frag: Fragment) -> vec4<f32> {
    // Where this pixel is in the doorway, from -1 to 1 each way, from its
    // middle.
    let from_middle = region_uv(frag) * 2.0 - vec2<f32>(1.0, 1.0);
    // How near the middle it is: 1 at the middle, 0 from the edges' middles
    // out.
    let near_middle = clamp(1.0 - length(from_middle), 0.0, 1.0);
    // How far round to turn it, in radians: more the nearer the middle, and a
    // little more every second.
    let angle = near_middle * turns() * 6.2831853 + time();
    let turned = vec2<f32>(
        from_middle.x * cos(angle) - from_middle.y * sin(angle),
        from_middle.x * sin(angle) + from_middle.y * cos(angle),
    );
    // Back to a place in the picture, moved by the ripple: up to one pixel of
    // the picture itself.
    let here = frag.screen_uv * resolution();
    let place = frag.region.xy
        + (turned * 0.5 + vec2<f32>(0.5, 0.5)) * (frag.region.zw - frag.region.xy)
        + ripple(here, time()) * sheet_texel();
    return texel(region_clamp(frag, place)) * frag.color;
}
//! param turns: float = 1.5- How many whole turns the picture is wound at its middle. The shader reads it as
turns(). frag.region- The sprite’s own rectangle in its texture, from the corner
xyto the cornerzw, each from0to1. A place worked out fromregion_uvgoes back into the texture through it. region_clamp(frag, place)- Holds a place inside the sprite’s own rectangle, half a pixel clear of its edge, so a place turned past the edge reads the edge and nothing beyond it.
sheet_texel()- One pixel of the sprite’s own texture, as a share of it: the ripple, from
-1to1, moves where the swirl reads by up to one pixel of the far side’s picture. Chapter 12’stexel_size()is a pixel of the screen.
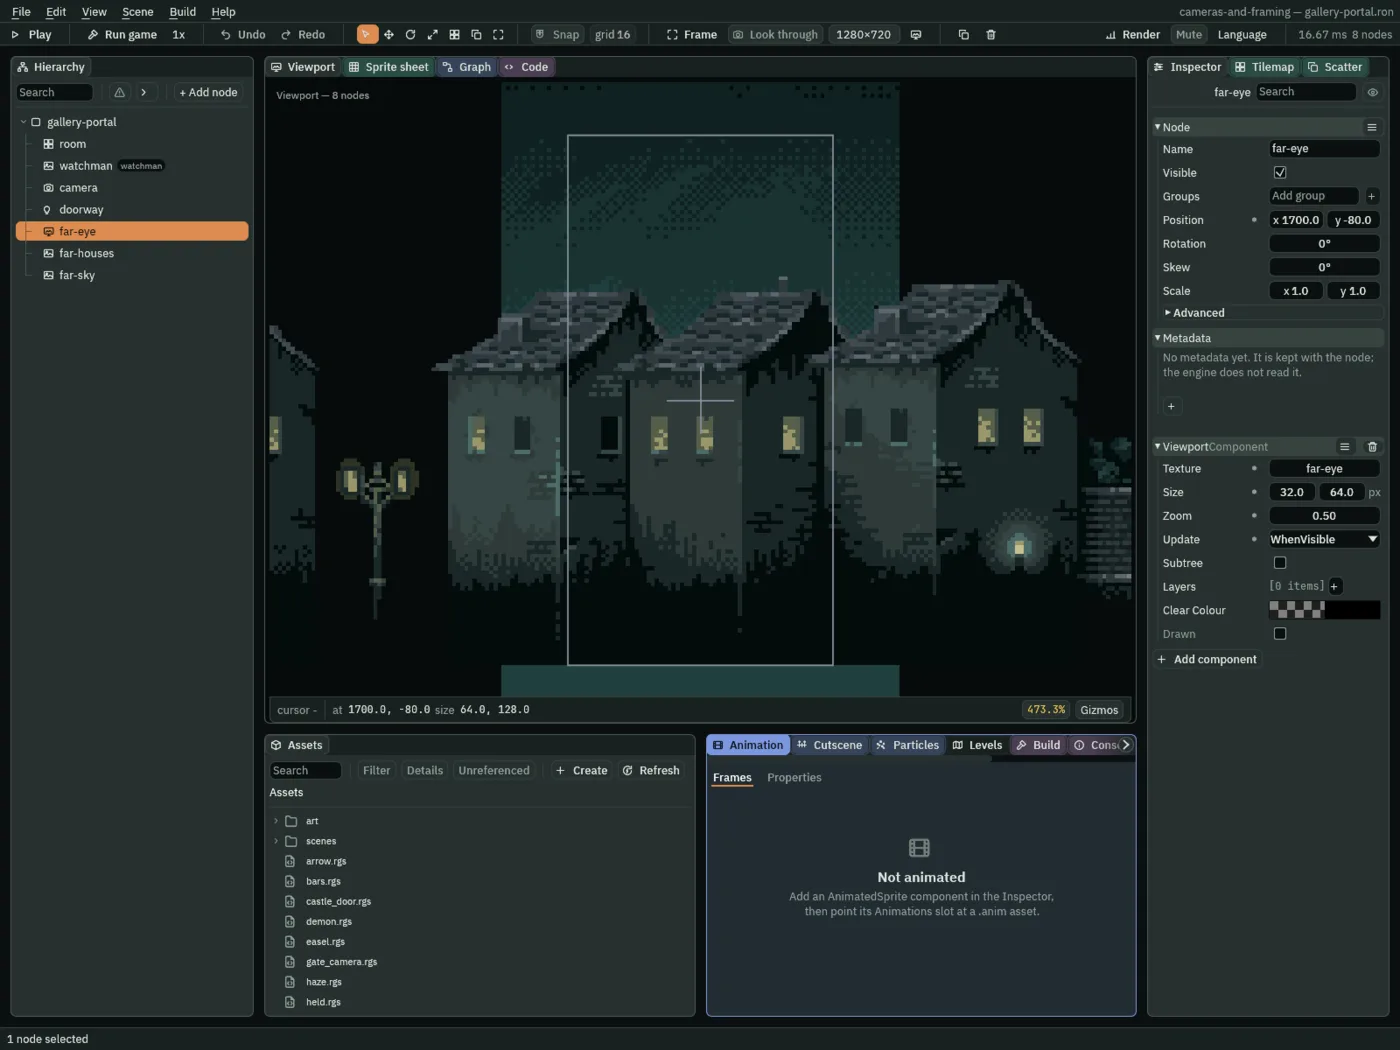
far-eye sees: 64 by 128.far-eye sees 64 by 128 round its place, x 1668 to 1732 and y -144 to -16: the town’s houses and the sky over them, standing far down the corridor. The camera follows him, so walk east to the doorway.
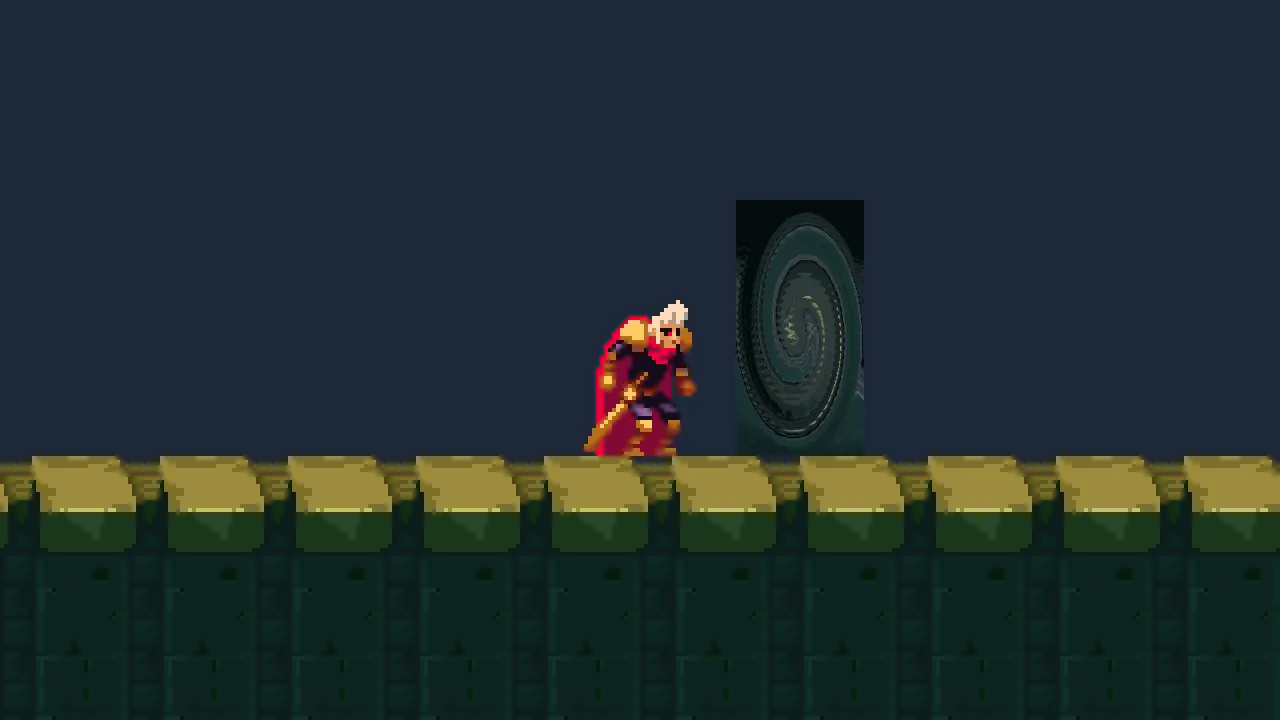

The swirl winds the picture round its middle: turns, 1.5 whole turns, at the middle, fewer further out, and none from the middles of its edges outward. On top of that the whole picture turns on by a radian every second, and the ripple moves where it reads from by up to a pixel. The far side itself stands still: it is the shader that turns.
At his start the doorway is far off the screen, and its view does not draw: no pass, and no texture made for it. Beside it, the view draws, one pass a frame, into a texture of 16,384 bytes, 32 by 64 pixels at 8 bytes each. Walk 400 units on and it stops drawing; the texture is kept.
Node, under gallery-portal | Component | Field | Value |
|---|---|---|---|
| project | shader | swirl.wgsl beside project.rengy | |
camera | Node | Position | 96, -24 |
| Camera Rig | Framings | follow: Subject watchman, Offset 0, 24 | |
far-eye | Node | Position | 1700, -80 |
| Viewport | Texture, Size, Zoom | New render target; 32, 64; 0.5 | |
| Update, Clear Colour | WhenVisible; as it comes, clear | ||
far-houses | Node | Position | 1700, -16 |
| Sprite | Texture, Size, Anchor, Sort Layer | art/night-town-background-town.png; 512, 99; 0.5, 1; Town | |
far-sky | Node | Position | 1700, -80 |
| Sprite | Texture, Size, Sort Layer | art/night-town-background-sky.png; 96, 224; Sky | |
doorway | Node | Position | 480, -32 |
| Sprite | Texture, Size, Sort Layer | far-eye; 32, 64; Fixtures | |
| Shader Material | Shader, Values | swirl.wgsl; none |
A magnifying glass
A magnifying glass he holds up at his hand: a view that sees a little round itself, and shows it twice as big, in the same place.
- Open
scenes/gallery-magnifier.ron. Givecamerathe doorway’s rig: Position96,-24, and a CameraRigComponent with one framing,follow, Subjectwatchman, Offset0,24. - Select
gallery-magnifier, add a Sprite and rename itlever, at132,-24. Dragart/lever.pngonto Texture, and set Size to20,24, Anchor to0.5,1and Sort Layer to Props: the starter’s lever, at the height of his hand, just east of where he starts. - Select
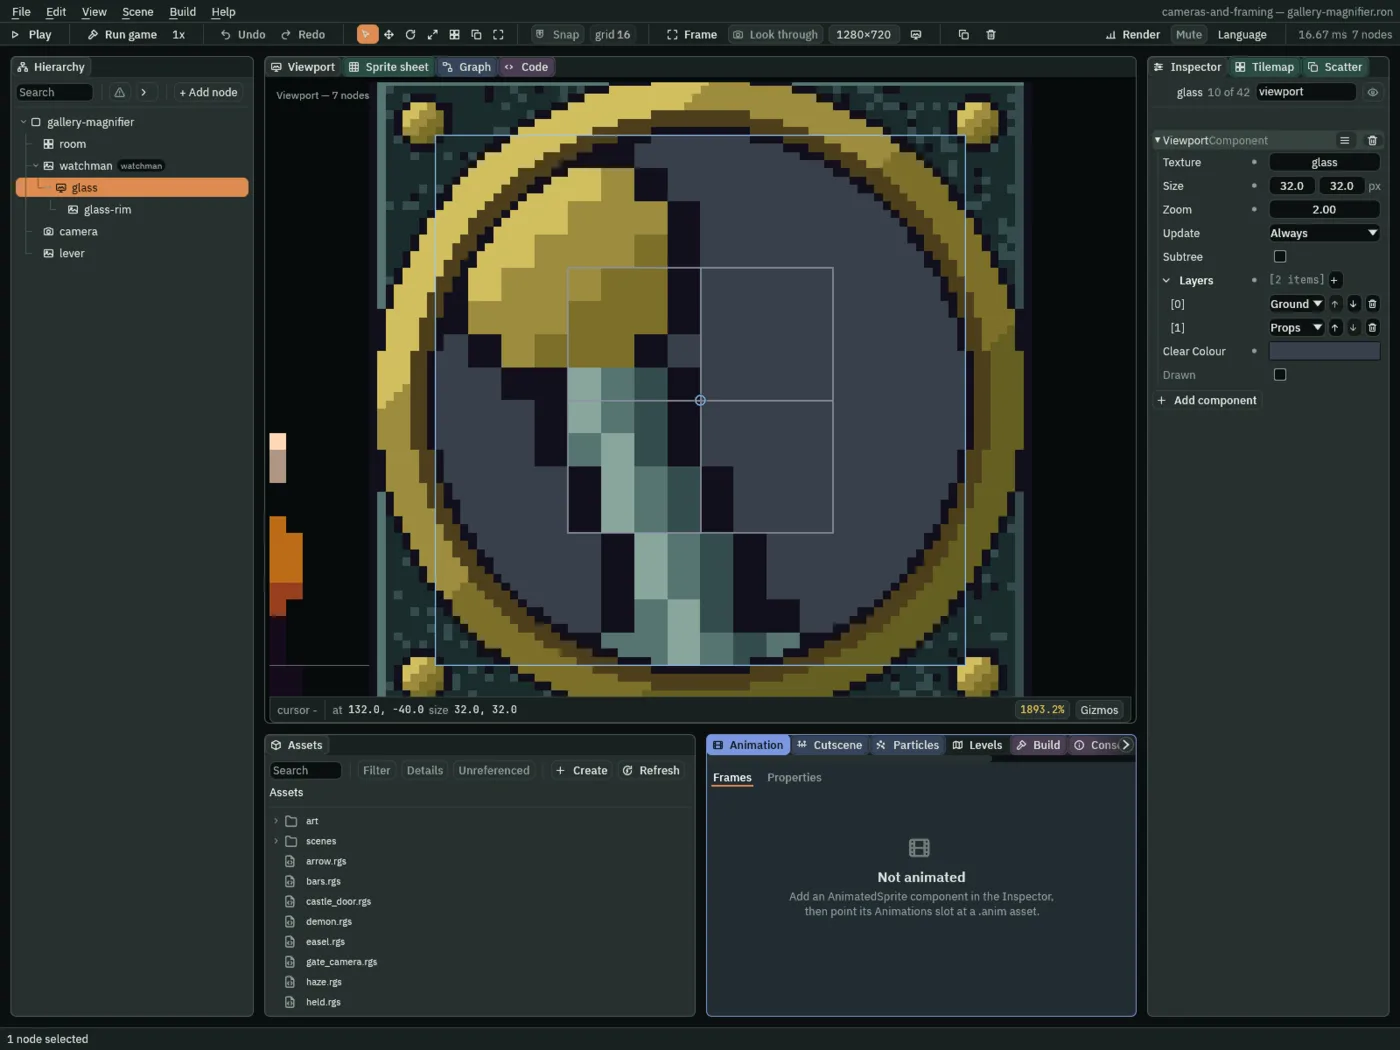
watchman, press + Add node and choose Viewport: it lands under him. Rename itglassand set its Position to36,-40: at his hand. - In its Viewport, choose New render target for Texture. Set Size to
32,32and Zoom to2, and leave Update at Always and Subtree unticked. Add two Layers, Ground and Props. Set Clear Colour to0.04,0.05,0.07, alpha1, the map’s. - Press Add component and choose SpriteComponent. Click Texture and choose
glass, and set Size to32,32and Sort Layer to Glass. - Select
glass, add a Sprite and rename itglass-rim, at0,0. Dragart/lens-bezel.pngonto Texture, and set Size to40,40and Sort Layer to Marks. - Press Ctrl+S.
16 by 16.- The Viewport’s Zoom above
1 - Closer than the picture: at
2a pixel of the texture is half a unit, so the glass’s32pixels see16units, and its Sprite,32units across, shows them twice as big. Every view before this one was at1or under.
One node holds both the view and the Sprite that shows it, so what the glass sees and where it shows it are the same place, and both go where he carries them. It sees 16 by 16 units round itself, at his hand, 36 along and 40 up from his feet. Its Layers leave out Glass and Marks, where it and its rim draw, so it is not in its own picture: a view whose picture held its own texture would be a loop, and the game warns of it every frame. What it shows at his start is the lever’s knob and stick, twice as close as the picture draws them.

The glass does not flip with him. It is a child of his node, 36 along it, and turning him flips his Sprite and not his node, so it stays east of him whichever way he faces. It is Always: a pass of its own in every frame, a small one, 32 pixels square.
Node, under gallery-magnifier unless it says | Component | Field | Value |
|---|---|---|---|
camera | Node | Position | 96, -24 |
| Camera Rig | Framings | follow: Subject watchman, Offset 0, 24 | |
lever | Node | Position | 132, -24 |
| Sprite | Texture, Size, Anchor, Sort Layer | art/lever.png; 20, 24; 0.5, 1; Props | |
glass, under watchman | Node | Position | 36, -40 |
| Viewport | Texture, Size, Zoom | New render target; 32, 32; 2 | |
| Update, Layers | Always; Ground, Props | ||
| Clear Colour | 0.04, 0.05, 0.07, 1 | ||
| Sprite | Texture, Size, Sort Layer | glass; 32, 32; Glass | |
glass-rim, under glass | Node | Position | 0, 0 |
| Sprite | Texture, Size, Sort Layer | art/lens-bezel.png; 40, 40; Marks |
A title screen
A title screen: a camera that does not move, a dusk sky of three planes, and a Label in front. It has no corridor and no watchman.
- Choose File › New scene. Add a Node, rename it
gallery-title, and choose File › Save as…:scenes/gallery-title.ron. - Select
gallery-title, add a Camera and rename itcamera, at0,-90. Set Scaling to Letterbox, Extent to180and Width to320, and Background to0.4,0.1,0.04, alpha1: a dusk’s orange. It sees x-160to160and y-180to0. - Make three planes under
gallery-title, each with + Add node → Parallax, as chapter 6’s were, from the table below. Every picture is inart, namednight-town-background-and the layer. Each plane is at0,0, its Sprite’s Anchor at0.5,0.5, and a field the table does not name stays as it comes.
| Node | Picture | Size | Sort Layer | Factor | Other fields |
|---|---|---|---|---|---|
dusk-sky | …-sky.png | 96, 224 | Sky | 1, 1 | Repeat Y ticked; Color 1, 0.62, 0.5, 0.55 |
dusk-clouds | …-clouds.png | 288, 224 | Clouds | 0.95, 1 | Autoscroll -8, 4; Repeat Y ticked; Color 1, 0.78, 0.66, 0.9 |
dusk-mountains | …-mountains.png | 96, 224 | Mountains | 0.9, 1 | Offset 0, 40; Color 0.55, 0.4, 0.5, 1 |
- Select
gallery-title, press + Add node and choose Canvas. Rename ittitle, and leave it as it comes: Reference Size1280,720, ScaleWithHeight. - Select
title, press + Add node and choose Label. Rename ittitle-label. In its Rect, set Anchor Min and Anchor Max both to0.5,0.3, Offset Min to-450,-80and Offset Max to450,80: a box900by160round a point30percent of the way down the screen. Leave Pivot at0.5,0.5. - In its Text, set Text to
The Lookout, Scale to6, Color to1,0.92,0.8, alpha1, and Align to Center. - Press Ctrl+S.
- The Label’s Text, Scale and Align
- What it says; how big,
2as it comes; and where across its box it sits, Center here, Left as it comes. Its Color is the colour its letters are drawn in.
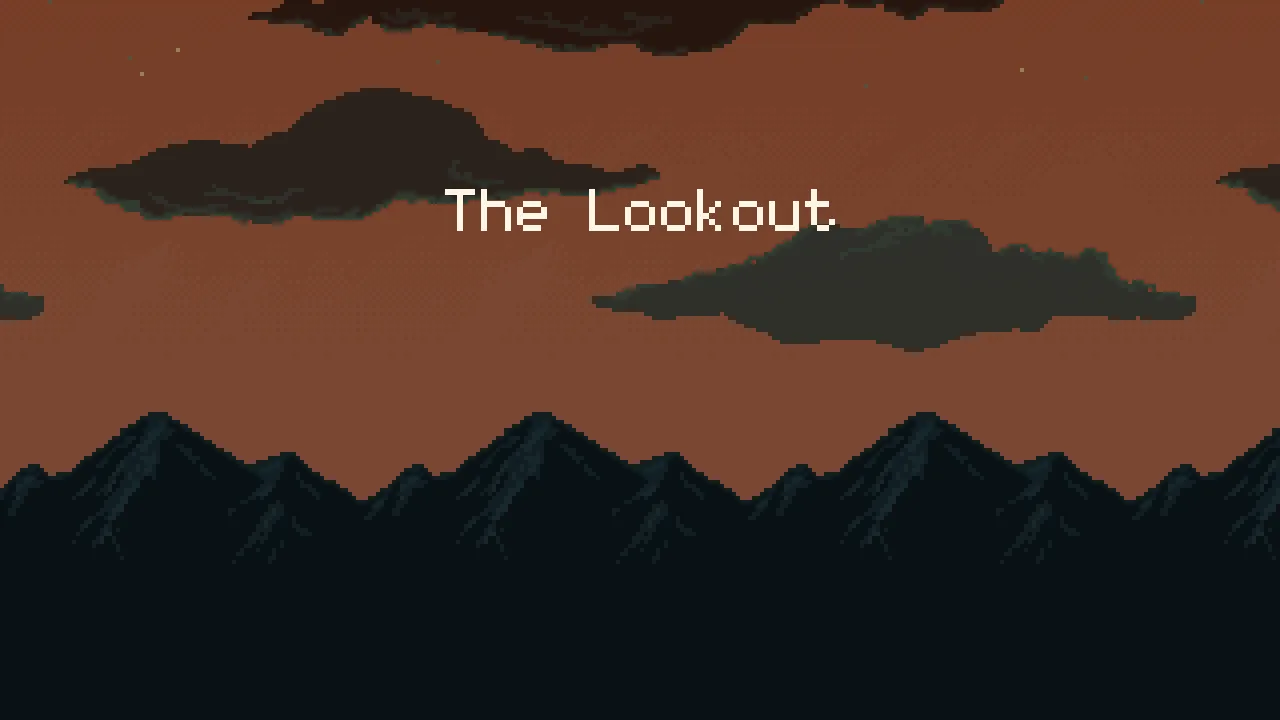
A plane’s Color multiplies its picture, alpha and all, so it tints each plane, and it cannot add a hue the picture lacks: Night Town’s art has almost no red, so a warm Color on the sky makes it a muddy olive, not orange. The orange is what lies behind a see-through sky: the camera’s Background, showing through the sky at an alpha of 0.55, with the clouds and the mountains in front of it as dark shapes.

8 units a second across and 4 down, behind the title.With Repeat Y ticked the clouds never run out: after 20 seconds they have gone -160, 80, and the copies of the picture, repeated along and up, still cover the whole view. With Repeat Y unticked there is one row of them, and the drift carries it down out of the sky. A minute in, as made and on a copy with Repeat Y unticked:
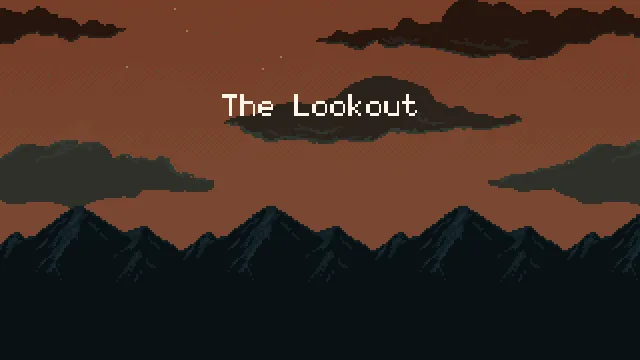
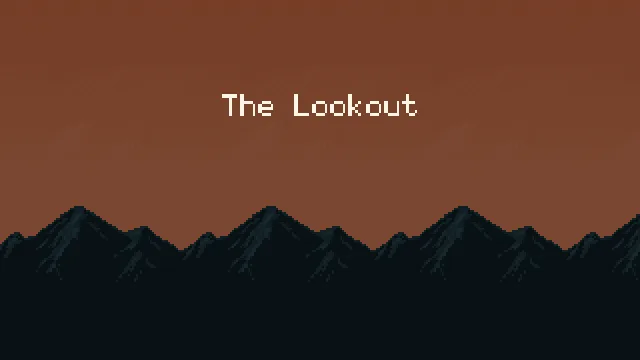
Node, under gallery-title unless it says | Component | Field | Value |
|---|---|---|---|
camera | Node | Position | 0, -90 |
| Camera | Scaling, Extent, Width | Letterbox; 180; 320 | |
| Background | 0.4, 0.1, 0.04, 1 | ||
dusk-sky | Sprite | Texture, Size, Sort Layer | art/night-town-background-sky.png; 96, 224; Sky |
| Parallax | Factor, Repeat Y, Color | 1, 1; ticked; 1, 0.62, 0.5, 0.55 | |
dusk-clouds | Sprite | Texture, Size, Sort Layer | art/night-town-background-clouds.png; 288, 224; Clouds |
| Parallax | Factor, Autoscroll | 0.95, 1; -8, 4 | |
| Repeat Y, Color | ticked; 1, 0.78, 0.66, 0.9 | ||
dusk-mountains | Sprite | Texture, Size, Sort Layer | art/night-town-background-mountains.png; 96, 224; Mountains |
| Parallax | Factor, Offset, Color | 0.9, 1; 0, 40; 0.55, 0.4, 0.5, 1 | |
title | Canvas | as it comes | |
title-label, under title | Rect | Anchor Min, Anchor Max | 0.5, 0.3; 0.5, 0.3 |
| Offset Min, Offset Max, Pivot | -450, -80; 450, 80; 0.5, 0.5 | ||
| Text | Text, Scale, Color, Align | The Lookout; 6; 1, 0.92, 0.8, 1; Center |
A spyglass
Hold Down and the camera glides out to a far tower and draws it close; let go and it glides back to him. A second framing, on the tower, that a script switches on while the key is held.
- Open
scenes/gallery-spyglass.ron. Selectgallery-spyglass, add a Node and rename itfar-tower, at1500,-80: the middle of its beacon, about1400units east of him. - Select
far-tower, add a Sprite,far-pillar, at0,80: the floor. Dragart/gothic-horror-tiles.pngonto Texture, click Atlas Region, typepillarand press Enter. Set Size to32,48, Anchor to0.5,1and Sort Layer to Fixtures. - Select
far-pillar, add a Sprite,far-beacon, at0,-48: the same picture, Atlas Regionbeacon, Size32,64, Anchor0.5,1, Sort Layer Fixtures. - Select
gallery-spyglass, add a Sprite and rename itsky, at1000,-8. Dragart/night-town-background-sky.pngonto Texture, set Draw Mode to Tiled, Tile Size to96,224, Size to2000,224and Sort Layer to Sky, and leave Anchor at0.5,0.5: x0to2000and y-120to104, the length of the corridor, its top just above the highest the camera looks and its foot behind the floor. - Select
cameraand set its Position to96,-24, his framed point. Press Add component and choose PixelPerfectComponent: Assets PPU1, Reference Width320, Reference Height180, then tick Upscale Render Texture and Crop Frame, as in chapter 3. - Press Add component and choose CameraRigComponent. Add a framing,
look: Subjectwatchman, Offset0,24, the rest as it comes. - Add a second framing,
spyglass: Subjectfar-tower. Untick its Active, and set Priority to10, Zoom to3and Duration to0.6. Leave Ease at EaseInOut and the rest as it comes. - Make
spyglass.rgswith the script below. Selectcamera, press Add component and choose Spyglass. Press Ctrl+S.
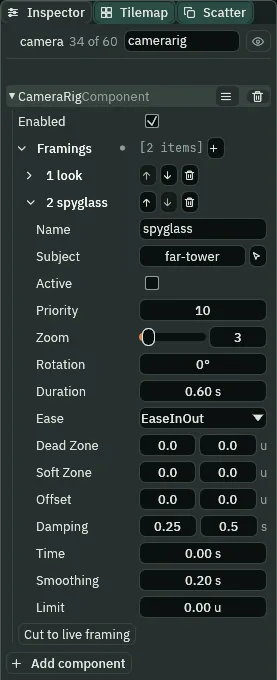
spyglass, off until the script switches it on./// The spyglass. The camera's rig has a framing called `spyglass` that looks at
/// the far tower and is off. While Down is held this switches it on, and the
/// camera glides over and draws the tower close; let go and it switches it off,
/// and the camera glides back to him.
component Spyglass {
fn loop() {
// `down` is the Down arrow or S. Held: the spyglass framing is on. Let go:
// it is off.
set_flag("CameraRigComponent", "framings.spyglass.active", held("down"));
}
}held("down")- True on every step the action
downis held: the Down arrow or S. Not Up: Up is also his jump.
While Down is held the spyglass is on, and with a Priority of 10 it outranks look: the camera blends to the tower over the spyglass’s 0.6 seconds and settles at a zoom of 12, Pixel Perfect’s 4 times the framing’s 3, on a view 106.7 by 60 with the beacon’s 32 across in it. Let go and it glides back to him in look’s 0.5 seconds: a blend takes the Duration of the framing it arrives at. He stands still all the while.

The sky is there for the glide’s sake. In the middle of the glide the view holds neither the floor nor the tower, only the corridor’s air, and with nothing drawn in it the air is the camera’s Background: a flat night blue, which does not show how fast the camera goes. Its clouds do. Its top, y -120, is just above the highest the camera looks, y -114 when it is on him, so none of the air it shows is the Background.
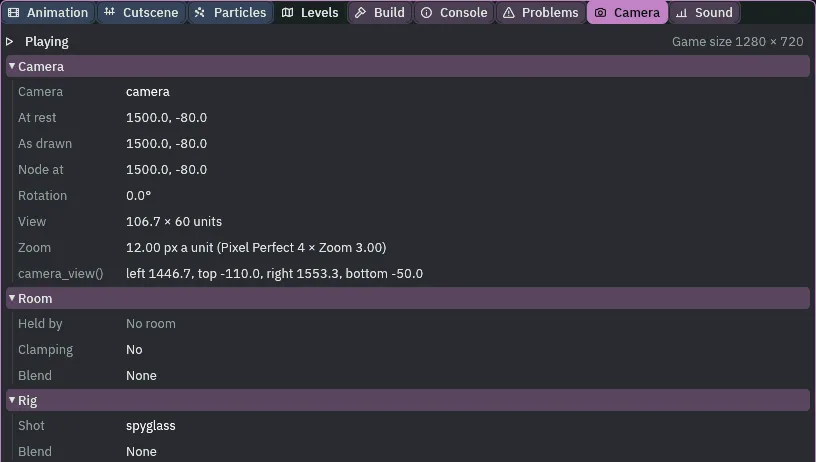
12.EaseInOut starts slowly and ends slowly. At a quarter of the 0.6 seconds the camera has come 0.156 of the way, not a quarter, as it would on Linear; at three quarters, 0.844. The glide back is eased the same way.
Node, under gallery-spyglass unless it says | Component | Field | Value |
|---|---|---|---|
| project | script | spyglass.rgs beside project.rengy | |
far-tower | Node | Position | 1500, -80 |
far-pillar, under far-tower | Node | Position | 0, 80 |
| Sprite | Texture, Atlas Region | art/gothic-horror-tiles.png, pillar | |
| Size, Anchor, Sort Layer | 32, 48; 0.5, 1; Fixtures | ||
far-beacon, under far-pillar | Node | Position | 0, -48 |
| Sprite | Texture, Atlas Region | art/gothic-horror-tiles.png, beacon | |
| Size, Anchor, Sort Layer | 32, 64; 0.5, 1; Fixtures | ||
sky | Node | Position | 1000, -8 |
| Sprite | Texture, Draw Mode, Tile Size | art/night-town-background-sky.png; Tiled; 96, 224 | |
| Size, Sort Layer | 2000, 224; Sky | ||
camera | Node | Position | 96, -24 |
| Pixel Perfect | Assets PPU, Reference Width, Reference Height | 1; 320; 180 | |
| Upscale Render Texture, Crop Frame | ticked; ticked | ||
| Camera Rig | framing look | Subject watchman, Offset 0, 24 | |
framing spyglass | Subject far-tower, Active unticked, Priority 10, Zoom 3, Duration 0.6, Ease EaseInOut | ||
| Spyglass | the script |
An auto-scroller
A camera that scrolls by itself, at one pace, with him carried along at its edge. Its rig is off, and a script moves it.
- Make
scroll.rgsandheld.rgswith the two scripts below. - Open
scenes/gallery-autoscroller.ron. Selectcameraand set its Position to160,-60. Press Add component and choose CameraRigComponent, and untick its Enabled. Add a framing,follow: Subjectwatchman, Offset0,24, the rest as it comes. - Press Add component and choose Scroll. Select
watchman, press Add component and choose Held, and leave its Margin at16. - Press Ctrl+S.
/// The auto-scroller's camera. Its rig is off, so nothing follows him: this
/// sends the camera down the corridor by itself, at a steady 48 units a second
/// for half a minute, and then switches the rig on, which finds him wherever the
/// scroll has left him.
component Scroll {
    fn on_create() {
        // The first step: start the glide to the far end of the corridor, at one
        // pace all the way.
        anneal_to(vec2(1600.0, -60.0), 30.0, .Linear);
        // Wait the glide out.
        await wait(30.0);
        // Then the rig, off until now, takes the camera back to him.
        set_flag("CameraRigComponent", "enabled", true);
    }
}/// Keeps him inside what the camera shows. A camera that scrolls on its own
/// does not wait for him, so this puts him back inside the view, by a margin,
/// whenever the edge has caught up with him.
component Held {
/// How far inside the edge of the view he is kept.
#[suffix("u")]
margin: f32 = 16.0,
fn loop() {
// What the camera shows now: (left, top, right, bottom).
let view = camera_view();
let here = position();
// The nearest place to him that is inside the margin.
let inside = vec2(
clamp(here.x, view.x + margin, view.z - margin),
clamp(here.y, view.y + margin, view.w - margin),
);
// Move him only when he is outside it, so that he walks as he does
// when the view is wide of him.
if inside.x != here.x || inside.y != here.y {
move_to(inside);
}
}
}on_create()- Runs once, as the scene starts. It may wait, as this one does: the rest of it runs
30seconds later. anneal_to(point, seconds, ease)- Moves this node to
pointover that many seconds, in the ease’s shape:.Linearat one pace. The camera goes1440units in30seconds,48a second, to the corridor’s far end. position()andmove_to(point)- Where this node is, and putting it somewhere else.
Heldmoves him only when the view’s edge has caught up with him, so between times he walks as he always does. clamp(value, low, high)- The value, held between the two: here, his place held inside the view less the margin, on both axes.

He stands still, and the view’s edge carries him along the corridor, 399 units in ten seconds, 16 inside its left edge. At the end, 30 seconds on, the camera is at 1600, -60, and the script switches the rig on.
The rig being off is not what lets the script scroll the camera. Scripts run after the rig in a step, so the script’s write to the camera wins whether the rig is on or off: on a copy with the rig on, the camera scrolls all the same, less than 2 units off the line, pulled a little toward him. What Enabled off does is keep the camera exactly on the line, and make the hand-back one flag.
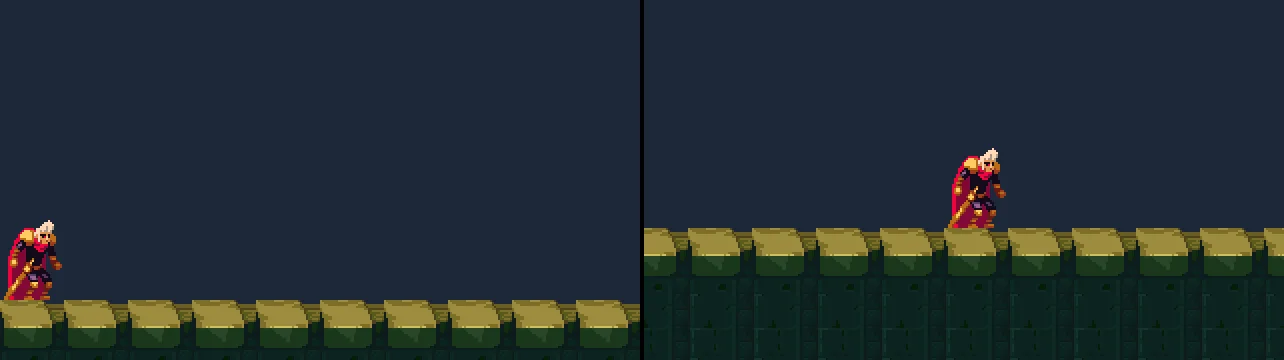
1802 and 1803, 30.03 and 30.05 s: the scroll’s end, and a step later, the camera on him.The hand-back is a cut. The rig keeps its springs running while it is off, so on the step it is on again it puts the camera at his framed point, 144 units from where the scroll left it, and does not glide.
Node, under gallery-autoscroller | Component | Field | Value |
|---|---|---|---|
| project | scripts | scroll.rgs, held.rgs beside project.rengy | |
watchman | Held | Margin | 16 |
camera | Node | Position | 160, -60 |
| Camera Rig | Enabled | unticked | |
| Framings | follow: Subject watchman, Offset 0, 24 | ||
| Scroll | the script |
Cinema bars
Bars above and below the picture, as a film has: a Letterbox wider than the window, its bars made of the camera’s own Background.
- Open
scenes/gallery-cinema.ron. Selectcamera, set its Position to160,-60, its Extent to134, and its Background to0.10,0.02,0.03, alpha1: a dark red. Its Width stays320. - Select
gallery-cinema, add a Sprite and rename itsky, at160,-60. Dragart/night-town-background-sky.pngonto Texture, set Draw Mode to Tiled, Tile Size to96,224, Size to384,224and Sort Layer to Sky, and leave Anchor at0.5,0.5: x-32to352, y-172to52, the whole picture and more. - Press Ctrl+S.
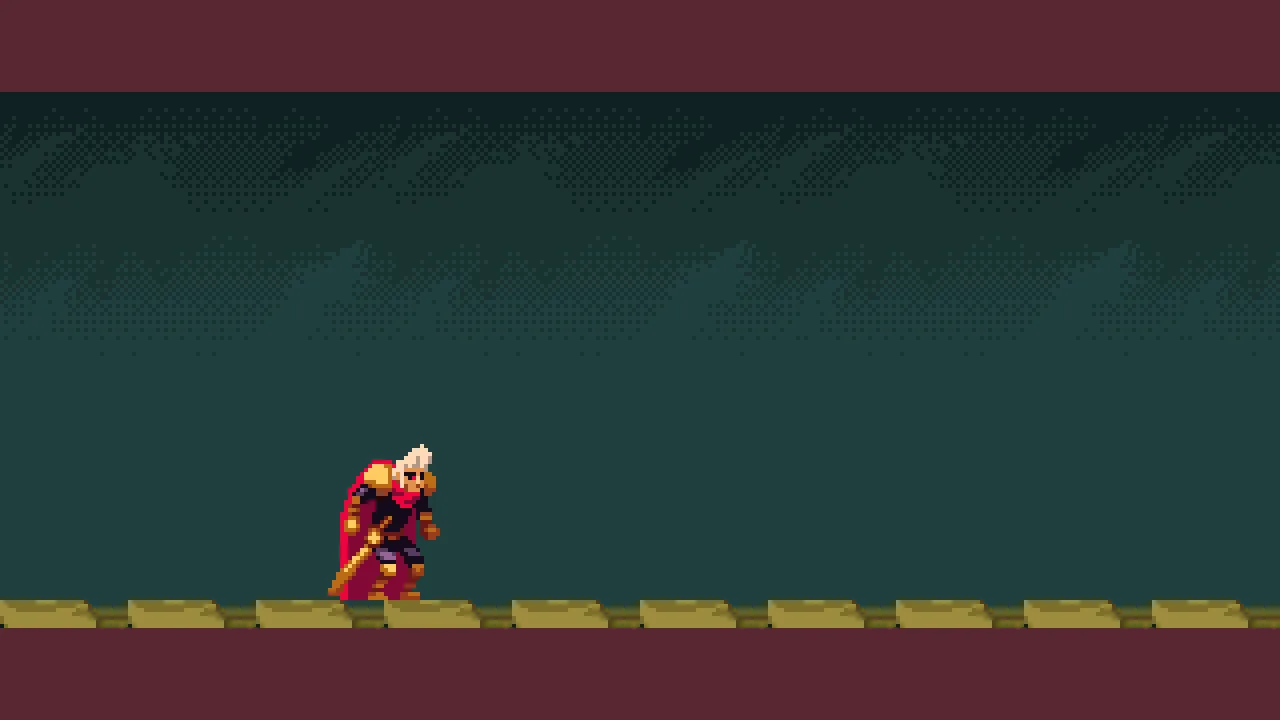
1280 by 720: 92 rows of bar above, and 92 below.A Letterbox of 320 by 134 fills what is not its picture with its Background. At 1280 by 720 the picture is 1280 by 536 at 4 pixels a unit, with 92 rows of bar above and below it; at 1920 by 1080, 1920 by 804 at 6; at a phone’s 2400 by 1080, 2400 by 1005 at 7.5, bars 37.5 rows deep. A script sees the same 320 by 134 round 160, -60 in each.
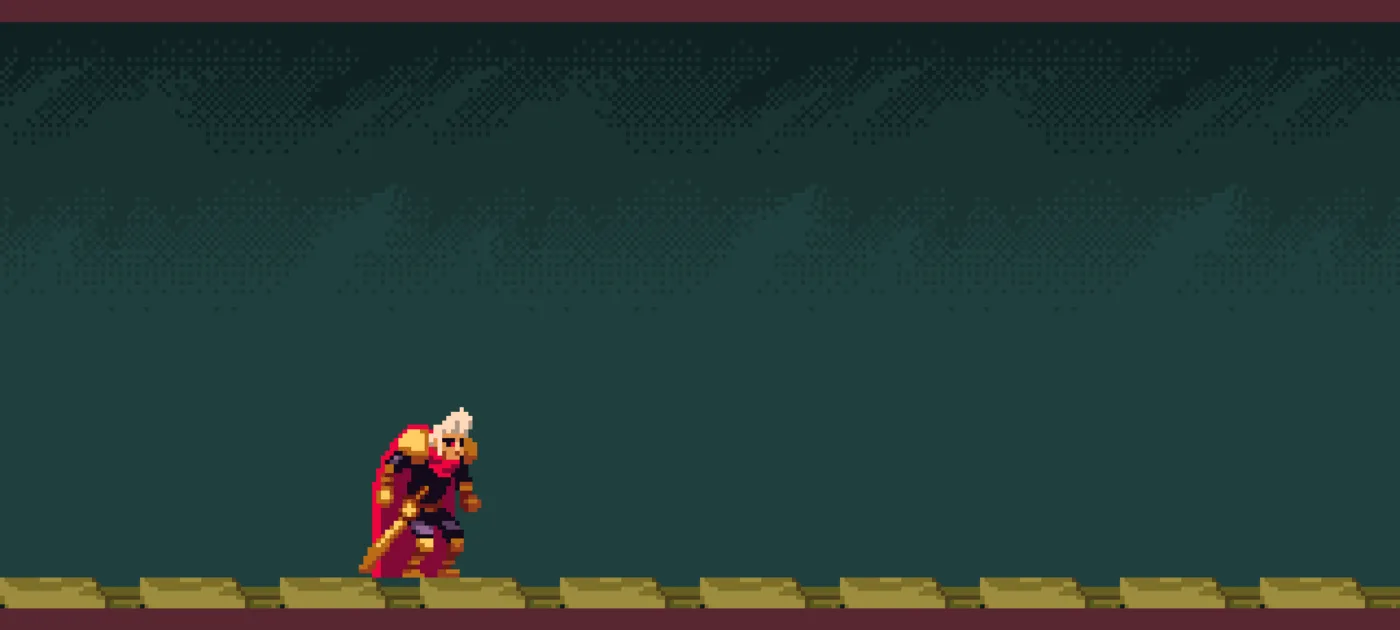
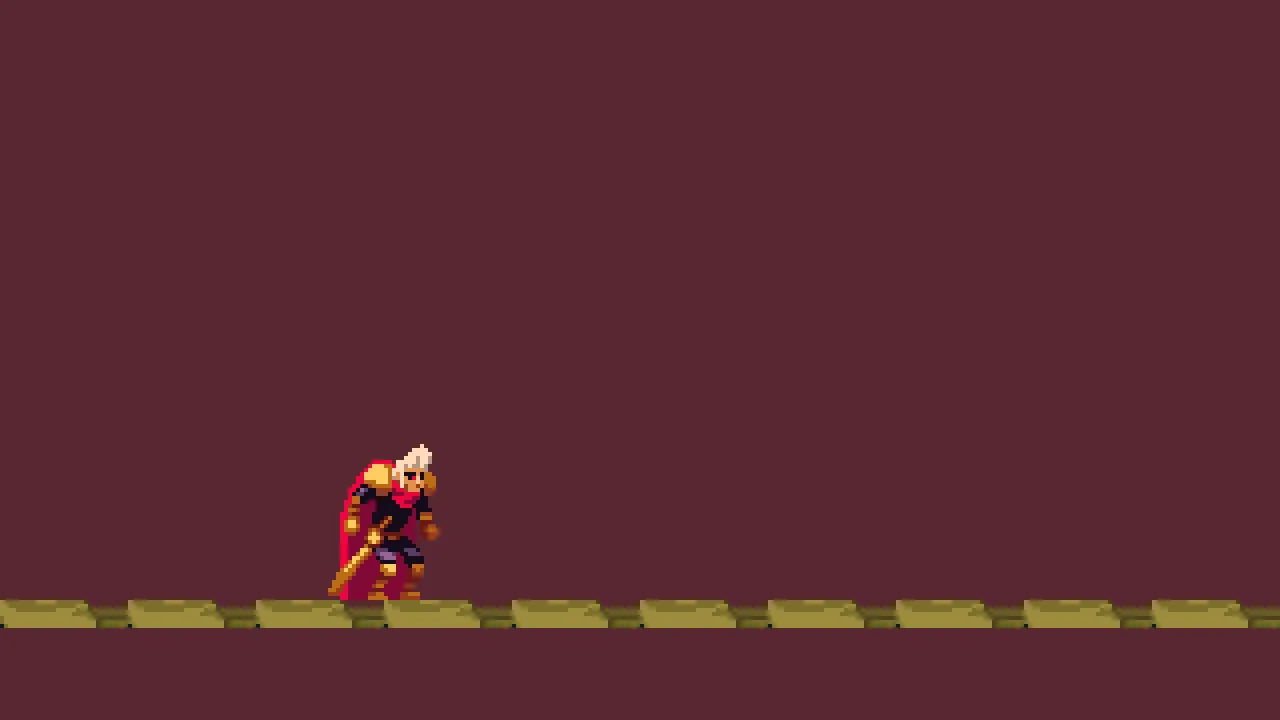
2400 by 1080: the same 320 by 134, bars 37.5 rows deep.The sky is there for the bars’ sake. The corridor’s air has nothing drawn in it, so it shows the Background too: without sky, the top bar runs into the air and cannot be told from the picture. With it, nothing between the bars is the Background, and each bar ends at the picture’s edge. On a copy with sky hidden:
- The bars
- What a Letterbox draws where the window is not its picture: the camera’s Background, above and below when the picture’s shape is wider than the window’s, at the sides when it is narrower.
Node, under gallery-cinema | Component | Field | Value |
|---|---|---|---|
camera | Node | Position | 160, -60 |
| Camera | Scaling, Width, Extent | Letterbox; 320; 134 | |
| Background | 0.10, 0.02, 0.03, 1 | ||
sky | Node | Position | 160, -60 |
| Sprite | Texture, Draw Mode, Tile Size | art/night-town-background-sky.png; Tiled; 96, 224 | |
| Size, Sort Layer | 384, 224; Sky |
A phone
A game for a phone held upright, and two ways to frame it: a tall Letterbox, and a camera fixed to its width. E swaps them.
- Make
swap.rgswith the script below. - Open
scenes/gallery-phone.ron. Renamecameratotalland set its Position to96,-96: the corridor’s192of height in the middle of its320. Set its Width to180and Extent to320, and leave Active ticked. - Press Add component and choose Swap, and tick its On.
- Right-click
tallin the Hierarchy and choose Copy; right-clickgallery-phoneand choose Paste as child. Rename the copywide. Set its Scaling to FixedHorizontal and Extent to180, untick its Camera’s Active, and untick its Swap’s On. Its Width stays the copied180, which FixedHorizontal does not read. - Select
gallery-phone, add a Sprite and rename itsky, at96,-96, the cameras’ place. Dragart/night-town-background-sky.pngonto Texture, set Draw Mode to Tiled, Tile Size to96,224, Size to192,640and Sort Layer to Sky, and leave Anchor at0.5,0.5: x0to192and y-416to224, more than either camera shows on a phone. Its tiles meet at y-192, just under the ceiling’s stone, and at32, inside the floor’s, so no seam shows. - Press Ctrl+S.
/// One of the phone's two cameras. Each carries this script, and E swaps them:
/// the camera that was the game's lets go of it, and the other takes it.
component Swap {
    /// Whether this camera is the one the game is seen through. The tall camera
    /// starts on and the wide one off.
    on: bool = false,

    fn loop() {
        // E or Enter is the action key.
        if pressed("action") {
            on = !on;
            if on {
                // This camera becomes the game's, and the other goes off.
                make_current();
            }
        }
    }
}pressed("action")- True on the one step the action is pressed: E or Enter. Both cameras’ scripts see it on the same step, so one E swaps them: the one that was on turns off, and the other calls
make_current(), chapter 9’s, which makes it the game’s and switches every other camera off.
FixedHorizontal’s width is its Extent, not its Width, as chapter 2 found. On a phone the shape of 720 by 1280 the two show the same: tall its 180 by 320 at 4 pixels a unit, filling the window, and wide 180 across and as tall as the window makes it, 320.
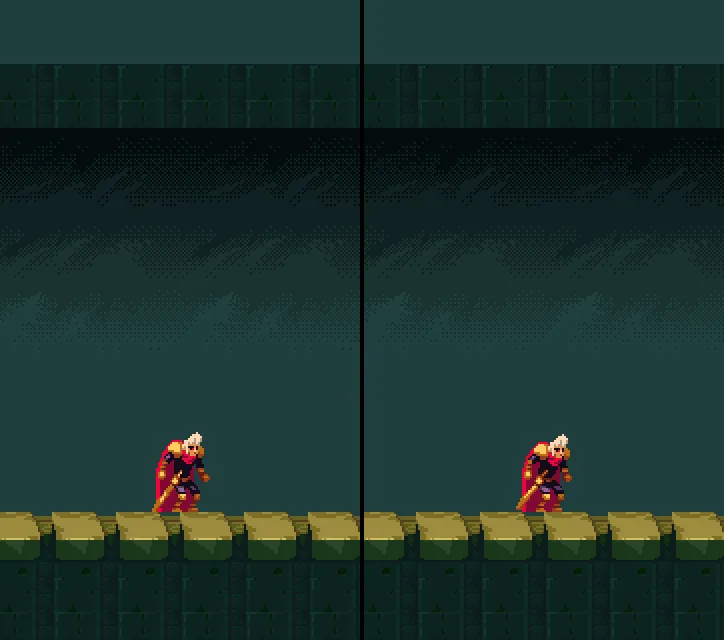
720 by 1280, shown at half size: through tall at step 30, and through wide at step 60, E pressed at step 40.On a longer phone they part. At 1080 by 2400, tall still shows 180 by 320, at 6 pixels a unit: a picture 1080 by 1920, with 240 rows of bar above and below, the camera’s Background. wide shows 180 across and 400 tall, drawn to the whole window: no bar, and more of the room above and below.
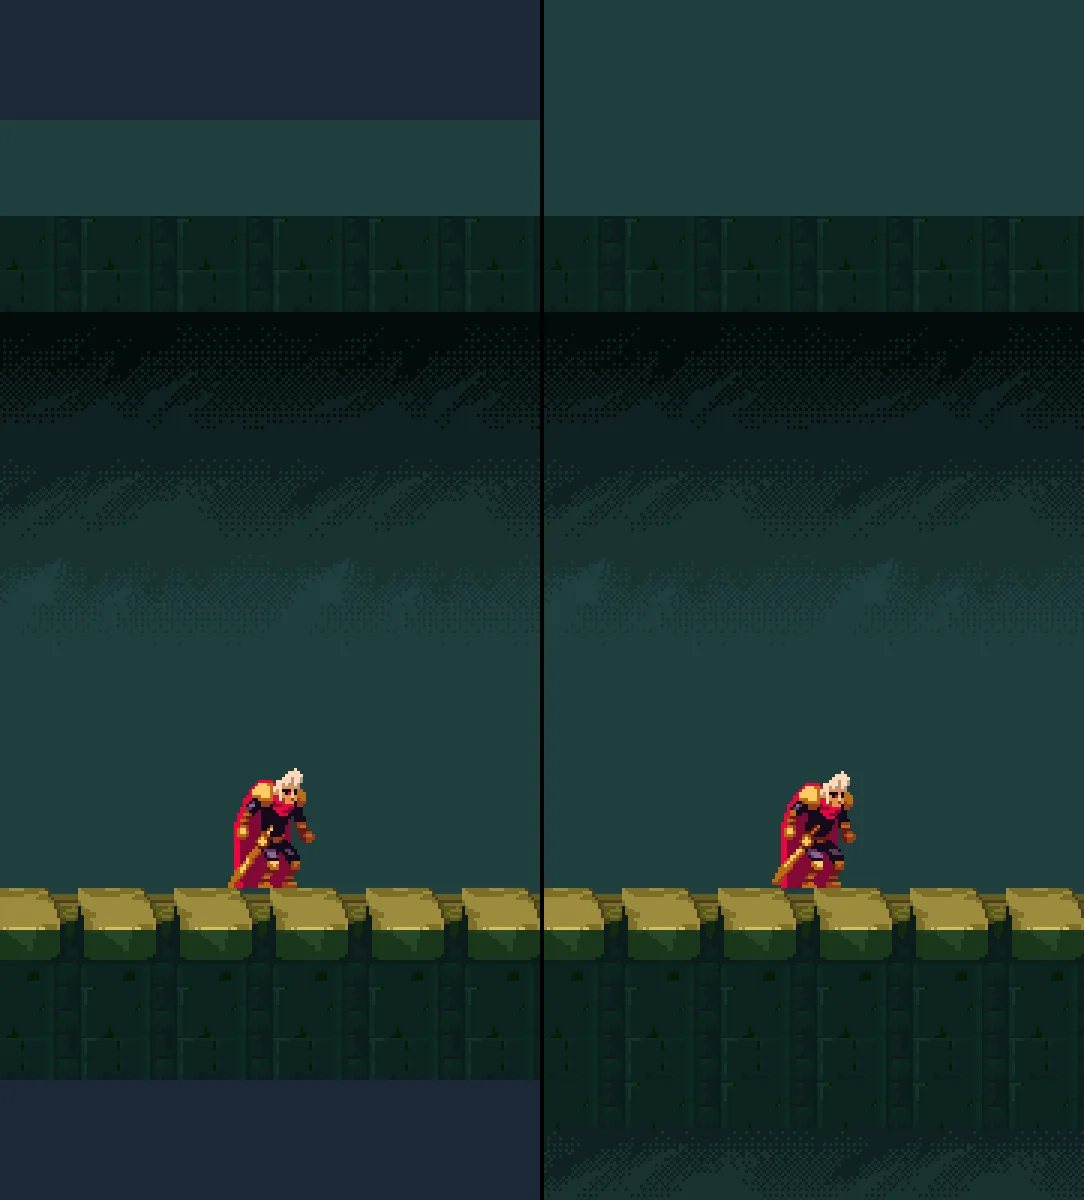
1080 by 2400, shown at half size: through tall at step 30, its bars the Background, and through wide at step 60, the sky to its edges.The sky is there for the bars’ sake, as the cinema’s is. Without it the air above the ceiling and in the corridor is the Background too, the same night blue as the bars, and the bars run into it. It reaches further than either camera shows, so through wide it goes on under the floor’s stone, to the foot of the window.
Leave wide’s Active ticked and the scene has two active cameras: the game looks through the first, tall, and Problems says so on wide, as in chapter 9. Try it, then untick it again.

Node, under gallery-phone | Component | Field | Value |
|---|---|---|---|
| project | script | swap.rgs beside project.rengy | |
tall | Node | Position | 96, -96 |
| Camera | Active, Scaling | ticked; Letterbox | |
| Width, Extent | 180; 320 | ||
| Swap | On | ticked | |
wide | Node | Position | 96, -96 |
| Camera | Active, Scaling | unticked; FixedHorizontal | |
| Width, Extent | 180, not read; 180 | ||
| Swap | On | unticked | |
sky | Node | Position | 96, -96 |
| Sprite | Texture, Draw Mode, Tile Size | art/night-town-background-sky.png; Tiled; 96, 224 | |
| Size, Sort Layer | 192, 640; Sky |
Who moves the camera
A different owner in each case. The monitor’s, the title’s and the cinema’s cameras are moved by nothing, and neither are the views: a view’s camera is its own node, and vault-eye and far-eye stand where they were put. The glass is a child of his node, so he carries it. The doorway’s and the magnifier’s cameras are the rig’s, following him. The spyglass’s is the rig’s too, and a script picks which of its framings is on. The auto-scroller’s is a script’s while its rig is off, and the rig’s after; with the rig on as well, the script’s write would still win, coming after the rig’s in each step. The phone has two cameras, and make_current() picks which one the game is seen through.