Docs · Start
Getting started
By the end
- Rengy installed, and the editor open on a project of your own
- A room blocked out from shapes, saved as the scene the project opens on
- A crate that slides across the room when you press F5
On this page
Install it
Rengy comes as a zip for Windows or a package for Linux. Download the one for your system from the home page, then follow the half that matches it.
Windows
- Unzip the
rengy-…-windows.zipyou downloaded, wherever you like. There is no installer. - Open the folder it makes and double-click
rengy-editor.exe.
Keep that folder together. The editor looks beside itself for rengy-player.exe, which is what runs your game outside the editor and what an export ships.
Linux
- In a terminal in the folder holding the package, run
sudo dnf install ./rengy-….rpm, with the package’s full name in place of the dots. - Open Rengy from your applications menu, or run
rengy-editorin a terminal.
The package puts the editor and the player under /usr/lib64/rengy/, and a rengy-editor command on your path.
For other distributions there is a rengy-…-linux.tar.gz instead: unpack it wherever you like, keep the folder it makes together, and run ./rengy-editor in it.
Settings, and removing it
The editor keeps one settings file, with your recent projects and how you like the editor set up. On Windows it is %APPDATA%\rengy\prefs.ron. On Linux it is ~/.config/rengy/prefs.ron. Your projects are never in it, and never beside the editor: they live wherever you make them.
To remove Rengy on Windows, delete the folder you unzipped. On Linux, run sudo dnf remove rengy. Neither touches your projects or the settings file. Delete the settings file by hand if you want the editor to forget you.
The launcher
The editor opens on the launcher, and stays there until you open a project: every panel in the editor reads from one.
- New project…
- Makes a project in an empty folder you choose, and opens it.
- Open project…
- Opens a project folder you already have.
- Recent projects
- Every project you have opened, newest first, apart from the showcases below it. Click a row to open it. The cross at its end forgets it; the folder stays on disk.
Under them, Showcases lists the demo projects that came with the engine. This guide doesn’t use them. If you do open one, take Copy and open…: it copies the demo into a folder you choose and leaves the original as it shipped. On Linux the originals are installed read-only, so a copy is the only way to save changes to one.
Once a project is open, File → Project manager… brings the launcher back as a window, with the same buttons on it.
Make a project
- Press New project….
- In the folder dialog, make an empty folder and choose it. Its name becomes the project’s name.
- The editor opens on an empty room. The Hierarchy on the left says so.
The folder now holds four files:
project.rengy- The project itself: its name, the scene it opens on, its simulation rate. File → Project settings… edits it.
mover.rgs- A starter script. It is yours to change or delete.
sorting-layers.ron- The project’s named draw layers. It starts with one.
.rengyignore- Folders the editor leaves alone, one pattern per line.
That is the whole project. There are no folders until you make some, and nothing to build. As you work, the editor adds a .meta beside each file and remembers your panel layout in layout.ron. Projects and assets covers what each of them is for.
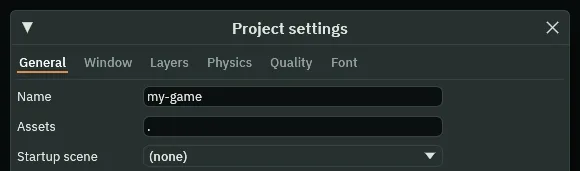
project.rengy as you make it.Your first room
A room is a scene: a tree of nodes. A node is a position in the room plus a list of components that say what it does there. The quickest component to see is a Shape, an untextured rectangle, circle or capsule for blocking out a room before any art exists.
- In the Hierarchy, press + Add node and choose Node. With nothing selected, it goes in as the root.
- In the Inspector on the right, change its Name to
Room. - With
Roomstill selected, press + Add node again. The menu now offers Add child of Room. Choose Shape: a 64 by 64 blue square appears in the middle of the Viewport, already selected. - Change its Name to
floor. Set the Shape’s Size to640and24, and drag it down toward the bottom of the room. The table below has its exact place. - Find Sort Layer at the bottom of the Shape. Type
-10into the number box beside its dropdown.
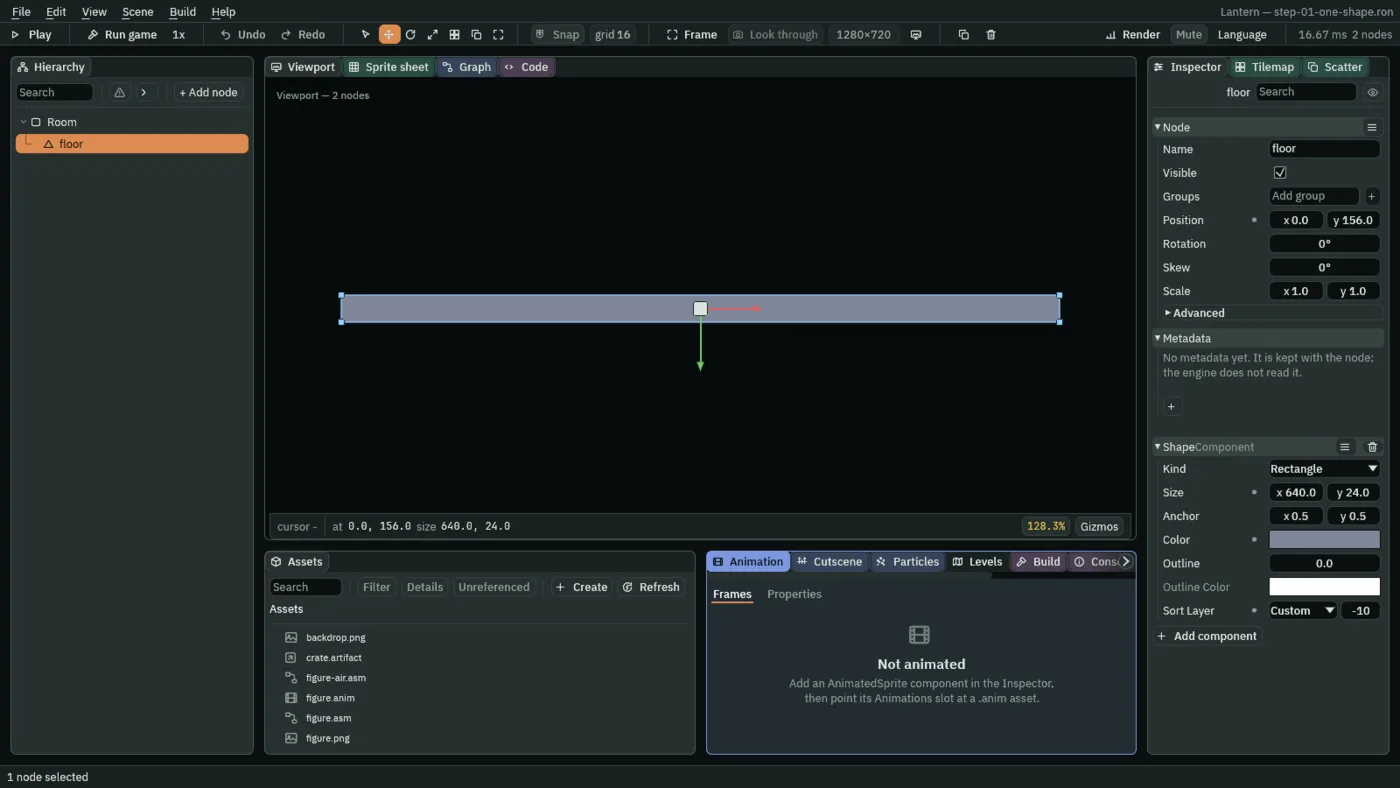
Build the rest the same way. Ctrl+D duplicates the selection, components and all, so make the floor once and copy it. Rename each copy, then set the floor and every copy from this table, typing the numbers into Size, Position and Sort Layer:
| Name | Size | Position | Sort Layer |
|---|---|---|---|
backdrop | 640 × 360 | 0, 0 | -20 |
floor | 640 × 24 | 0, 168 | -10 |
ceiling | 640 × 24 | 0, -168 | -10 |
wall left | 24 × 360 | -308, 0 | -10 |
wall right | 24 × 360 | 308, 0 | -10 |
crate 1 | 48 × 48 | -176, 132 | 5 |
crate 2 | 48 × 48 | 16, 132 | 5 |
crate 3 | 96 × 96 | 168, 108 | 5 |
Pick colours with each Shape’s Color swatch. Give the crates a warm colour and an Outline of 2, so they read as boxes rather than blocks.
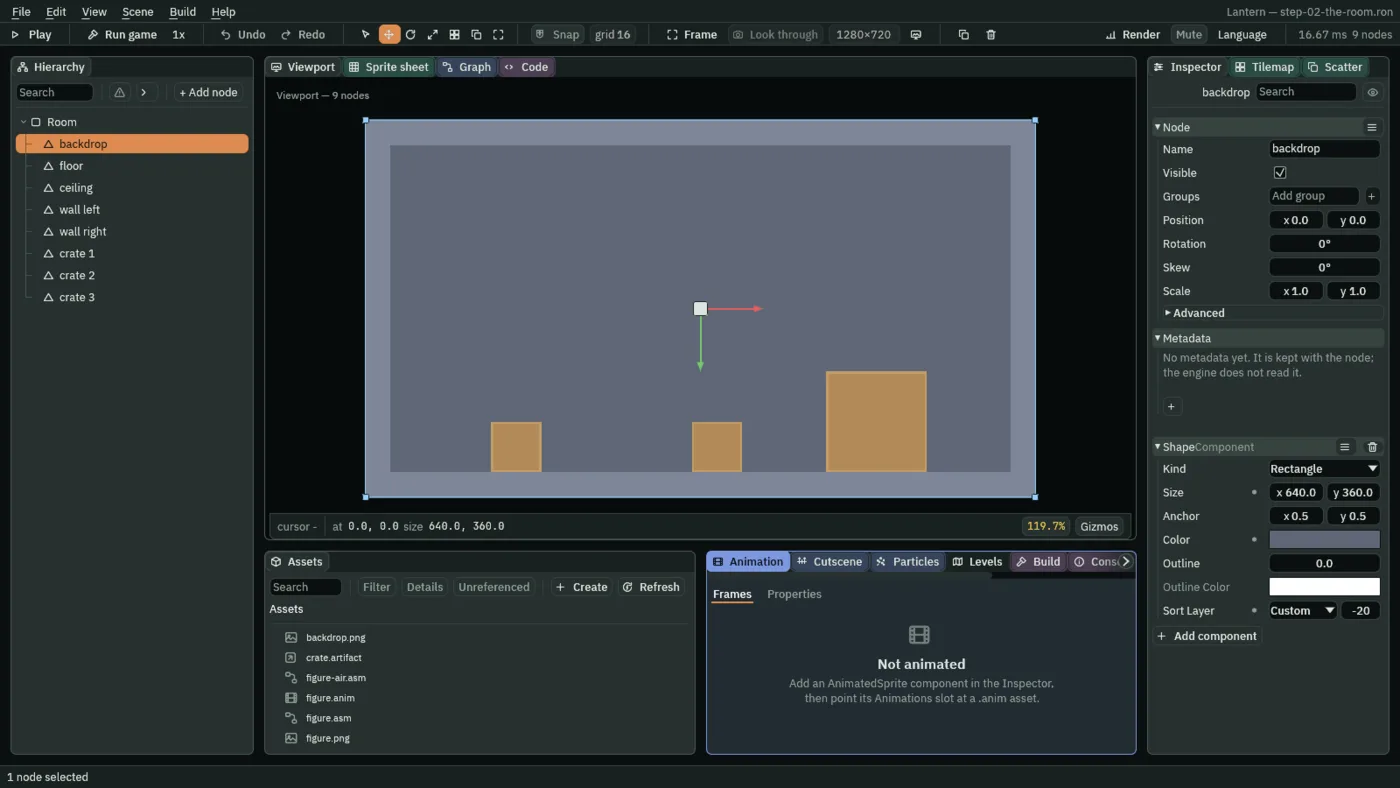
What draws on top
Lower Sort Layers draw first. The backdrop at -20 goes down before the walls at -10, and the crates at 5 go over both. Things on the same layer have no fixed order; give the one in front a higher layer.
Y grows downward, as it does on a screen. That is why the floor is at 168 and the ceiling at -168.
Save it
- Press Ctrl+S. The first save asks where: name it
room, in the project folder, and it is saved asroom.ron. - In the Assets panel at the bottom, press Refresh. The panel lists what was on disk when it last looked, and a file you have just saved is not in it until you do.
- Right-click
room.ronand choose Set as startup scene. The project opens on it from now on.
A first script
Game logic is written in Rengy Script. A script declares one component: its fields, and what it does while the game runs. Your project came with one.
- At the top of the middle panel, click the Code tab. It is the last of four, after Viewport, Sprite sheet and Graph.
- In its Scripts list, click
mover.rgs.
/// Moves the node it is on to the right at a steady pace.
///
/// Delete this once you have your own. It exists so the first press of Play
/// does something.
component Mover {
    /// World units per second.
    #[name("Speed")]
    #[range(0.0..500.0)]
    speed: f32 = 80.0,

    fn loop(dt: f32) {
        translate(vec2(speed * dt, 0.0));
    }
}
component Mover- Names the component. The file is named after it in snake case, so
Moverlives inmover.rgs. A script whose file name disagrees is refused. speed: f32 = 80.0- A field: a number, starting at 80. Every field is a row in the Inspector.
#[name("Speed")]is the row’s label,#[range(0.0..500.0)]makes it a slider from 0 to 500, and the///comment above it is the row’s tooltip. fn loop(dt: f32)- A hook: code the engine runs for you. This one runs every simulation step, and
dtis the seconds since the last one. See loop. translate(vec2(speed * dt, 0.0))- Moves the node by that much, from wherever it is now. Speed times seconds is a distance, so the node covers
speedunits every second. See translate and vec2.
A script does nothing until a node carries it. Put it on a crate:
- Select
crate 1in the Hierarchy. - In the Inspector, press Add component. A menu opens with the caret already in its search box.
- Type
moverand choose Mover. Your own components are listed after the engine’s. - A Mover section appears, with a Speed slider at 80.
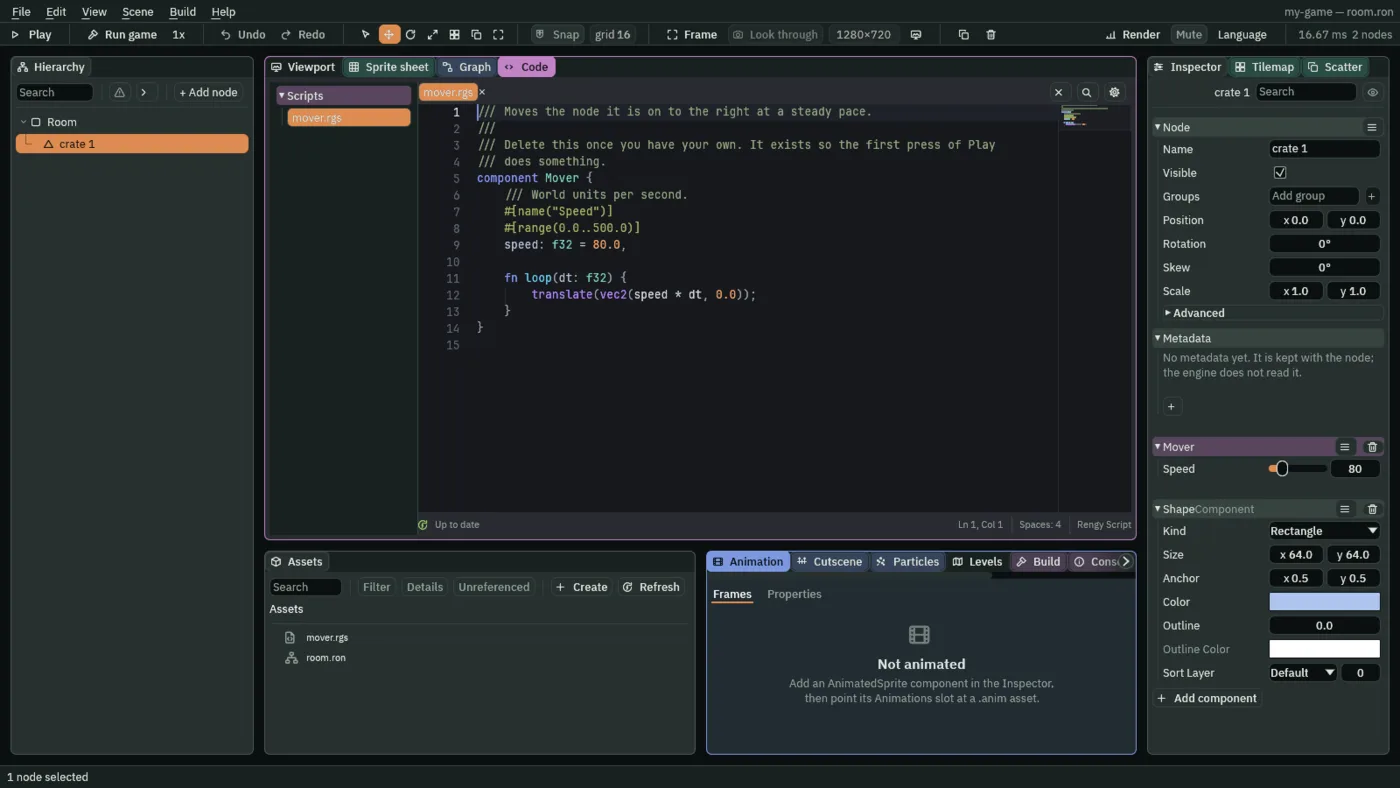
Play it
- Press F5, or Play at the left of the toolbar.
crate 1slides to the right, through the wall and out of the room. A Shape is only a picture, andtranslategoes where it is told. - Press F5 again, or Stop. The crate is back where you put it.
Stop throws away everything the run changed, which is what makes it safe to try things while the game runs. Drag Speed to 300 and play again.
Now change the script. In the Code panel, change the translate line to translate(vec2(speed * dt, speed * dt));, press Ctrl+S to save the script, and press Play. The crate drifts down as well as right. Nothing compiles: the editor runs the script as you saved it.
If a script has a mistake in it, the Code panel underlines it and its status line counts the errors. The room still plays, without that script, until you fix it.
Next
- The editor: every panel, how to rearrange them, and the keys you will use every day.
- Projects and assets: what is in a project folder, and how to get art into it.
- Scenes and nodes: how a room is put together, and the things you place many times.
- Rengy Script: fields, hooks, waiting and signals, and what to do when a script is wrong.
- Exporting: your game in a folder of its own, to zip and send.
The script reference lists every hook and builtin a script can use.