Docs · Start
Projects and assets
By the end
- Read a project folder and know what each file is for
- Bring in art, and read how each file is imported
- Find, rename and move assets without breaking a scene
A project on disk
A project is a folder with a project.rengy in it. Everything else in the folder is the game: its scenes, scripts, pictures and sounds. Back the folder up, copy it to another machine or put it under version control, and the whole game goes with it. Apart from screenshots and exports, every file the editor writes there is text you can read.
A new project starts flat: project.rengy, the starter script mover.rgs, sorting-layers.ron and .rengyignore. Make folders as you need them, in your file manager or with Create → New folder in the Assets panel.
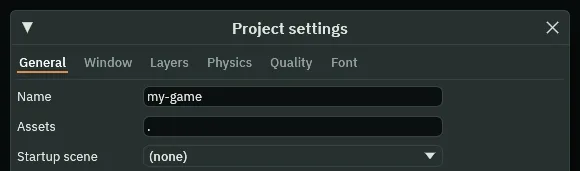
project.rengy, as File → Project settings… shows it. Assets is ., the project folder itself. Every change is written to the file as you make it.Getting art in
There is no import button. Copy the file into the project folder with your file manager, then press Refresh in the bar of the Assets panel. The panel lists what was on disk when it last looked, which is when the project opened and whenever you press Refresh, so a file you have just copied in is not there until you do.
It lists pictures (.png, .jpg), Aseprite files (.aseprite), sound (.ogg, .wav, .mp3) and fonts (.ttf, .otf). Only a PNG draws, though: a Sprite shows nothing for a .jpg or an Aseprite file, in the editor or in Run game, so save every picture as a PNG. Exporting has what reaches an exported game.
The .meta beside every file
The first time the editor sees a file, it writes a second one beside it: hero.png gets hero.png.meta. The .meta is a short text file holding two things: how the file is imported, and the file’s id, a string of 32 letters and digits such as d861da05a35634acac4fbe50c2d2df13.
Scenes, tilemaps and animations point at a file by that id, never by its path. That is why you can rename a file or move it into another folder and nothing that uses it breaks, as long as its .meta goes with it.
So when you move files in your file manager, move each .meta with its file. Renaming from the Assets panel does that for you: see Finding and renaming.
Import settings
Select a picture in Assets and press Details in the panel’s bar. The import form opens under the file list: the file’s path and id, whether its settings are the defaults or yours, and how it is imported.
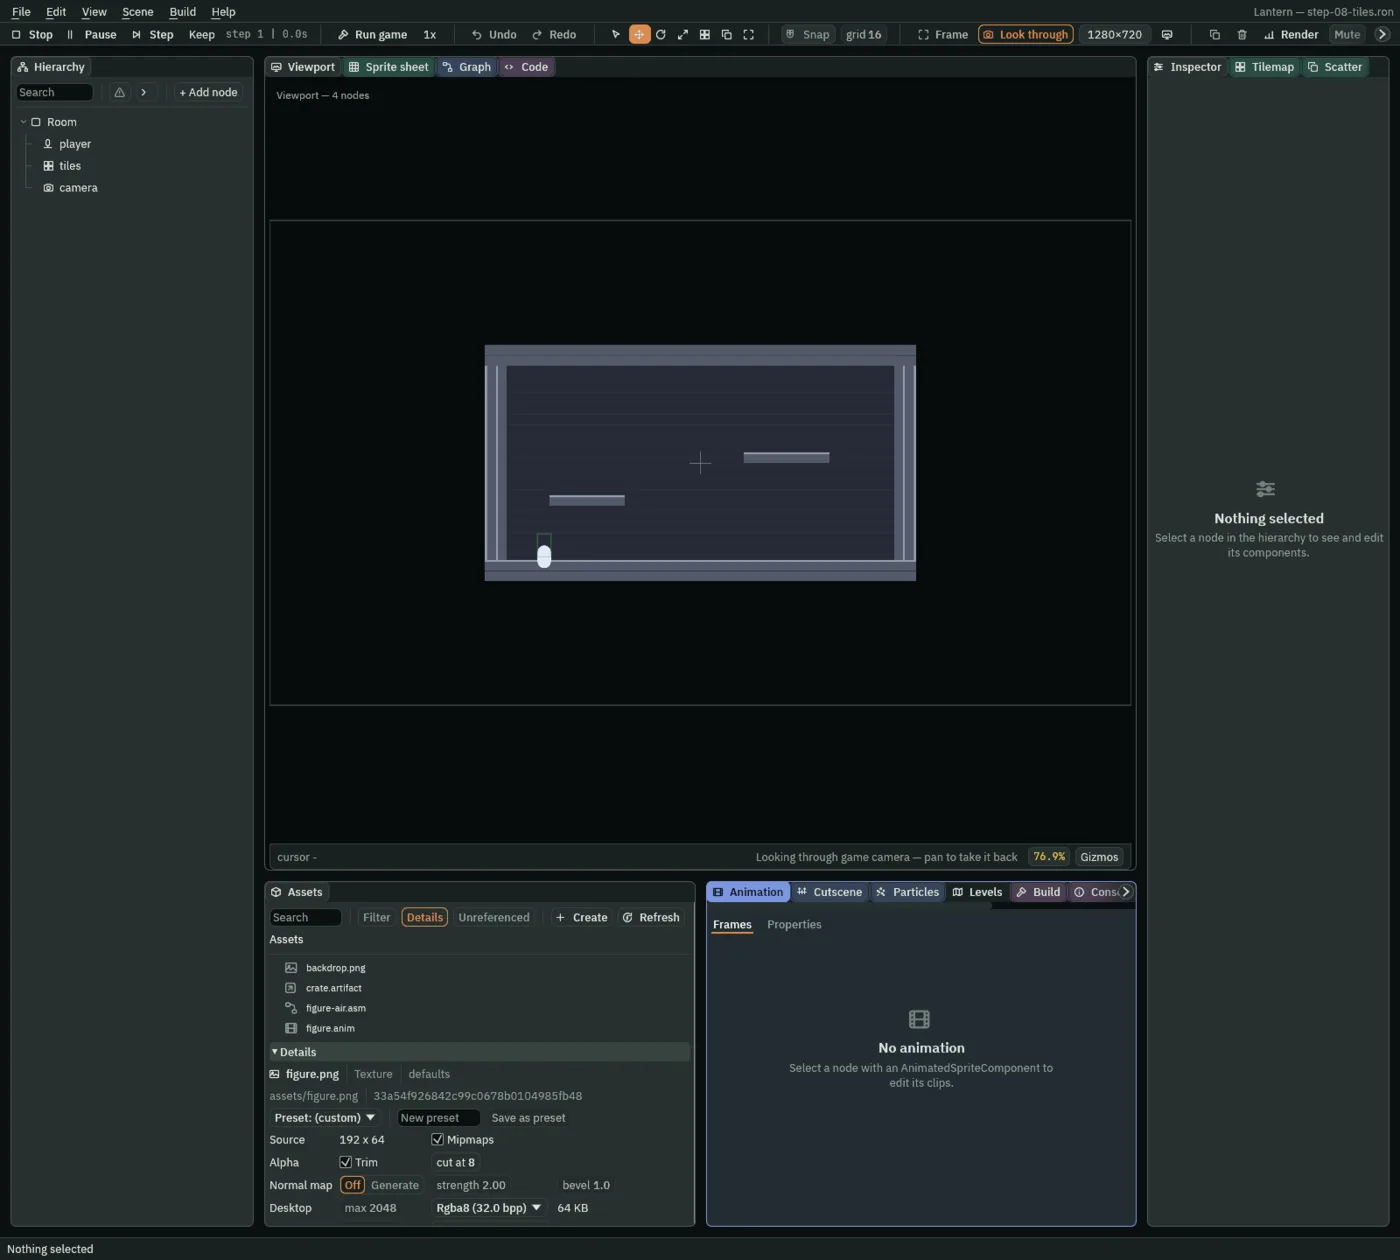
Source is read from the picture itself, which is how you notice a sprite exported at the wrong size.- Source
- The picture’s own size, in pixels.
- Mipmaps
- Whether the memory figures below count smaller copies of the picture, for drawing it shrunk. Nothing builds or uses those copies yet, in the editor or in exported games.
- Alpha: Trim
- Trimming the picture’s transparent border, with the number beside it as the cut: a pixel with alpha at or below it counts as transparent. Stored, but not applied yet: the picture is drawn whole, border and all.
- Normal map
- Off, or Generate: a normal map made from the picture’s brightness, for lights to rake across. strength is how deep the relief is, and bevel how far in its solid edges round off. Save writes it beside the picture as
<name>.normal.png, with a.metaof its own, and saving again rewrites it; a Sprite names it in its Normal Map slot. Depth from normal maps makes one. - Desktop
- The size cap (
0means none) and the format a desktop build would use, and the memory that comes to. The cap is shown locked: its number is kept in the file, and its hover says why, because a picture is shipped at its own size on every platform, whatever it reads. The format is stored, but not applied yet: the editor and exported games draw the picture at its own size, uncompressed. The memory is the picture’s own, stored size in that format.
Change a setting and press Save: that writes the .meta and marks the file hand-edited. Revert to default hands it back to the defaults. Reimport reads a tilemap or an animation file from disk again. It does not refresh a picture: see the note on repainting above.
Presets, from the Preset dropdown, and import rules, at the foot of Details, are stored, not applied yet, and a preset carries the named regions of the picture it was saved from: pick one for another picture and press Save, and that picture’s own regions are replaced.
The file types
These are the files you will meet in a project, and what each one holds.
project.rengy- The project: its name, where its assets and scripts are, the scene it opens on, its levels and its simulation rate. Edit it with File → Project settings….
.ron,.scene- A scene: a room, as a tree of nodes and their components. File → Save writes a scene as
.ron, and Create → New scene in Assets as.scene. Not every.ronis a scene: the settings files named below are.rontoo. .rgs- A Rengy Script: one component, in a file named after it.
.tilemap- Painted tile layers, and the collision made from them.
.anim- Animation clips: which parts of a sprite sheet play, in what order and for how long. An Animated Sprite plays them, in the editor and in an exported game; Ship Evader makes one.
.asm- An animation state machine: states that name clips, and the conditions for moving between them. A State Machine runs it from its Graph, in the editor and in an exported game. The Graph tab draws it, and its New state machine writes one. A state machine builds one.
.spritelib- Outfits: other art for the same frames of a clip, to swap in. Create → New sprite library writes one; an Animated Sprite swaps its pictures from it, through its Library, in the editor and in an exported game.
.propanim- Property clips: keys for any field of a node and the nodes under it, played on a timeline. A Property Animation plays them from its Clips, in the editor and in an exported game. Create → New property clips writes an empty set. Keyframes builds some.
.timeline- A cutscene: tracks that show or hide a node, play a clip or a sound, and name moments for a script to hear, all on one clock. A Timeline component plays it, in the editor and in an exported game; its Timeline names the file. The Cutscene tab’s New cutscene writes one beside the scene. The opening builds one.
input.ron- The project’s controls: the actions a script asks about, and the keys and buttons bound to each. View → Input map… writes it, beside
project.rengy. .meta- Beside every other file: its id and its import settings. Never delete one.
.rengyignore- Folders the editor leaves alone, one pattern per line. A
#starts a comment.
A few more appear beside project.rengy as you work: layout.ron for your panel layout, and import-presets.ron and import-rules.ron once you save a preset or a rule. The editor finds them, and sorting-layers.ron, by name, so leave them where they are. Exports go into a dist folder, which .rengyignore keeps out of the Assets panel.
Finding and renaming
- Search
- Type part of a name. The search looks in every folder, not only the open one.
- Filter
- Show only some kinds of file: Texture, Audio, Scene, Script and the rest. Right-click the button to clear it.
- Unreferenced
- Files that nothing reaches from a level or the startup scene. Read the list rather than trusting it: your scripts are in it too, because a scene names a script by its component, not its file.
Right-click a file for everything else you can do with it:
- Rename
- Renames the file and moves its
.metawith it, so every scene keeps working. - Find usages
- Narrows the panel to the files that refer to this one. Only what is written in files counts.
- Duplicate
- A copy beside it, with an id of its own.
- Delete
- Asks first, and lists what still refers to the file. The file and its
.metaboth go, and it cannot be undone. - Reveal in file manager
- Opens the folder it is in.
- Set as startup scene
- On a scene: the one the project opens on.
To move a file into a folder, move it together with its .meta in your file manager, then press Refresh. The .meta carries the id, so every scene that uses the file still finds it.