Docs · Start
The editor
By the end
- Know which panel to look at for any job
- Arrange the panels your way, and get the shipped layout back
- Know when to press Play and when to press Run game
The panels
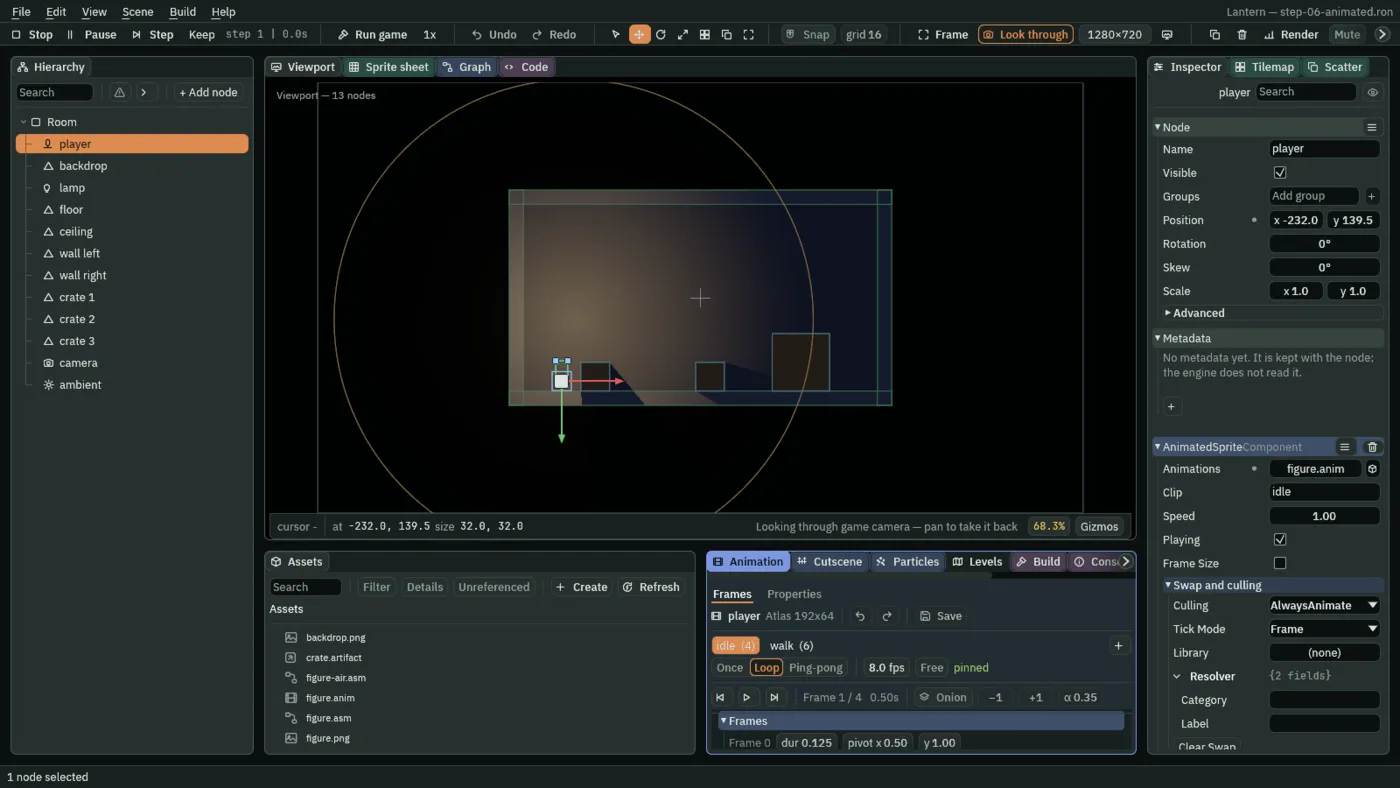
The editor is one window of panels. Four of them do most of the work: you select a node in the Hierarchy, see it in the Viewport, change it in the Inspector, and find files in Assets.
| Panel | What it is for |
|---|---|
| Hierarchy | The room’s nodes, as a tree. Every other panel follows what you select here. Drag a node onto another to make it a child. |
| Viewport | The room itself. Click to select, drag to move the selection, scroll to zoom, and middle-drag or hold Space and drag to pan. |
| Inspector | Everything the selected node is: its name and transform, then one section per component. |
| Assets | Every file in the project. Right-click one to open, rename or find what uses it. |
| Code | The project’s scripts and shaders, with a list of the scripts beside the text. |
| Build | Where you export your game. |
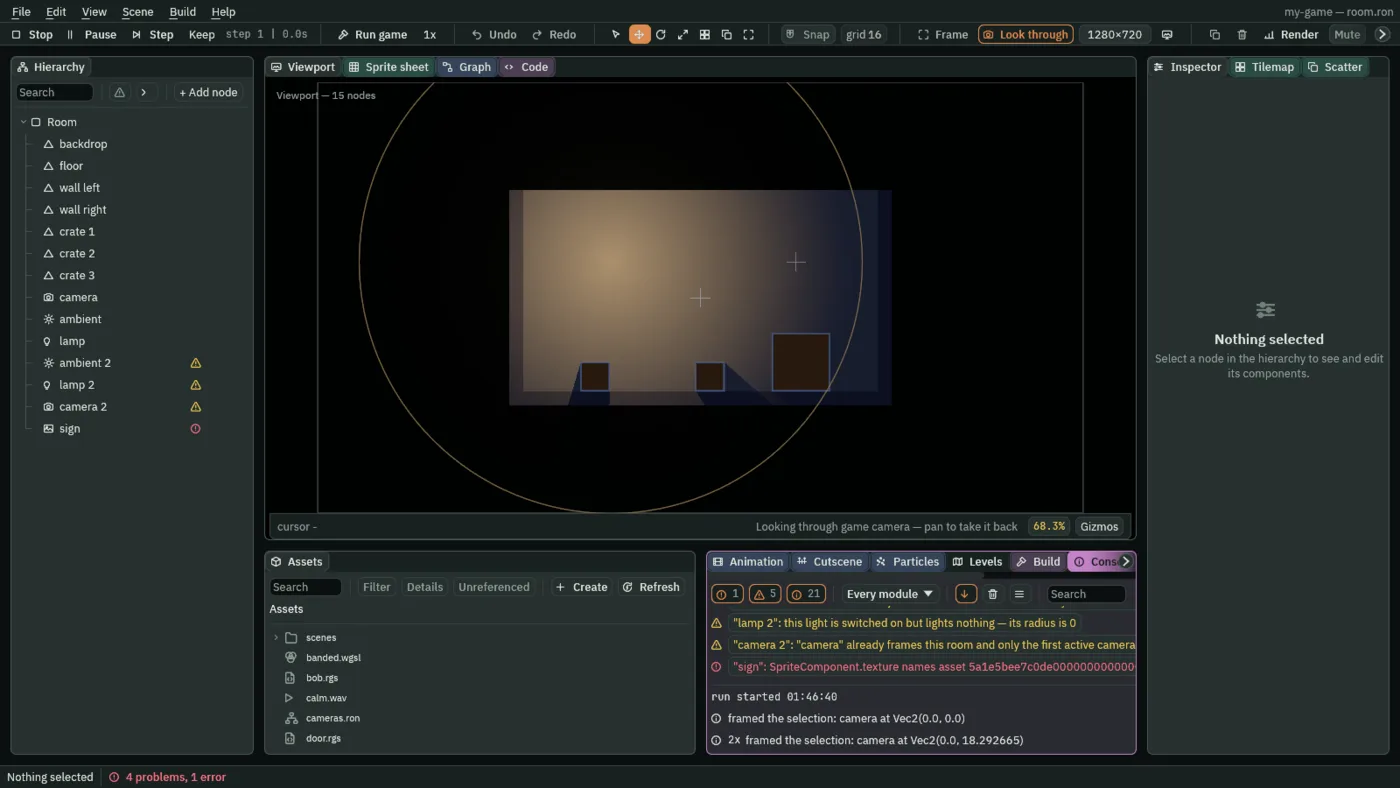
| Console | What the game and the editor printed: script errors, warnings and messages. |
| Problems | Nodes set up to do nothing, such as a light with no radius, and, as errors, references to files that are gone and scripts that write to a component or field that does not exist. A node leaves the list when you fix it. |
| Camera | What the game’s camera is doing, in numbers: where it rests and where the picture is drawn from, how much it shows and at what zoom, the room holding it, its rig’s shot and its shake. It moves with the game in Play; while you edit, it shows the camera at rest. See Cameras. |
| Sound | What the game plays while it runs: a meter for each bus, the music, the mix and every sound playing. Outside Play it shows the sound you are previewing. See Audio. |
| Tilemap | Paint tiles into a tilemap: tools, layers and the tile picker. |
| Scatter | Brush copies of a saved group of nodes across the room. |
| Sprite sheet | Cut a texture into the regions a sprite draws. |
| Levels | The project’s levels, in order, each with a track of music, and a scene to open after the last. A game follows the list as each level ends, in the editor’s Play started on a scene that is no level and in an exported game. See Levels and endings. |
| Animation | Sprite clips and their frames, which an Animated Sprite plays, and keys on a timeline for any field, in the panel’s Properties mode. Both play in the editor and in an exported game. |
| Graph | Animation state machines: the states a character moves between, and the conditions that move it. The state it is in picks its clip, in the editor and in an exported game. |
| Cutscene | Cues on a timeline: show or hide a node, play a clip or a sound, name a moment for a script to hear. It plays in the editor and in an exported game. |
| Particles | Particle emitters, drawn in the editor and in an exported game. |
View → Panels lists every panel, with an eye beside each one that is shown. Click one to show or hide it.
Arrange them
- Drag a tab by its name onto another panel to join that panel’s tabs, or onto one of its edges to split it there.
- Drag a tab away from the others to float it as a window over the editor.
- Drag the gap between two panels to resize them.
- Right-click a tab and choose Close panel to close it. The Viewport is the one panel that cannot be closed or floated.
The arrangement belongs to the project. The editor saves it in the project’s layout.ron when you close the window or press Ctrl+Shift+S, and puts it back the next time you open that project. View → Reset layout brings back the shipped arrangement.
Code on a second screen
View → Code editor in its own window moves the Code panel into a window of its own, which you can put on another monitor. Choose it again to put the panel back. The editor remembers where the window was.
Play, Pause, Step and Run game
- Play F5
- Runs the room inside the Viewport. The button becomes Stop. Press it, or F5 again, and the room goes back to exactly how it was.
- Pause F6
- Stops the clock without ending the run. Resume carries on.
- Step F7
- Advances exactly one simulation step, pausing first. For looking at something that happens too fast to see.
- Run game
- Runs the project in a window of its own, with the same player an export ships. The button becomes Stop game.
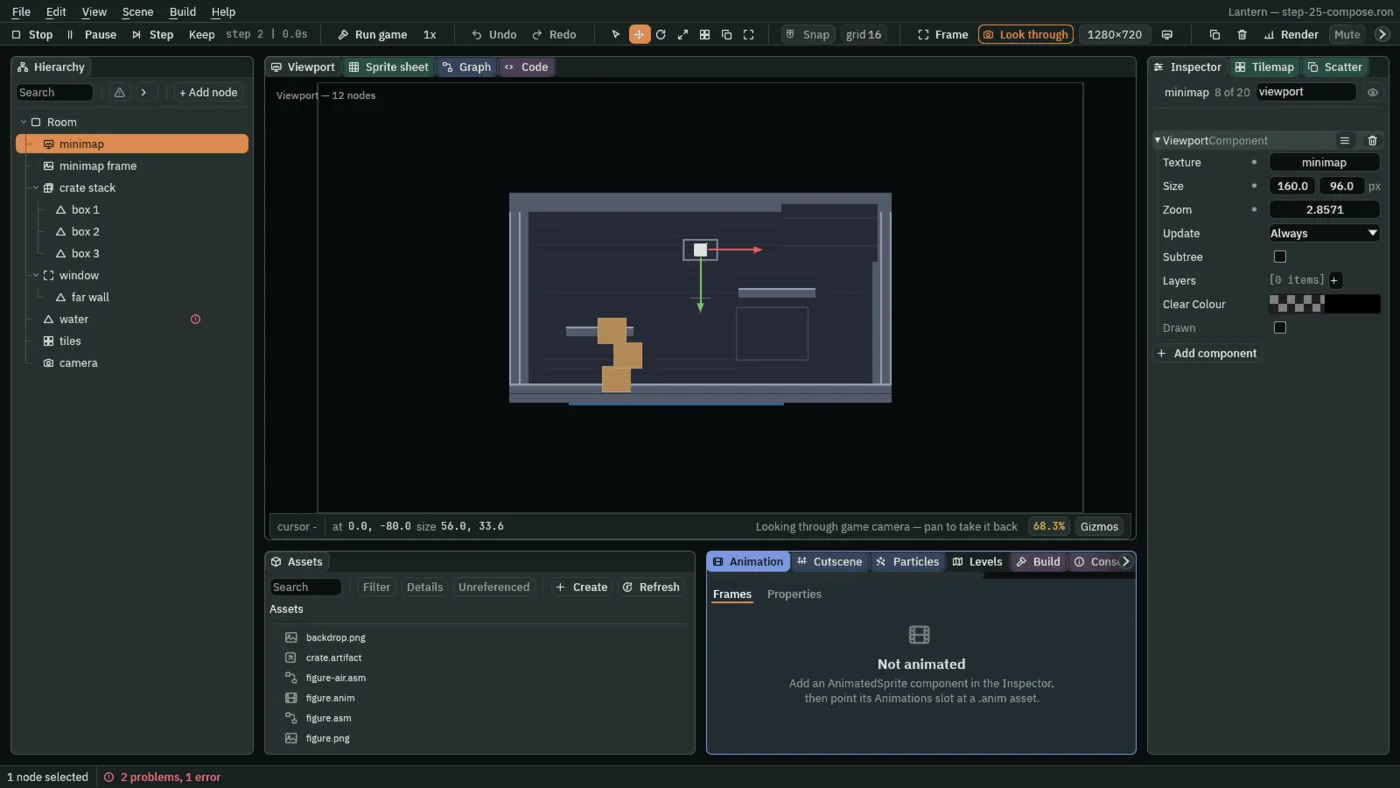
water is a shader that does not compile, one of the two problems the status bar counts.Stop keeps nothing. Everything the run changed is thrown away, including edits you make in the Inspector while it runs. To keep one, select the node, open Keep on the toolbar and tick the component before you press Stop. A stroke painted on a tilemap while it runs is not the run’s: it paints the map, so it is kept, and Undo takes it back after Stop.
Speed. The 1x button beside Run game picks a slower or faster clock. [ and ] step through the speeds, and \ goes back to real time.
Play or Run game?
Play is the quick one: it runs the room you are editing, as it is in the editor, saved or not; a script runs as it was last saved.
Run game is the honest one. It starts the same player your exported game is built on, and shows what the people you send it to will see. It reads your saved files, so save first. It opens the project’s startup scene, or, if the project has none, the saved scene you have open.
Keys worth learning first
| Key | What it does |
|---|---|
| F5 | Play, or Stop |
| F6 | Pause, or Resume |
| F7 | Advance one step |
| Ctrl+S | Save the scene, and every tilemap with strokes not yet saved. In the Code panel, save the script. |
| Ctrl+Shift+S | Save all: the scene, the project, the layout, every tilemap you painted, and every other file you edited in a panel, but no script: a script saves with Ctrl+S in the Code panel. |
| Ctrl+Z / Ctrl+Y | Undo / Redo |
| Ctrl+D | Duplicate the selection |
| Delete | Delete the selection |
| F | Frame the selection in the Viewport |
| Home | Frame the whole room |
| Q W E R | The Select, Move, Rotate and Scale tools |
| Arrow keys | Nudge the selection 1 unit. With Shift, one grid step. With Ctrl, 10 units. |
| Escape | Cancel a drag, or clear the selection |
| Ctrl+= / Ctrl+- / Ctrl+0 | Zoom in / Zoom out / 100% |
| F12 | Save a screenshot of the Viewport in the project’s captures folder |
Apart from Ctrl+S in the Code panel, none of them fire while you are typing, in a text field or in the Code panel: click in the Viewport first, or use the toolbar. And once you click in the Hierarchy, the arrow keys and Home belong to the tree: the arrows walk it, and Home and End jump to its ends. Click in the Viewport to take them back.
These work once you have clicked in the Hierarchy:
| Key | What it does |
|---|---|
| Ctrl+Shift+A | Open the + Add node menu |
| F2 | Rename the selected node |
| Ctrl+C / Ctrl+V | Copy nodes / Paste them as children of the selected node |
| Ctrl+G | Group the selection under a new parent |
| H / Alt+H | Hide the selection / Show everything hidden |
| Ctrl+Up / Ctrl+Down | Move the selection up or down among its siblings |
Help → Keyboard shortcuts lists every one, including those. It is built from the same table the editor reads its keys from, so it is never out of date.