Docs · Build a world
Terrain and shapes
By the end
- A ledge whose art, fill and collision come from one line and cannot drift apart
- A rope or a cable drawn through points
- A sprite that shows only inside, or only outside, another shape
- A stack of sprites that nothing can slip between
On this page
Shapes made of points
Three components here are drawn through a list of points: a Sprite Shape, a Line and a Polygon. The points are in the node’s own space, so moving, turning or scaling the node takes the whole shape with it. You shape all three the same way.
- Add the node from + Add node: Sprite Shape, Line or Polygon. A Sprite Shape comes as a ledge of two points,
-64, 0to64, 0, and a Polygon as a square64across. A Line comes with no points. - To type the points, press the + beside Points in the Inspector for each point you add, and type each point’s x and y. For a first ledge, give it five:
-200, 60,-90, 20,20, 30,140, -18and240, -6. - A Polygon or a Sprite Shape with too few points to draw, such as one added to a node with Add component, is drawn in the Viewport instead. With its node selected, each click puts a point where it lands, until it has the three a Polygon needs or the two a Sprite Shape needs. A Sprite Shape added that way has no edge art yet, so it shows only its dots until you give it some.
- With the node selected, every point is a dot in the Viewport. Drag a dot to move the point.
- Double-click an edge to put a new point on it. Hover a point and press Delete or Backspace to take it away: the point goes, and the node stays.
A Line or a Sprite Shape needs two points and a Polygon three, and a press of Delete over a point leaves it at least that many. The arrows beside each point in the Inspector move it earlier or later in the list, and the bin removes it. A Line and a Polygon show as soon as they have their points. A new Sprite Shape shows its edge art, the preset’s one plain white band along its line; its fill is off until you tick Fill in its Fill fold.
A ledge drawn as a line
A ledge built by hand is two things kept in step: a collider, and a row of sprites for the art. Move one without the other and the grass floats above the ground. A Sprite Shape is one line of points that makes the edge art, the fill under it and the collision, so there is only one thing to move.
The Sprite Shape preset comes with a Collider on the same node. Keep it: the Collider says whether the shape is solid, one-way and on which layer, and the Sprite Shape gives it its outline.
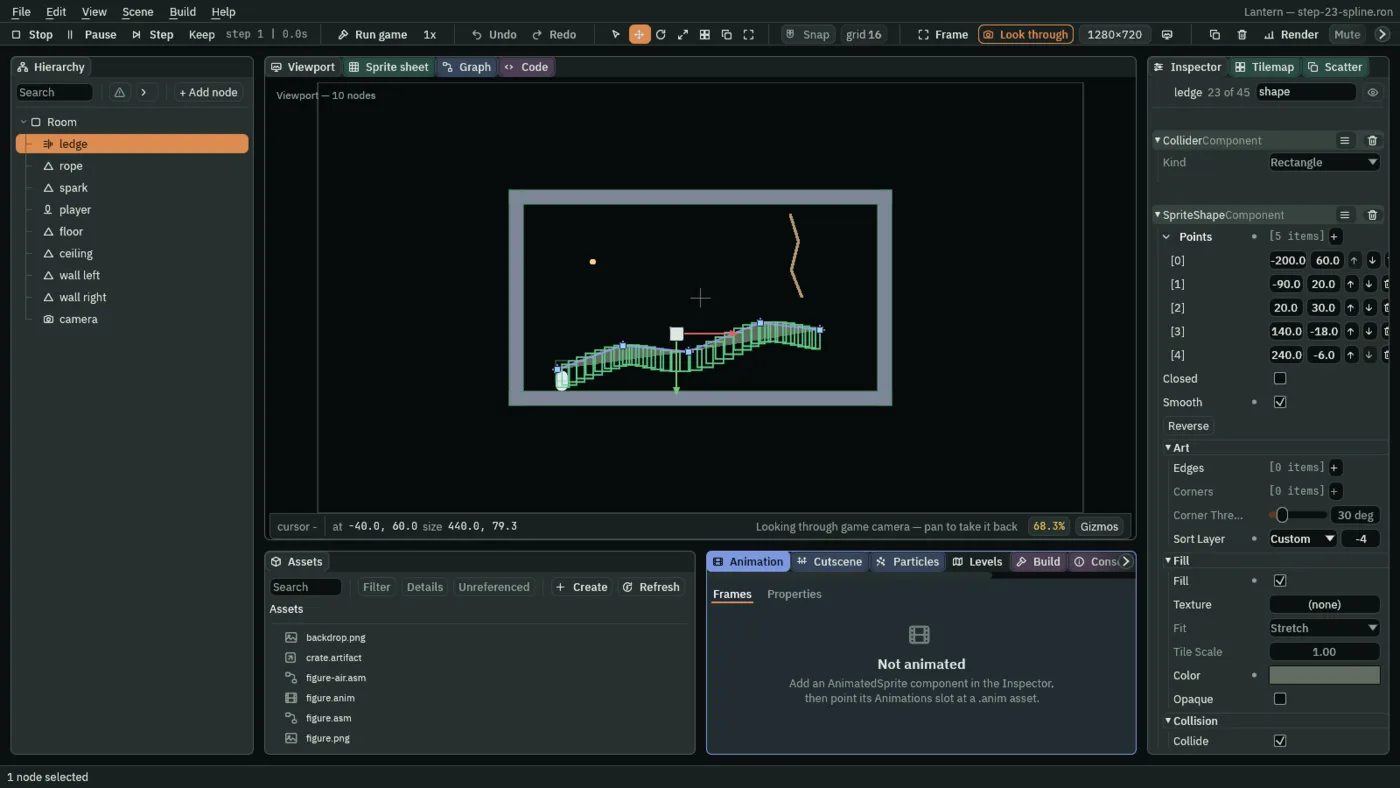
- Closed
- Joins the last point back to the first, for an island rather than a ledge.
- Smooth
- Rounds the line into a curve through the points instead of straight runs between them.
- Reverse
- Turns the list of points round. On an open shape that swaps which side counts as the top: see below.
- Fill
- Fills the inside with Color, or with a Texture laid as Fit says: Stretch spreads it once across the whole shape, and Tile repeats it at its own size times Tile Scale, counted from the node’s origin. Opaque draws the fill without blending, for ground nothing shows through: a see-through part of it comes out dark. An open shape fills up to a straight line from its last point back to its first.
Which art goes where
A ledge’s top, its underside and its walls are different drawings, and what tells them apart is the way each part of the line faces. Under Art, each entry in Edges is a picture and the range of directions it is for, in degrees, from From up to but not including To. Zero faces right, 90 faces up, 180 left and 270 down.
| Part of a ledge | Faces | From | To |
|---|---|---|---|
| The top, with grass on it | up | 45 | 135 |
| The left wall | left | 135 | 225 |
| The underside | down | 225 | 315 |
| The right wall | right | 315 | 45 |
A To smaller than its From wraps round through zero, as the right wall’s does. An open line faces up when it is drawn from left to right, which is how most ledges are drawn. If your ledge comes out as a ceiling, press Reverse. A closed shape is turned the right way round for you.
- When two ranges overlap, the first in the list wins. Reorder the list to change which.
- When a direction is in no range, that part of the line draws no art at all. A hole in the terrain is how you find a gap in your ranges.
- Size is one picture’s length along the edge by its depth into the shape. The art is laid as one band along the line, bent through every curve and mitred at every joint, so no gap opens where one straight run meets the next. Along each stretch that takes the same picture it repeats a whole number of times, each a little wider or narrower than its Size, rather than cut short. A turn sharper than
120°splits the band, each side ending square.
Corners work the same way for sharp turns. Where the line turns by more than Corner Threshold degrees and an entry in Corners covers the turn, one corner picture replaces the ends of both edges, and the band stops square on either side of it. It is chosen by the direction halfway between the two edges, so the top-left corner of a platform is 135. A turn no corner covers is bent through by the band, as a gentler one is. A Smooth shape has no corners.
Collision
With Collide ticked, the line is the Collider’s shape. It is made of boxes laid along the line, each Step units long and Thickness units deep into the shape. A shorter Step follows a slope more closely, for one more box to check. Surface Offset pushes the collision out from the line, for art that stands above it.
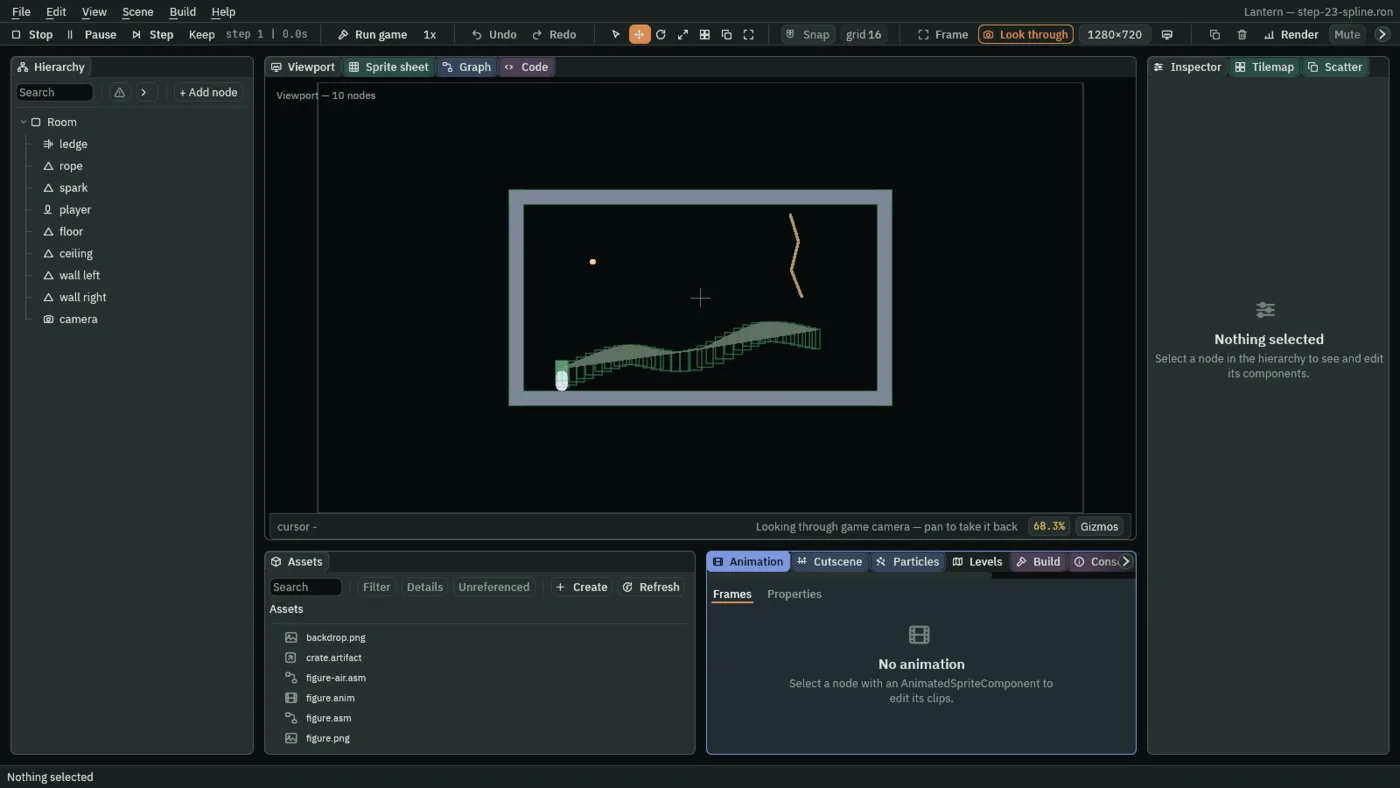
A character walks on a Sprite Shape’s collision in the editor’s Play and in an exported game, just as it does on a tilemap’s.
Ropes, cables and beams
A Line draws a stroke through its points: a rope, a hanging cable, a pipe run, a beam. It only draws. Nothing collides with it.
- Width
- How thick the stroke is, in the node’s units.
- Color
- The stroke’s colour.
- Joint
- Flat leaves square ends and corners, right for a beam or a pipe. Round rounds the corners so no notch shows where two pieces meet. RoundCaps rounds the ends too, which is what a rope looks like.
- Closed
- Joins the last point back to the first.
- Sort Layer
- Lower draws first, as everywhere.
Filled outlines
A Polygon fills the outline its points make: a pool of water, a slope of scree, a hill in the backdrop. It can be any shape that does not cross itself, and the editor cuts it into triangles for you.
- Color
- The fill colour, or the tint over the texture.
- Texture
- A picture over the outline, laid as Fit says.
- Fit
- Stretch spreads the picture once across the whole outline. Tile repeats it at its own size times Tile Scale, counted from the node’s origin, so two Polygons whose nodes stand a whole number of repeats apart line up.
- Tile Scale
- World units each pixel of the picture covers under Tile:
1draws it at its own size,2at twice it. - Opaque
- Draws it without blending, for a shape at the very back.
Like a Line, a Polygon only draws. To make it solid, put a Collider on a node over it.
Under a Polygon’s rows, Make a Mesh replaces it with a Mesh of the same triangles, whose points you then colour and map one by one; one undo puts the Polygon back. A MultiMesh draws the Polygon or Mesh on its own node at each of its placements, all in one draw: grass over a hill, which the Scatter brush paints.
Masks: showing a sprite only inside a shape
A torch that reveals a dark room, a keyhole, a spotlight: each shows some sprites only inside a shape, or only outside it. A Sprite Mask is that shape. It never draws itself. Sprites that read it draw only where it is, or only where it is not.
- Add a node with + Add node → Sprite Mask, and set its Texture to the shape: a soft white circle, for a torch. Only the picture’s transparency is read, not its colour.
- Set its Size, and note its Channel. There are eight channels,
0to7, so several masks can do different jobs in one room. - Select a sprite that should show only inside it. In its Sprite, tick Mask: its Channel reads
0and Inside comes ticked. Set Channel to the mask’s number, and leave Inside ticked. - Move the mask. The sprite shows only where the mask is. Untick Inside and it shows everywhere except there.
- Alpha Cutoff
- How solid a pixel of the mask must be to count as inside. The edge is hard either way; this says where it falls on a soft picture.
- Sort Layer
- The mask has to be drawn before the sprites that read it. Keep it on their layer or a lower one.
- Enabled
- Off, the mask is not drawn at all: sprites reading its inside vanish, and sprites reading its outside show everywhere.
Two masks on one channel add together, so a room lit by three torches is one channel and three masks. Only Sprites read masks; shapes, lines and tiles ignore them.
Sorting groups: a stack that sorts as one
Three crates stacked on one another are three sprites, and each sorts on its own. Something passing at the wrong layer can end up drawn between two of them, as if it went through the stack. A Sorting Group makes everything under a node sort as one thing.
- Put the crates under one parent node.
- Select the parent, press Add component, type
sortingand choose SortingGroupComponent. - Set its Sort Layer, and its Depth to place it within that layer. The whole stack now sorts there, and the crates keep their own order inside it.
Untick Enabled to see what the group was fixing. Groups do not nest: the nearest enabled group above a node is the one it sorts with. The group covers the sprites, shapes, lines, trails, sprite shapes, polygons, meshes and words under it, in the editor and in exported games. A tilemap’s tiles and particles are not grouped: under a group, they still sort for themselves.
Under a parent with Sort children by Y ticked, a group sorts by its own position, as one figure among the room’s, and its Depth is dimmed there. What is under it still draws as one, so nothing of another figure comes between a body and what it carries.
Next
Worlds and Levels builds Hollowmere with the shapes on this page. Hills draws its hills and a ravine’s lips as Sprite Shapes, Water and stone a cliff and a mere as Polygons, Made to measure a sky and banners as Meshes, and The meadow grass as a MultiMesh. Stacked and grouped makes carts of Sorting Groups, and In the dark shows a crypt by a lantern’s Sprite Mask. The Sprite Shape, Polygon, Sprite Mask and Sorting Group pages list every field they have.