Tutorials · Particle Effects · Chapter 16
A gallery of effects
By the end
- Six scenes in
scenes, each finished and playing: snow with depth, an explosion, waterfall mist, falling leaves, a portal and dust in a shaft of light - Two new scripts,
boom.rgs, that sets a blast off on a timer, andflash.rgs, that flashes a light with it, and two things you had not met: the Subtract blend and a Freeform light - For each, its values in one table with the reason for each, what it costs, and which controls change it in your own game
On this page
Six scenes
The first fifteen chapters taught the controls one at a time, in one town. A game uses them together, in many small places. This chapter builds six of those places, each a case you will meet again: snow that has depth, an explosion, the mist at the foot of a waterfall, leaves in the wind, a portal and dust in a shaft of light. Every control in them is one you have used, but for two: the Subtract blend and a Freeform light. There are two short scripts, boom.rgs, that sets a blast off on a timer, and flash.rgs, that flashes a light with it.
The project’s scenes folder holds the six, beside town.ron. They came with the starter, composed and still: the pictures are placed, each scene has a camera of its own, and nothing moves. You open one, add its particles, and play it by itself.
| Scene | The case | What carries it |
|---|---|---|
| Snow | A snowy level with depth, or a cold title screen. | Two emitters on two Sort Layers, Noise, and Collision on the near flakes |
| An explosion | A barrel or an enemy going up. | Six one-shot emitters set off by one script, a light that flashes from another, a Subtract scorch and an attractor that pushes |
| Waterfall mist | Water meeting a pool. | A stretched stream, a Screen mist moved by Noise, and a spray |
| Falling leaves | Autumn wind over a menu, a cutscene or the edge of a forest. | Rotation Over Life, Noise and a gradient that fades each leaf in and out |
| A portal | A magic door, a level exit or a teleporter. | An Edge Only box, a Swirl attractor, a sheet of runes and Additive glow |
| Dust in a shaft of light | A quiet room: a crypt, an attic, a library. | Light Only motes and a Freeform light |
- In Assets, open
scenesand double-click the scene the recipe names. If you changed the open scene, press Ctrl+S first. - Click Look through, so that the Viewport shows the scene as its own camera sees it.
- Build the recipe, and press Ctrl+S.
- Press F5 to play the open scene, and F5 again to stop.
An exported game opens the project’s startup scene, the town, so these six are for lifting and not for shipping. Build a scene of your own the same way.
Every recipe has the same parts, in the same order:
- What it is for: the case, in a game.
- The steps, with a picture at each place the result changes.
- Why: a note wherever the result is not what you would guess.
- The values, in one table, each with the reason for it. Every control was defined in the chapter where you first used it.
- What it costs: the most particles it can draw at once, its largest particle, and any light, attractor or script that comes with it.
- Make it yours: which control gives which result in your own game.
Snow
What it is for. A snowy level, or a title screen in the cold: snow that has depth, with small dim flakes far away and big bright ones close by, and flakes that settle where they land. It joins five controls you know: two emitters on two Sort Layers, a Line shape, Noise, a gradient and Collision.
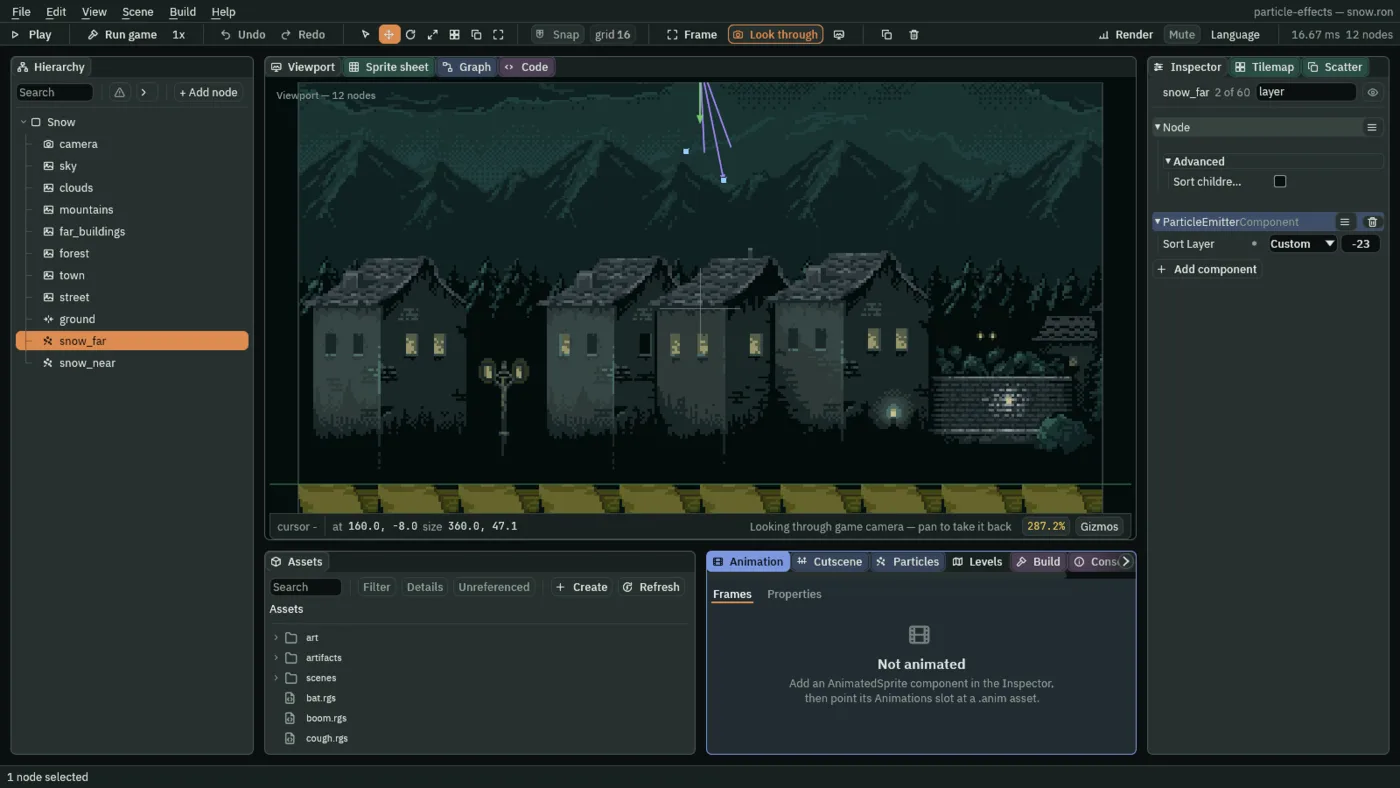
snow.ron holds a row of grey houses under mountains and a forest, a lamp, a low wall with a lantern, and a street of yellow tiles along the bottom. The street’s ground is a Collider just under the tiles’ top edge, the solid the near flakes will land on. Nothing falls yet.
- Open
snow.ronand click Look through. - Select
Snow, press + Add node and choose Particles. Rename itsnow_far, and set its Position to160and-8: above the top of the view, so the flakes are born out of sight. - Set Rate to
30, Lifetime to9, Speed to14, Direction to0.2and1, Spread to0.3and Gravity to4. - Set Start Color and End Color to
0.85,0.9,1, alpha0.6, Start Size and End Size to1.5, Capacity to300, Prewarm to9and Sort Layer to-23. - Under Sprite, set Texture to
soft-dot.png. Under Emission Shape, set Shape to Line and its Length to360. - Tick Noise and set Strength to
6, Frequency to0.05, Scroll to4and0, and Seed to1.
The near flakes are a second emitter in the same place, with its own numbers.
- Select
Snow, press + Add node and choose Particles. Rename itsnow_near, and set its Position to160and-8. - Set Rate to
12, Lifetime to9, Speed to22, Direction to0.15and1, Spread to0.3and Gravity to6. - Set Start Color and End Color to
1,1,1, alpha0.95, Start Size and End Size to3.5, Capacity to120, Prewarm to9and Sort Layer to5. - Under Sprite, set Texture to
snowflake.png. Under Emission Shape, set Shape to Line and its Length to360. - In Over Lifetime, tick Color Over Life and open it. Leave its colour stops empty, so it stays white, and set three alpha stops: at
0alpha1, at0.85alpha1and at1alpha0. - In Rotation, set Rotation Spread to
6.3, Angular Velocity to0.8and Angular Velocity Spread to1.6. - Tick Noise and set Strength to
10, Frequency to0.03, Scroll to6and0, and Seed to2. - In Collision, tick Collision and set Bounce to
0and Friction to1. - Press Ctrl+S.
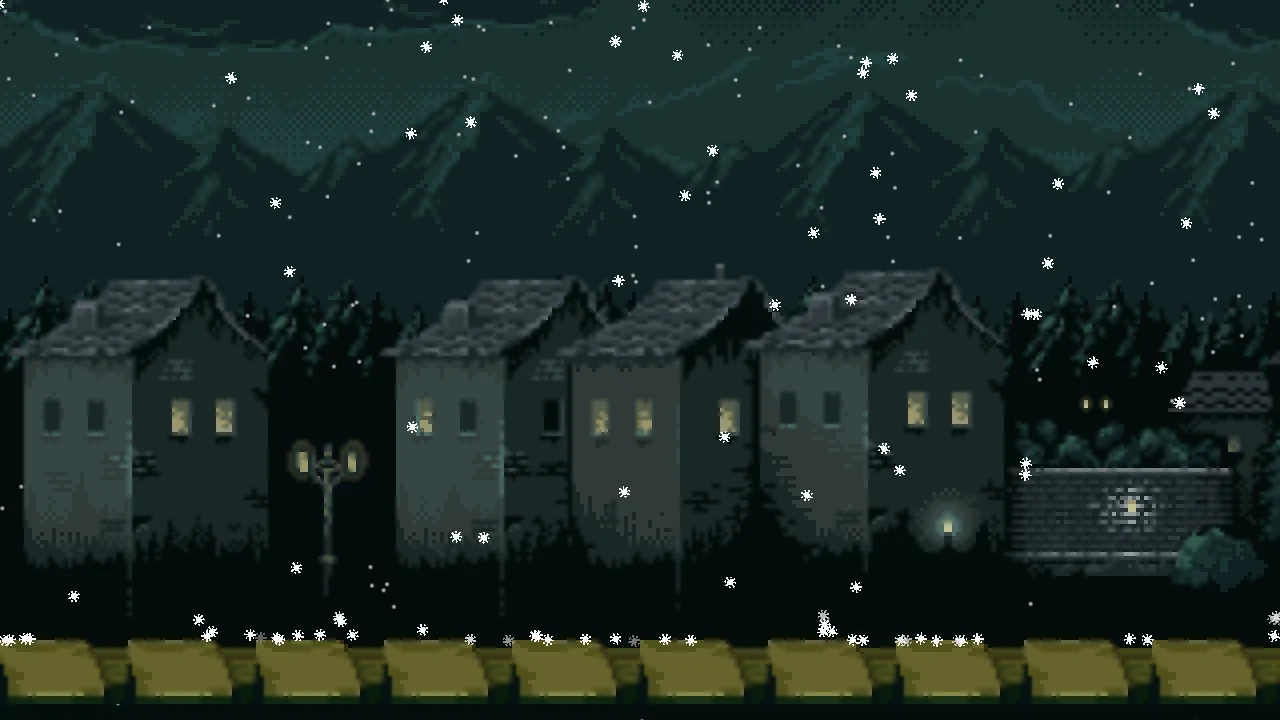
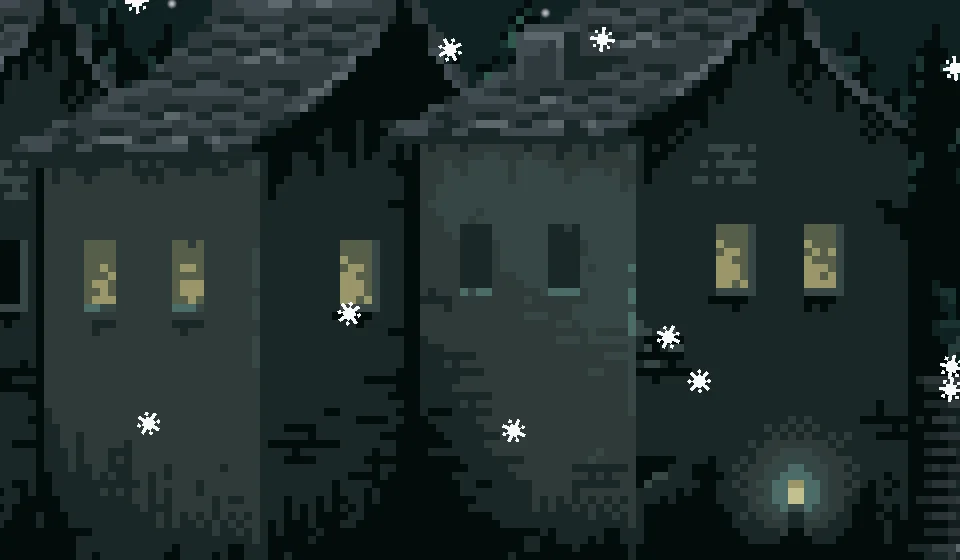
9 means the snow is already falling when the scene opens.The two layers are the depth. Close up on two houses, the far flakes are behind the town and the near flakes are in front of it.
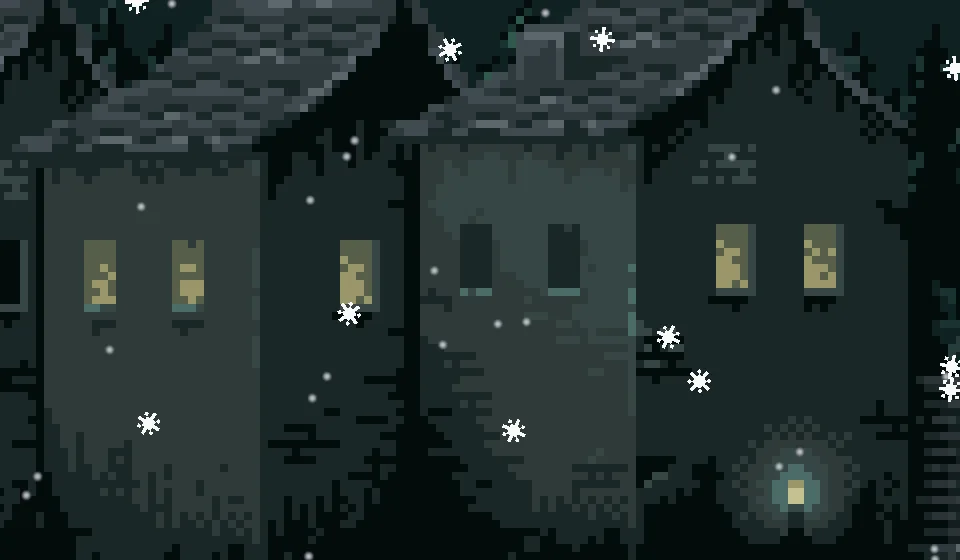
5: they are in front of the houses, small dim specks on the walls, and the depth is gone.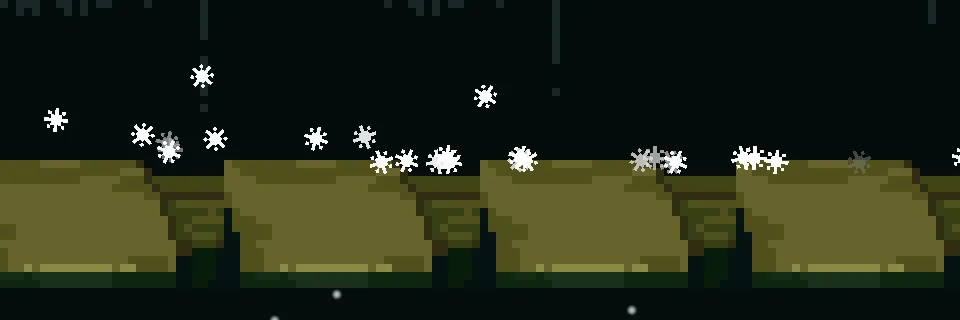
The snow, in one table
| Node | Values | Why this value |
|---|---|---|
snow_far, a Particles node | Position 160, -8, Rate 30, Lifetime 9, Speed 14, Direction 0.2, 1, Spread 0.3, Gravity 4, Start Color and End Color 0.85, 0.9, 1, alpha 0.6, Start Size and End Size 1.5, Capacity 300, Prewarm 9, Sort Layer -23, Texture soft-dot.png, Shape Line, Length 360, Noise Strength 6, Frequency 0.05, Scroll 4, 0, Seed 1 | Small, dim and slow: far away. Behind the houses and in front of the forest. A Capacity of 300 is Rate times Lifetime, 270, and a little more, and a Prewarm of its whole Lifetime opens the scene in snow. The noise is a light drift. |
snow_near, a Particles node | Position 160, -8, Rate 12, Lifetime 9, Speed 22, Direction 0.15, 1, Spread 0.3, Gravity 6, Start Color and End Color 1, 1, 1, alpha 0.95, Start Size and End Size 3.5, Capacity 120, Prewarm 9, Sort Layer 5, Texture snowflake.png, Color Over Life alpha stops 0 → 1, 0.85 → 1, 1 → 0, Rotation Spread 6.3, Angular Velocity 0.8, Angular Velocity Spread 1.6, Shape Line, Length 360, Noise Strength 10, Frequency 0.03, Scroll 6, 0, Seed 2, Collision Bounce 0, Friction 1 | Big, bright and quicker: close. A flake is a picture of a snowflake, born at any angle (Rotation Spread 6.3 is a whole turn) and turning slowly, all one way. A stronger Noise than the far flakes, so they wander more. It stops dead on the ground, and the gradient fades it at the end. |
What it costs. 420 particles at most, 300 and 120, and the largest is a near flake at 3.5 units: many small particles, which is the cheap kind. The near flakes’ Collision looks at the room’s solids each step, and this room has one Collider, so it costs almost nothing here.
An explosion
What it is for. A barrel or an enemy going up: a flash of light, a fireball, sparks, a ring that races outward, chips of stone that fall and bounce, grey smoke that drifts up, and a scorch mark left on the wall. It is six emitters, a light and an attractor, set off together by two short scripts. It joins most of what the tutorial taught: One Shot, the Add blend, Stretch, Collision, an attractor, a light and two scripts.
explosion.ron holds a brick house with a window, a rubble heap at each side and a street of stone, with a ground Collider along the street. Nothing is lit and nothing goes off yet. Two short scripts do the work, since a script changes only the components on its own node: one restarts a node’s emitter, and one flashes a node’s light. Write the first now.
- In Assets, click Assets in the path bar over the tree, so the script is written at the project’s top, then press Create, choose New script, type
boom, and press Enter. - In the Code tab, replace everything in
boom.rgswith the script below, and press Ctrl+S.
/// A blast on a timer. Every `every` seconds this node's emitter fires again
/// from the start, as the Particles panel's Restart does.
component Boom {
    /// Seconds from one blast to the next.
    #[suffix("s")]
    every: f32 = 4.0,

    fn loop() {
        restart();
        await wait(every);
    }
}
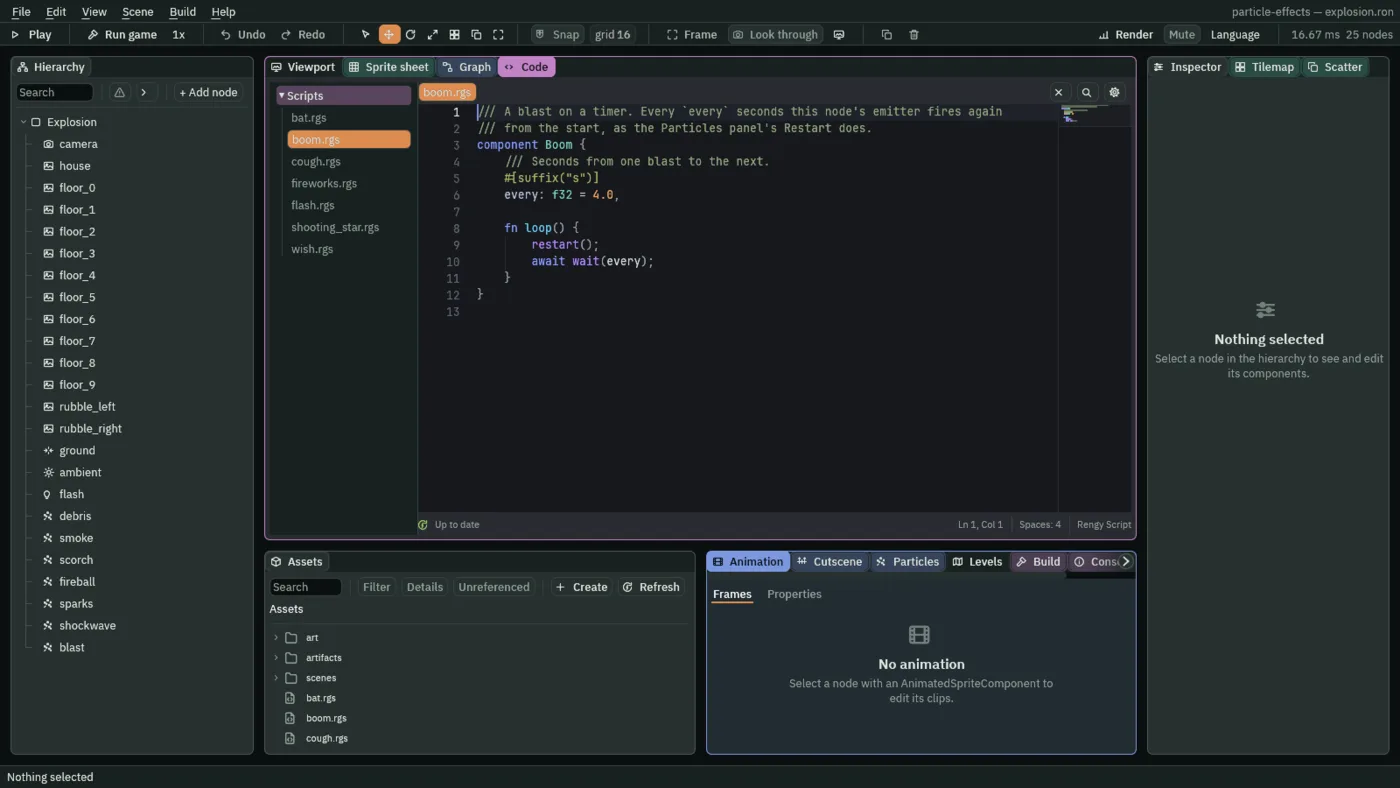
loop runs for ever. It calls restart, which empties this node’s emitter and lets its One Shot fire again, as the Particles panel’s Restart does. Then it waits every seconds and starts again. The first pass runs as the room opens, so the first blast goes off at once.
- restart
- Empties this node’s particle emitter at the end of the step and lets a One Shot fire again. It reaches the emitter on its own node and no other.
- wait
- Suspends the hook for that many seconds, then carries on from the same line. It is awaited:
await wait(every). - Every
- Seconds from one blast to the next:
4.
The flash is the second script. The light is a node of its own, and a script changes only the components on its own node, so the light needs a script of its own rather than a share of Boom.
- In Assets, click Assets in the path bar over the tree, so the script is written at the project’s top, then press Create, choose New script, type
flash, and press Enter. - In the Code tab, replace everything in
flash.rgswith the script below, and press Ctrl+S.
/// A light that flashes on a timer. Every `every` seconds this node's Light
/// leaps to `brightness` and fades out over a third of a second. Give it the
/// same `every` as the blast's Boom and the flash and the blast stay in step.
component Flash {
    /// Seconds from one flash to the next.
    #[suffix("s")]
    every: f32 = 4.0,
    /// How bright the Light flashes: its peak.
    brightness: f32 = 3.0,

    fn loop() {
        set_number("LightComponent", "intensity", brightness);
        anneal_number("LightComponent", "intensity", 0.0, 0.35, .OutQuad);
        await wait(every);
    }
}
loop sets the node’s Light to brightness at once and eases it back to zero over 0.35 seconds. Then it waits every seconds and starts again. Like Boom, its first pass runs as the room opens, so with the same every the flash and the blast start together and stay in step.
- set_number
- Writes a number onto a field of another component on this node. Here the Light’s Intensity, straight to
brightness. - anneal_number
- Takes a number field to a value over a time, along a curve. Here the Light’s Intensity back to
0in0.35seconds along.OutQuad, which starts fast and slows to a stop, so the flash leaps and dies away. - Every
- Seconds from one flash to the next:
4, the same as every Boom. - Brightness
- The peak the Light leaps to:
3. The Light’s own Intensity holds the same3, because the editor warns of a Light switched on at0, which lights nothing. In play, the first blast sets it to3as the room opens.
The scene starts with its lights: an ambient, and the flash, a warm light that leaps with each blast and dies away.
- Open
explosion.ronand click Look through. - Select
Explosion, press + Add node and choose Ambient Light. Rename itambient. Set its Position to8and8and its Color to0.5,0.48,0.5, alpha1. - Press + Add node and choose Light. Rename it
flash. Set its Position to160and140, and leave Kind on Point. Set Radius to160, Intensity to3and Color to1,0.75,0.45, alpha1. - Press Add component and choose Flash. Set Every to
4and Brightness to3.
Then the chips of stone: twenty flung up in a fan that fall back and bounce on the street.
- Select
Explosion, press + Add node and choose Particles. Rename itdebris, and set its Position to160and150. - Tick One Shot and set Burst to
20and Capacity to20: a one-shot fires its whole burst at once, so its pool needs exactly that many. Set Lifetime to2.5, Speed to150, Spread to1.6and Gravity to420. Leave Direction at0and-1, straight up. - Set Start Color and End Color to
1,1,1, alpha1, Start Size and End Size to6and Sort Layer to3. Under Sprite, set Texture todebris.png. - In Rotation, set Rotation Spread to
6.3, Angular Velocity to6and Angular Velocity Spread to8. - In Collision, tick Collision and set Bounce to
0.35and Friction to0.6. - Press Add component and choose Boom. Leave Every at
4.
The smoke is grey puffs that swell and rise, born across a small disc.
- Add a Particles node
smokeat160and150. Tick One Shot and set Burst to30and Capacity to30. - Set Lifetime to
3.6, Speed to14, Spread to7, Gravity to-16and Drag to3. - Set Start Color to
0.05,0.05,0.055, alpha0.85and End Color to0.16,0.16,0.17, alpha0.85. Set Start Size to16, End Size to56and Sort Layer to2. Under Sprite, set Texture tosoft-dot.png. - In Over Lifetime, tick Color Over Life and set three alpha stops, with no colour stops: at
0alpha1, at0.6alpha1and at1alpha0. - Under Emission Shape, set Shape to Circle and its Radius to
16. - Add Boom, with Every
4.
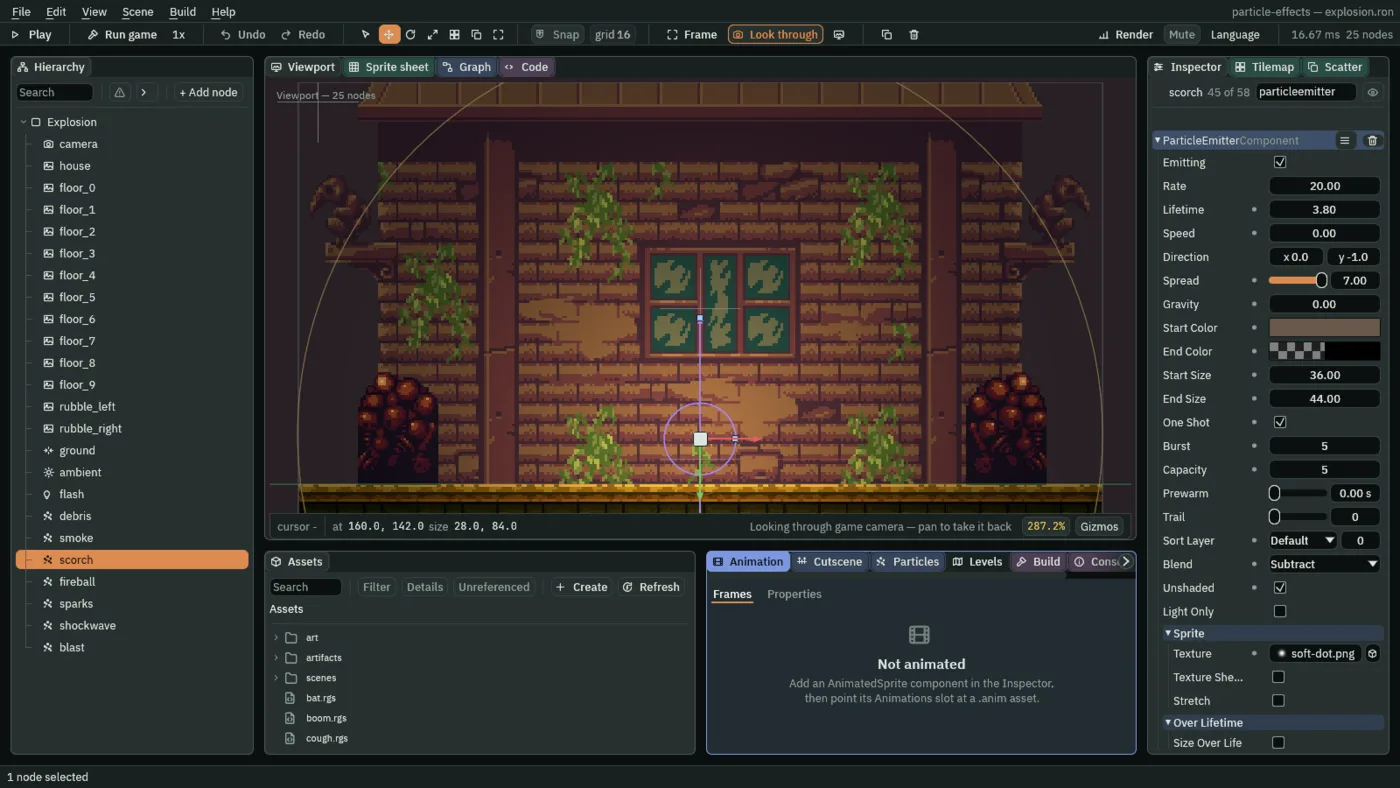
The fireball is the white-hot core, and the scorch is the mark it leaves on the wall. The scorch is the one place the tutorial uses the Subtract blend, so it has a section of its own below. Build both now.
- Add a Particles node
fireballat160and150. Tick One Shot and set Burst to10and Capacity to10. - Set Lifetime to
0.45, Speed to10, Spread to7, Gravity to0and Drag to8. - Set Start Color to
1,0.95,0.8, alpha1and End Color to1,0.4,0.08, alpha0. Set Start Size to26, End Size to56and Sort Layer to3. - Set Blend to Add and tick Unshaded. Under Sprite, set Texture to
soft-dot.png. - Add Boom, with Every
4. - Add a Particles node
scorchat160and142. Tick One Shot and set Burst to5and Capacity to5. - Set Lifetime to
3.8, Speed to0, Spread to7and Gravity to0. - Set Start Color to
0.14,0.1,0.07, alpha1and End Color to0.14,0.1,0.07, alpha0. Set Start Size to36, End Size to44and Sort Layer to0. - Set Blend to Subtract and tick Unshaded. Under Sprite, set Texture to
soft-dot.png. - In Over Lifetime, tick Velocity Over Life and open it. Set both of its points to
0: at0the value0, and at1the value0. - Under Emission Shape, set Shape to Circle and its Radius to
14. - Add Boom, with Every
4.
The sparks are thin streaks, and the shockwave is a ring of forty dots.
- Add a Particles node
sparksat160and148. Tick One Shot and set Burst to36and Capacity to36. - Set Lifetime to
0.9, Speed to220, Spread to7, Gravity to200and Drag to1.5. - Set Start Color to
1,0.95,0.7, alpha1and End Color to1,0.5,0.15, alpha0. Set Start Size to2.5, End Size to1and Sort Layer to4. - Set Blend to Add and tick Unshaded. Under Sprite, set Texture to
spark.png, tick Stretch and set Length Scale to1and Speed Scale to0.01. In Rotation, tick Align To Velocity. - Add Boom, with Every
4. - Add a Particles node
shockwaveat160and150. Tick One Shot and set Burst to40and Capacity to40. - Set Lifetime to
0.6, Speed to0, Spread to7and Gravity to0. - Set Start Color to
1,0.9,0.7, alpha0.8and End Color to1,0.8,0.6, alpha0. Set Start Size to4, End Size to2and Sort Layer to4. - Set Blend to Add and tick Unshaded. Under Sprite, set Texture to
soft-dot.png. - Under Emission Shape, set Shape to Circle, Radius to
6, and tick Edge Only. - Add Boom, with Every
4.
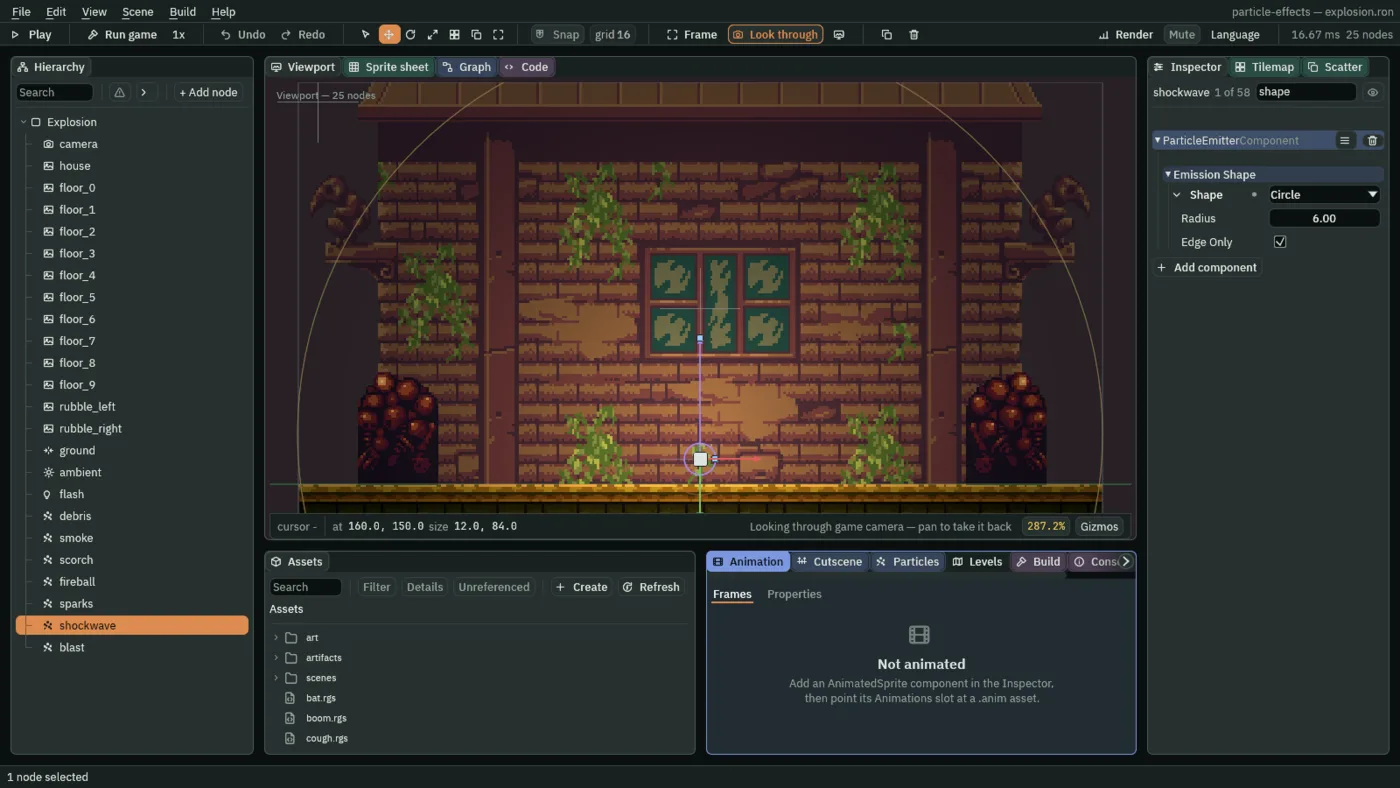
The last node is the push. A Repel at the middle of the blast gives everything born near it a shove outward.
- Select
Explosion, press + Add node and choose Particle Attractor. Rename itblast, and set its Position to160and150. - Set Kind to Repel, Radius to
14and Strength to3000. Leave Enabled ticked. - Press Ctrl+S, and press F5.
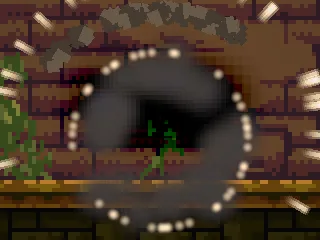
The blast goes off as soon as the room opens and again every four seconds. Four moments of it:
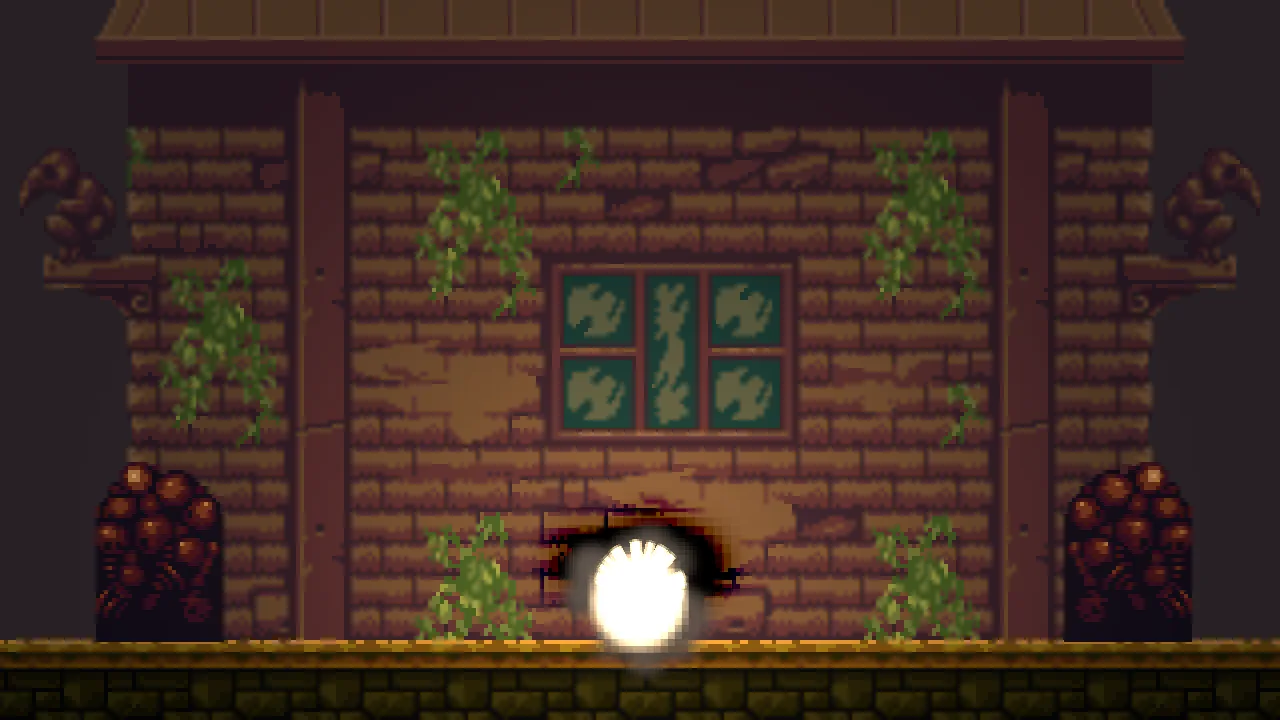
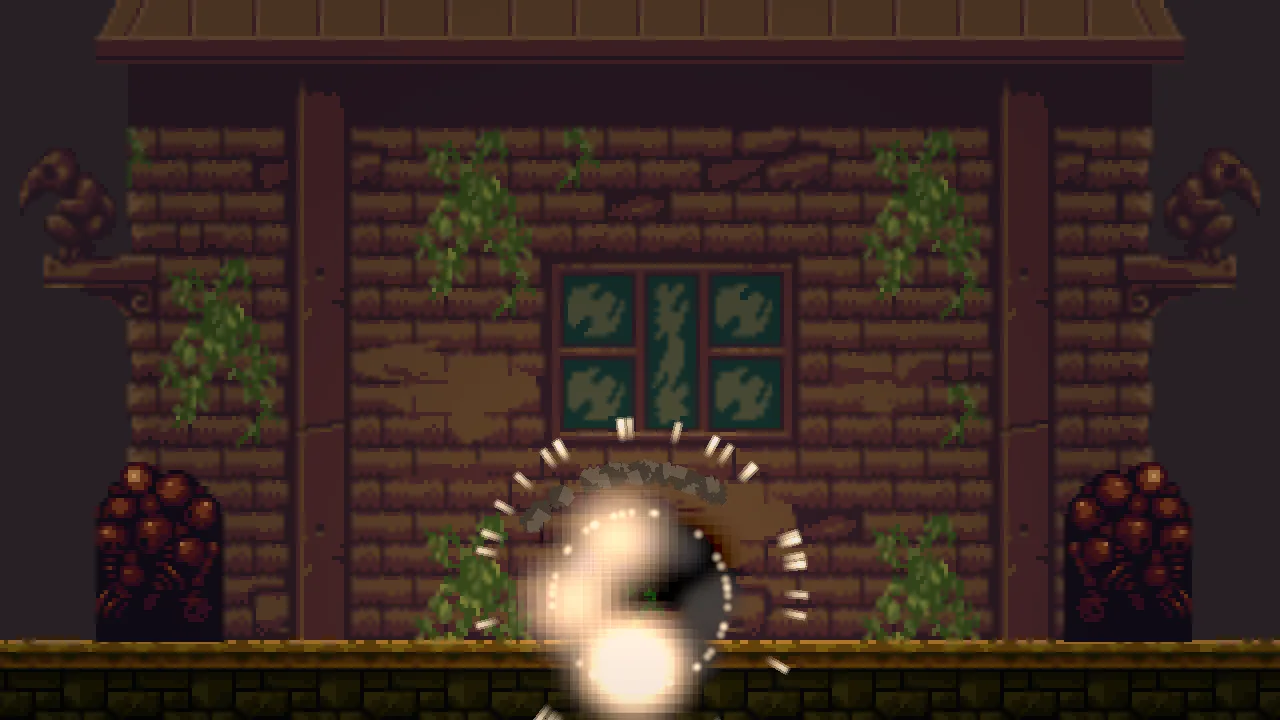
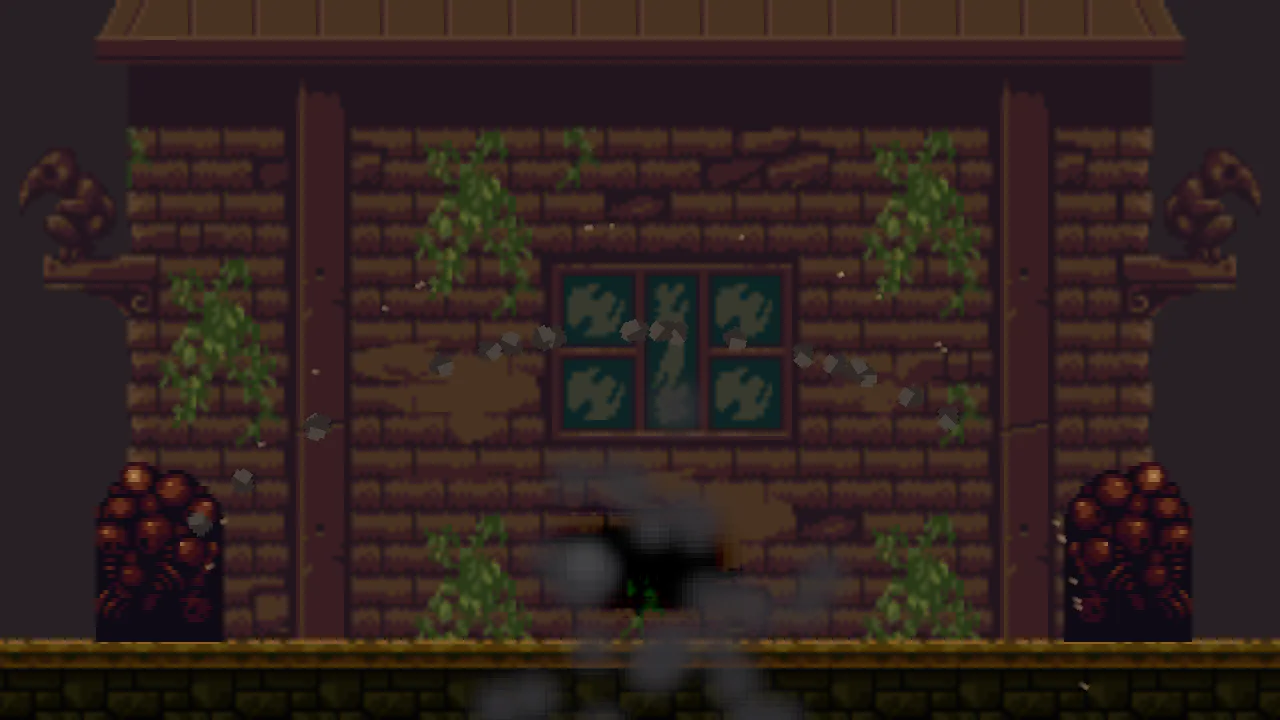
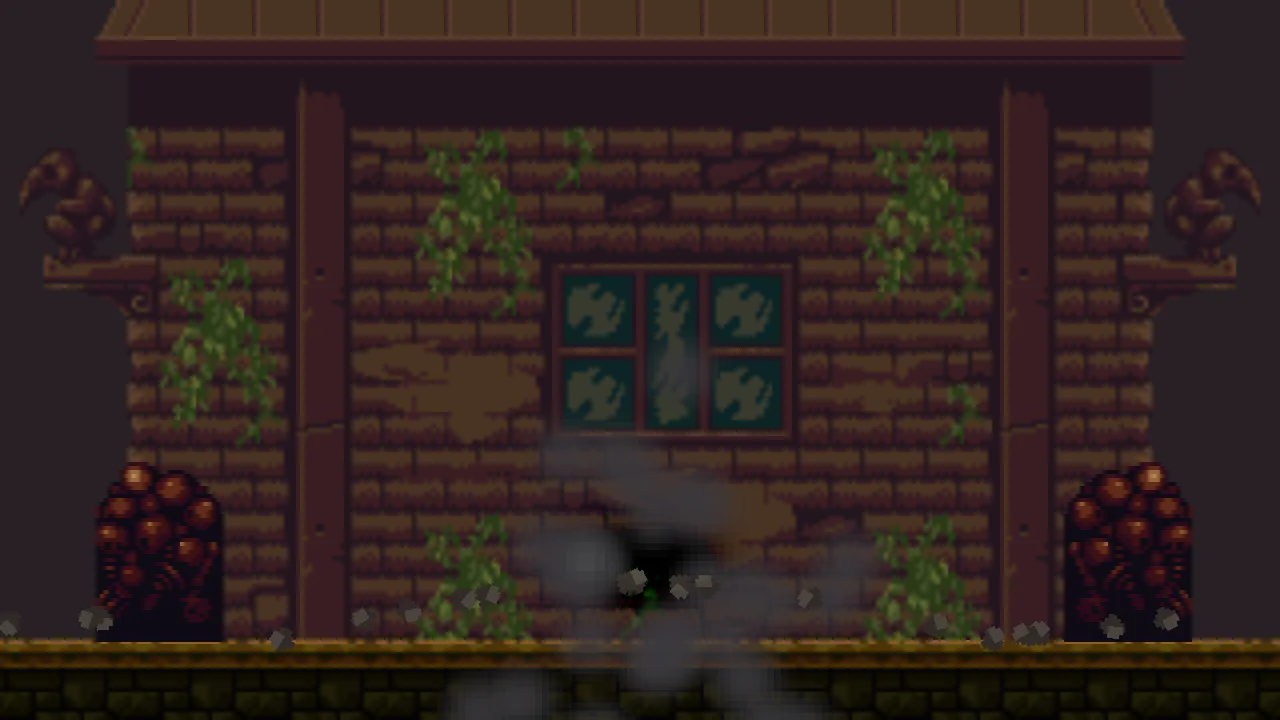
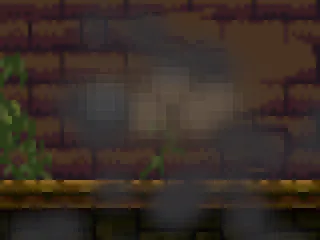
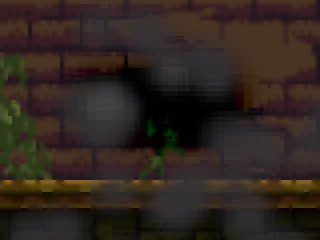
The push is why the ring is a ring. The next two pictures leave the fireball out of both, since it covers the middle, and cut to the core at a fifth of a second.
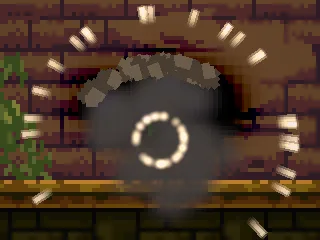
The scorch is what is left. It is the only emitter here that darkens the wall behind it, and that needs a blend you have not used.
- Blend Subtract
- Takes the particle’s colour away from what is behind it: red from red, green from green, blue from blue, scaled by the particle’s alpha, and never below black. It is the opposite of Add. Where particles overlap, each takes its share again. Use it for a mark that must darken a wall, a stain or a hole. Its Color is an amount to take away, not a colour to paint.
- Velocity Over Life
- A curve that multiplies a particle’s whole velocity across its life, as chapter 5 set it. Here it is
0from birth to death, so the scorch’s five dots do not move at all, whatever pushes them.
The explosion, in one table
| Node | Values | Why this value |
|---|---|---|
ambient, an Ambient Light | Position 8, 8, Color 0.5, 0.48, 0.5, alpha 1 | Half strength, so the wall is lit but the flash still stands out. |
flash, a Light, with Flash | Position 160, 140, Kind Point, Radius 160, Intensity 3, Color 1, 0.75, 0.45, Flash Every 4, Brightness 3 | A warm light that leaps to 3 as a blast goes off, then dies in a third of a second. Its own Intensity holds the peak, so the editor has nothing to warn of. |
debris, a Particles node, with Boom | Position 160, 150, One Shot, Burst 20, Capacity 20, Lifetime 2.5, Speed 150, Direction 0, -1, Spread 1.6, Gravity 420, Start Color and End Color 1, 1, 1, alpha 1, Start Size and End Size 6, Sort Layer 3, Texture debris.png, Rotation Spread 6.3, Angular Velocity 6, Angular Velocity Spread 8, Collision Bounce 0.35, Friction 0.6, Boom Every 4 | Chips thrown up in a quarter-circle fan, tumbling at 2 to 10 radians a second, that fall hard and bounce on the street. White, so the picture’s own grey shows. |
smoke, a Particles node, with Boom | Position 160, 150, One Shot, Burst 30, Capacity 30, Lifetime 3.6, Speed 14, Spread 7, Gravity -16, Drag 3, Start Color 0.05, 0.05, 0.055, alpha 0.85, End Color 0.16, 0.16, 0.17, alpha 0.85, Start Size 16, End Size 56, Sort Layer 2, Texture soft-dot.png, Color Over Life alpha stops 0 → 1, 0.6 → 1, 1 → 0, Shape Circle, Radius 16, Boom Every 4 | Grey, soft puffs that swell and rise. The alpha is kept in the gradient, so the End Color’s alpha can stay 0.85. |
scorch, a Particles node, with Boom | Position 160, 142, One Shot, Burst 5, Capacity 5, Lifetime 3.8, Speed 0, Spread 7, Gravity 0, Start Color 0.14, 0.1, 0.07, alpha 1, End Color 0.14, 0.1, 0.07, alpha 0, Start Size 36, End Size 44, Sort Layer 0, Blend Subtract, Unshaded, Texture soft-dot.png, Velocity Over Life 0 → 0, 1 → 0, Shape Circle, Radius 14, Boom Every 4 | The amount to take off the wall, in a patch as wide as the blast, held still, fading out over its life. Sort Layer 0 is above the house’s -10. |
fireball, a Particles node, with Boom | Position 160, 150, One Shot, Burst 10, Capacity 10, Lifetime 0.45, Speed 10, Spread 7, Gravity 0, Drag 8, Start Color 1, 0.95, 0.8, alpha 1, End Color 1, 0.4, 0.08, alpha 0, Start Size 26, End Size 56, Sort Layer 3, Blend Add, Unshaded, Texture soft-dot.png, Boom Every 4 | Ten big soft dots with almost no speed of their own: Drag 8 takes it at once, so the ball is where the blast is, and the push splits it into lumps. It swells and cools from white to orange as it fades. |
sparks, a Particles node, with Boom | Position 160, 148, One Shot, Burst 36, Capacity 36, Lifetime 0.9, Speed 220, Spread 7, Gravity 200, Drag 1.5, Start Color 1, 0.95, 0.7, alpha 1, End Color 1, 0.5, 0.15, alpha 0, Start Size 2.5, End Size 1, Sort Layer 4, Blend Add, Unshaded, Texture spark.png, Stretch Length Scale 1, Speed Scale 0.01, Align To Velocity, Boom Every 4 | Fast, in every direction, falling and slowing. A spark at full speed is stretched to about three times its width and points the way it flies. |
shockwave, a Particles node, with Boom | Position 160, 150, One Shot, Burst 40, Capacity 40, Lifetime 0.6, Speed 0, Spread 7, Gravity 0, Start Color 1, 0.9, 0.7, alpha 0.8, End Color 1, 0.8, 0.6, alpha 0, Start Size 4, End Size 2, Sort Layer 4, Blend Add, Unshaded, Texture soft-dot.png, Shape Circle, Radius 6, Edge Only, Boom Every 4 | Forty dots on a rim, born still. The push is what makes them a ring that grows. |
blast, a Particle Attractor | Position 160, 150, Kind Repel, Radius 14, Strength 3000 | A short, hard shove at the middle: just past the ring’s birth circle of 6, strong enough to throw a ring and a fireball out in a few frames. |
What it costs. 141 particles at most: 20, 30, 5, 10, 36 and 40. The costliest pixels are the smoke and the fireball, each up to 56 units across and 30 and 10 of them overlapping, so a phone feels this one even though it is brief. It also carries one light, which is off between blasts, one attractor, a Collision on the chips and seven small scripts.
Waterfall mist
What it is for. Water meeting a pool: a fall of streaks, mist that rises where it lands and spray thrown up at its foot. Use it for a level’s waterfall, a dam, a broken pipe or a fountain. It joins a Line shape, Stretch, Prewarm, a Screen blend and Noise.
waterfall.ron holds a cliff of six stone pillars at the left, mountains and a forest behind, and a pool of water along the bottom. The water is a picture, with the cliff’s edge at its left and the pool’s top edge at 164. Nothing falls yet.
- Open
waterfall.ronand click Look through. - Select
Waterfall, press + Add node and choose Particles. Rename itfalls, and set its Position to104and40, at the lip of the cliff. - Set Rate to
160, Lifetime to1, Speed to20, Direction to0.2and1, Spread to0.1and Gravity to300. - Set Start Color and End Color to
0.75,0.9,1, alpha0.85, Start Size and End Size to4, Capacity to176, Prewarm to1and Sort Layer to-1. - Under Sprite, set Texture to
raindrop.png, tick Stretch and set Length Scale to1and Speed Scale to0.02. Under Emission Shape, set Shape to Line and its Length to14.
The mist is a second emitter at the foot of the fall, and the spray a third.
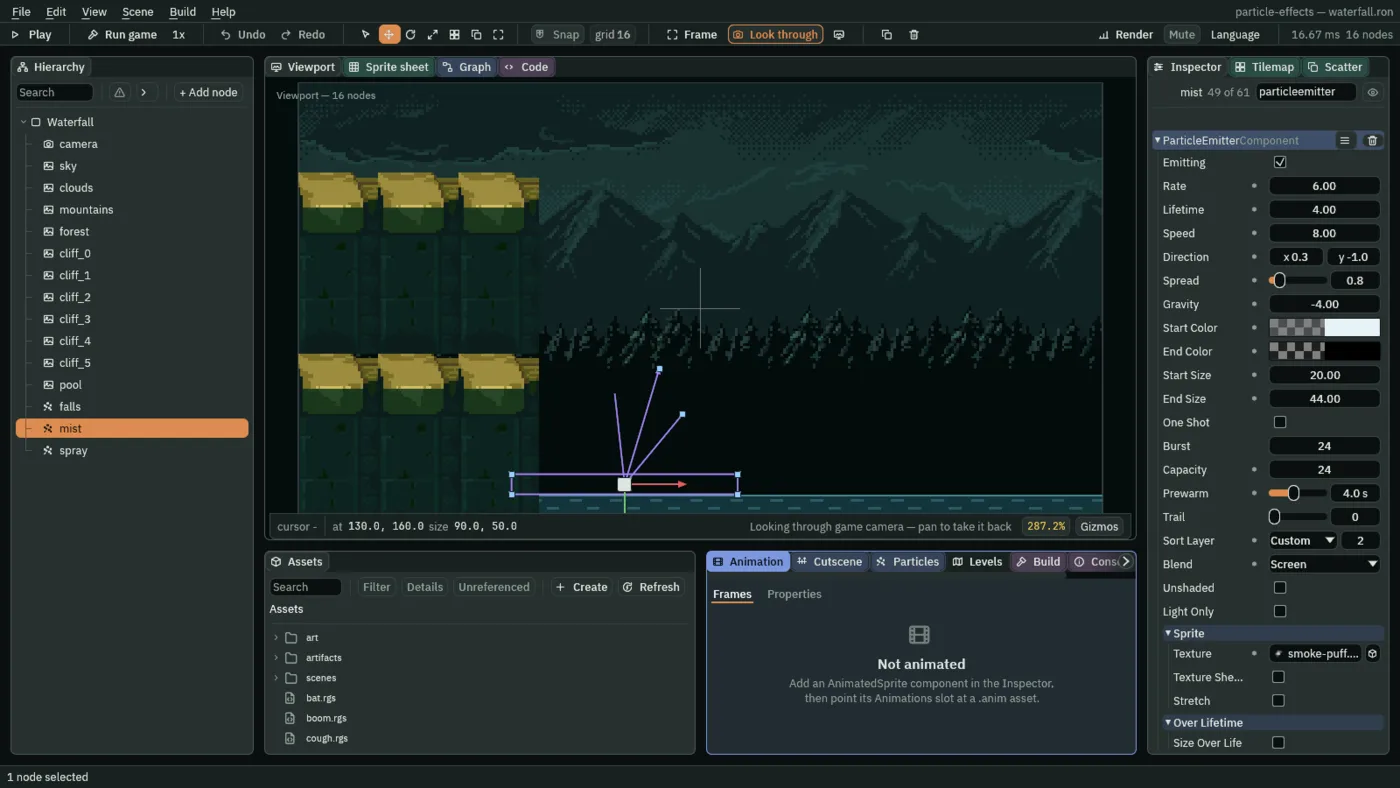
- Add a Particles node
mistat130and160, on the water. Set Rate to6, Lifetime to4, Speed to8, Direction to0.3and-1, Spread to0.8and Gravity to-4. - Set Start Color to
0.8,0.9,0.95, alpha0.3and End Color to the same three numbers with alpha0. Set Start Size to20, End Size to44, Capacity to24, Prewarm to4and Sort Layer to2. - Set Blend to Screen. Under Sprite, set Texture to
smoke-puff.png. Under Emission Shape, set Shape to Box and its Size to90and8. - Tick Noise and set Strength to
8, Frequency to0.02, Scroll to5and-2, and Seed to4. - Add a Particles node
sprayat110and164. Set Rate to40, Lifetime to0.6, leave Speed at60, and set Direction to0.4and-1, Spread to0.9and Gravity to260. - Set Start Color to
0.85,0.95,1, alpha0.8and End Color to the same three numbers with alpha0. Set Start Size to1.5, End Size to1, Capacity to32and Sort Layer to2. Under Sprite, set Texture tosoft-dot.png. Under Emission Shape, set Shape to Box and its Size to24and2. - Press Ctrl+S.
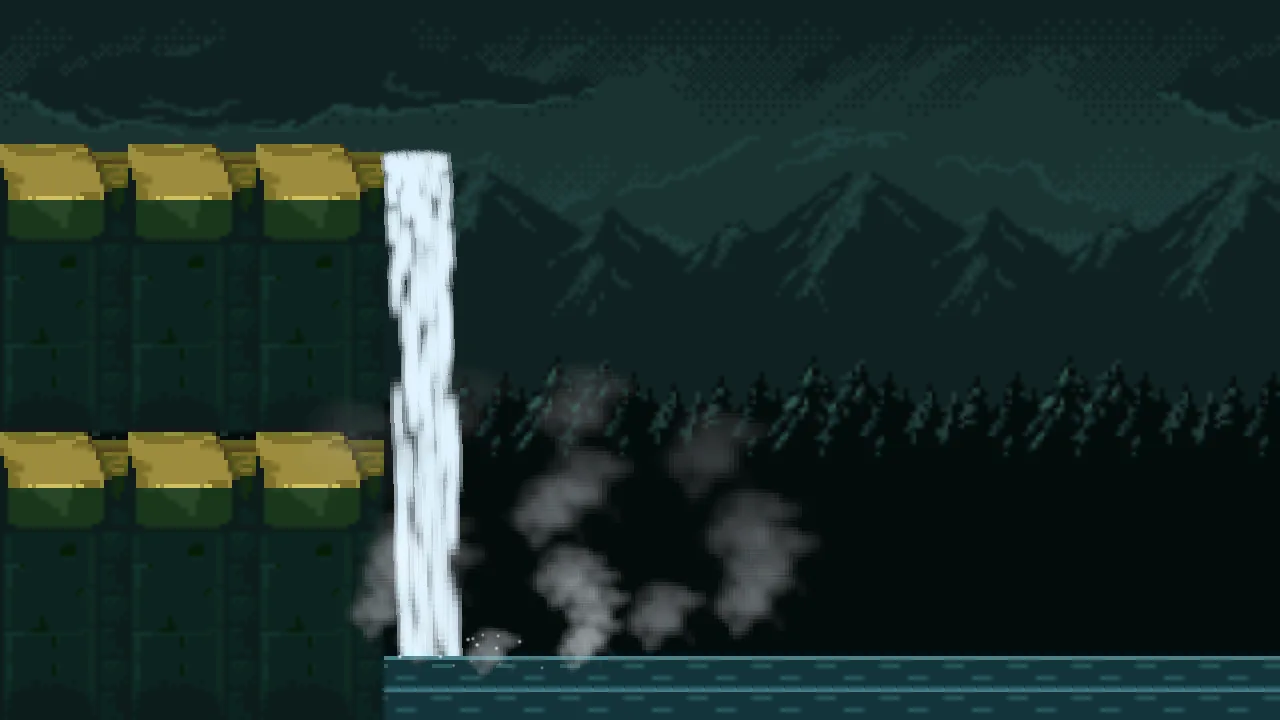
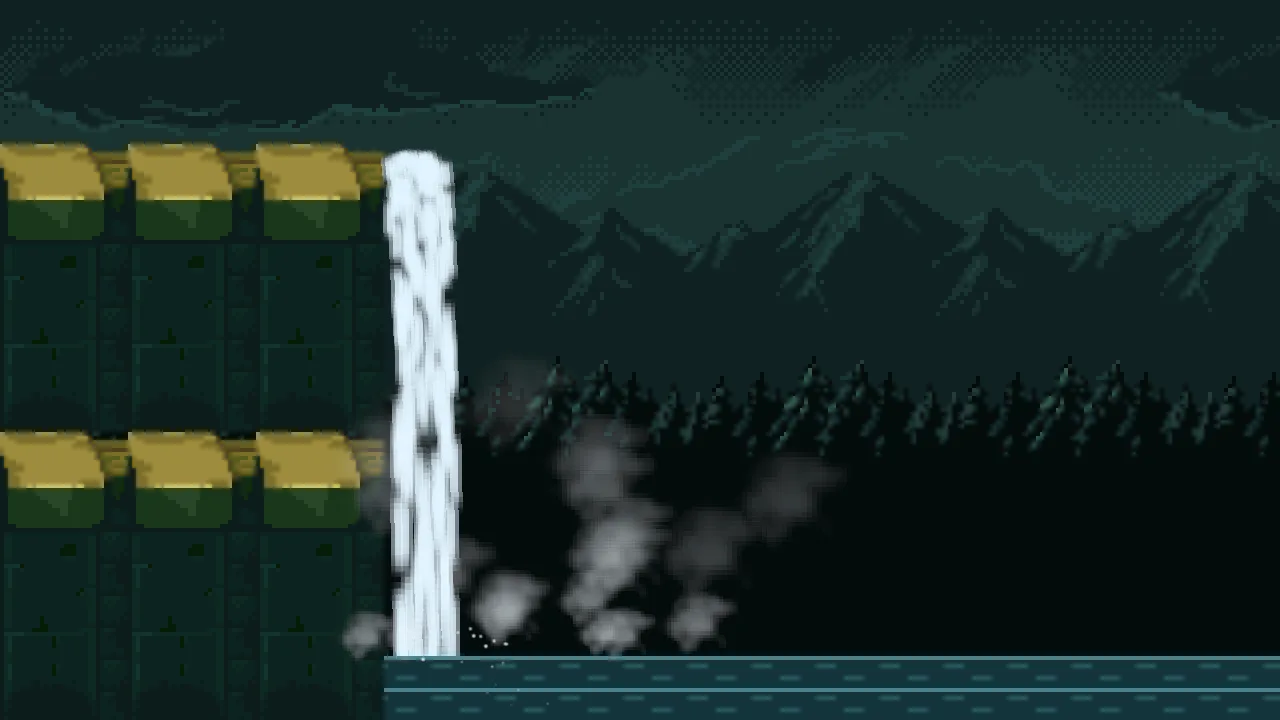
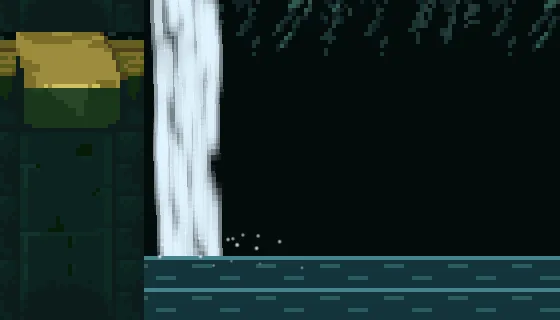
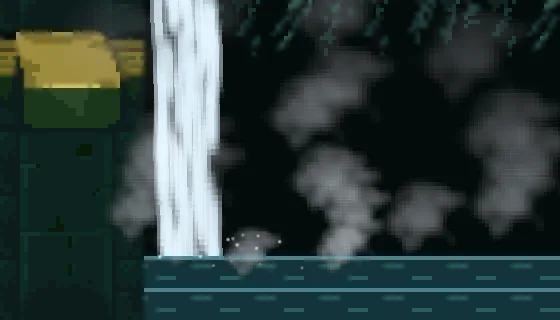
The waterfall, in one table
| Node | Values | Why this value |
|---|---|---|
falls, a Particles node | Position 104, 40, Rate 160, Lifetime 1, Speed 20, Direction 0.2, 1, Spread 0.1, Gravity 300, Start Color and End Color 0.75, 0.9, 1, alpha 0.85, Start Size and End Size 4, Capacity 176, Prewarm 1, Sort Layer -1, Texture raindrop.png, Stretch Length Scale 1, Speed Scale 0.02, Shape Line, Length 14 | A dense stream, 160 a second, with a little lean and almost no spread, so it holds together. Capacity is Rate times Lifetime, 160, and a little more. Pale blue and mostly solid: water. |
mist, a Particles node | Position 130, 160, Rate 6, Lifetime 4, Speed 8, Direction 0.3, -1, Spread 0.8, Gravity -4, Start Color 0.8, 0.9, 0.95, alpha 0.3, End Color 0.8, 0.9, 0.95, alpha 0, Start Size 20, End Size 44, Capacity 24, Prewarm 4, Sort Layer 2, Blend Screen, Texture smoke-puff.png, Shape Box, Size 90, 8, Noise Strength 8, Frequency 0.02, Scroll 5, -2, Seed 4 | Few, slow, faint and growing. The Box is a strip 90 wide along the water, most of it to the right of the fall. A Prewarm of its whole Lifetime has the mist up when the scene opens. |
spray, a Particles node | Position 110, 164, Rate 40, Lifetime 0.6, Speed 60, Direction 0.4, -1, Spread 0.9, Gravity 260, Start Color 0.85, 0.95, 1, alpha 0.8, End Color 0.85, 0.95, 1, alpha 0, Start Size 1.5, End Size 1, Capacity 32, Sort Layer 2, Texture soft-dot.png, Shape Box, Size 24, 2 | Fine drops thrown up and back down within 0.6 of a second, at the water’s edge, from a strip a little wider than the fall. |
What it costs. 232 particles at most: 176, 24 and 32. The streaks are many but thin. The mist is the larger price: at most 24 puffs, each growing to 44 units across and overlapping the others.
Falling leaves
What it is for. Autumn wind: leaves falling past a village on a menu screen, a cutscene or the edge of a forest level. Each leaf tumbles at its own pace, the wind pushes them all sideways, and they fade in and out rather than pop. It joins Rotation, Rotation Over Life, Noise and a gradient.
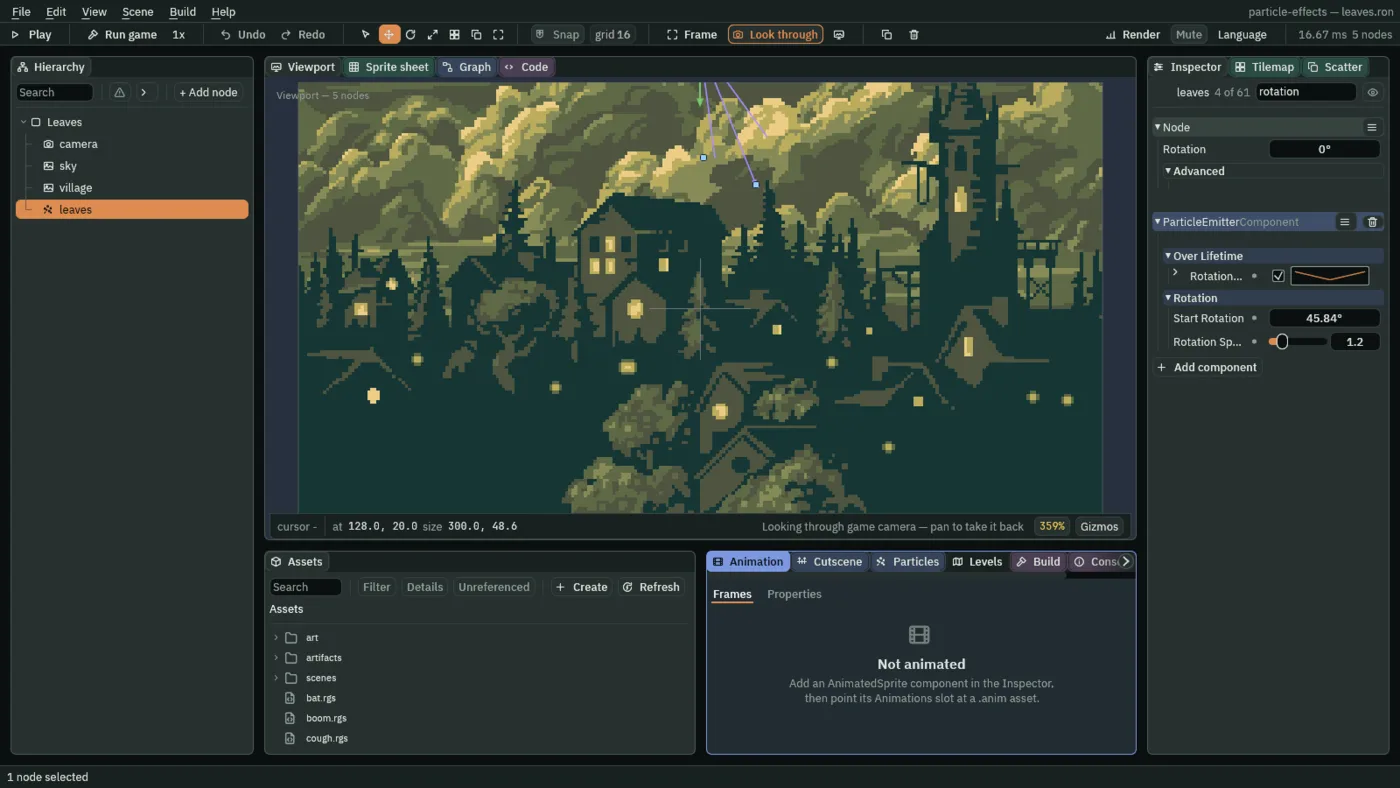
leaves.ron holds a village under a stormy sky, drawn from 256 by 144, a smaller view than the other scenes’ 320 by 180, so everything is larger on the screen. Nothing falls yet.
- Open
leaves.ronand click Look through. - Select
Leaves, press + Add node and choose Particles. Rename itleaves, and set its Position to128and20, above the top of the view. - Set Rate to
5, Lifetime to9, Speed to12, Direction to0.4and1, Spread to0.5, Gravity to14and Drag to0.4. - Set Start Color to
0.95,0.55,0.18, alpha1and End Color to0.55,0.25,0.1, alpha1. Set Start Size and End Size to5, Capacity to48, Prewarm to9and Sort Layer to2. Under Sprite, set Texture toleaf.png. - In Over Lifetime, tick Color Over Life and set four alpha stops, with no colour stops: at
0alpha0, at0.08alpha1, at0.9alpha1and at1alpha0. - Tick Rotation Over Life and open it. Set three points: at
0the value1, at0.5the value0.3and at1the value1. - In Rotation, set Start Rotation to
45.84, Rotation Spread to1.2, Angular Velocity to1and Angular Velocity Spread to4. The Inspector shows Start Rotation in degrees, and45.84degrees is0.8radians, the number the scene holds. The other three are in radians. - Under Emission Shape, set Shape to Box and its Size to
300and8. - Tick Noise and set Strength to
22, Frequency to0.03, Scroll to8and0, and Seed to5. - Press Ctrl+S.
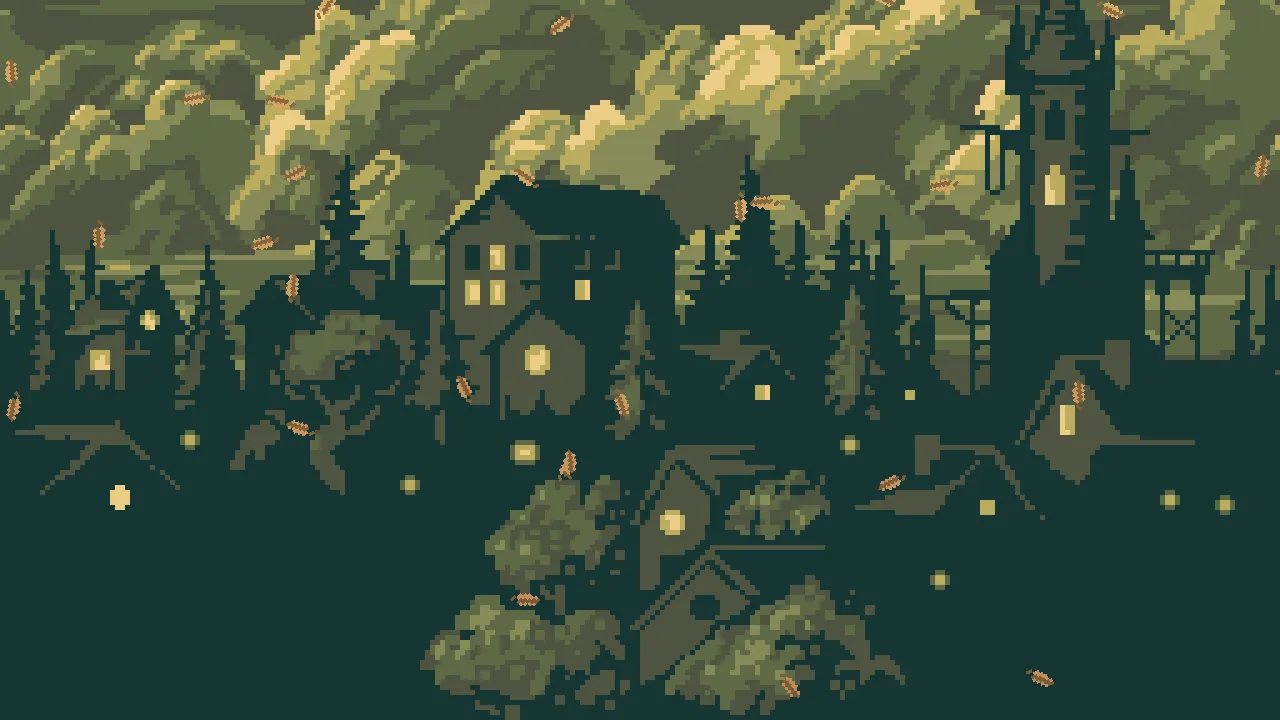
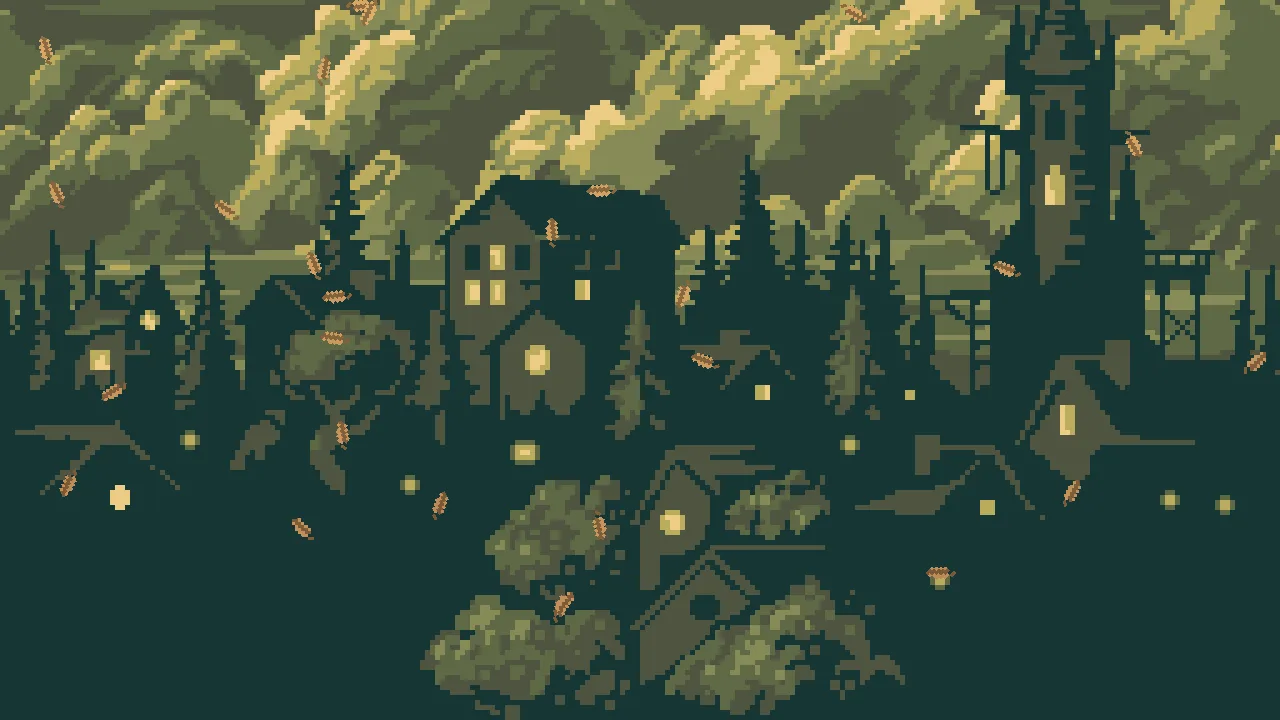
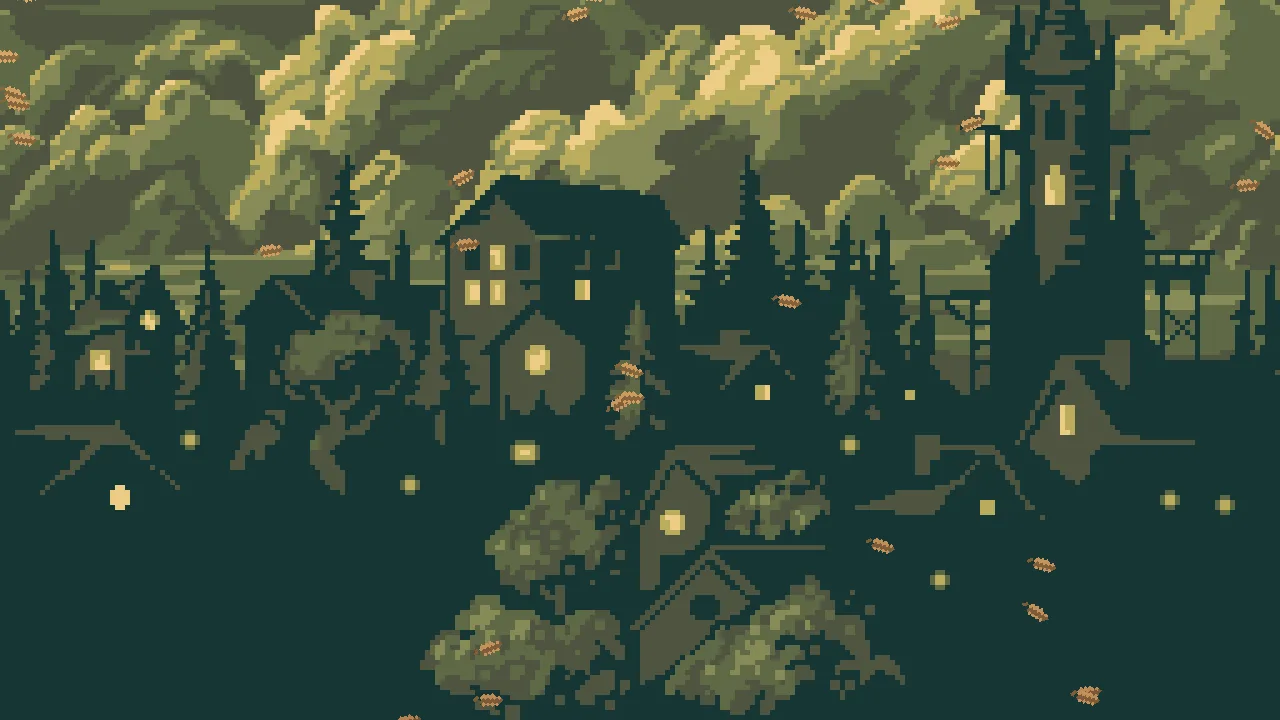
The leaves, in one table
| Node | Values | Why this value |
|---|---|---|
leaves, a Particles node | Position 128, 20, Rate 5, Lifetime 9, Speed 12, Direction 0.4, 1, Spread 0.5, Gravity 14, Drag 0.4, Start Color 0.95, 0.55, 0.18, alpha 1, End Color 0.55, 0.25, 0.1, alpha 1, Start Size and End Size 5, Capacity 48, Prewarm 9, Sort Layer 2, Texture leaf.png, Color Over Life alpha stops 0 → 0, 0.08 → 1, 0.9 → 1, 1 → 0, Rotation Over Life 0 → 1, 0.5 → 0.3, 1 → 1, Start Rotation 45.84 degrees, 0.8 radians, Rotation Spread 1.2, Angular Velocity 1, Angular Velocity Spread 4, Shape Box, Size 300, 8, Noise Strength 22, Frequency 0.03, Scroll 8, 0, Seed 5 | Slow and light: a small Speed, a gentle Gravity, a little Drag. Orange at birth and browner as it falls. A Start Rotation of 0.8 with a spread of 1.2 leans every leaf the same way, by different amounts. A Capacity of 48 is Rate times Lifetime, 45, and a little more. |
What it costs. 48 particles at most, each 5 units across: almost free.
A portal
What it is for. A magic door, a level exit or a teleporter: sparks that crawl round a doorway and are swept into a swirl, a dark void in its middle and a ring of runes that turns slowly. Three emitters and an attractor.
portal.ron holds a dark stone hall: a stair at the left, a gargoyle over an arch in the middle and a wall at the right, with a floor of stone below. Nothing glows yet.
- Open
portal.ronand click Look through. - Select
Portal, press + Add node and choose Particles. Rename itframe, and set its Position to200and112, the middle of the arch. - Set Rate to
70, Lifetime to1.4, Speed to2, Spread to7, Gravity to0and Drag to1. - Set Start Color to
0.75,0.45,1, alpha1and End Color to0.35,0.2,1, alpha0. Set Start Size to3, End Size to1, Capacity to100and Sort Layer to4. - Set Blend to Add. Under Sprite, set Texture to
soft-dot.png. Under Emission Shape, set Shape to Box, its Size to44and72, and tick Edge Only. - Press + Add node and choose Particle Attractor. Rename it
swirl, and set its Position to200and112. Set Kind to Swirl, Radius to48and Strength to90.
The void is a dark puff behind the sparks, and the runes are a turning ring in front of them.
- Add a Particles node
voidat200and112. Set Rate to4, Lifetime to2.5, Speed to3, Spread to7and Gravity to0. - Set Start Color to
0.08,0.02,0.12, alpha0.9and End Color to the same three numbers with alpha0. Set Start Size to36, End Size to52, Capacity to12and Sort Layer to3. Under Sprite, set Texture tosmoke-puff.png. - In Rotation, set Rotation Spread to
6.3and Angular Velocity to0.5. - Add a Particles node
runesat200and112. Set Rate to1.2, Lifetime to2.4, Speed to0, Spread to0and Gravity to0. - Set Start Color and End Color to
0.8,0.6,1, alpha1. Set Start Size to40, End Size to56, Capacity to4, Sort Layer to5and Blend to Add. - Under Sprite, set Texture to
rune-ring-sheet.png, tick Texture Sheet and set Columns to4, Rows to1, First to0, Last to3and Driver to Lifetime. - In Over Lifetime, tick Color Over Life and set three alpha stops, with no colour stops: at
0alpha0, at0.3alpha1and at1alpha0. In Rotation, set Angular Velocity to0.6. - Press Ctrl+S.
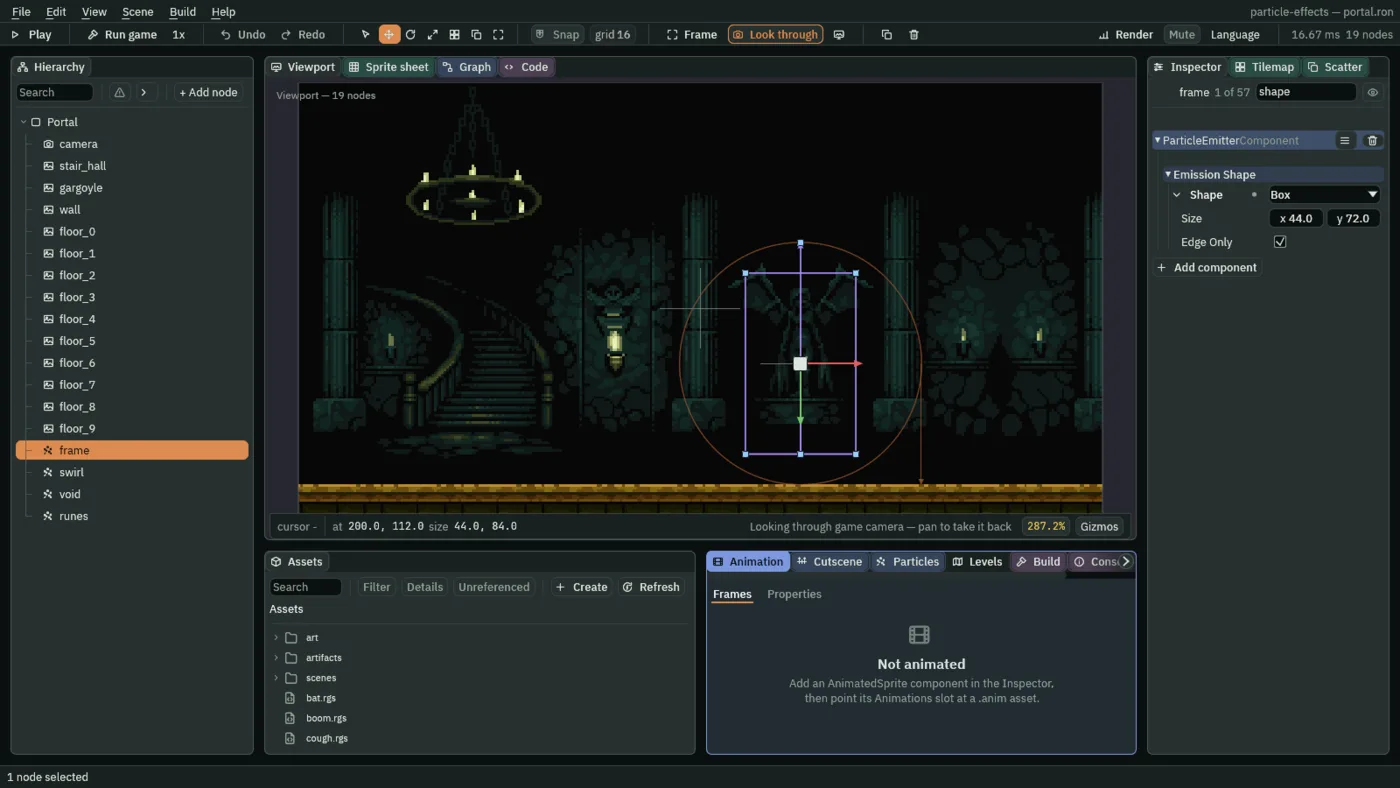
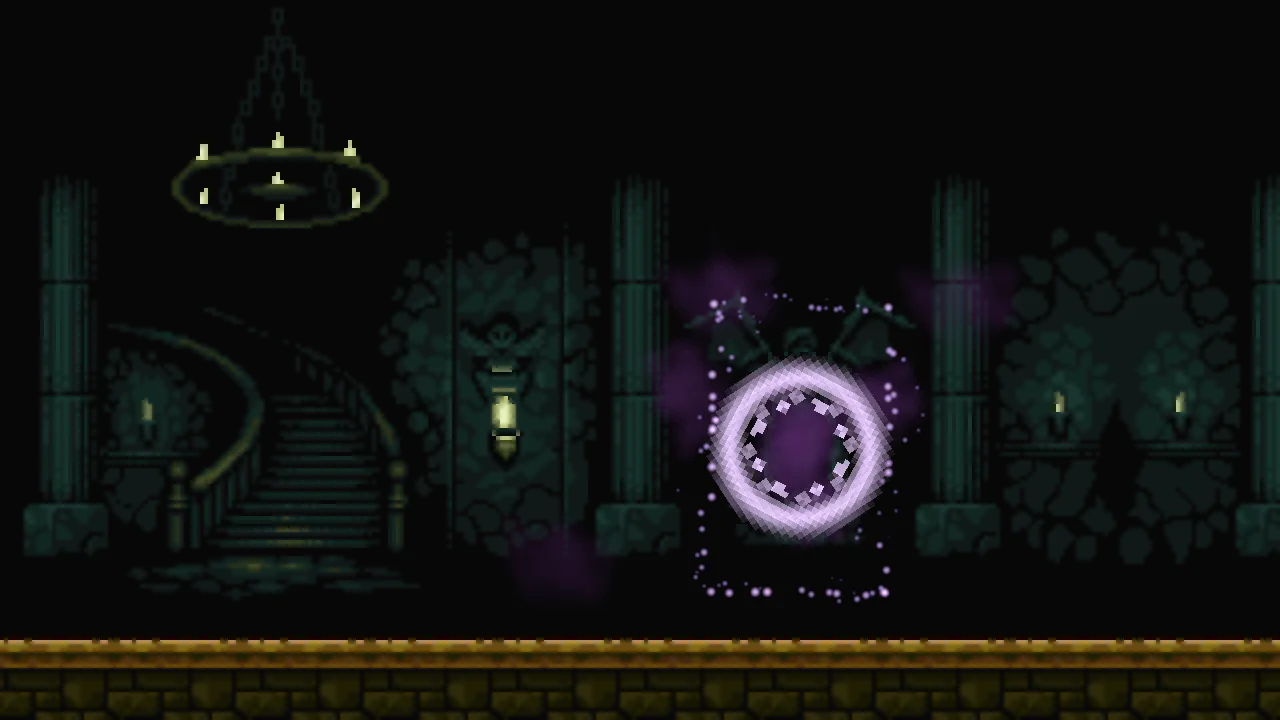
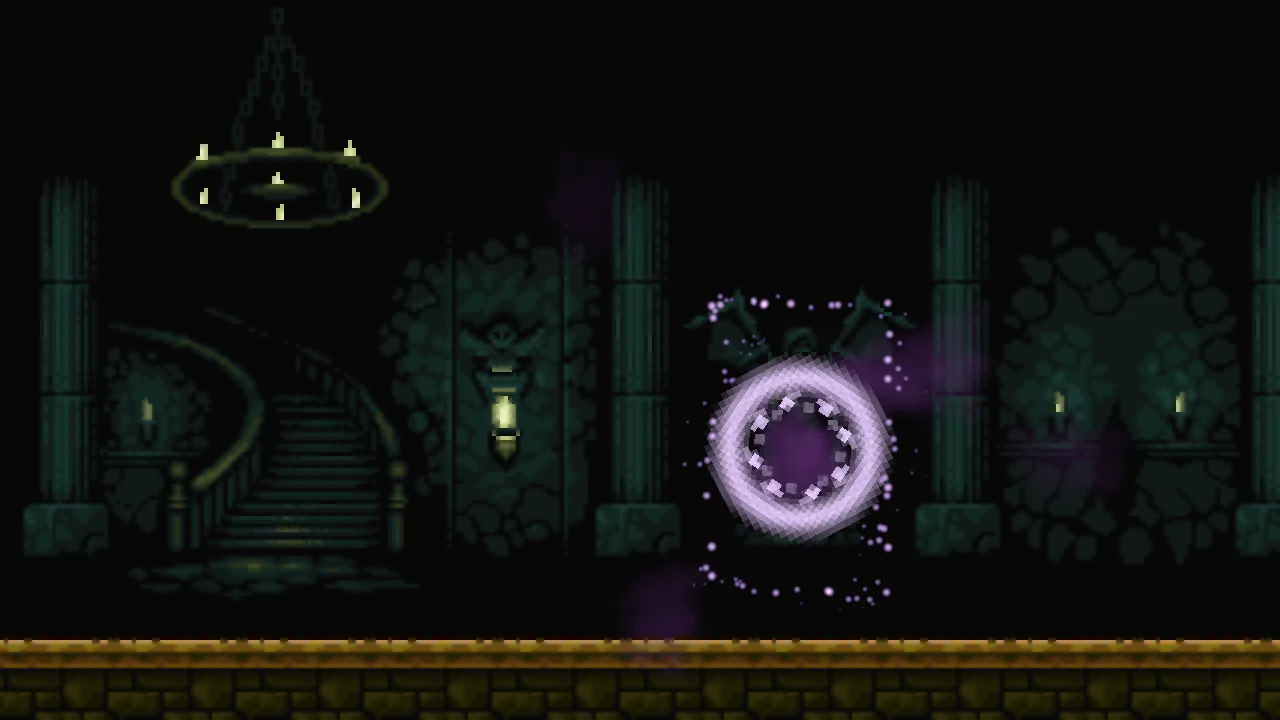
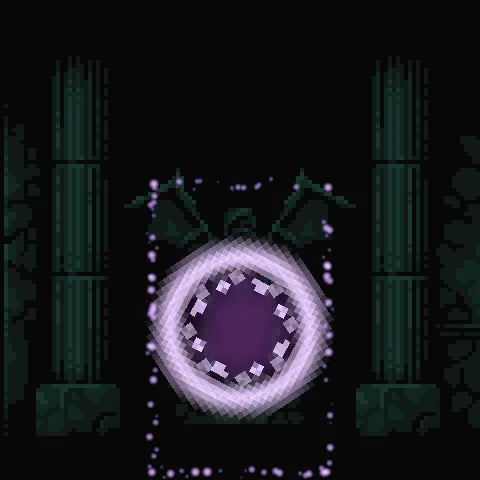
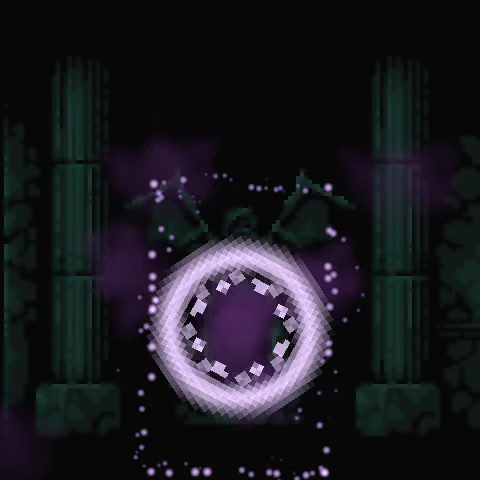
The portal, in one table
| Node | Values | Why this value |
|---|---|---|
frame, a Particles node | Position 200, 112, Rate 70, Lifetime 1.4, Speed 2, Spread 7, Gravity 0, Drag 1, Start Color 0.75, 0.45, 1, alpha 1, End Color 0.35, 0.2, 1, alpha 0, Start Size 3, End Size 1, Capacity 100, Sort Layer 4, Blend Add, Texture soft-dot.png, Shape Box, Size 44, 72, Edge Only | Many, small and almost still: born on the rim at a Speed of 2, so they stay near it unless something moves them. Lilac fading to blue. Capacity is Rate times Lifetime, 98, and a little more. |
swirl, a Particle Attractor | Position 200, 112, Kind Swirl, Radius 48, Strength 90 | Reaches the whole frame and a little past it, and is strong enough to carry the sparks round in about a second. |
void, a Particles node | Position 200, 112, Rate 4, Lifetime 2.5, Speed 3, Spread 7, Gravity 0, Start Color 0.08, 0.02, 0.12, alpha 0.9, End Color 0.08, 0.02, 0.12, alpha 0, Start Size 36, End Size 52, Capacity 12, Sort Layer 3, Texture smoke-puff.png, Rotation Spread 6.3, Angular Velocity 0.5 | A few big, slow, dark puffs, each turning a little, so the middle of the door is a darkness that moves. Capacity is Rate times Lifetime, 10, and a little more. |
runes, a Particles node | Position 200, 112, Rate 1.2, Lifetime 2.4, Speed 0, Spread 0, Gravity 0, Start Color and End Color 0.8, 0.6, 1, alpha 1, Start Size 40, End Size 56, Capacity 4, Sort Layer 5, Blend Add, Texture rune-ring-sheet.png, Texture Sheet Columns 4, Rows 1, First 0, Last 3, Driver Lifetime, Color Over Life alpha stops 0 → 0, 0.3 → 1, 1 → 0, Angular Velocity 0.6 | One ring about every 0.8 seconds, born still at the middle and turning slowly as it grows, in front of everything else. |
What it costs. 116 particles at most: 100, 12 and 4. The count is modest, the sizes are not: the void’s puffs reach 52 units and the runes’ rings 56. It also carries one attractor, which tests each particle in its reach once a step.
Dust in a shaft of light
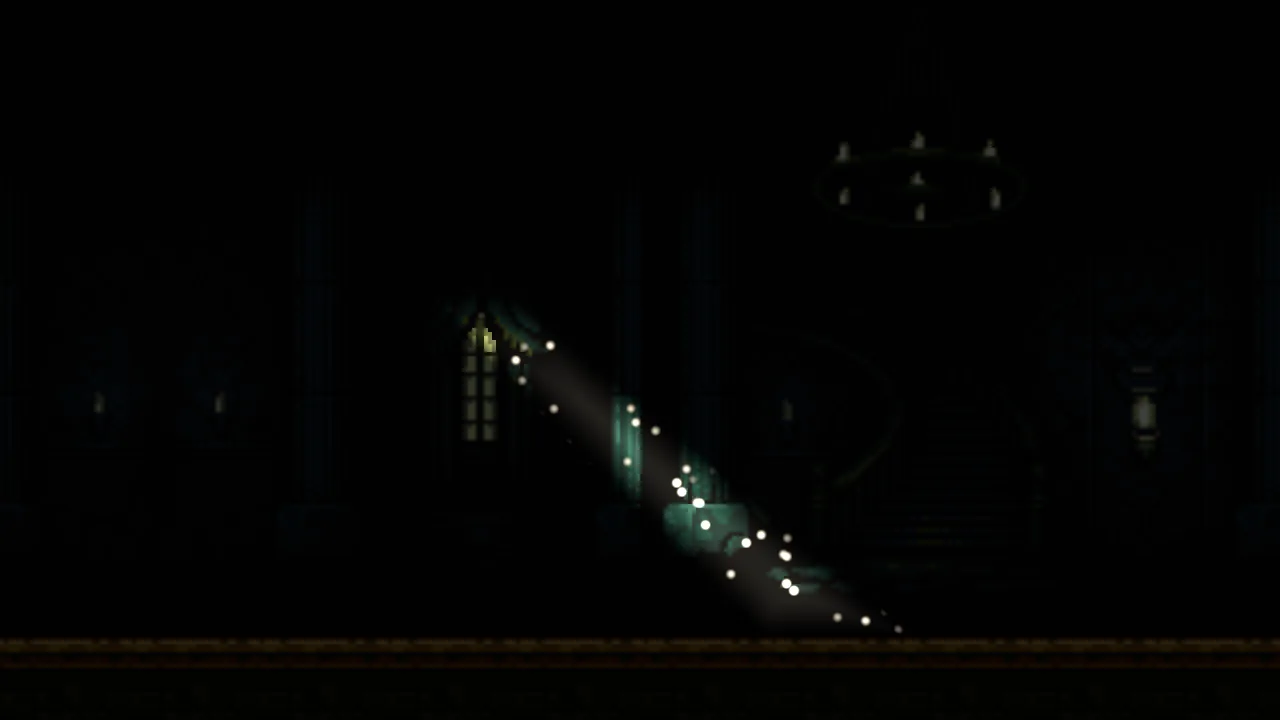
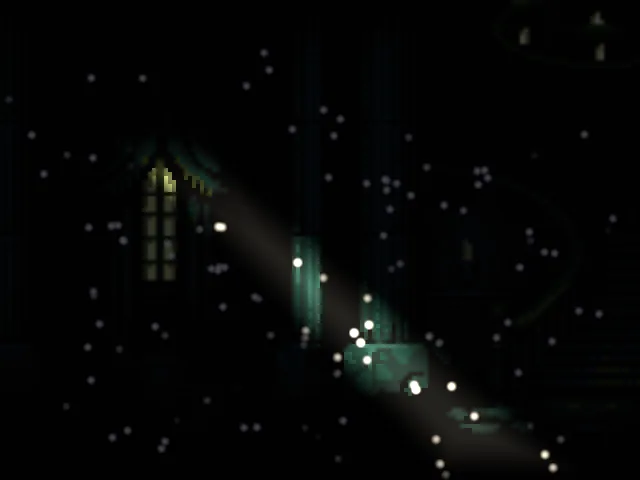
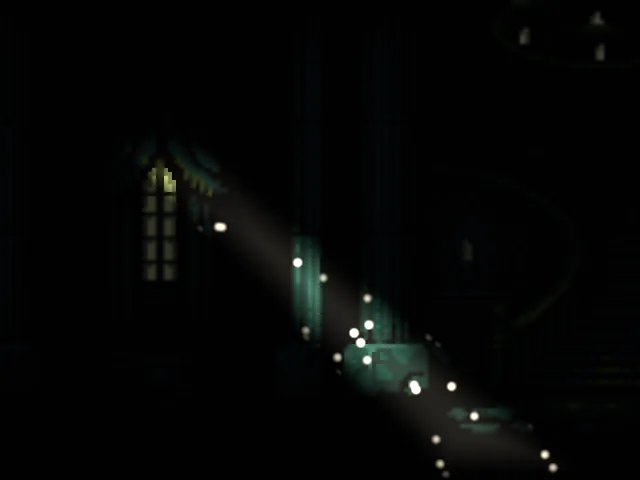
What it is for. A quiet, dusty room: a crypt, an attic, a library, with sunlight coming through a window and dust turning in it. The dust fills the whole room and only the light shows it, so the shaft appears to be full of it. It joins an ambient light, a Freeform light, Light Only, a gradient and Noise.
dust.ron holds a dark hall: a wall at the left, a tall window and a stair at the right, over a floor of stone. Nothing is lit yet.
- Open
dust.ronand click Look through. - Select
Dust, press + Add node and choose Ambient Light. Rename itambient. Set its Position to8and8and its Color to0.06,0.06,0.09, alpha1: so dark that the hall hardly shows. - Press + Add node and choose Light. Rename it
shaft. Set its Position to116and92, and its Kind to Freeform. Set Radius to0, Intensity to8and Color to1,0.92,0.75, alpha1. - Under the Freeform group, beside Outline, press the + four times, and type the four points of the table below: the window’s opening, and where the shaft lands on the floor. Set Falloff to
10.
| Point | x | y |
|---|---|---|
[0] | -12 | -20 |
[1] | 12 | -20 |
[2] | 114 | 68 |
[3] | 74 | 68 |
- Kind Freeform
- Lights a shape you draw, which is what light through a window is: its opening, and then a slanting band across the floor. Light and Shadow builds a shaft like this one in full.
- Outline
- The shape, as points in the node’s own units from its middle:
-12,-20is twelve to the left and twenty up. The first two points are the window’s opening,24across, and the last two are where the band meets the floor. Three or more are needed. - Falloff
- How far in from the outline the light reaches full brightness, in world units.
0is a hard-edged cut-out, and above it the light fades in across that band:10here. Keep it under half the outline’s narrowest width. - Radius
- For a Freeform light, only how far its shadows reach.
0casts none.
The dust is an emitter that fills a box round the whole shaft, and is drawn only where the light falls.
- Select
Dust, press + Add node and choose Particles. Rename itmotes, and set its Position to160and116. - Leave Rate at
20. Set Lifetime to6, Speed to3, Spread to7and Gravity to-1. - Set Start Color and End Color to
1,0.95,0.85, alpha0.9, Start Size and End Size to3, Capacity to128, Prewarm to6and Sort Layer to5. Tick Light Only. - Under Sprite, set Texture to
soft-dot.png. In Over Lifetime, tick Color Over Life and set four alpha stops, with no colour stops: at0alpha0, at0.2alpha1, at0.8alpha1and at1alpha0. - Under Emission Shape, set Shape to Box and its Size to
130and90. - Tick Noise and set Strength to
5, Frequency to0.05, Scroll to2and1, and Seed to6. - Press Ctrl+S.
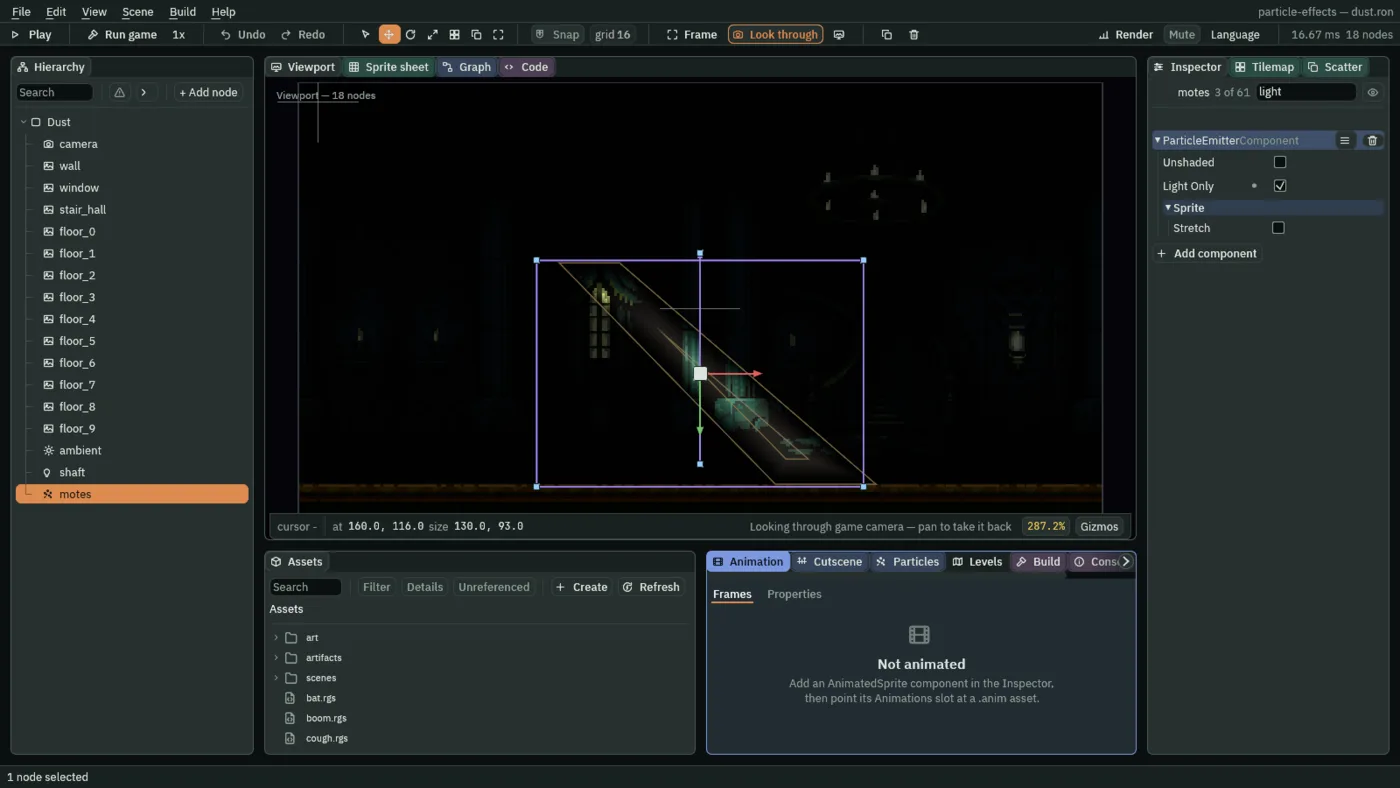
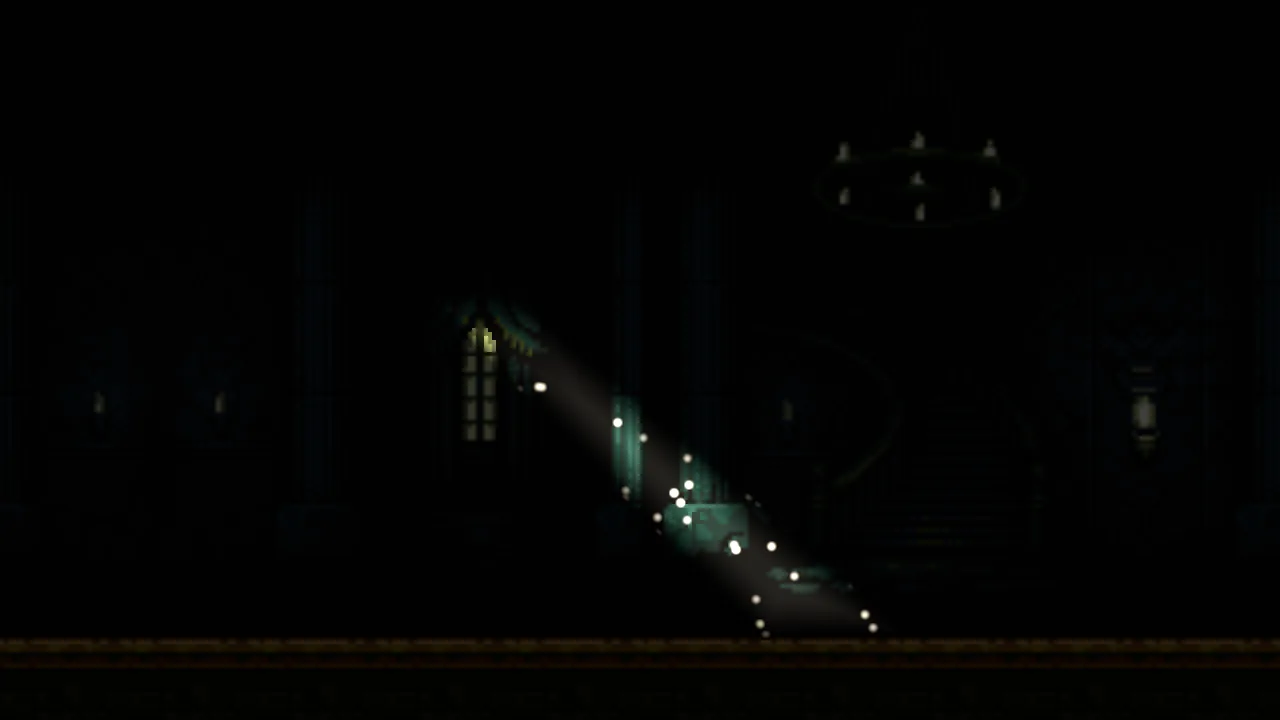
The dust, in one table
| Node | Values | Why this value |
|---|---|---|
ambient, an Ambient Light | Position 8, 8, Color 0.06, 0.06, 0.09, alpha 1 | A cold near-black, so the shaft is the one lit thing in the room. |
shaft, a Light | Position 116, 92, Kind Freeform, Radius 0, Intensity 8, Color 1, 0.92, 0.75, Outline -12, -20, 12, -20, 114, 68, 74, 68, Falloff 10 | A warm band from the window to the floor, soft at its edges. A Radius of 0 casts no shadows, and nothing stands in its way. |
motes, a Particles node | Position 160, 116, Rate 20, Lifetime 6, Speed 3, Spread 7, Gravity -1, Start Color and End Color 1, 0.95, 0.85, alpha 0.9, Start Size and End Size 3, Capacity 128, Prewarm 6, Sort Layer 5, Light Only, Texture soft-dot.png, Color Over Life alpha stops 0 → 0, 0.2 → 1, 0.8 → 1, 1 → 0, Shape Box, Size 130, 90, Noise Strength 5, Frequency 0.05, Scroll 2, 1, Seed 6 | Slow, small and warm white, drifting up a little. They fill a box round the shaft and fade in and out, so none pops. Capacity is Rate times Lifetime, 120, and a little more, and Prewarm its whole Lifetime. |
What it costs. 128 particles at most, each 3 units across: almost free. The one thing it adds is a light, a Freeform one: one light draw a frame, as Light and Shadow counted them.
What each costs
Each recipe priced its own scene. Here they are together.
| Scene | Most particles | Largest particle | Also |
|---|---|---|---|
| Snow | 420 | 3.5 units | Collision on the near flakes, against one Collider. |
| An explosion | 141 | 56 units | One light, off between blasts, one attractor, Collision on the chips and seven small scripts. |
| Waterfall mist | 232 | 44 units | Nothing more. |
| Falling leaves | 48 | 5 units | Nothing more. |
| A portal | 116 | 56 units | One attractor. |
| Dust in a shaft of light | 128 | 3 units | One Freeform light. |
The count alone misleads. Chapter 15’s rule is that a phone pays for pixels, so the explosion’s smoke and the portal’s runes cost more than all the snow, though they are a few dozen particles beside its 420. When you lift a recipe, read its Largest particle first, and thin the big soft ones before the small ones.