Tutorials · Particle Effects · Chapter 14
Light, glow and your own look
By the end
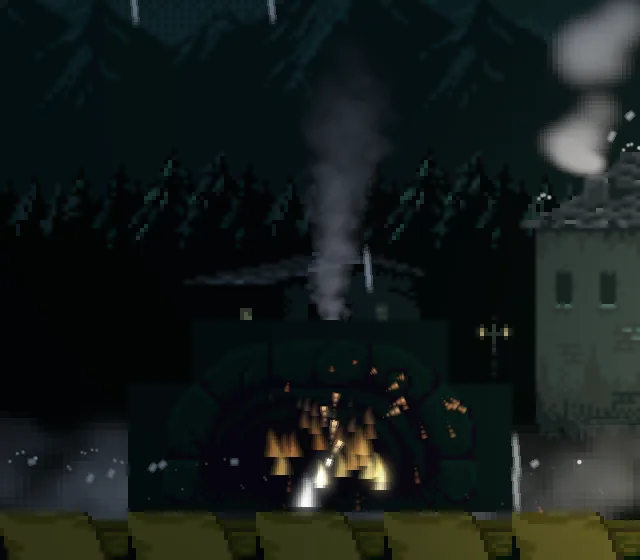
- An ambient light and a Light in each street lamp: the town dark, with a warm pool round each lamp that lights the smoke and the rain
- Fire, sparks and fireflies that glow of their own (Unshaded), moths seen only in the lamp’s light (Light Only), and a Post Volume that gives the bright things a halo
spark-hue.wgsland Custom Data: every spark of a firework in a colour of its own, twinklingbat.rgsand a Trail: a lantern-bat and its ribbon, which breaks at the leap home
On this page
The lamps light the town
Until now the whole town has been drawn at full brightness. Lights light a particle as they light a sprite, so this chapter gives the town a night: a dim, cold ambient light everywhere, and a warm pool round each of the two street lamps. Light and Shadow teaches lights to the last control; this section sets only what the town needs.
- Select
Town, press + Add node, and choose Ambient Light. Rename itambient. Set its Position to8and8. Click Color; if the button at the top left of the picker reads U8, press it so it reads F, as in chapter 2. Set Color to0.3,0.34,0.42, alpha1: a cold blue-grey. - Select
lamp_1, press Add component, and choose LightComponent. Leave Kind on Point. Set Radius to150, Intensity to2.4and Color to1,0.78,0.48, alpha1: a warm orange. - Select
lamp_2and do the same. - Tick each lamp’s Sprite’s Unshaded. The lamp’s own picture is where the light comes from, so it keeps its painted brightness, and the next section says what Unshaded does for particles.
- Press Ctrl+S.
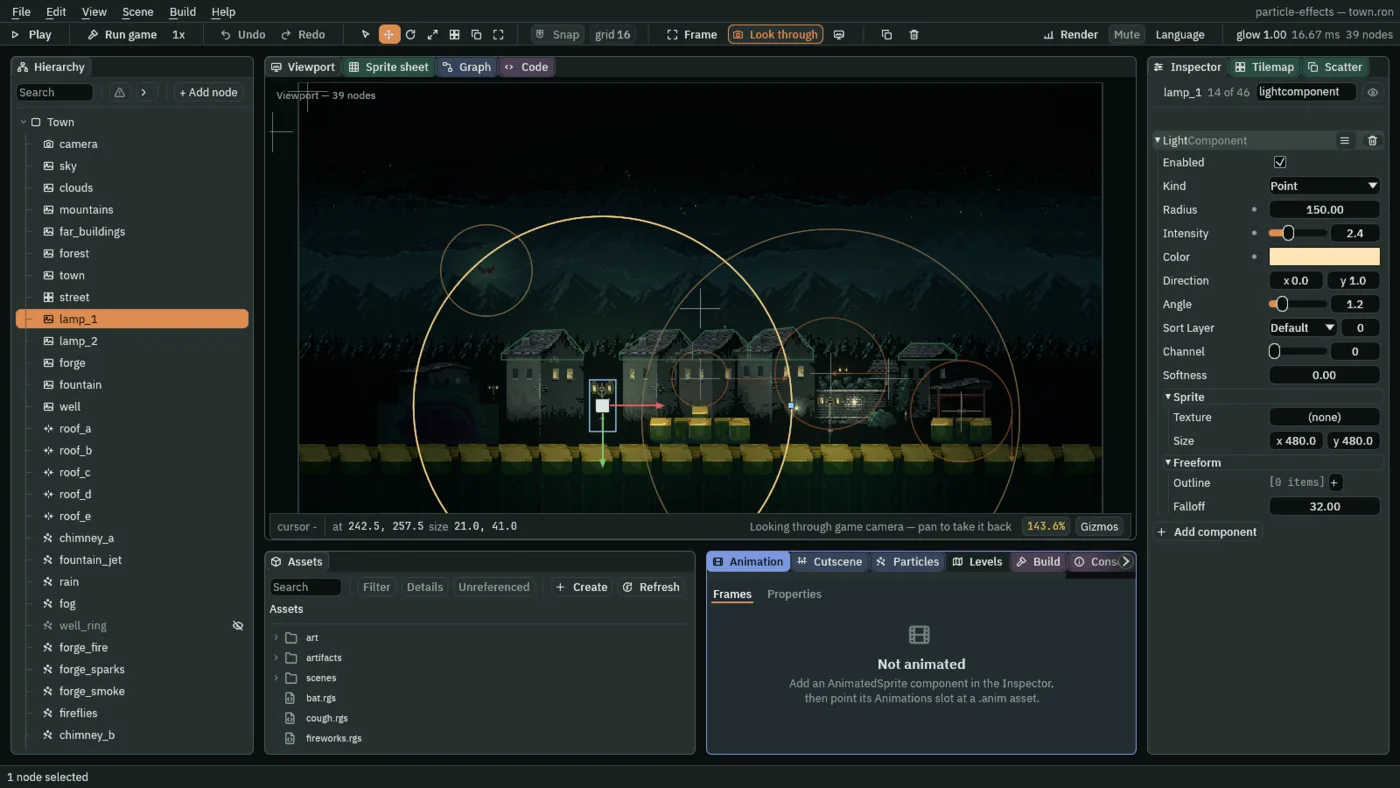
- Color of the Ambient Light
- The light the whole town has before any lamp adds its own, three numbers from
0to1. A cold0.3,0.34,0.42makes the night read blue. At1,1,1nothing is dimmed, which is how the town looked until now. - Radius and Intensity of a Light
- How far a Point light reaches, in world units, and how bright it is at its middle.
150and2.4make a pool about as wide as a house round each lamp. Light and Shadow’s A lantern shows them at several values. - Color of a Light
- The colour a light lights with, a warm orange here. Everything the light reaches is tinted by it.
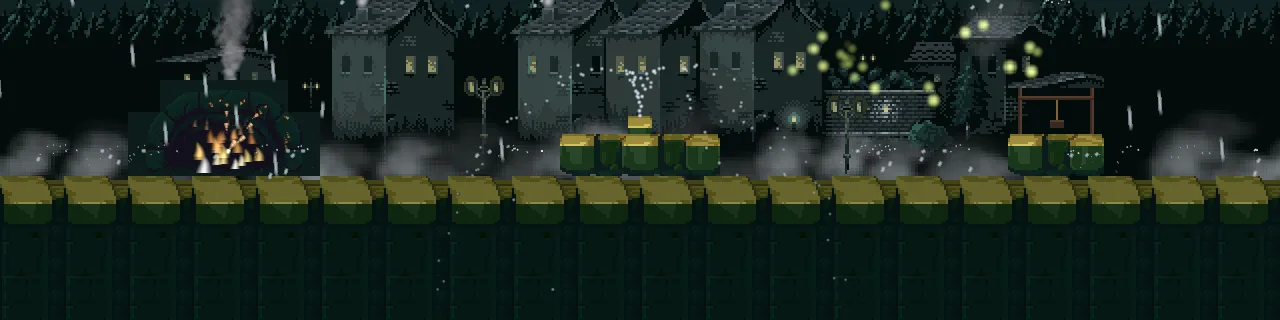
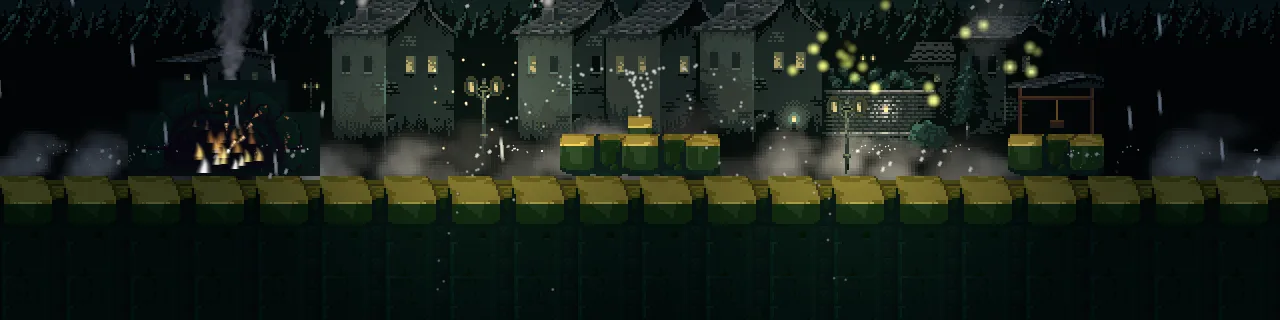
The smoke, the fog and the rain are lit too, since they are particles drawn in the town: where a lamp’s pool reaches them they are warm, and elsewhere they are dark and blue. The fire and the fireflies are lit too, which is not what a fire should be, and the next section sets it right.
What glows, what shows only in the light
A lit particle is its colour times the light that falls where it is. In a dark town that is right for smoke and rain, and wrong for a fire, which is itself a source of light. Two ticks decide it: Unshaded for a particle that makes its own light, and Light Only for one that is nothing but the light that falls on it.
- Tick Unshaded on
forge_fire,forge_sparks,fireflies,well_ring,shooting_starandfireworks: the things in the town that are themselves light. - Select
Town, press + Add node, and choose Particles. Rename itmothsand set its Position to242.5and248, round the first lamp. - Set Rate to
6, Lifetime to4, Speed to10, Spread to7and Gravity to0. - Set Start Color to
0.9,0.9,0.85, alpha0.9, and End Color to0.9,0.9,0.85, alpha0. Set Start Size to2; End Size is already2. - Set Capacity to
24, Prewarm to4and Sort Layer to6. Tick Light Only, and set Texture tosoft-dot.png. - In Emission Shape, set Shape to Box, and Size to
56and36. - Tick Noise and set Strength to
20, Frequency to0.08, Scroll to0and0, and Seed to3: a slow, wandering drift. Press Ctrl+S.
Shape, Noise and Prewarm are chapters 4, 8 and 9’s: a box of moths round the lamp, wandering, and already there when the town opens. The two new controls are the ticks.
- Unshaded
- Draws the particles at full brightness, whatever the lights do, so they are neither darkened by the ambient light nor lit by the lamps. For things that are themselves the light: fire, sparks, fireflies, a magic ring. A sprite has it too, and it is what the lamps’ pictures use. It costs next to nothing.
- Light Only
- Draws the particles only where light falls, lit by it and by nothing else: in a lamp’s pool they show, and outside it they are gone. For things you see only by the light on them, such as moths, dust, rain in a beam. If Unshaded is ticked as well, Unshaded wins. It costs next to nothing.
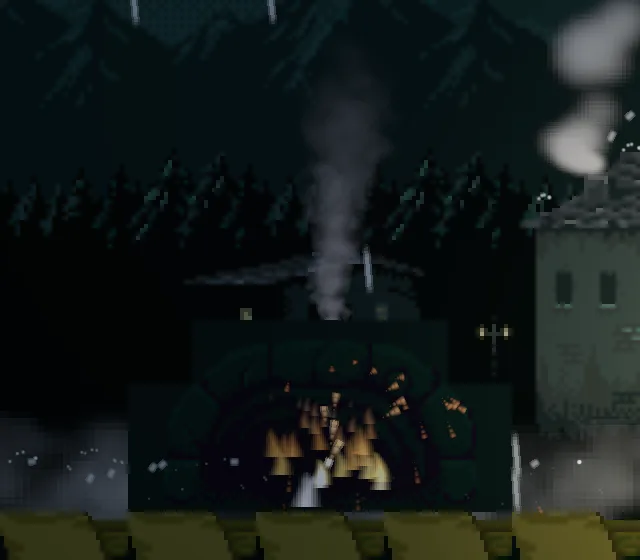
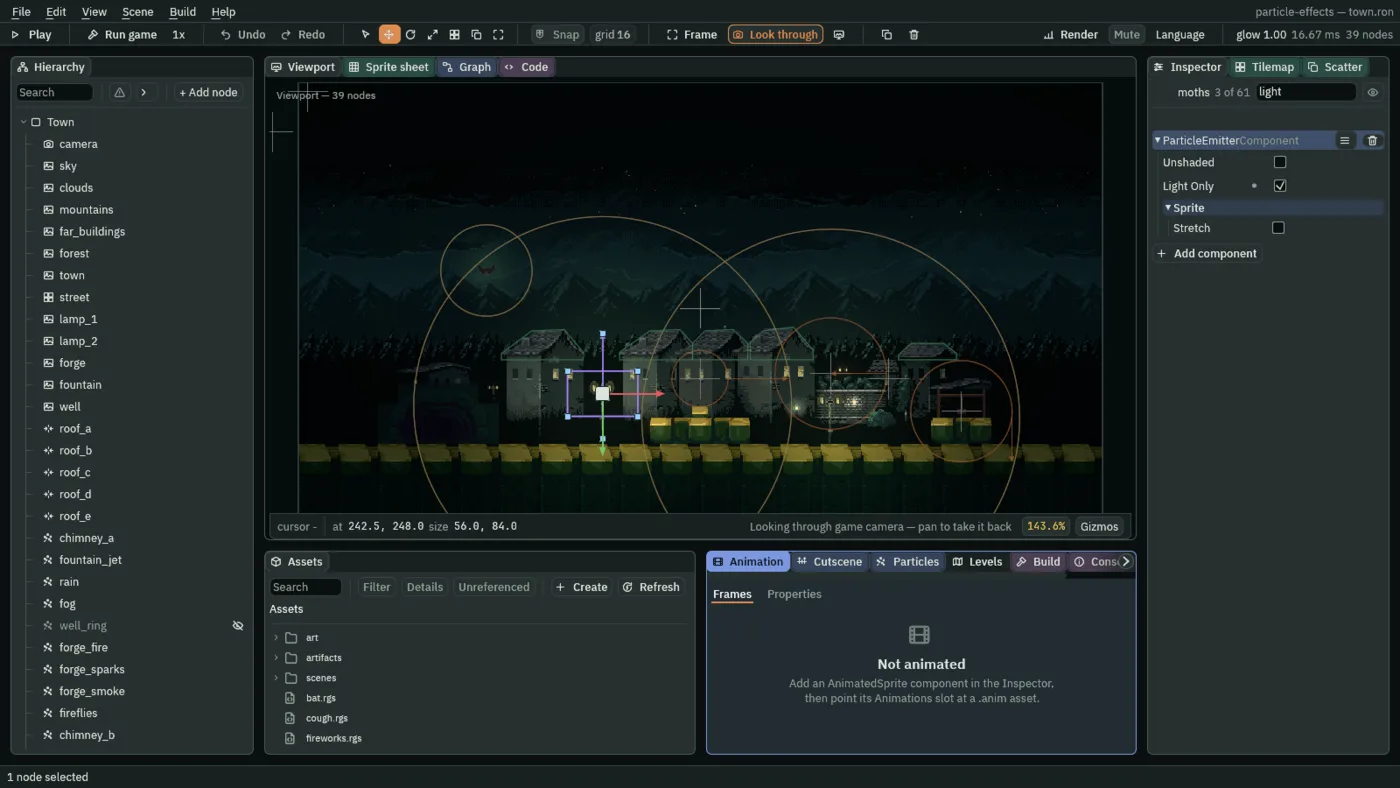
Inside a lamp’s pool a moth is lit whether or not it is Light Only, and the moths’ box sits well inside the first lamp’s 150, so ticking and unticking it there changes nothing. The pictures below switch the lamp’s Light off instead, and look at the same moths in the dark.
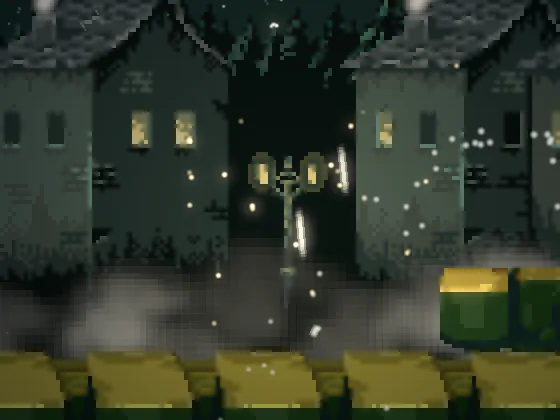
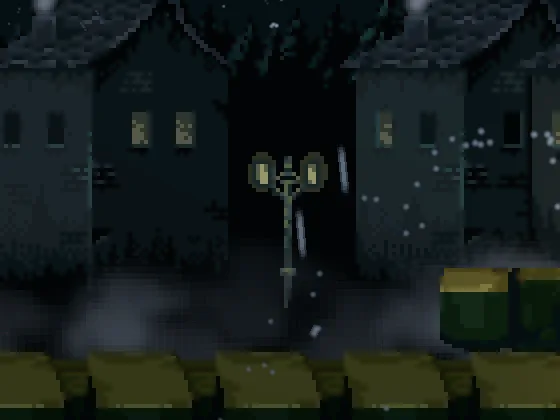
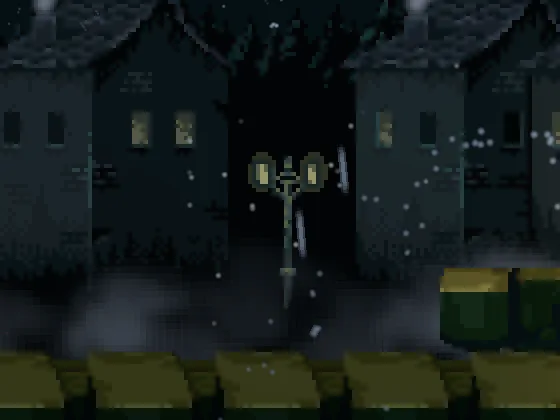
A glow over the town
A Post Volume changes the whole picture after it is drawn. Its bloom takes the brightest parts of the picture and spreads them into a halo, so the unshaded fire, the sparks and the fireflies, which are the brightest things in the town, begin to glow.
- Select
Town, press + Add node, and choose Post Volume. Rename itglow, set its Position to320and180, and its Area to Global. - Open Profile. Set Exposure to
1, Tint to1,1,1, Saturation to1and Vignette to0.35. - Keep the bloom’s Enabled ticked, and set Threshold to
0.55, Intensity to1.4, Blur Pairs to2and Spread to3. Keep Aberration and Grain at0and Grain Rolloff at0.85. - Press Ctrl+S.
- Area
- Where the volume applies. Global is the whole picture, wherever the camera looks, which is what a glow over a whole town needs.
- Exposure, Tint and Saturation
- The picture’s overall brightness, its colour cast and how strong its colours are.
1, white and1leave it as it was drawn. - Vignette
- How much the corners of the picture are darkened, from
0, none.0.35is a light touch, which keeps the eye in the middle of the town. - Threshold, Intensity, Spread and Blur Pairs
- The bloom. Threshold is how bright a pixel must be before it gives any light to the halo:
0.55, so only the fire, the sparks, the lamps and the fireflies do. Intensity is how strong the halo is,1.4. Spread is how far it reaches,3, and Blur Pairs is how smooth,2; each pair is two more passes over the picture. - Aberration, Grain and Grain Rolloff
- A coloured fringe at the corners, film grain, and how much grain the brightest parts keep. This town uses none, so
0,0and0.85leave them off. Light and Shadow’s Glow teaches every field of a Post Volume.
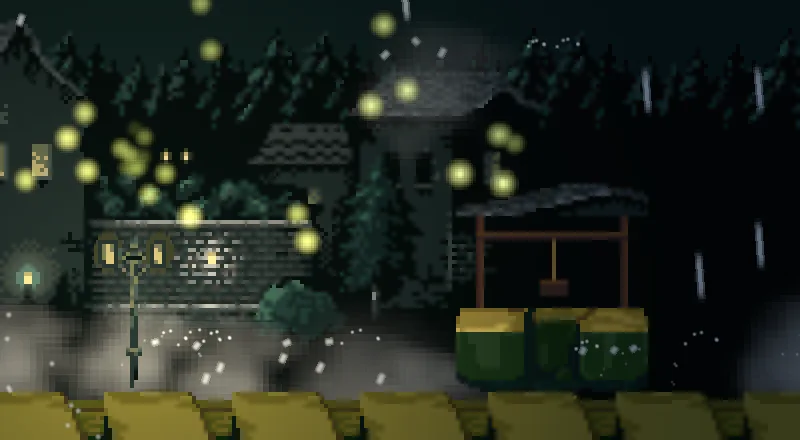
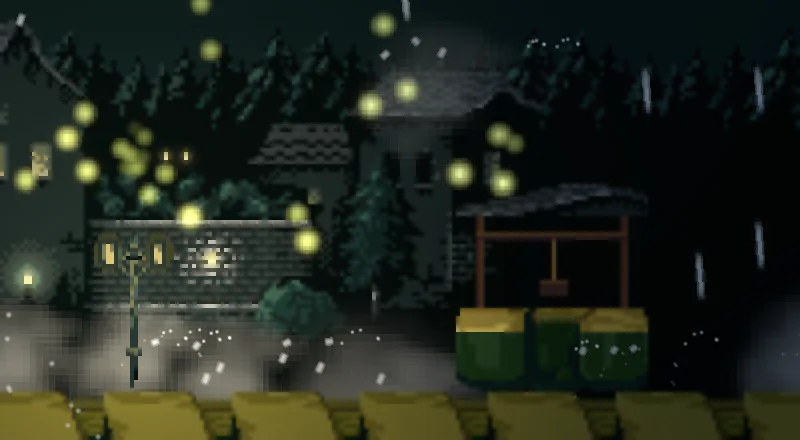
Every spark its own colour
Chapter 12’s firework bursts in one warm colour. A material is a shader on a node: on an emitter’s node it draws every particle the emitter makes. The emitter’s Custom Data hands each particle four numbers of its own, for the shader to read. Together they give a burst a colour for every spark.
- In Assets, click Assets in the path bar, so the shader is written beside
project.rengy, then press Create, choose New shader, typespark-hueand press Enter. A shader is written in the editor, as in Light and Shadow’s chapter 12. - Double-click
spark-hue.wgslto open it in the Code panel, replace everything in it with the text below, and press Ctrl+S. - In Assets, open
artifactsand double-clickfirework.artifact. It opens as a scene of its own, with one node,firework, which is the burst each shell makes.
//! param twinkle: float = 9.0 range 0 30

// Each spark of a firework in a colour of its own. The emitter's Custom Data
// hands every spark four numbers, which arrive here as frag.custom:
//   x  its hue, 0 to 1 round the colour wheel, drawn at random at birth;
//   y  how brightly it burns, a curve over its life;
//   z  how much of its hue shows, the same for every spark;
//   w  where it is in its twinkle, drawn at random so no two twinkle together.

// A fully saturated colour at hue h, 0 to 1 round the wheel.
fn hue(h: f32) -> vec3<f32> {
    let k = vec3<f32>(0.0, 2.0 / 3.0, 1.0 / 3.0);
    return clamp(abs(fract(vec3<f32>(h) + k) * 6.0 - 3.0) - 1.0, vec3<f32>(0.0), vec3<f32>(1.0));
}

fn shade(frag: Fragment) -> vec4<f32> {
    let base = texel(frag.uv) * frag.color;
    let colour = mix(vec3<f32>(1.0), hue(frag.custom.x), frag.custom.z);
    let flicker = 0.75 + 0.25 * sin(time() * twinkle() + frag.custom.w);
    let glow = frag.custom.y * flicker;
    return vec4<f32>(base.rgb * colour * glow, base.a * glow);
}
The first line is a param: it makes twinkle a value the Inspector can set, 9 by default and from 0 to 30. shade runs once for every pixel of every spark, and frag.custom holds that spark’s four numbers. hue(frag.custom.x) turns the first into a fully coloured shade round the colour wheel, and mix then pulls the colour from white toward that shade by frag.custom.z: at 0 every spark is white, and at 1 it shows its full colour. How brightly it burns is frag.custom.y, which the curve lowers over the spark’s life, times a flicker of between 0.5 and 1, from sin(time() * twinkle() + frag.custom.w). Every spark twinkles at the same speed, and w starts each at a different point of its twinkle, so they do not flash together.
- Select
fireworkand tick Unshaded, so that the town’s lights do not dim the burst. - In the Custom Data group, tick Custom Data. Set X to Random, with Min
0and Max1. Set Y to Over Life, and open its Curve in the curve editor, as in chapter 5. It has two points, the left one at x0and y1: click the right one and set its y to0.7. Set Z to Fixed, with an Amount of0.85. Set W to Random, with Min0and Max6.28. - Press Add component and choose ShaderMaterialComponent. Click its Shader slot and choose
spark-hue.wgsl, or drag the file onto the slot. Under Values is a row for the shader’s oneparam, twinkle, readingunset. Press Set the 1 missing parameter(s): the material holds it at the file’s own9.0, and the row reads= default. Typing9into its box would hold nothing: the box takes only a change. - Press Ctrl+S. Then open
scenes/town.ronagain from Assets, to go back to the town.
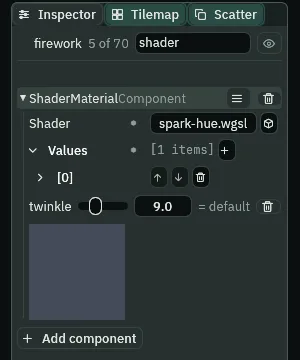
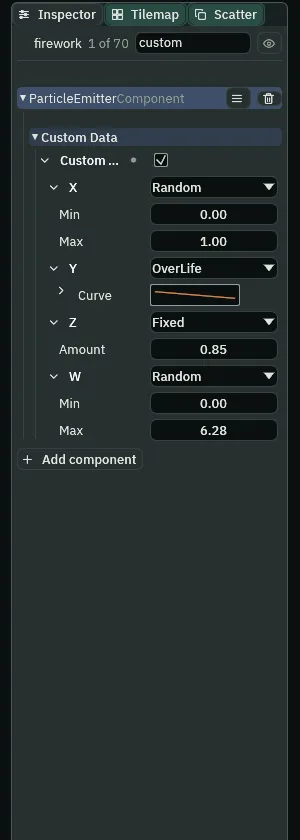
- Custom Data
- Four numbers that each particle carries, for a material to read as
frag.custom. Ticked, every particle is born with its own four, set by the channels below. Unticked, no particle carries any, and a material reads zeros. It is the one way a shader can tell two particles of one emitter apart. - X, Y, Z and W
- The four channels, each set one of three ways. Fixed gives every particle one Amount. Random draws a number once, at a particle’s birth, between Min and Max. Over Life reads a number from a Curve every step, along the particle’s life from birth, at the left, to death, at the right.
- X
- Here the hue,
0to1round the colour wheel, drawn at random: every spark a colour of its own. - Y
- Here how brightly the spark burns,
1at birth falling to0.7at death. A lower end makes the sparks fade as they fall. - Z
- Here how much of its hue a spark shows,
0.85for every spark.1is the full colour,0.5to0.9keeps a warm look, and0is white. - W
- Here where the spark is in its twinkle,
0to6.28, a whole turn of a circle in radians, drawn at random so that no two sparks twinkle together. - Shader
- The
.wgslfile the node is drawn through:spark-hue.wgsl. On an emitter’s node it draws every one of the emitter’s particles; on a sprite’s node it draws the sprite. Left empty, the node draws as it always did. - twinkle
- The shader’s own value, the one
paramits first line declares: how fast the sparks twinkle,9. From5to15is a shimmer, and higher is a flutter.
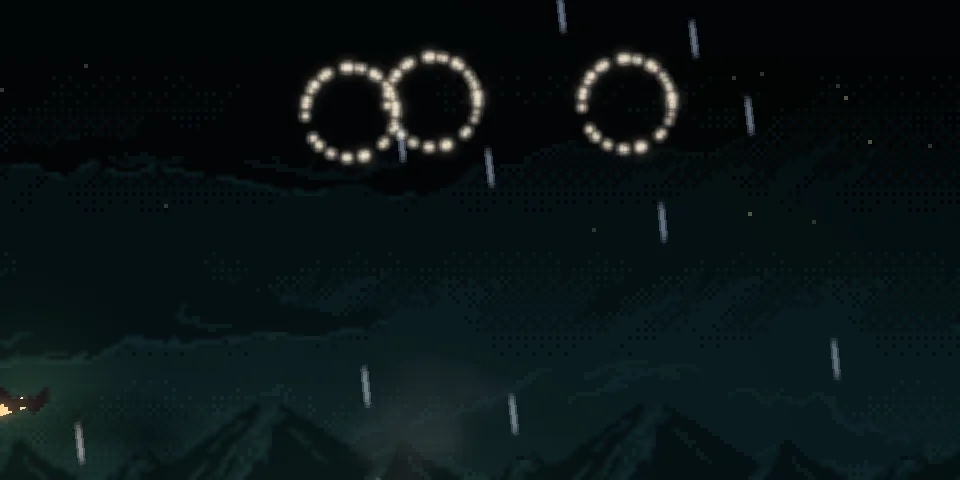
0: every spark the same warm white.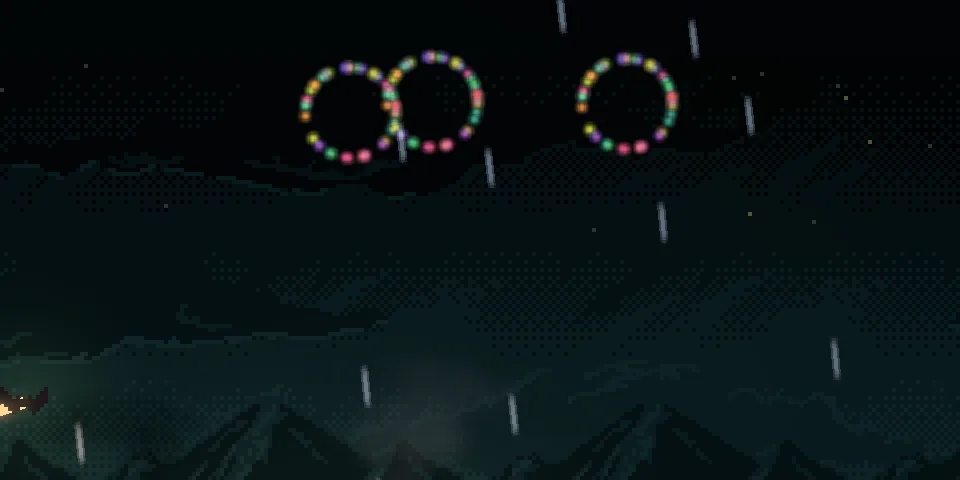
A lantern-bat and its ribbon
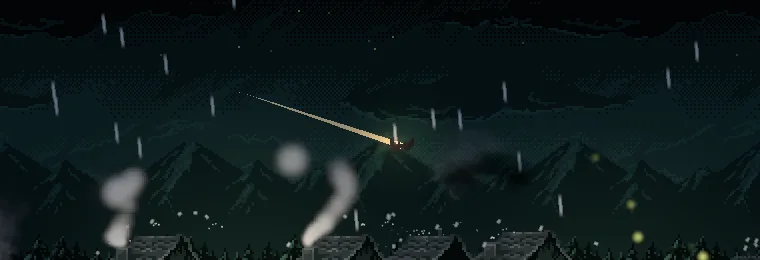
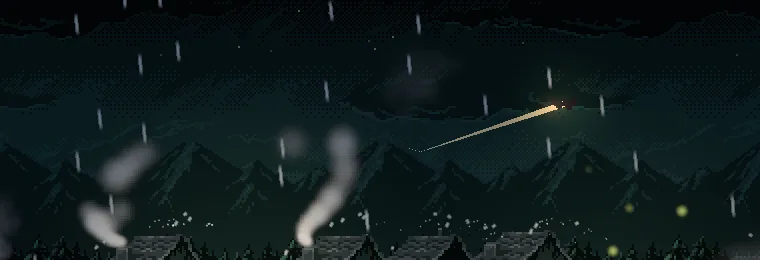
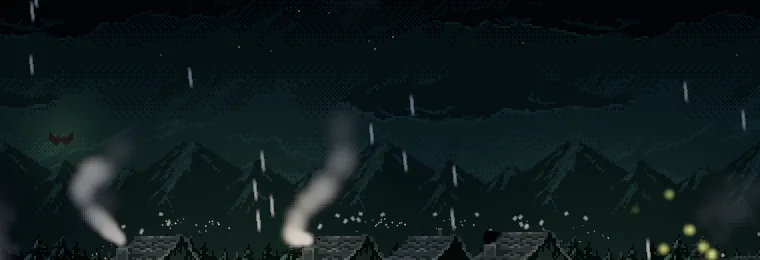
A Trail is a component of its own, apart from an emitter: a ribbon drawn behind any node that moves. It makes no particles. It records where its node has been and draws a strip along those places. This one goes on a lantern-bat, a sprite that a script flits across the roofs.
- Make
bat.rgsthe way you made the others, with the script below, and press Ctrl+S. - Select
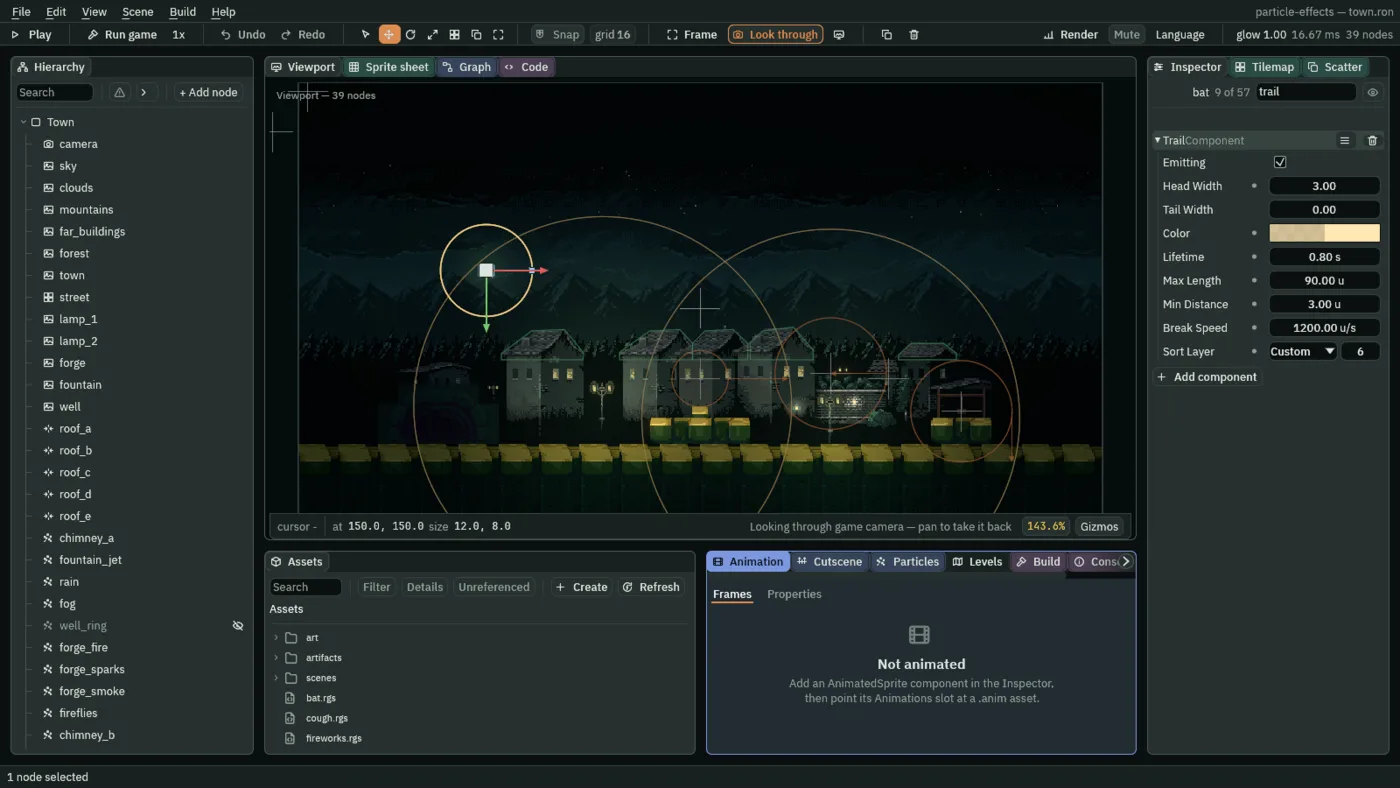
Town, press + Add node, and choose Sprite. Rename itbat. Set its Position to150and150, its Texture tobat.png, its Size to12and8, and its Sort Layer to7. - Press Add component and choose TrailComponent. Leave Emitting ticked and Tail Width at
0. Set Head Width to3, Color to1,0.8,0.45, alpha0.8, Lifetime to0.8, Max Length to90, Min Distance to3, Break Speed to1200and Sort Layer to6. - Press Add component again and choose LightComponent. Leave Kind on Point, and set Radius to
36, Intensity to1.2and Color to1,0.75,0.4, alpha1: the bat carries a lantern. - Press Add component once more and choose Bat. Set Home to
150and150. Swoop starts at the script’s own0.9: leave it. - Press Ctrl+S.
/// A lantern-bat's round over the rooftops. It flits right across the town in
/// three swoops, rests, then darts back to `home` in one jump, too fast for
/// its ribbon to follow, so the ribbon breaks instead of drawing a line back
/// across the sky.
component Bat {
    /// Where each round starts.
    home: Vec2,
    /// Seconds for one swoop.
    #[suffix("s")]
    swoop: f32 = 0.9,

    fn loop() {
        move_to(home);
        await wait_frames(1);
        await anneal_by(vec2(90.0, -24.0), swoop, .InOutSine);
        await anneal_by(vec2(90.0, 30.0), swoop, .InOutSine);
        await anneal_by(vec2(90.0, -30.0), swoop, .InOutSine);
        await wait(0.6);
    }
}
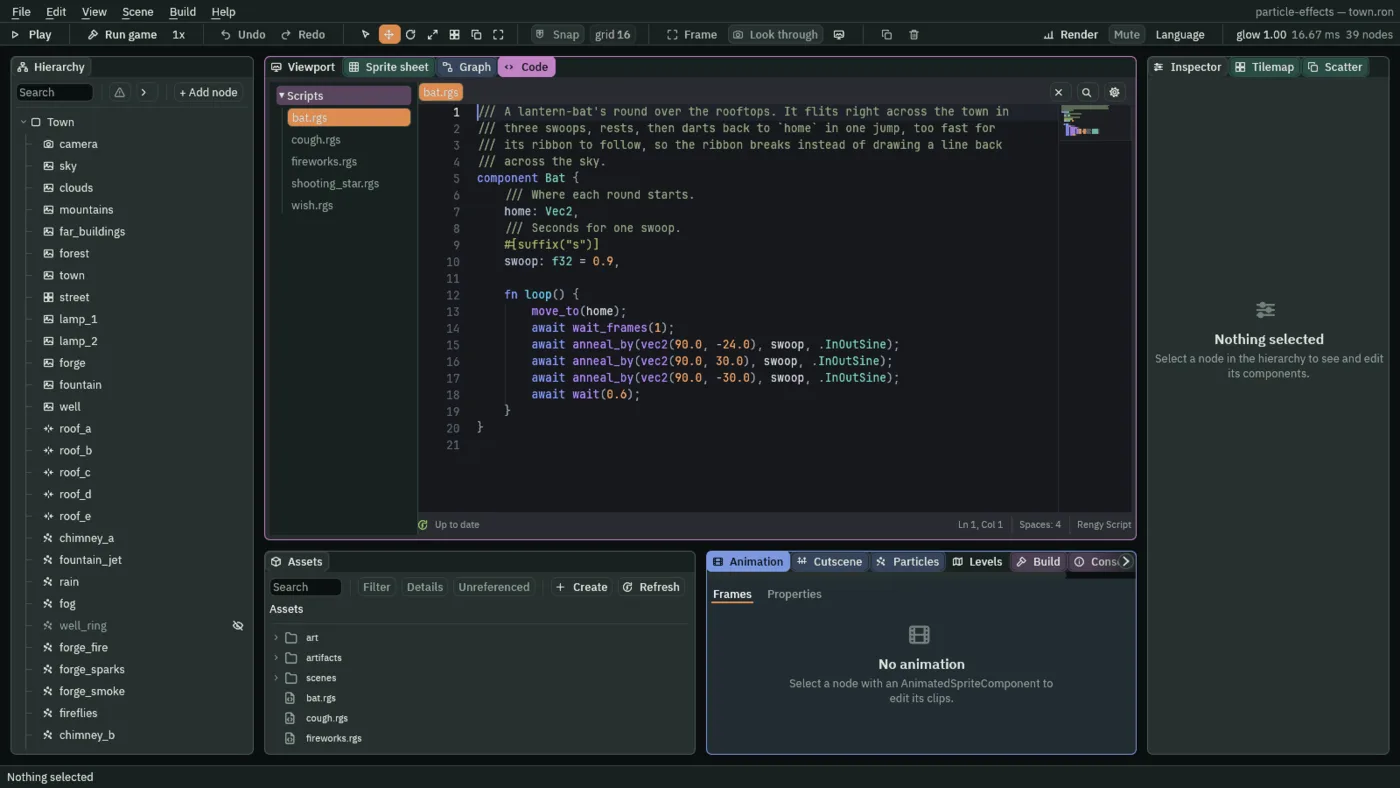
loop is one round. move_to(home) puts the bat at its start in a single move, and await wait_frames(1) lets one frame pass. The three anneal_by calls carry it by 90 units to the right, and a little up, then down, then up again, each over swoop seconds along .InOutSine, which eases in and out. It rests for 0.6 seconds, and the next round begins with move_to(home): a jump of about 270 units, in one frame.
- Emitting
- Whether the ribbon records new points. This is the Trail’s own, apart from the emitter’s from chapter 1. Unticked, no point is added, and the ribbon shortens as its old points run out, which is how a ribbon can be ended gently. Leave it ticked.
- Head Width
- The ribbon’s width at the node, in world units:
3here, about a third of the bat.2to6suits a streak behind a small thing. - Tail Width
- Its width at its far end, in world units.
0tapers it to a point, as a comet’s tail does. - Color
- The ribbon’s one colour: three numbers and an alpha. A warm
1,0.8,0.45, with an alpha of0.8that lets the sky show through. - Lifetime
- Seconds a recorded point lasts before it drops off the ribbon’s tail:
0.8.0means no time limit. A longer life makes a longer ribbon, up to Max Length. - Max Length
- The longest the ribbon may be, in world units:
90.0means no length limit. With both this and Lifetime at0the engine caps the ribbon, so it cannot grow for ever. - Min Distance
- How far the node must move before another point is recorded, in world units:
3. Smaller gives a smoother curve, and more points to draw. - Break Speed
- Above this speed, in world units a second, a move counts as a jump: the ribbon breaks there and starts again, instead of drawing a line across the jump.
1200here.0switches the guard off. - Sort Layer
- Where the ribbon is drawn among the town’s layers, like the emitter’s: lower first, so further back.
6puts it behind the bat’s own7. - anneal_by and wait_frames
anneal_bycarries the node by an amount over a time, along an easing: here.InOutSine, which starts and ends gently.wait_frameswaits that many frames, wherewaitwaits seconds.- Home and Swoop
- Where each round starts,
150,150, and the seconds one swoop takes,0.9. A swoop of0.6to1.2seconds reads as a bat’s flit.
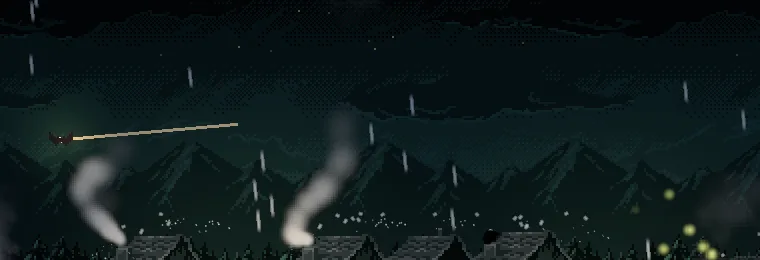
0, the guard off: the jump home drawn as a line across the sky.The recipes
The lamps
| Field | Value |
|---|---|
ambient, an Ambient Light | Position 8, 8, Color 0.3, 0.34, 0.42, alpha 1 |
lamp_1 and lamp_2, LightComponent | Kind Point, Radius 150, Intensity 2.4, Color 1, 0.78, 0.48, alpha 1 |
lamp_1 and lamp_2, Sprite | Unshaded ticked |
What glows
| Node | Value |
|---|---|
forge_fire, forge_sparks, fireflies, well_ring, shooting_star, fireworks | Unshaded ticked |
firework, in firework.artifact | Unshaded ticked |
The moths
| Field | Value |
|---|---|
| Node | moths, a Particles node, Position 242.5, 248 |
| Rate | 6 |
| Lifetime | 4 |
| Speed | 10 |
| Spread | 7 |
| Gravity | 0 |
| Start Color | 0.9, 0.9, 0.85, alpha 0.9 |
| End Color | 0.9, 0.9, 0.85, alpha 0 |
| Start Size | 2 |
| Capacity | 24 |
| Prewarm | 4 |
| Sort Layer | 6 |
| Light Only | ticked |
| Texture | soft-dot.png |
| Shape | Box, Size 56, 36 |
| Noise | Strength 20, Frequency 0.08, Scroll 0, 0, Seed 3 |
The glow
| Field | Value |
|---|---|
| Node | glow, a Post Volume, Position 320, 180 |
| Area | Global |
| Exposure | 1 |
| Tint | 1, 1, 1 |
| Saturation | 1 |
| Vignette | 0.35 |
| Bloom Enabled | ticked |
| Threshold | 0.55 |
| Intensity | 1.4 |
| Blur Pairs | 2 |
| Spread | 3 |
| Aberration, Grain, Grain Rolloff | 0, 0, 0.85 |
The sparks’ colours
| Field | Value |
|---|---|
| Node | firework, in firework.artifact |
| Lifetime | 1.4 |
| Speed | 90 |
| Spread | 7 |
| Gravity | 40 |
| Start Color | 1, 0.9, 0.7, alpha 1 |
| End Color | 1, 0.6, 0.3, alpha 0 |
| Start Size | 5 |
| One Shot | ticked, Burst 48, Capacity 48 |
| Sort Layer | -22 |
| Blend | Add |
| Unshaded | ticked |
| Texture | soft-dot.png |
| Drag | 0.8 |
| Inherit Velocity | 0.5 |
| Custom Data | ticked: X Random 0 to 1; Y Over Life, a curve from 1 at the left to 0.7 at the right; Z Fixed 0.85; W Random 0 to 6.28 |
| ShaderMaterialComponent | Shader spark-hue.wgsl, twinkle 9 |
The lantern-bat
| Field | Value |
|---|---|
| Node | bat, a Sprite, Position 150, 150 |
| Texture, Size, Sort Layer | bat.png, 12, 8, 7 |
| TrailComponent | Emitting ticked, Head Width 3, Tail Width 0, Color 1, 0.8, 0.45, alpha 0.8, Lifetime 0.8, Max Length 90, Min Distance 3, Break Speed 1200, Sort Layer 6 |
| LightComponent | Kind Point, Radius 36, Intensity 1.2, Color 1, 0.75, 0.4, alpha 1 |
| Bat | Home 150, 150, Swoop 0.9 |