Tutorials · Light and Shadow · Chapter 15
A gallery of lights
By the end
- Six scenes in
scenes, each lit and playing: a neon sign, a searchlight, a campfire, day and night, a lava pool and light through blinds - Two new scripts,
sweep.rgsanddaylight.rgs, and a second light shader,lava.wgsl - For each, its values in one table with the reason for each, what it costs, and which controls change it in your own game
On this page
Six scenes
The first fourteen chapters taught the controls one at a time, in one hall. A game uses them together, in many small places. This chapter lights six of those places, each a case you will meet again: a sign, a searchlight, a fire, a day, a pool of lava and a room with blinds. Each is built from controls you have already used, with two short scripts and a second shader to join them.
The project’s scenes folder holds the six, beside hall.ron. They came with the starter, composed and unlit, as the hall did: the pictures are placed and nothing is lit. Each has a camera of its own, so you open one, light it, and play it by itself.
| Scene | The case | What carries it |
|---|---|---|
| A neon sign | A sign that glows in the dark and colours the wall round it. | A Sprite light, an Additive halo and a bloom |
| A searchlight | A guard’s lamp sweeping a wall in a stealth level. | A Cone, a script that turns it, Occluders and a normal map |
| A campfire | A camp, a brazier or a hearth. | Two flickering lights, Softness, a Replace light and Occluders |
| Day and night | A day passing over a level, with the shadows swinging. | One script on two nodes, a Directional light and Occluders |
| A lava pool | A cave lit only by molten rock. | A light shader of your own, Light Only sprites and a bloom |
| Light through the blinds | Sun or a street lamp through slats into a dark room. | A Sprite light turned on its node and a Subtractive light |
- In Assets, open
scenesand double-click the scene the recipe names. If you changed the open scene, press Ctrl+S first. - Click Look through, so that the Viewport shows the scene as its own camera sees it.
- Build the recipe, and press Ctrl+S.
- Press F5 to play the open scene, and F5 again to stop.
An exported game opens the project’s startup scene, the hall, so these six are for lifting and not for shipping. Light a scene of your own the same way.
Every recipe has the same parts, in the same order:
- What it is for: the case, in a game.
- The steps, with a picture at each place the result changes.
- Why: a note wherever the result is not what you would guess.
- The values, in one table, each with the reason for it. Every control was defined in the chapter where you first used it.
- What it costs: light draws and light passes, as chapter 14’s statistics overlay counts them, and anything else that costs.
- Make it yours: which control gives which result in your own game.
A neon sign
What it is for. A sign that glows in the dark and throws its colour on the wall round it, in the sign’s own shape: a shop, an inn or a bar in a town at night. It joins three controls you know: a Sprite light, a light on another channel, and a bloom.
neon.ron holds the front of an inn, house, with a window above, and sign, a beer mug and the word INN in pink glass tubes, two pixels thick. Nothing is lit yet.
- Open
neon.ronand click Look through. - Select
Neon, press + Add node, and choose Ambient Light. Rename itambient. Set its Position to8and8and its Color to0.06,0.07,0.14, alpha1. - Select
signand tick its Sprite’s Unshaded. - Select
Neon, press + Add node, and choose Light. Rename itsign_light. Set its Position to160and138, on the sign, and its Kind to Sprite. - Under the Sprite group, set Texture to
neon-glow.pngand Size to180and92. Set Radius to0, Intensity to5.0and Color to1.0,0.36,0.78, alpha1. - Add another Light under
Neonand rename ithalo. Set its Position to160and138, and leave Kind on Point. Set Channel to1, Radius to56, Intensity to0.15and Color to1.0,0.25,0.65, alpha1. - Select
Neon, press + Add node, and choose Post Volume. Rename itsign_glow. Set its Position to160and90and its Area to Global. - Open Profile. Set Exposure to
1.0, Tint to1.0,1.0,1.0, Saturation to1.3and Vignette to0.5. Keep the bloom’s Enabled ticked, and set Threshold to0.25, Intensity to2.4, Blur Pairs to2and Spread to8.0. Keep Aberration and Grain at0and Grain Rolloff at0.85. - Press Ctrl+S.
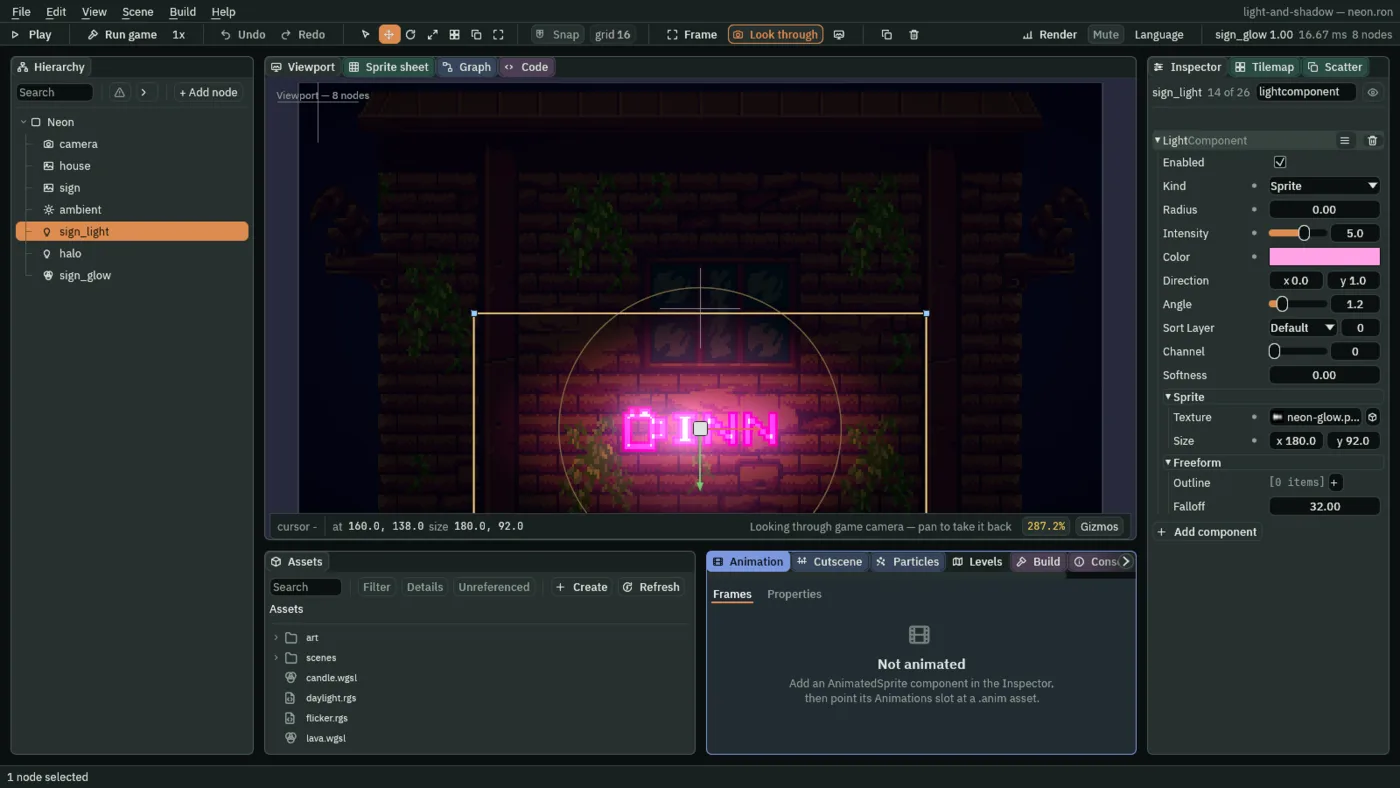
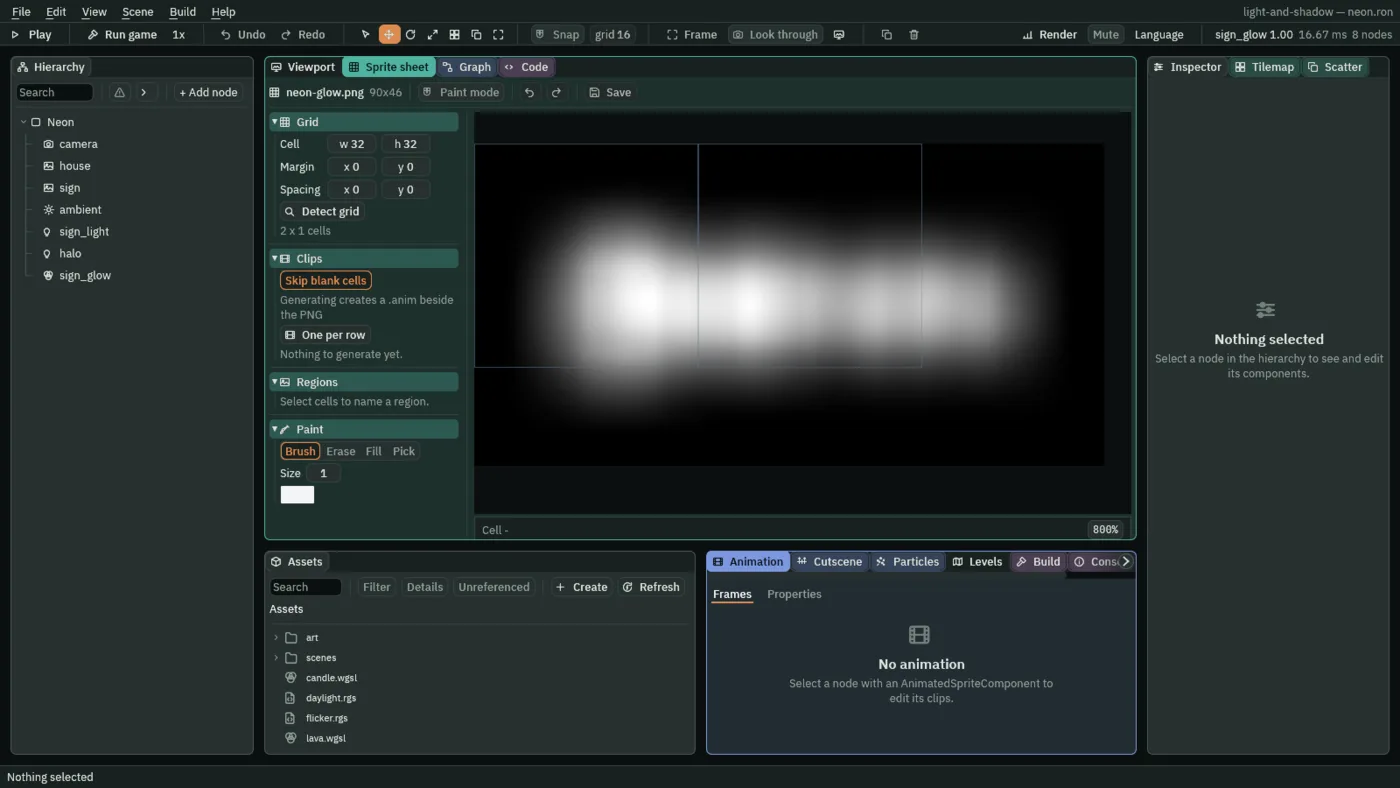
The light’s Texture is neon-glow.png, 90 by 46 pixels, opened large in the Sprite sheet tab: the sign’s tubes spread soft, white where they were brightest.
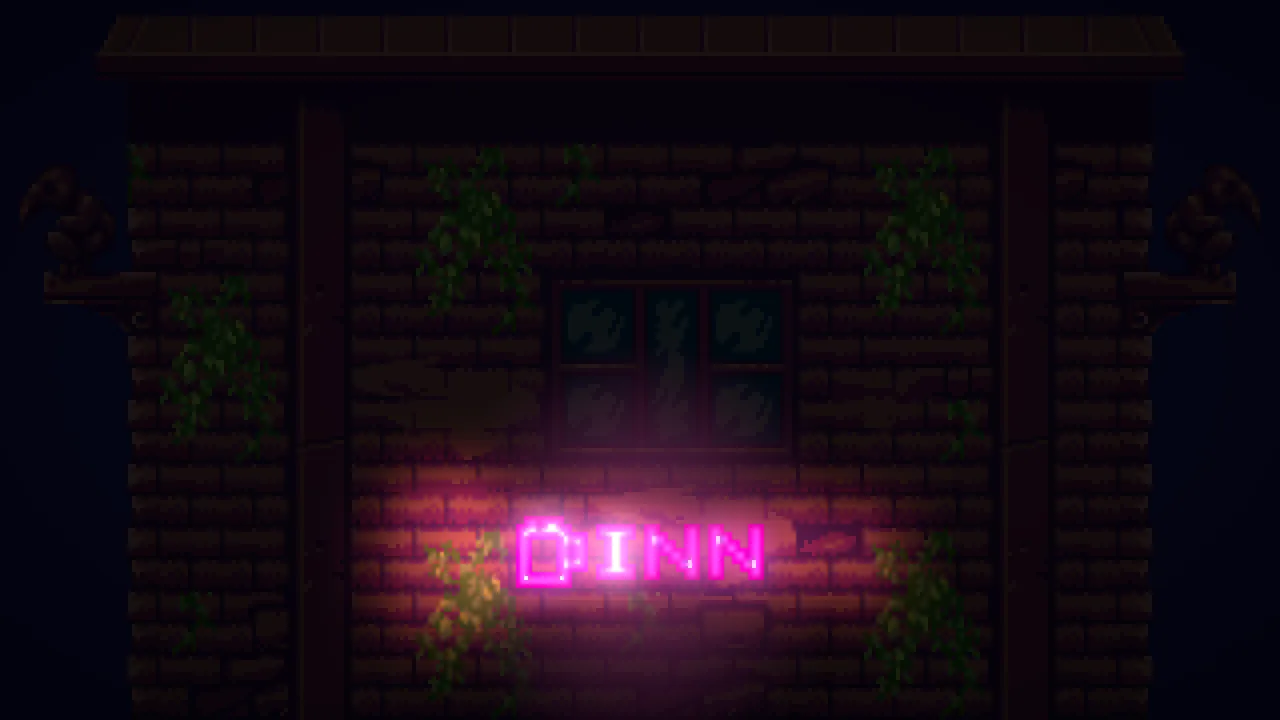
Three things make it read as neon, and the pictures take them away one at a time, cut to the sign and the wall round it.
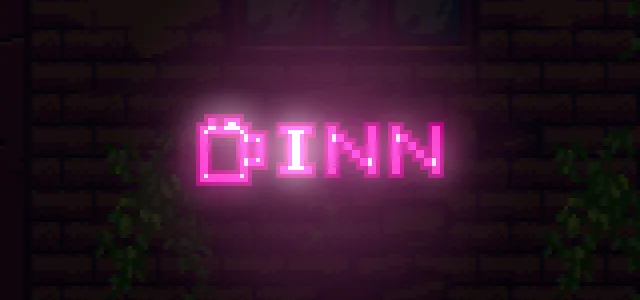
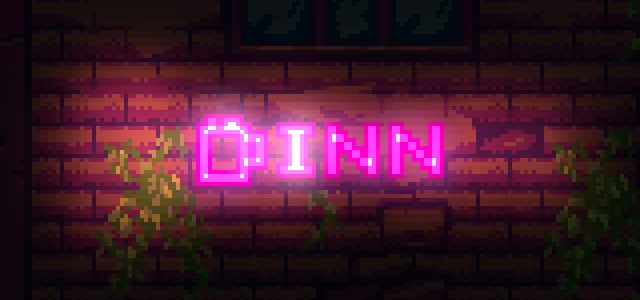
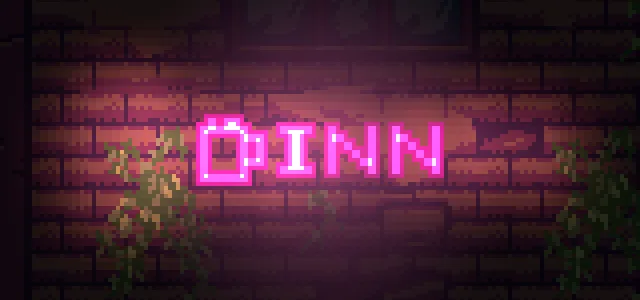
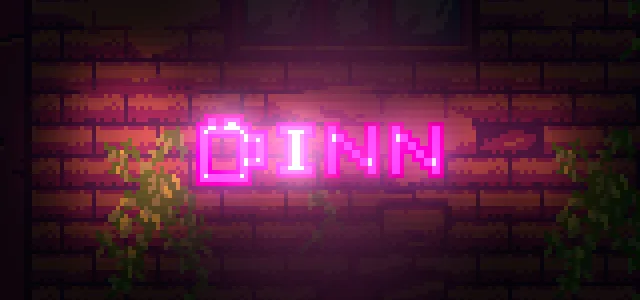
The neon sign, in one table
| Node | Values | Why this value |
|---|---|---|
ambient, an Ambient Light | Color 0.06, 0.07, 0.14 | A cold near-black night, so the pink is the only colour in the street. |
sign, the sign’s Sprite | Unshaded ticked | The tubes keep their own colours. The lights are for the wall, not for them. |
sign_light, a Light | Kind Sprite, Texture neon-glow.png, Size 180, 92, Radius 0, Intensity 5.0, Color 1.0, 0.36, 0.78 | The picture shapes the light. Its Size is twice the picture’s, so the glow reaches well past the tubes. A Radius of 0 casts no shadows, and nothing stands in the way. The Intensity is high because the picture is dim except at the tubes. |
halo, a Light | Channel 1, Radius 56, Intensity 0.15, Color 1.0, 0.25, 0.65 | Additive, small and faint: it brightens the bricks right beside the glass and no further. |
sign_glow, a Post Volume | Area Global, Exposure 1.0, Tint 1.0, 1.0, 1.0, Saturation 1.3, Vignette 0.5, bloom Threshold 0.25, Intensity 2.4, Blur Pairs 2, Spread 8.0, Aberration 0, Grain 0, Grain Rolloff 0.85 | The bloom is what makes the glass glow. The saturation deepens the pink and the vignette darkens the corners, which costs nothing. |
What it costs. 2 light draws in 2 light passes. The sign’s light is one draw on channel 0, and the halo is one on channel 1, which is a pass of its own. Neither casts a shadow, because nothing blocks them. The larger price is the bloom: four passes, two for each of its two Blur Pairs.
A searchlight
What it is for. A guard’s lamp sweeping a castle wall in a stealth level: a beam that crosses the wall by itself, and whatever stands in front of the wall throws a shadow as the beam passes. It joins a Cone, a script that turns it, Occluders and a wall with a normal map.
searchlight.ron holds a wall of stone blocks, a floor of blocks along the bottom and three columns. Nothing is lit yet.
- In Assets, open
artand selectgothic-castle-tileset.png. Press Details, set Normal map to Generate, strength to2and bevel to1, and press Save.gothic-castle-tileset.normal.pngappears beside the picture. - Open
searchlight.ronand click Look through. Selectwall, set its Sprite’s Normal Map togothic-castle-tileset.normal.png, and set Specular to0.3. - Select
Searchlight, press + Add node, and choose Ambient Light. Rename itambient. Set its Position to8and8and its Color to0.08,0.1,0.2, alpha1. - Select
column_0, press Add component, and choose OccluderComponent. Set its Size to10and60. Do the same oncolumn_1andcolumn_2. - Select
Searchlight, press + Add node, and choose Light. Rename itsearchlight. Set its Position to160and192, below the bottom of the view, so the beam begins out of sight. - Set Kind to Cone, Radius to
300, Intensity to2.5, Color to0.85,0.92,1.0, alpha1, Direction to-0.5and-0.866, and Angle to0.5. - Press Ctrl+S.
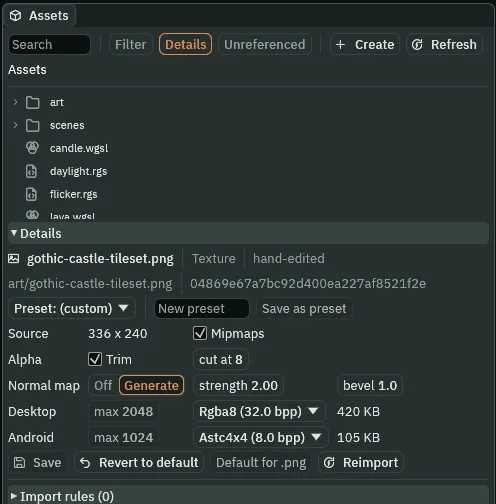
Generate, strength 2, bevel 1.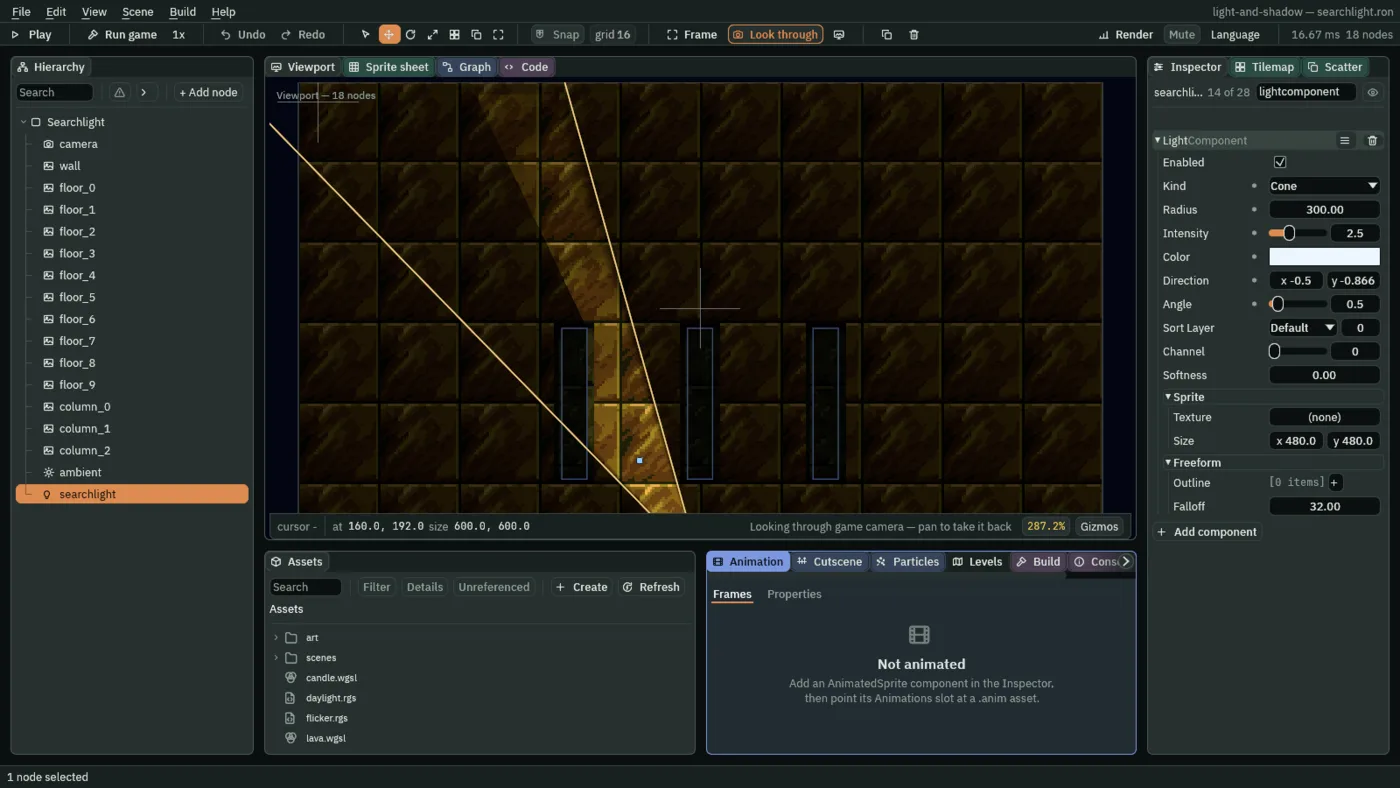
The lamp lights a fixed wedge. To make it sweep, give it a script.
- In Assets, click Assets in the path bar over the tree, so the script is written at the project’s top, then press Create, choose New script, type
sweep, and press Enter. - In the Code tab, replace everything in
sweep.rgswith the script below, and press Ctrl+S.
/// A searchlight's sweep. The Light's Direction swings from the one it was
/// given to `right` and back, for ever, `seconds` each way, slowing at each
/// end as a heavy lamp on a pivot does.
component Sweep {
    /// The Direction at the other end of the sweep.
    right: Vec2,
    /// Seconds from one end of the sweep to the other.
    #[suffix("s")]
    seconds: f32 = 3.0,

    fn on_create() {
        pulse_point("LightComponent", "direction", right, seconds, .InOutSine);
    }
}
There is no loop. on_create runs once, when the node is made, and starts a pulse on the Light’s Direction: from the one it has, -0.5, -0.866, to right and back, seconds each way, for ever. .InOutSine starts and ends slowly, so the beam slows at each end as a heavy lamp on a pivot does. The pulse runs by itself every step.
- pulse_point
- Takes a point field of another component on this node to a value and back, for ever. Here the Light’s Direction, to
rightand back,secondseach way. - Right
- The Direction at the sweep’s other end. The Light’s own Direction is the first end.
0.5,-0.866leans thirty degrees right of straight up, as-0.5,-0.866leans thirty degrees left, so the beam swings a sixth of a turn. - Seconds
- Seconds from one end to the other:
3, so a whole sweep out and back takes six.
- Select
searchlight, press Add component, and choose Sweep. Set Right to0.5and-0.866, and Seconds to3. - Press Ctrl+S.
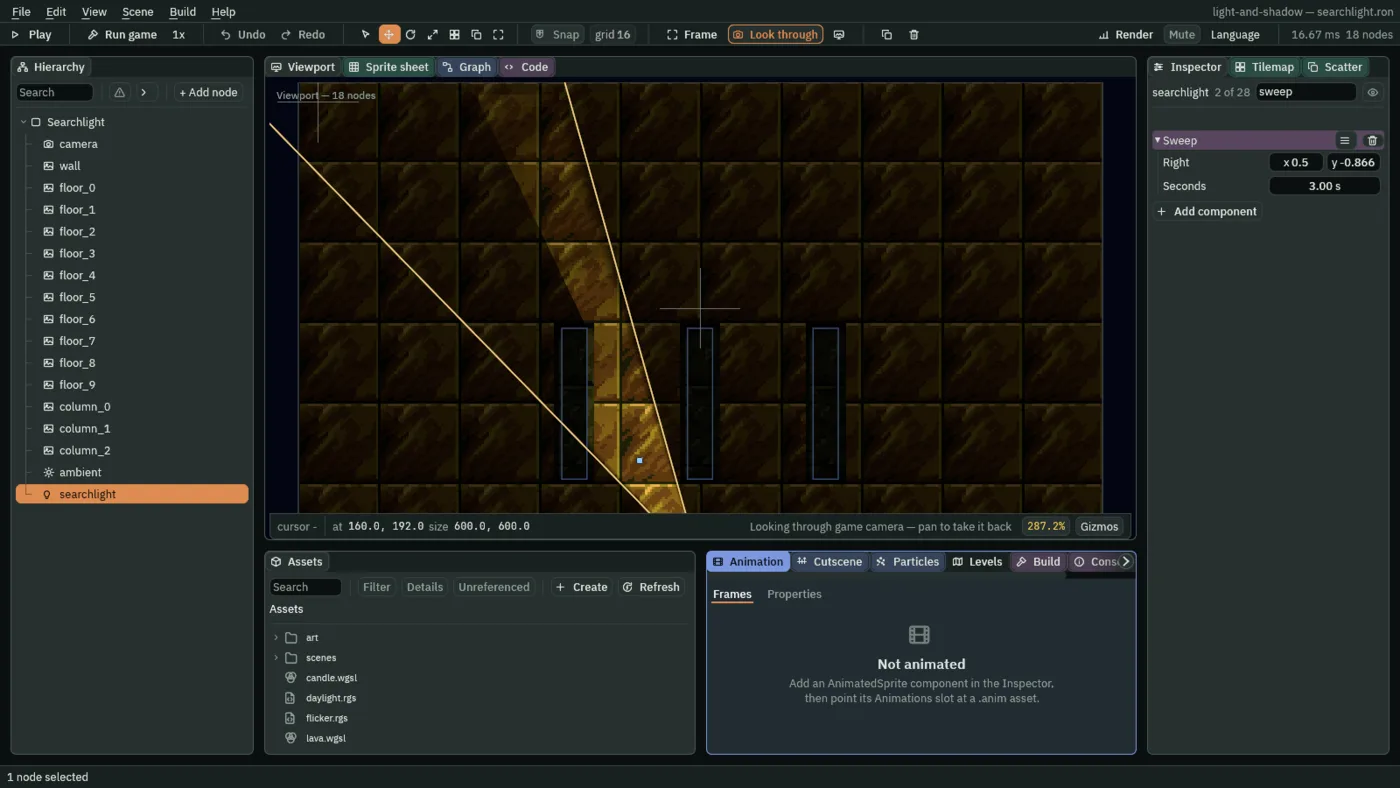
Play it, and the beam crosses the wall and comes back. Three moments of the sweep, with the dark columns standing in front of it:
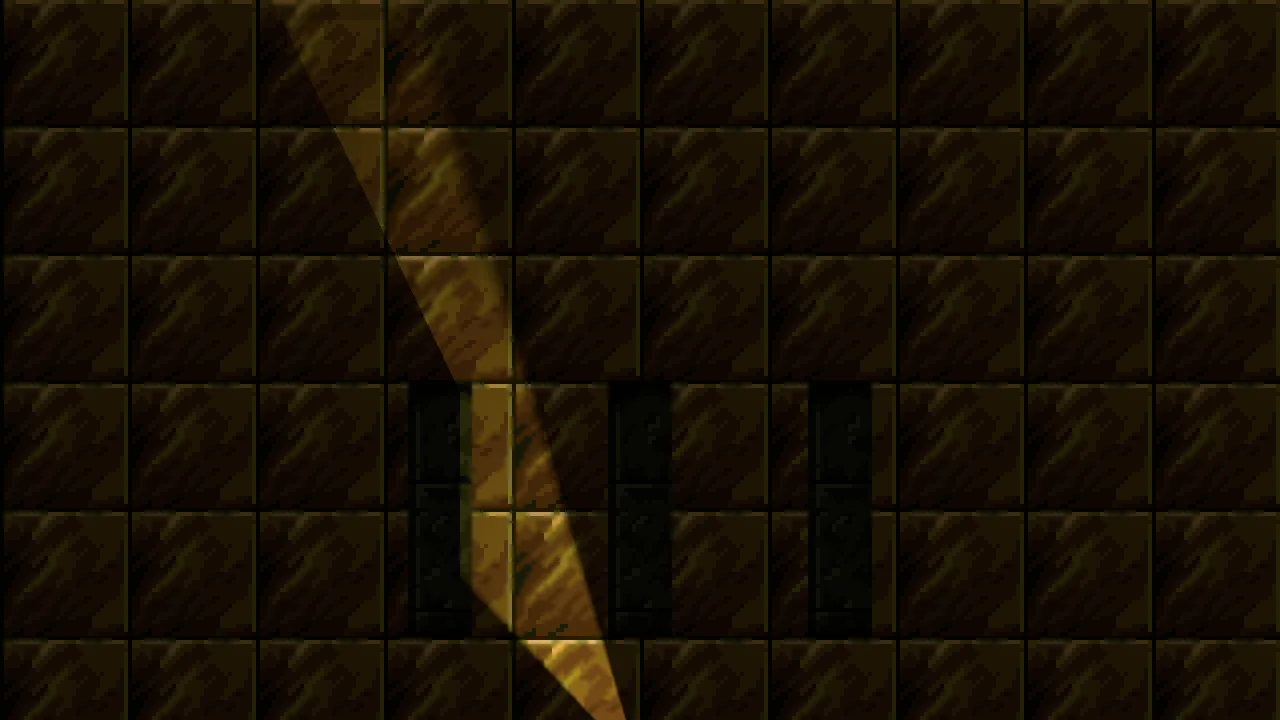
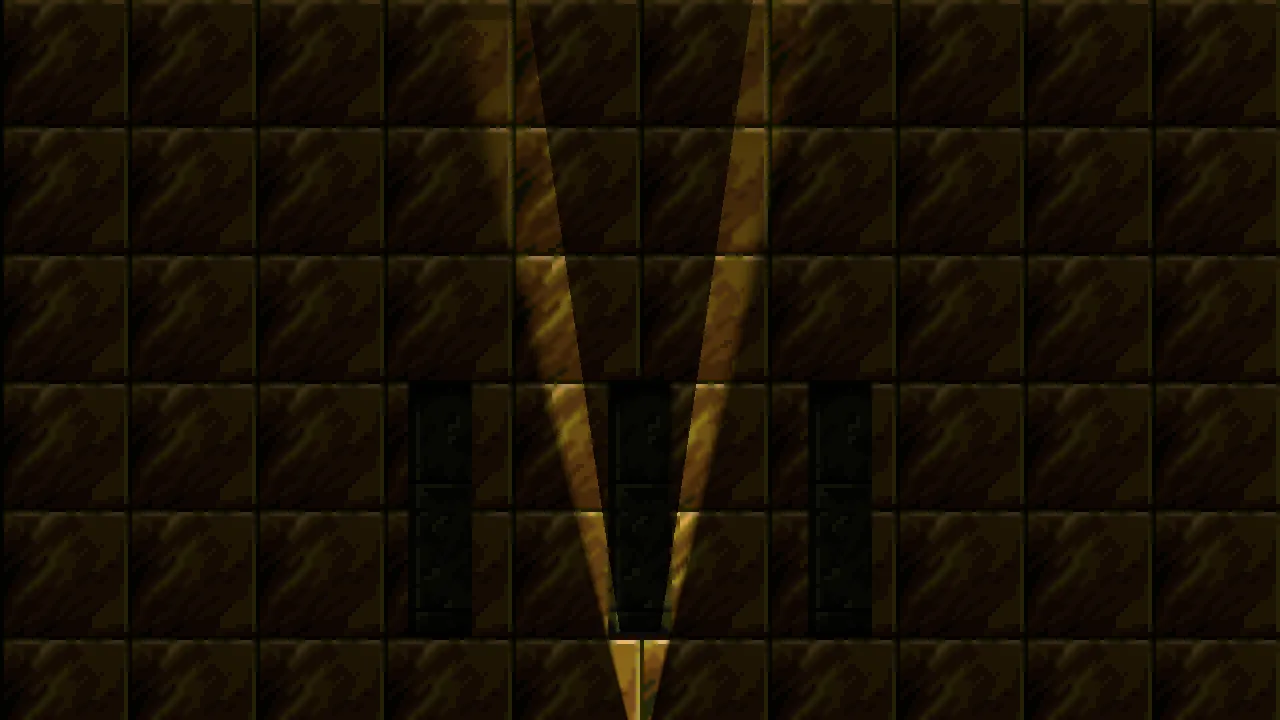
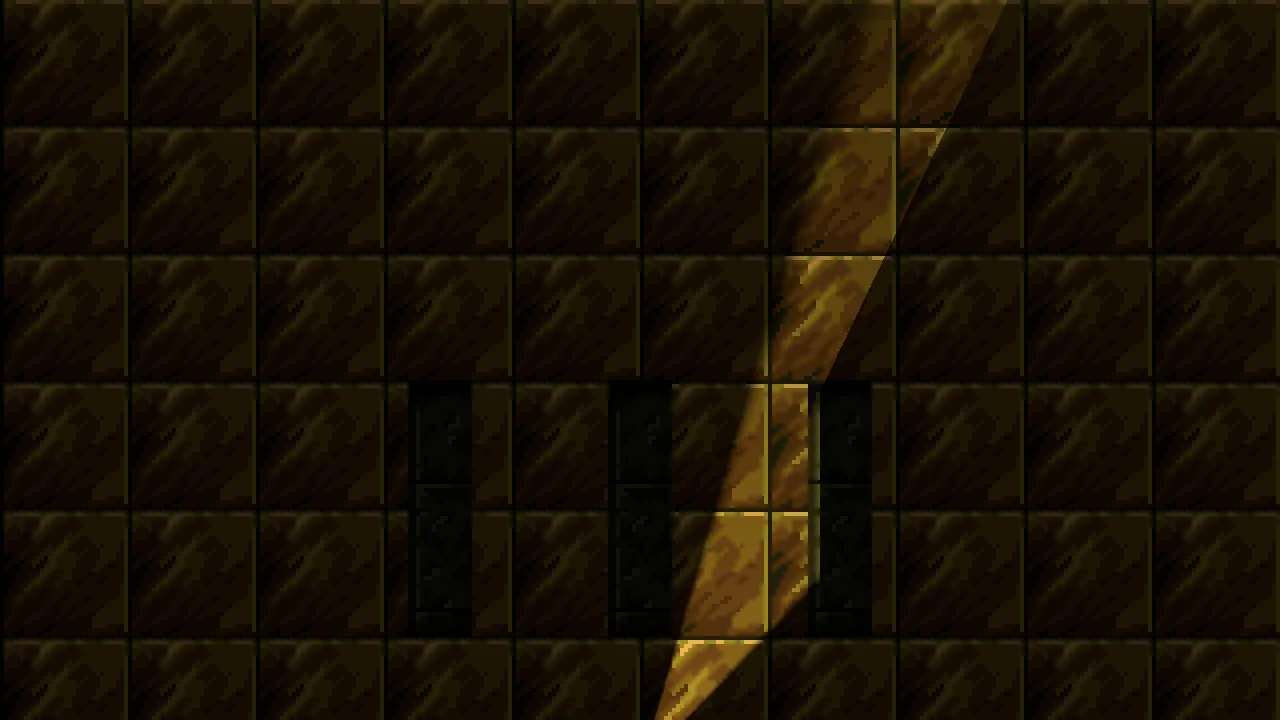
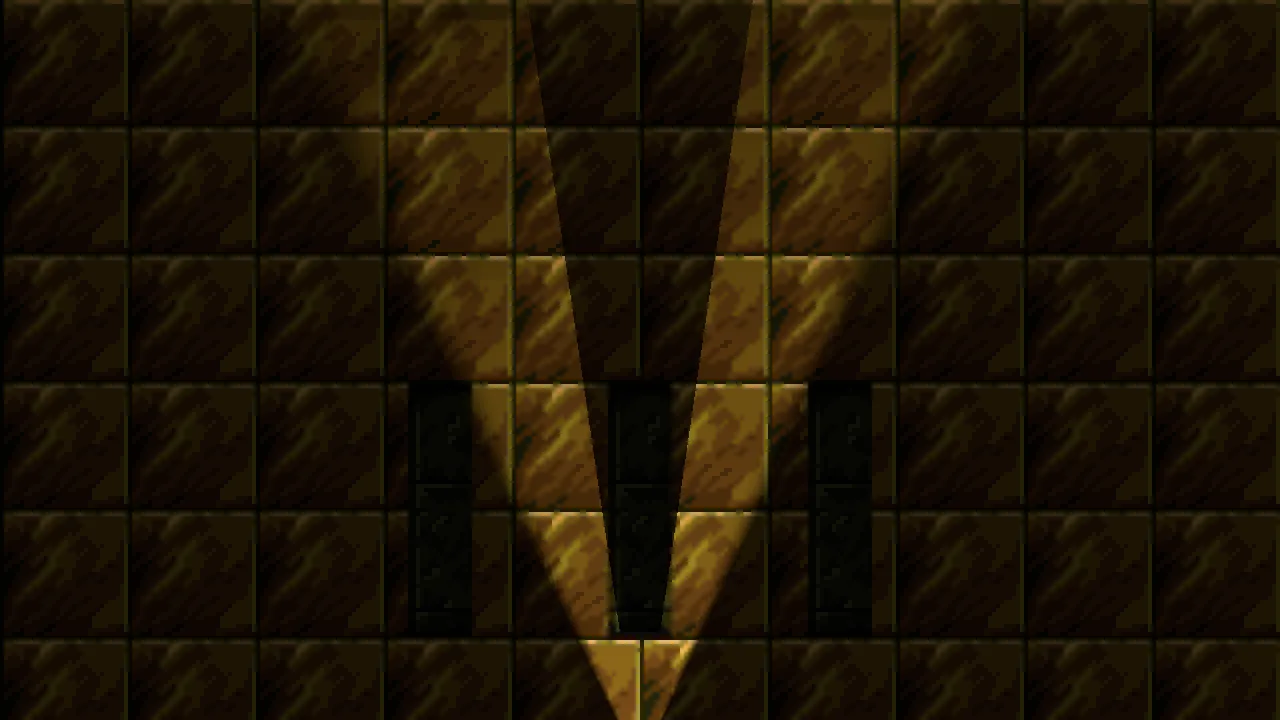
0.9 with the beam straight up: a floodlight, with the middle column’s shadow a narrow wedge in the middle of it.The searchlight, in one table
| Node | Values | Why this value |
|---|---|---|
gothic-castle-tileset.png, its import | Normal map Generate, strength 2, bevel 1 | A gentle relief made from the blocks’ own brightness, a step under chapter 10’s strength of 3. |
wall, its Sprite | Normal Map gothic-castle-tileset.normal.png, Specular 0.3 | The wall takes the map. A Specular of 0.3 is a faint highlight where the beam meets a block’s face. |
ambient, an Ambient Light | Color 0.08, 0.1, 0.2 | Dark enough that the beam is the one thing lit, light enough that the columns still read as shapes. |
column_0, column_1, column_2, each with an Occluder | Size 10, 60 | A little inside each column’s picture, 16 by 64, so a shadow begins at the stone. |
searchlight, a Light | Kind Cone, Radius 300, Intensity 2.5, Color 0.85, 0.92, 1.0, Direction -0.5, -0.866, Angle 0.5 | At 160, 192, below the view, so the beam fans out from out of sight. A Radius of 300 carries it past the top of the 180-high view. An Angle of 0.5 is a lamp’s beam, between a torch’s 0.3 and a wide shade’s 1.2. |
searchlight, a Sweep | Right 0.5, -0.866, Seconds 3 | The beam swings from thirty degrees left of straight up to thirty right, three seconds each way. |
What it costs. 1 light draw in 1 light pass. A Cone is one draw, and with Occluders in reach it also draws a shadow for each column edge that faces it, the stencil fill chapter 3 priced. The normal map costs a pass of its own on top, as chapter 10 said: every frame first draws the sprites that have a map into a buffer the lights read.
A campfire
What it is for. A camp, a brazier or a hearth: a small warm light in the dark that never repeats itself, with stones that fence its glow in. It joins chapter 11’s Flicker, used again with other numbers; a soft light; a Replace light; and two Occluders.
campfire.ron holds a village at night, two stones, a pair of logs and a flame. The flame is a picture of fire and lights nothing yet. The Flicker is the script from chapter 11, flicker.rgs; if your project does not have it, that chapter’s page holds the file.
- Open
campfire.ronand click Look through. - Select
Campfire, press + Add node, and choose Ambient Light. Rename itambient. Set its Position to8and8and its Color to0.03,0.04,0.1, alpha1. - Select
flameand tick its Sprite’s Unshaded. - Select
stone_left, press Add component, and choose OccluderComponent. Set its Size to22and30. Do the same onstone_right. - Select
Campfire, press + Add node, and choose Light. Rename itfire_low. Set its Position to128and156, and leave Kind on Point. Set Radius to105, Intensity to1.6, Color to1.0,0.55,0.2, alpha1, and Softness to3. - Press Add component and choose Flicker. Set Low to
1.1, High to2.1, Gap to0.09, Reach to120and Breath to1.1. - Add another Light under
Campfireand rename itfire_high. Set its Position to128and146, Radius to70, Intensity to1.2and Color to1.0,0.82,0.45, alpha1. Add a Flicker and set0.7,1.8,0.13,80and0.8. - Add a third Light under
Campfireand rename itembers. Set its Position to128and168, on the logs, Channel to3, Radius to18, Intensity to1.4and Color to1.0,0.5,0.12, alpha1. - Press Ctrl+S.
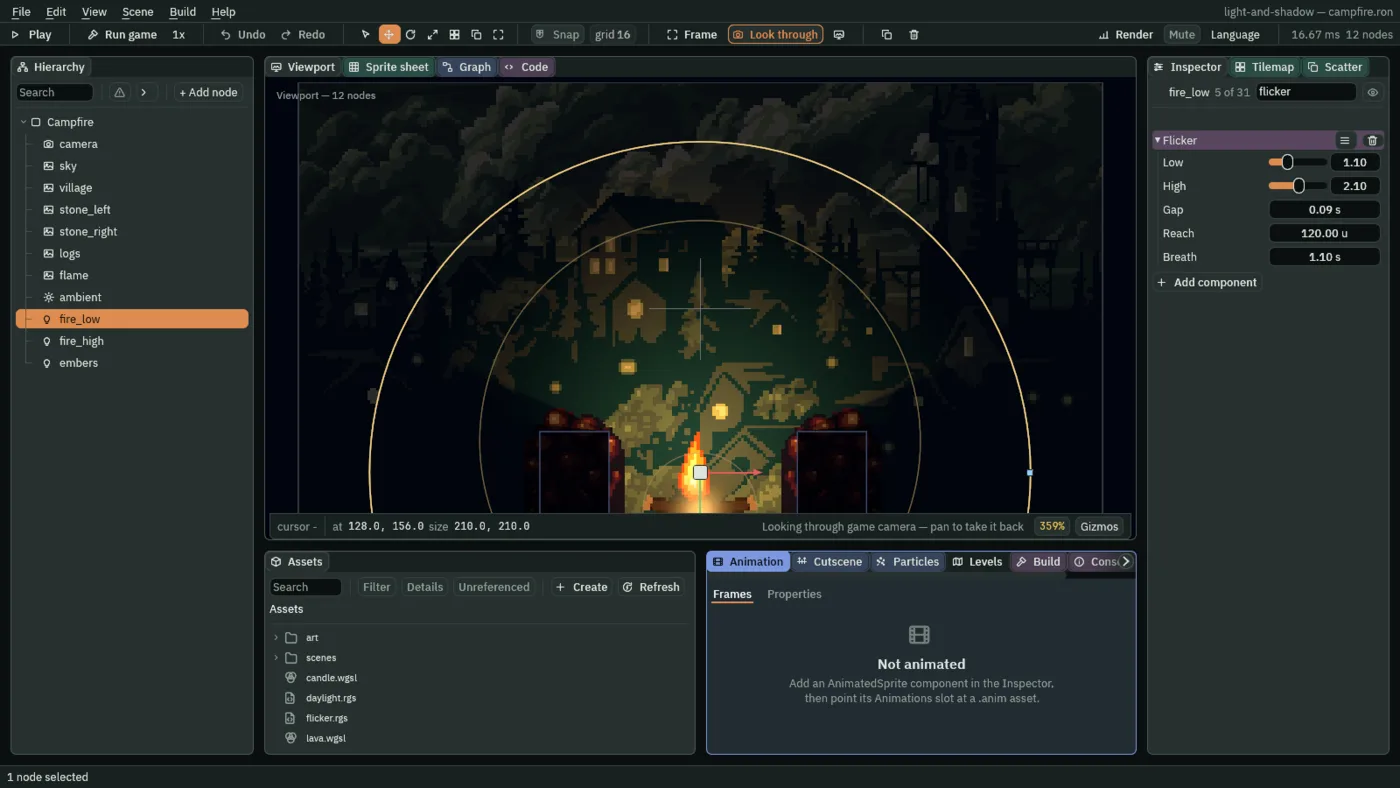
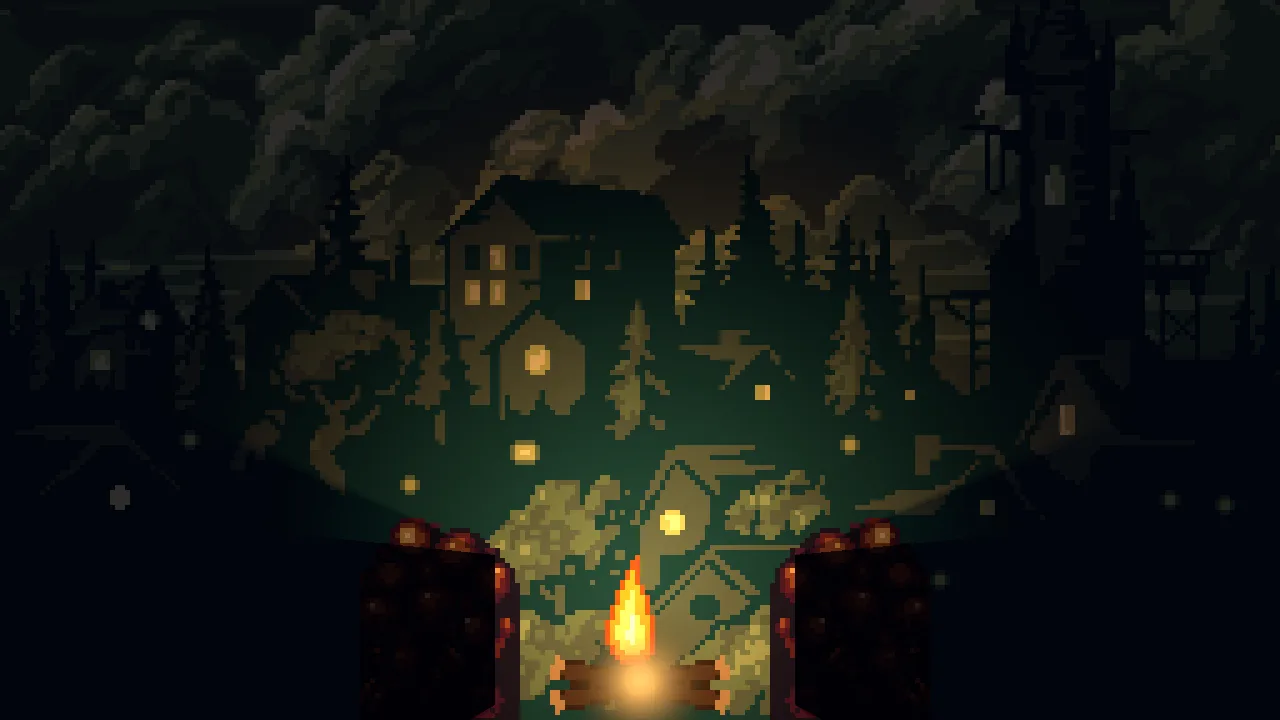
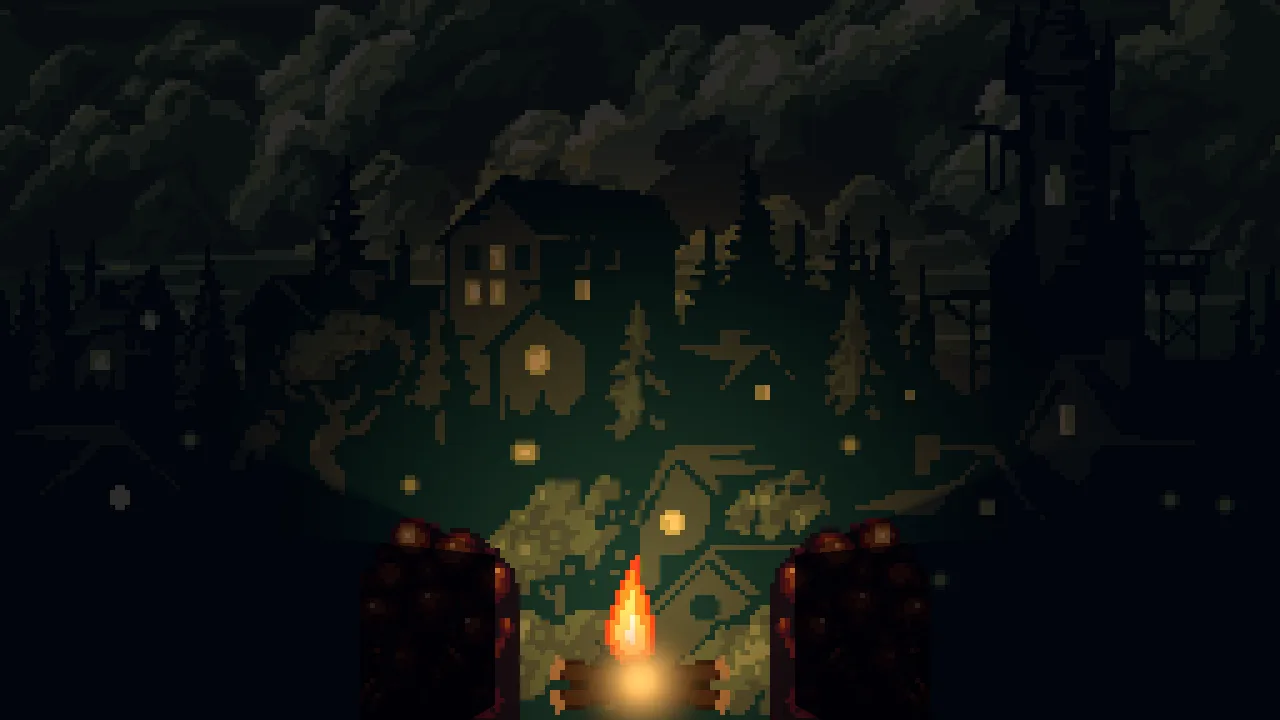
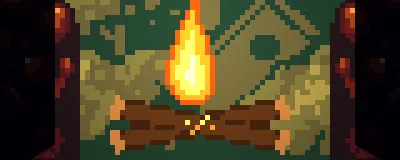
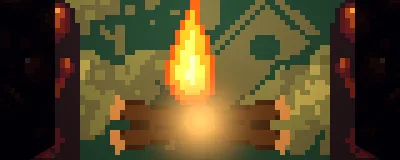
The two pictures are near the brightest and the dimmest the fires get in the first three seconds, so that the flicker reads in a still. In the game it is a waver and not a jump. The next two are the logs cut out of the picture, without the embers and with them.
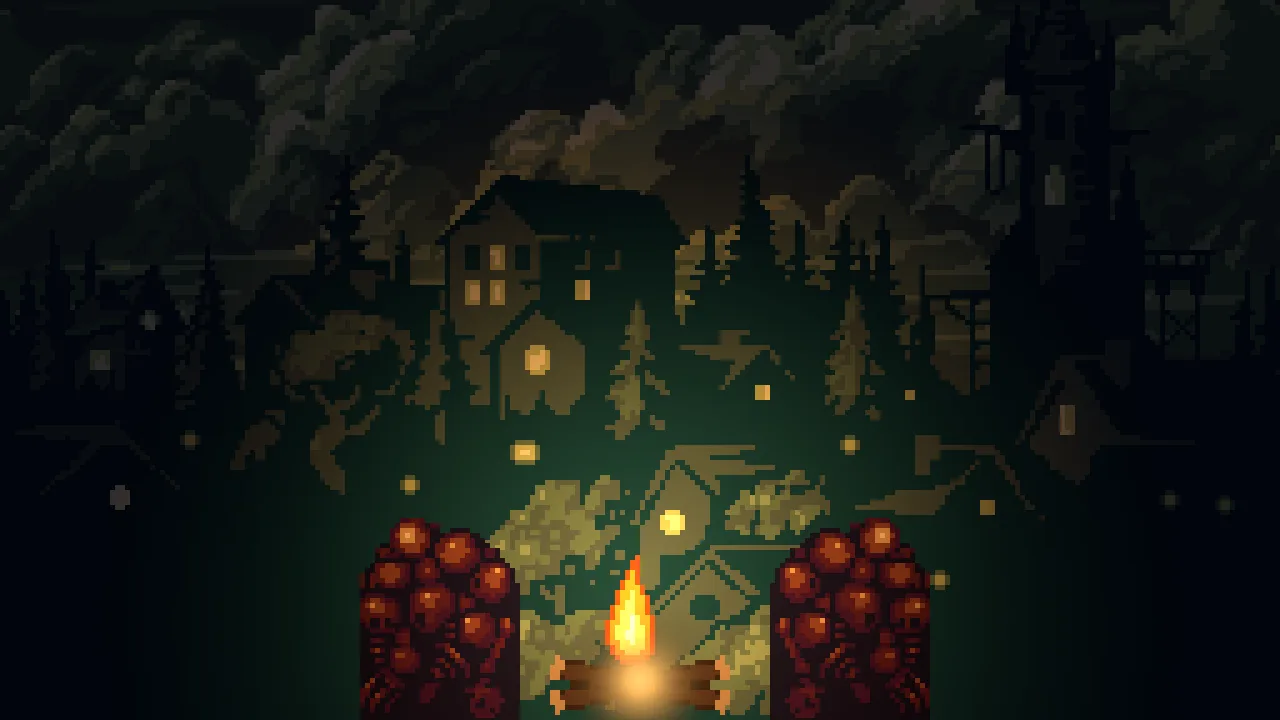
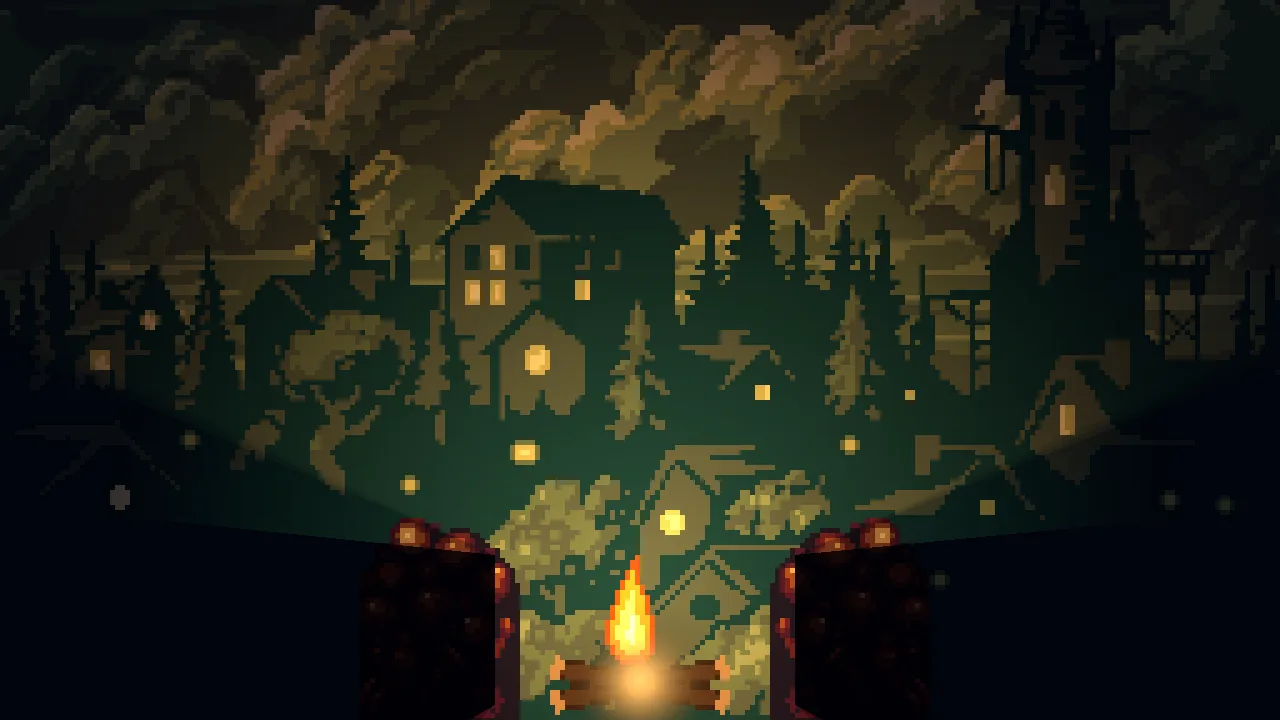
fire_low at Radius 150 and fire_high at 100, their Reach raised to 165 and 115: the clouds far above the camp are lit.The campfire, in one table
| Node | Values | Why this value |
|---|---|---|
ambient, an Ambient Light | Color 0.03, 0.04, 0.1 | Darker than the other scenes’ ambients, so the fire is most of what is lit. |
flame, the flame’s Sprite | Unshaded ticked | The flame is a source, so no light changes it. |
stone_left, stone_right, each with an Occluder | Size 22, 30 | A little inside each stone’s picture, so a shadow begins at the stone. |
fire_low, a Light | Kind Point, Radius 105, Intensity 1.6, Color 1.0, 0.55, 0.2, Softness 3 | The wide red-orange glow on the ground. A Softness of 3 softens the stones’ shadow edges, and makes the light three draws. |
fire_low, a Flicker | Low 1.1, High 2.1, Gap 0.09, Reach 120, Breath 1.1 | The Intensity wavers between 1.1 and 2.1, round the light’s own 1.6, with a new aim every 0.09 seconds, and the Radius swells from 105 to 120 and back, 1.1 seconds each way. |
fire_high, a Light | Kind Point, Radius 70, Intensity 1.2, Color 1.0, 0.82, 0.45 | The small yellow tip of the flame, 10 units above the first light. |
fire_high, a Flicker | Low 0.7, High 1.8, Gap 0.13, Reach 80, Breath 0.8 | The Intensity wavers round the light’s own 1.2. A slower aim and a faster breath than the first, so the two never beat together. |
embers, a Light | Channel 3, Radius 18, Intensity 1.4, Color 1.0, 0.5, 0.12 | A small Replace light on the logs, the colour of coals. |
What it costs. 5 light draws in 2 light passes. fire_low is soft, so it is three draws, fire_high is one and the embers are one. The embers’ channel is a pass of its own. The two stones add the stencil fill of their edges to the fires that reach them.
Day and night
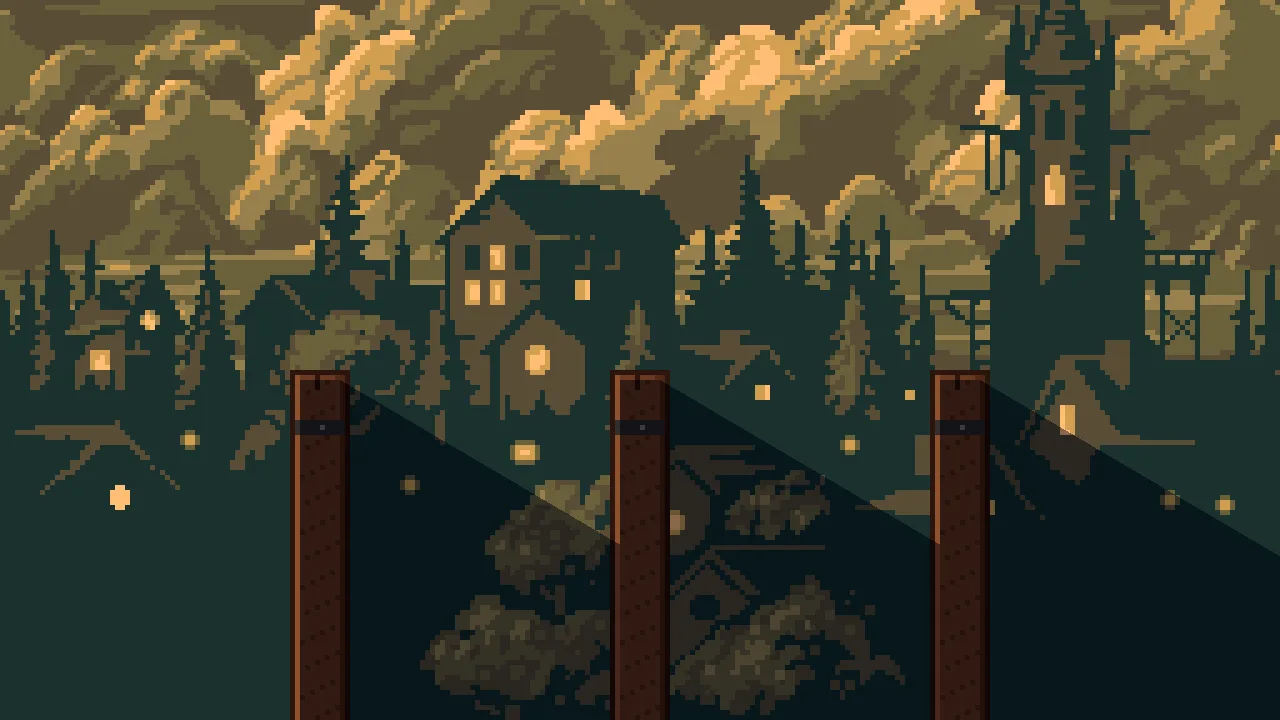
What it is for. A day passing over a level: the sky’s darkness, the sun’s colour and the sun’s angle, turning together, so that the shadows swing as the day goes. It joins one script on two nodes, a Directional light and Occluders.
day-and-night.ron holds the village at night with three timber posts in front of it. Nothing is lit yet.
- Open
day-and-night.ronand click Look through. - In Assets, click Assets in the path bar over the tree, so the script is written at the project’s top, then press Create, choose New script, type
daylight, and press Enter. - In the Code tab, replace everything in
daylight.rgswith the script below, and press Ctrl+S.
/// A day in a few seconds. This node's light anneals through dawn, noon,
/// dusk and night, `phase` seconds each, and round again. `target` names the
/// light: the AmbientLightComponent on the sky, the LightComponent on the
/// sun. With `swing` ticked the sun's Direction turns with the hours too:
/// low from the east at dawn, high at noon, low from the west at dusk, and
/// back round to the east while it is night, so its shadows swing.
component Daylight {
    /// The component whose colour changes with the hours.
    target: String = "LightComponent",
    /// The colour at dawn.
    #[color]
    dawn: Vec4,
    /// The colour at noon.
    #[color]
    noon: Vec4,
    /// The colour at dusk.
    #[color]
    dusk: Vec4,
    /// The colour at night, which the scene opens at.
    #[color]
    night: Vec4,
    /// Seconds from one time of day to the next.
    #[suffix("s")]
    phase: f32 = 4.0,
    /// Whether the Direction turns with the hours: tick it on the sun.
    swing: bool = false,

    fn loop() {
        await anneal_colour(target, "color", dawn, phase, .InOutSine);
        if swing {
            anneal_point(target, "direction", vec2(0.2, 1.0), phase, .InOutSine);
        }
        await anneal_colour(target, "color", noon, phase, .InOutSine);
        if swing {
            anneal_point(target, "direction", vec2(-0.85, 0.5), phase, .InOutSine);
        }
        await anneal_colour(target, "color", dusk, phase, .InOutSine);
        if swing {
            anneal_point(target, "direction", vec2(0.85, 0.5), phase, .InOutSine);
        }
        await anneal_colour(target, "color", night, phase, .InOutSine);
    }
}
loop runs for ever. It anneals the light’s Color to dawn, then noon, dusk and night, phase seconds each, with anneal_colour as chapter 11’s lightning does, and it waits for each with await, so the day goes round. target names whose colour changes: the sky’s AmbientLightComponent or the sun’s LightComponent. With swing ticked it also starts an anneal of the Direction beside each colour, without waiting for it, so the colour and the angle move together: low from the east at dawn, high at noon, low from the west at dusk, and back round to the east while it is dark.
- anneal_point
- Takes a point field of another component on this node to a value over a time, along a curve. Here the Light’s Direction, to a new angle in
phaseseconds.vec2(0.2, 1.0)builds that point from two numbers. - Target
- The component whose colour changes:
AmbientLightComponenton the sky,LightComponenton the sun. - Dawn, Noon, Dusk, Night
- The colour at each time of day. The scene opens at night, so the light’s own Color is its Night colour.
- Phase
- Seconds from one time of day to the next:
4, so a whole day takes sixteen seconds. - Swing
- Whether the Direction turns with the hours. Tick it on the sun. An ambient light has no Direction to turn, so the sky leaves it off.
- Select
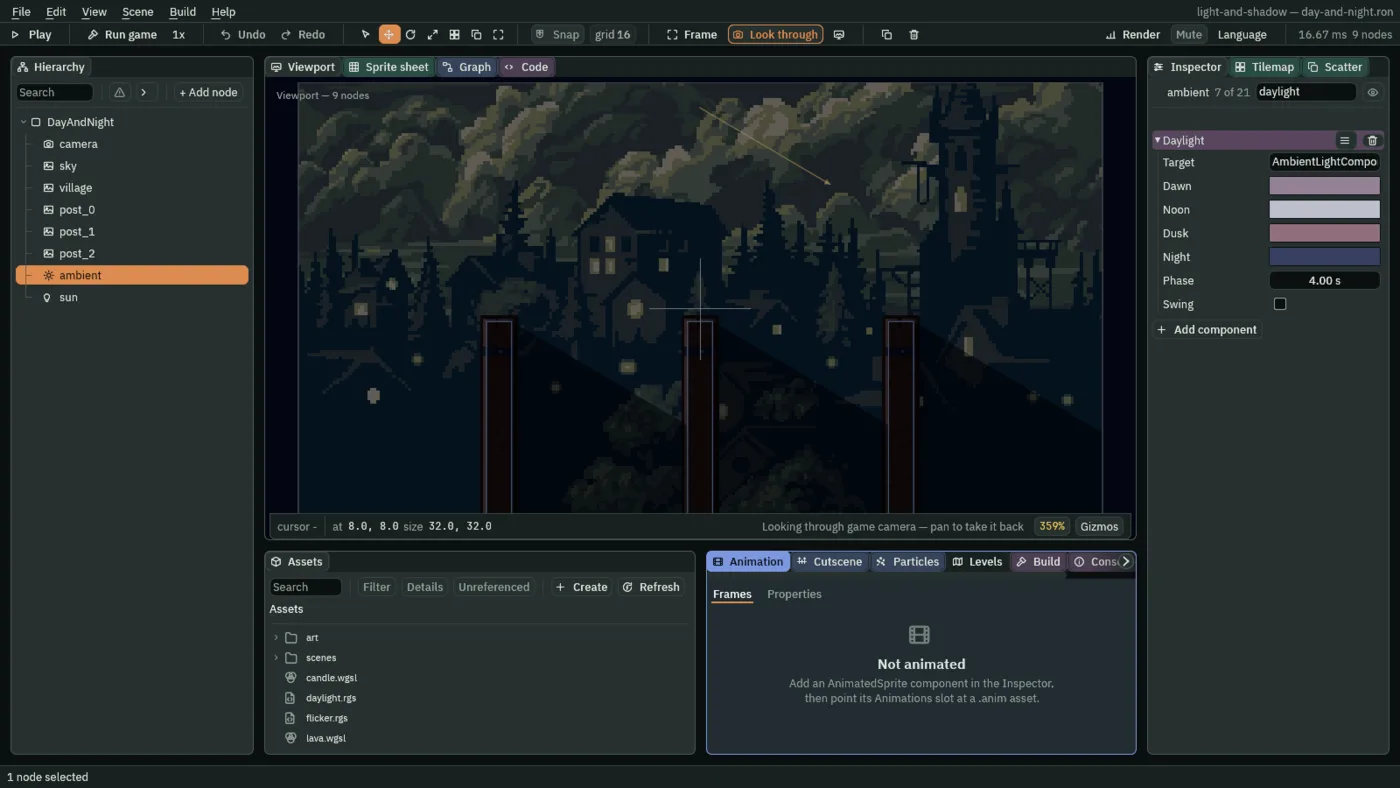
DayAndNight, press + Add node, and choose Ambient Light. Rename itambient. Set its Position to8and8and its Color to0.04,0.05,0.12, alpha1. - Press Add component and choose Daylight. Set Target to
AmbientLightComponent, Dawn to0.3,0.22,0.3, Noon to0.5,0.52,0.6, Dusk to0.28,0.16,0.2and Night to0.04,0.05,0.12, each with alpha1. Set Phase to4and leave Swing unticked. - Select
post_0, press Add component, and choose OccluderComponent. Set its Size to8and84. Do the same onpost_1andpost_2. - Select
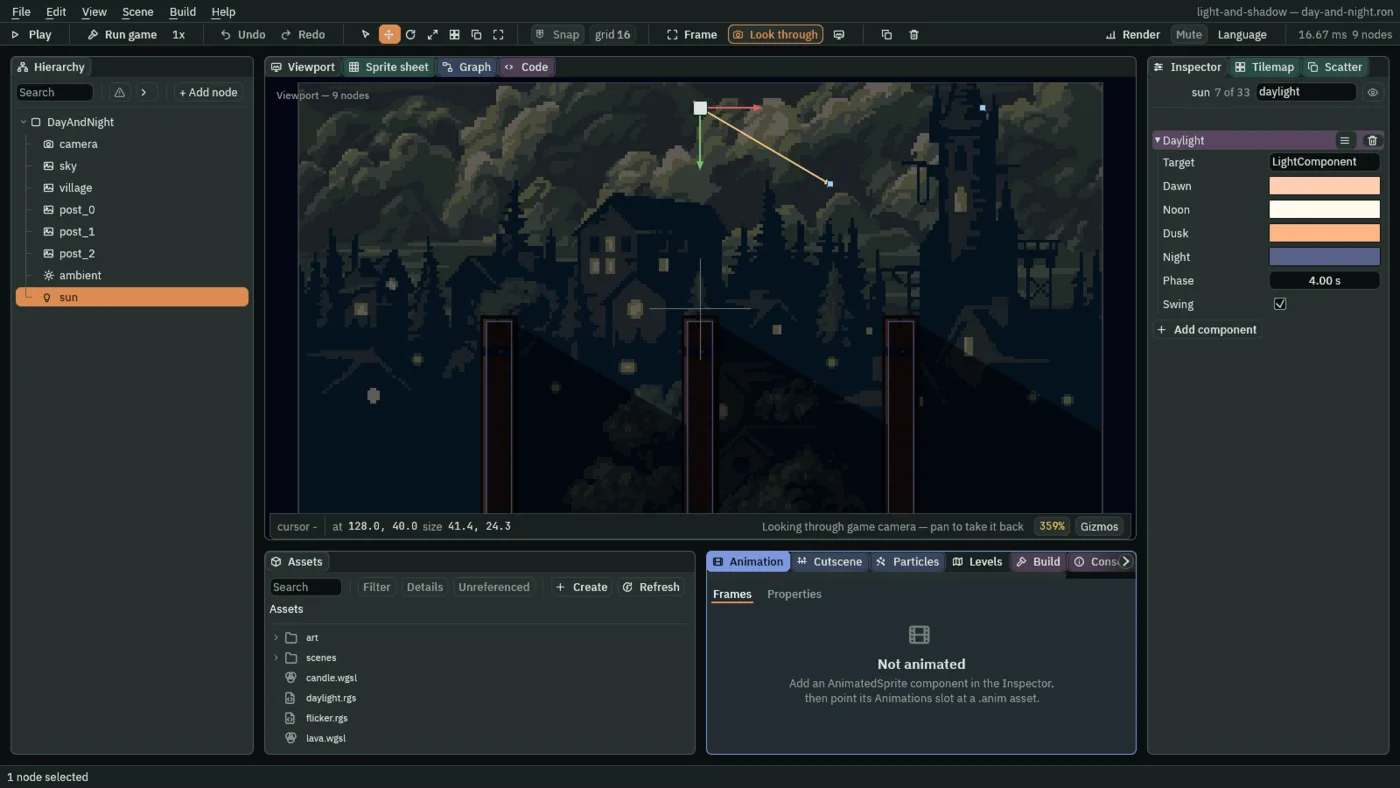
DayAndNight, press + Add node, and choose Light. Rename itsun. Set its Position to128and40, Kind to Directional, Radius to90, Intensity to1.0, Color to0.1,0.12,0.25, alpha1, and Direction to0.85and0.5. - Press Add component and choose Daylight. Set Target to
LightComponent, Dawn to1.0,0.62,0.45, Noon to1.0,0.96,0.86, Dusk to1.0,0.46,0.24and Night to0.1,0.12,0.25, each with alpha1. Set Phase to4and tick Swing. - Press Ctrl+S.
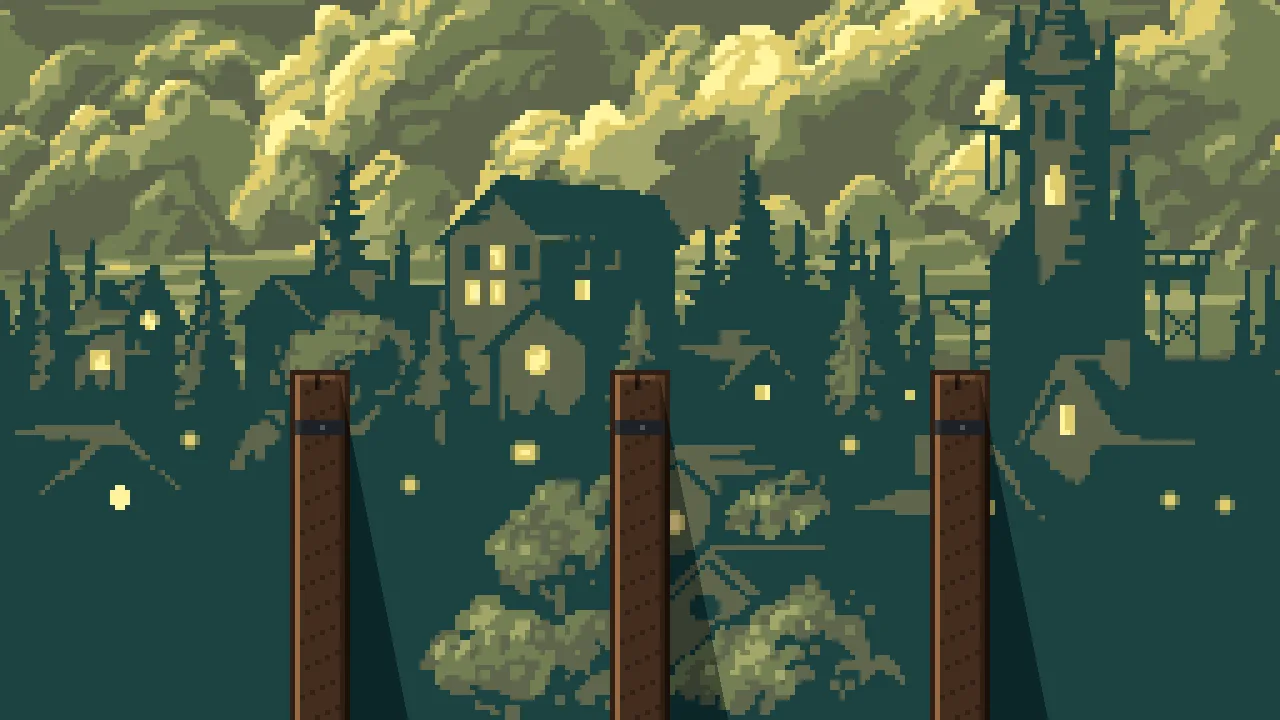
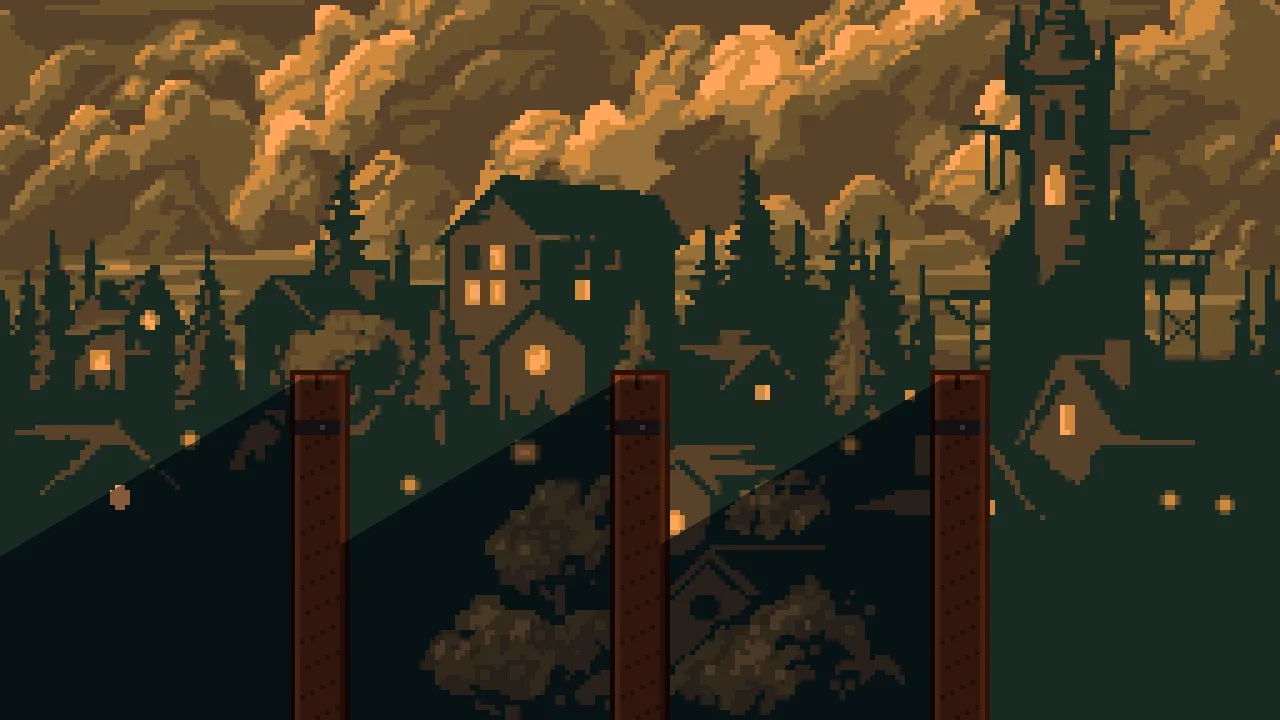
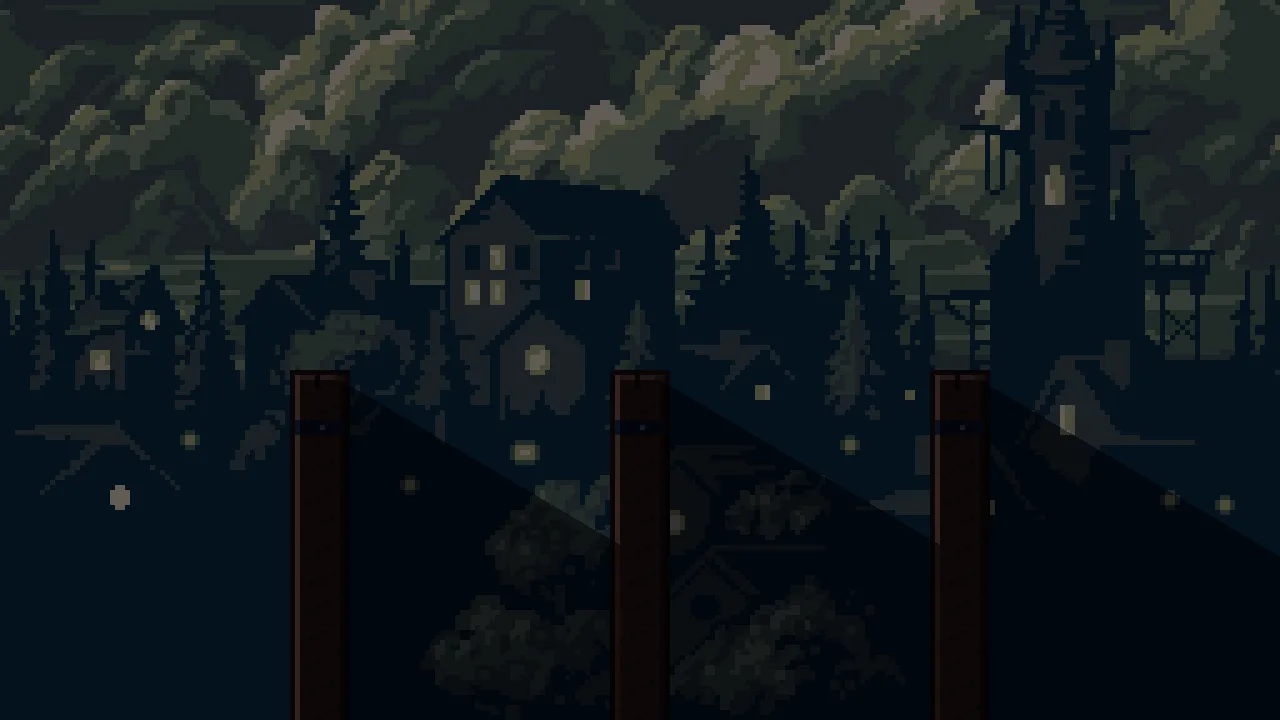
Day and night, in one table
| Node | Values | Why this value |
|---|---|---|
ambient, an Ambient Light | Color 0.04, 0.05, 0.12 | The sky’s Night colour, which the scene opens at. |
ambient, a Daylight | Target AmbientLightComponent, Dawn 0.3, 0.22, 0.3, Noon 0.5, 0.52, 0.6, Dusk 0.28, 0.16, 0.2, Night 0.04, 0.05, 0.12, Phase 4, Swing off | The sky: mauve at dawn, a pale blue-grey at noon, a dull rose at dusk, near-black at night. It has no Direction to swing. |
post_0, post_1, post_2, each with an Occluder | Size 8, 84 | A little inside each post’s picture, 12 by 88, so a shadow begins at the wood. |
sun, a Light | Kind Directional, Radius 90, Intensity 1.0, Color 0.1, 0.12, 0.25, Direction 0.85, 0.5 | The Night colour, and the first angle, low from the east. |
sun, a Daylight | Target LightComponent, Dawn 1.0, 0.62, 0.45, Noon 1.0, 0.96, 0.86, Dusk 1.0, 0.46, 0.24, Night 0.1, 0.12, 0.25, Phase 4, Swing on | The sun: peach, near-white, orange, dim blue. The same Phase as the sky, so the two keep time. |
What it costs. 1 light draw in 1 light pass, however the day turns: a script that anneals a colour costs nothing but the colour changing. The sun’s draw also fills the shadow of each post edge that faces it.
A lava pool
What it is for. A cave lit only by molten rock: a light that swells and sinks like something alive, and rock you see only where it reaches. It joins a light shader of your own, Light Only sprites, an Unshaded pool and a small bloom.
lava.ron holds a wall of cave rock, a pool of cracked lava and a heap of rubble at each side. Nothing is lit yet. The glow is a light shader, so write it first.
- In Assets, click Assets in the path bar, so the shader is written beside
project.rengy, then press Create, choose New shader, typelavaand press Enter. - Double-click
lava.wgslto open it in the Code panel, replace everything in it with the text below, and press Ctrl+S.
//! param speed: float = 1.2 range 0 6
//! param depth: float = 0.35 range 0 1
//! param heat: float = 0.5 range 0 1

// The lava pool's glow: the built-in fade, swelling brighter and dimmer over
// time as the molten rock wells up and sinks back, and hotter, yellower,
// near the pool than out at the edge of its reach.

fn light(l: Light) -> vec4<f32> {
    // 1 at the top of a swell, 1 - depth at the bottom of one.
    let swell = 1.0 - depth() * (0.5 + 0.5 * sin(time() * speed()));
    // Yellower where the light is strongest.
    let hot = mix(l.color, vec3<f32>(1.0, 0.85, 0.45), heat() * l.attenuation);
    return vec4<f32>(hot * l.energy * l.attenuation * swell, 1.0);
}
swell is 1 at the top of a swell and 1 - depth at the bottom: sin(time() * speed()) goes round, and depth says how far it dims. hot turns the light’s colour toward yellow, by heat, where the built-in fade l.attenuation is strongest, near the pool. The colour the shader returns is hot times the Intensity, the fade and the swell. time(), l.energy and l.attenuation are the ones chapter 12 defined.
- speed
- How fast the glow breathes, from
0, still, to6.1.2here, which is one swell every five seconds or so. The file’s own is1.2. - depth
- How far the glow dims at the bottom of a breath, from
0, not at all, to1, out.0.35here, so it sinks to0.65of its strength. The file’s own is0.35. - heat
- How much yellower the light is near the pool than at the edge of its reach, from
0to1.0.5here, a slight warm shift. The file’s own is0.5.
- Open
lava.ronand click Look through. SelectLava, press + Add node, and choose Ambient Light. Rename itambient. Set its Position to8and8and its Color to0.02,0.012,0.01, alpha1. - Select
caveand tick its Sprite’s Light Only. Do the same onrocks_leftandrocks_right. Selectpooland tick Unshaded. - Select
Lava, press + Add node, and choose Light. Rename itglow. Set its Position to160and164, on the pool, and leave Kind on Point. Set Radius to170, Intensity to2.2and Color to1.0,0.42,0.12, alpha1. - Press Add component and choose LightShaderComponent. Click its Shader slot and choose
lava.wgsl, or drag the file onto the slot. Under Values is a row for eachparam, speed, depth and heat, each readingunset. Press Set the 3 missing parameter(s): the light holds them at the file’s own1.2,0.35and0.5, and each row reads= default. Leave them there. - Select
Lava, press + Add node, and choose Post Volume. Rename itheat. Set its Position to160and90and its Area to Global. - Open Profile. Set Exposure to
1.0, Tint to1.0,1.0,1.0, Saturation to1.0and Vignette to0.6. Keep the bloom’s Enabled ticked, and set Threshold to0.6, Intensity to1.0, Blur Pairs to2and Spread to2.0. Set Aberration to1.0, and keep Grain at0and Grain Rolloff at0.85. - Press Ctrl+S.
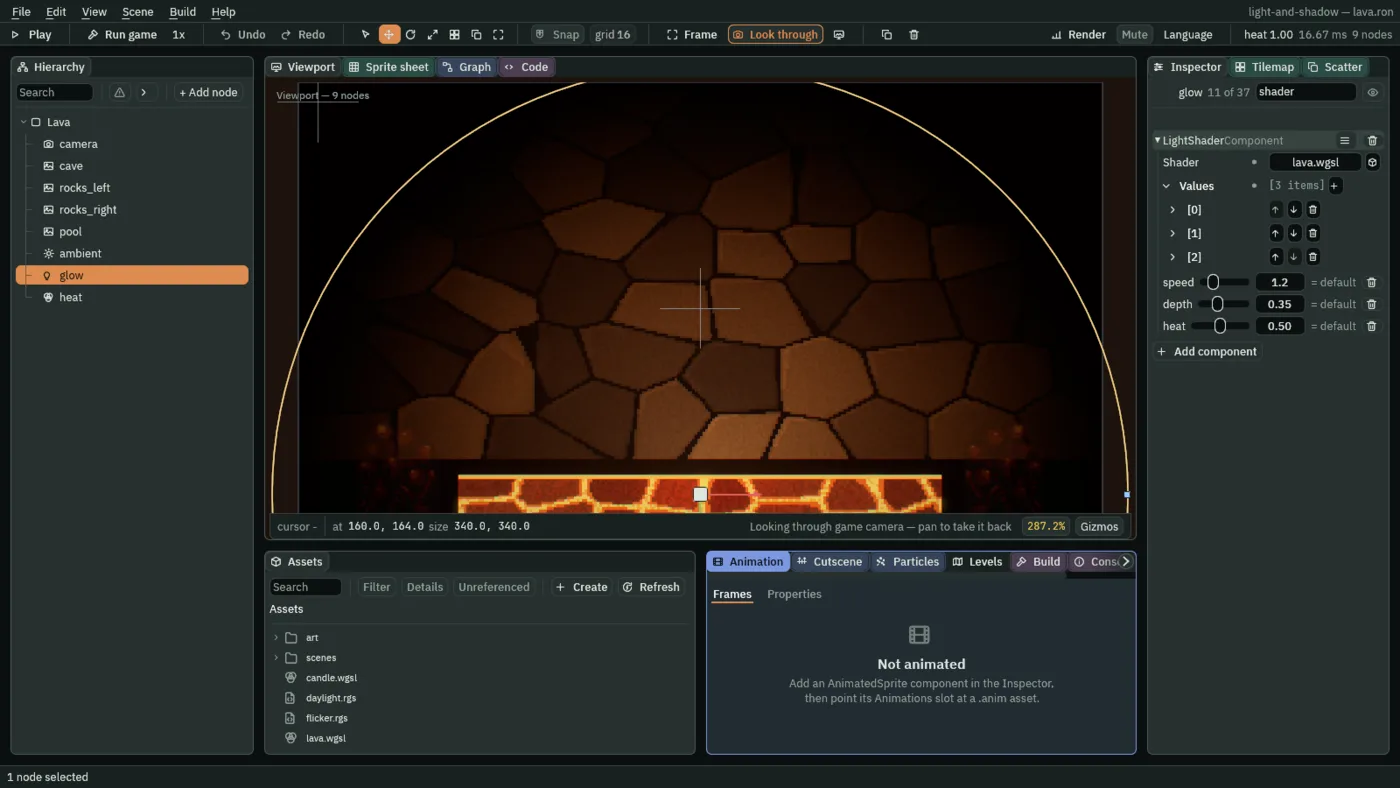
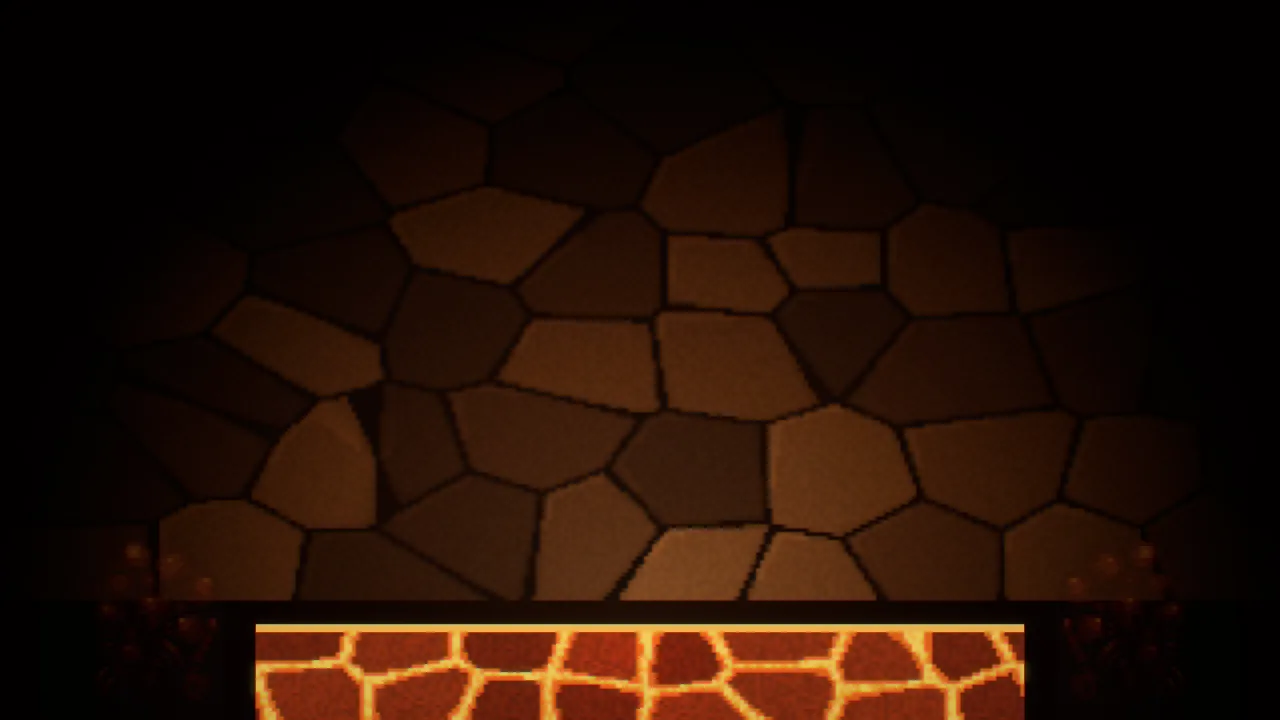
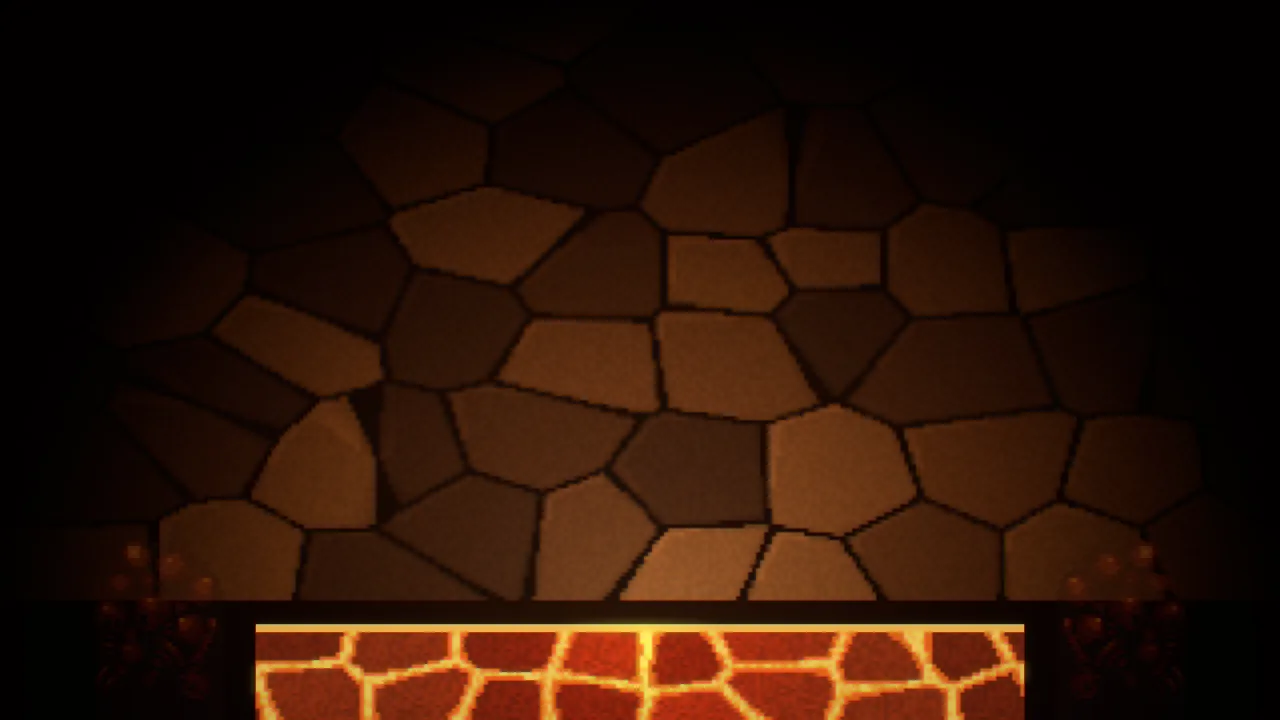
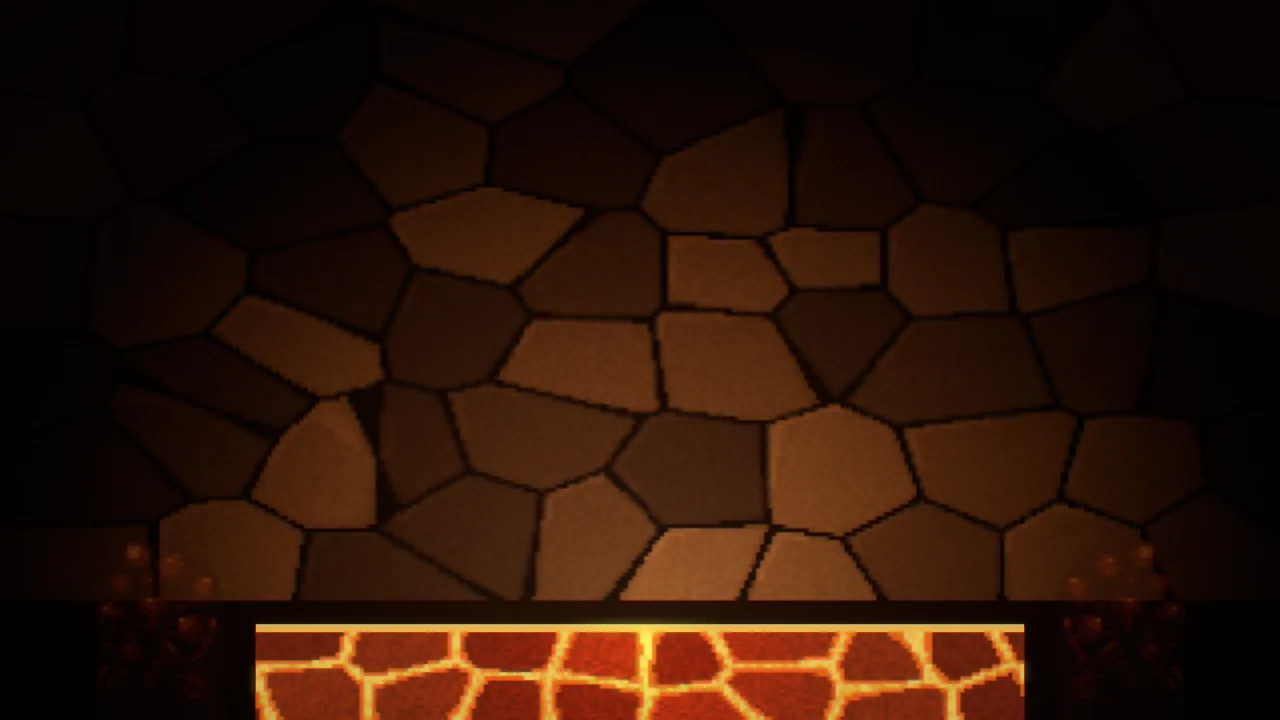
The lava pool, in one table
| Node | Values | Why this value |
|---|---|---|
ambient, an Ambient Light | Color 0.02, 0.012, 0.01 | A warm black, so the unlit rock is not blue. |
cave, rocks_left, rocks_right, their Sprites | Light Only ticked | The rock exists only where the lava reaches it. |
pool, the lava’s Sprite | Unshaded ticked | The lava is the source, drawn at its own colours. |
glow, a Light | Kind Point, Radius 170, Intensity 2.2, Color 1.0, 0.42, 0.12 | A dome of light that fades to black before the top of the view, so the rock above it is not drawn. |
glow, a Light Shader | Shader lava.wgsl, speed 1.2, depth 0.35, heat 0.5 | A swell about every five seconds, down to 0.65 of the glow’s strength and back, and a slight warm shift near the pool. |
heat, a Post Volume | Area Global, Exposure 1.0, Tint 1.0, 1.0, 1.0, Saturation 1.0, Vignette 0.6, bloom Threshold 0.6, Intensity 1.0, Blur Pairs 2, Spread 2.0, Aberration 1.0, Grain 0, Grain Rolloff 0.85 | A small glow on the brightest cracks, a vignette that pushes the dark in, and a one-pixel colour fringe at the edge of the frame. |
What it costs. 1 light draw in 1 light pass. The shader’s code runs on every pixel the glow covers, and at a Radius of 170 that is most of this view. The bloom adds four passes, two for each of its two Blur Pairs.
Light through the blinds
What it is for. Sunlight or a street lamp through slats into a dark room: stripes of light across a floor and a wall, and a corner the light must never reach. It joins a Sprite light turned on its node, a plain Point light for the window and a Subtractive light for the dark.
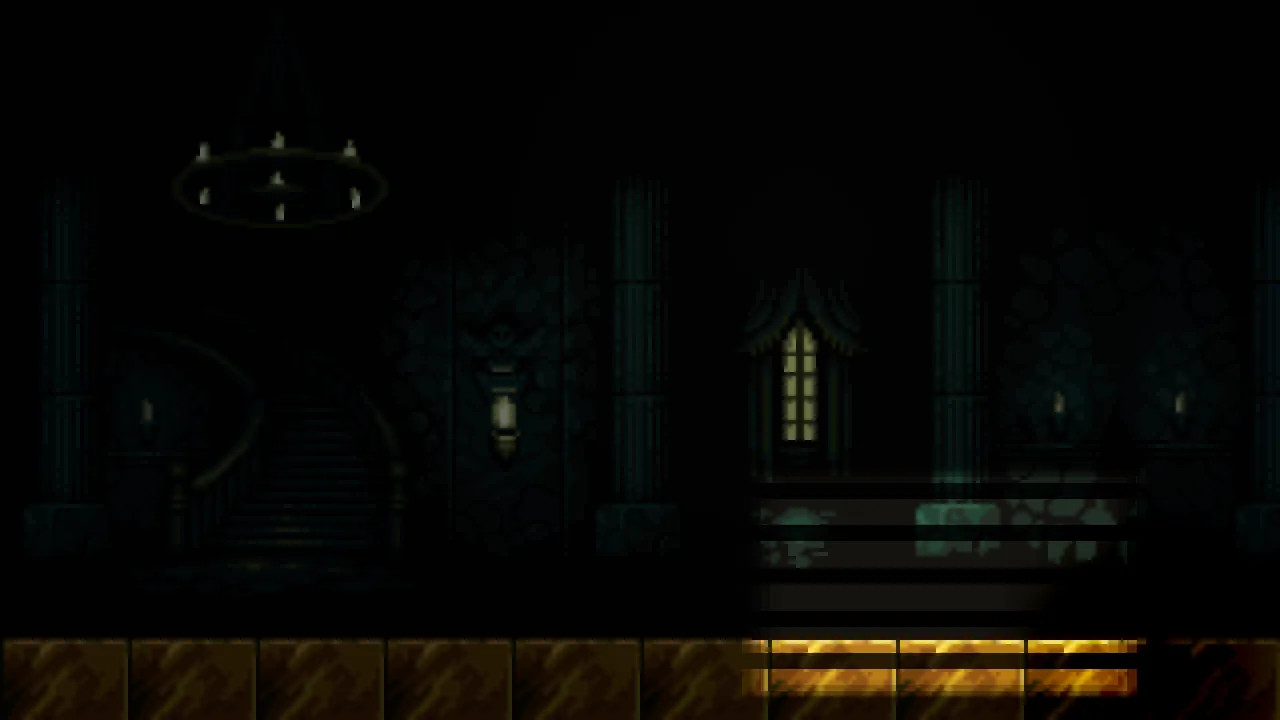
blinds.ron holds a castle hall at night: a stair, a tall window and sconces on the wall, over a floor of stone. Nothing is lit yet.
- Open
blinds.ronand click Look through. - Select
Blinds, press + Add node, and choose Ambient Light. Rename itambient. Set its Position to8and8and its Color to0.12,0.13,0.18, alpha1. - Select
Blinds, press + Add node, and choose Light. Rename itwindow_light. Set its Position to200and60, at the window, and leave Kind on Point. Set Radius to140, Intensity to0.35and Color to1.0,0.85,0.6, alpha1. - Add another Light under
Blindsand rename itslats. Set its Position to236and146and its Rotation to20. Set Kind to Sprite, and under the Sprite group Texture toblinds.pngand Size to110and64. Set Radius to0, Intensity to3.2and Color to1.0,0.88,0.62, alpha1. - Add a third Light under
Blindsand rename itdark_corner. Set its Position to286and166, on the floor at the right, and leave Kind on Point. Set Channel to2, Radius to44, Intensity to0.08and Color to0.6,0.6,0.6, alpha1. - Press Ctrl+S.
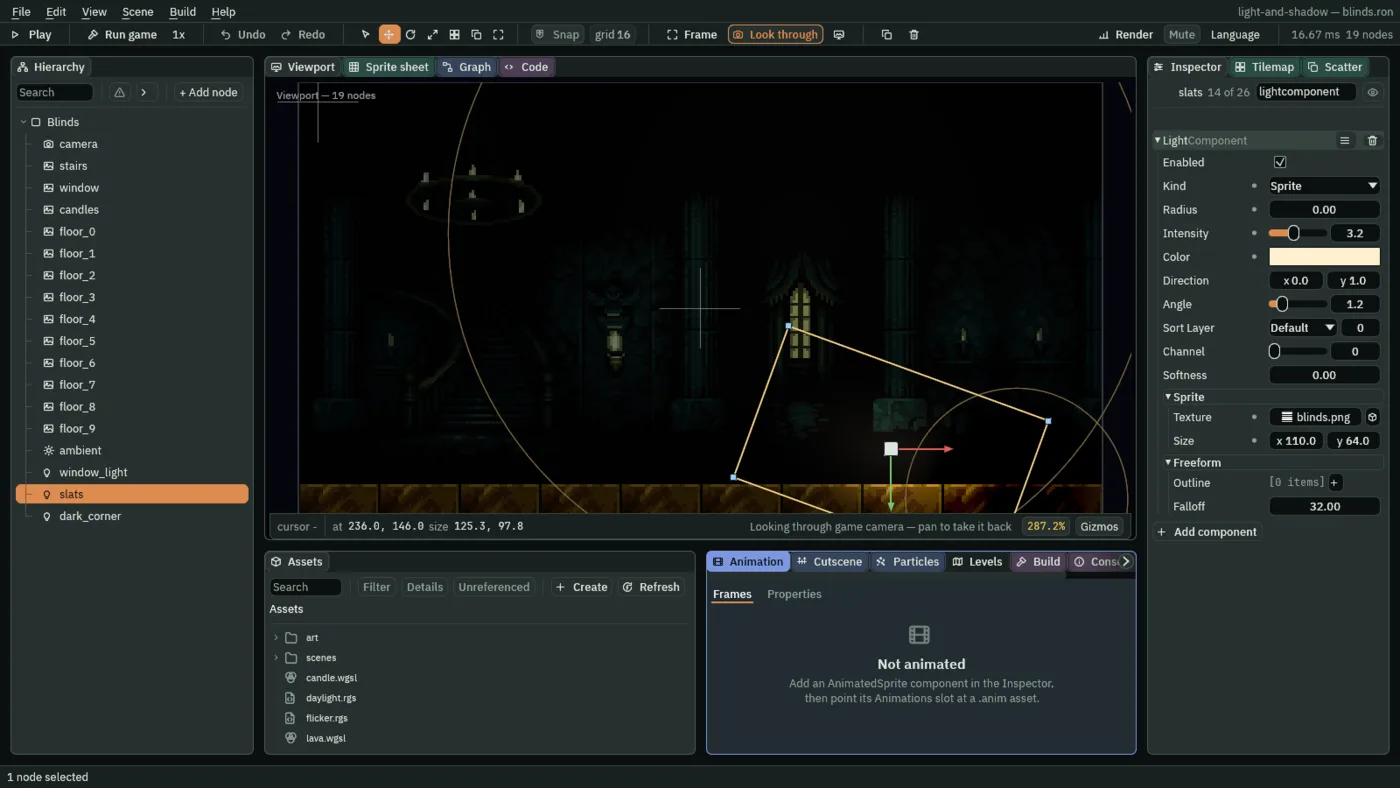
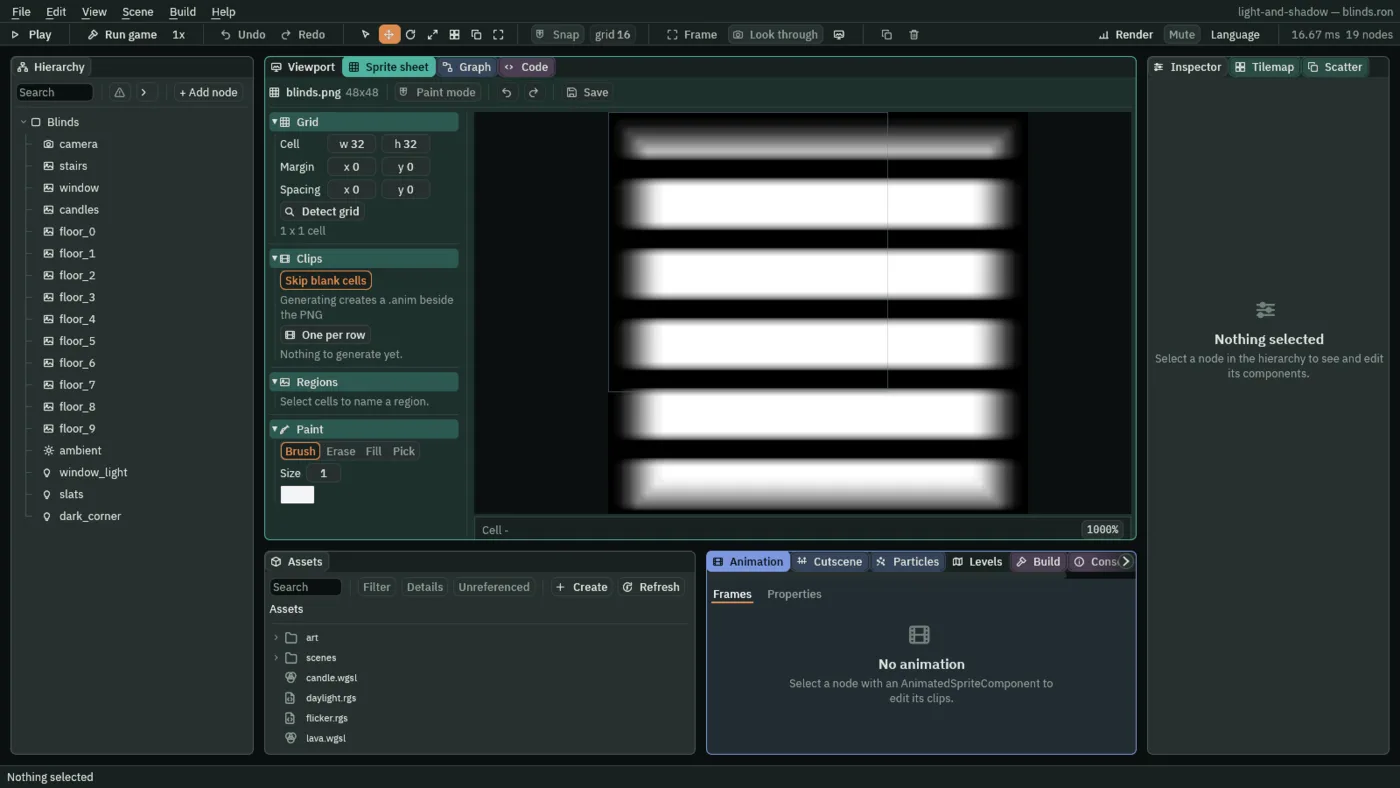
The light’s Texture is blinds.png, 48 by 48 pixels, opened large in the Sprite sheet tab. There is no slat in the scene: the stripes are the picture.
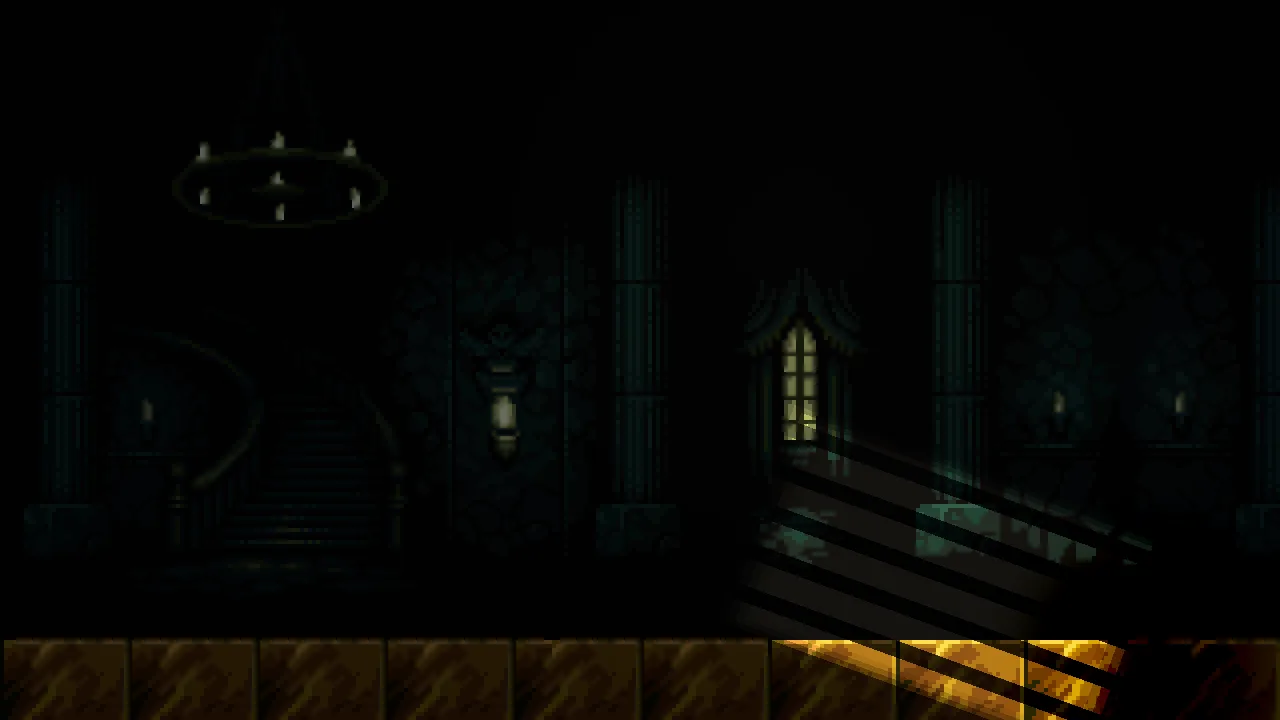
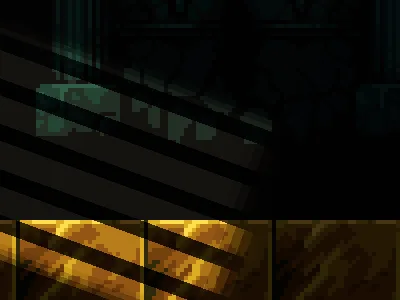
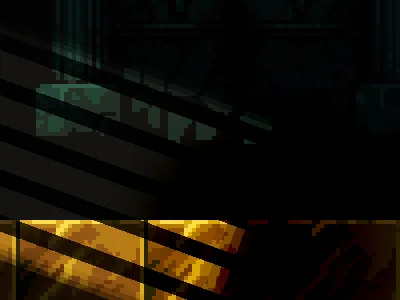
0 in place of 20: the same light, with the stripes level.Light through the blinds, in one table
| Node | Values | Why this value |
|---|---|---|
ambient, an Ambient Light | Color 0.12, 0.13, 0.18 | Brighter than the other scenes’ ambients, so the room is seen and the stripes are the bright thing in it. |
window_light, a Light | Kind Point, Radius 140, Intensity 0.35, Color 1.0, 0.85, 0.6 | A faint warm wash from the glass, so the window reads as the source. The stripes are what the slats let through. |
slats, a Light | Rotation 20, Kind Sprite, Texture blinds.png, Size 110, 64, Radius 0, Intensity 3.2, Color 1.0, 0.88, 0.62 | 20 degrees is the sun’s angle. The Size is the patch the stripes cover. The Intensity is high so that a stripe is clearly brighter than the window’s wash. A Radius of 0 casts no shadows. |
dark_corner, a Light | Channel 2, Radius 44, Intensity 0.08, Color 0.6, 0.6, 0.6 | Subtractive, small and tight, at 286, 166, where the stripes end on the floor. |
What it costs. 3 light draws in 2 light passes. The window’s wash and the stripes are on channel 0, and the dark corner is on channel 2, a pass of its own. Nothing casts a shadow, so there are no shadow draws, and there is no post chain.
What each costs
Each recipe priced its own scene. Here they are together, as chapter 14’s statistics overlay counts them at each scene’s first frame.
| Scene | Light draws | Light passes | Also |
|---|---|---|---|
| A neon sign | 2 | 2 | A bloom: two Blur Pairs, four passes. |
| A searchlight | 1 | 1 | Three Occluders, and the wall’s normal map, a pass of its own. |
| A campfire | 5 | 2 | The soft fire is three draws, and two Occluders cast on it. |
| Day and night | 1 | 1 | Three Occluders, and two scripts that only anneal. |
| A lava pool | 1 | 1 | A light shader on every pixel of a Radius of 170, and a bloom of four passes. |
| Light through the blinds | 3 | 2 | Nothing more. |
Light draws are cheap one at a time. What a phone minds is light passes, each a tile flush, and a bloom or a light shader on a large Radius. Read your own scene’s numbers with Render statistics before you lift a recipe, and budget it as chapter 14 budgeted the hall.